Pavement Series
Starting Point
The starting point for this project stemmed from my essay 'Out of Place;' an investigation into how deliberate imperfections in craft be used to embody the intersection between the natural and the human-made; visually and conceptually.


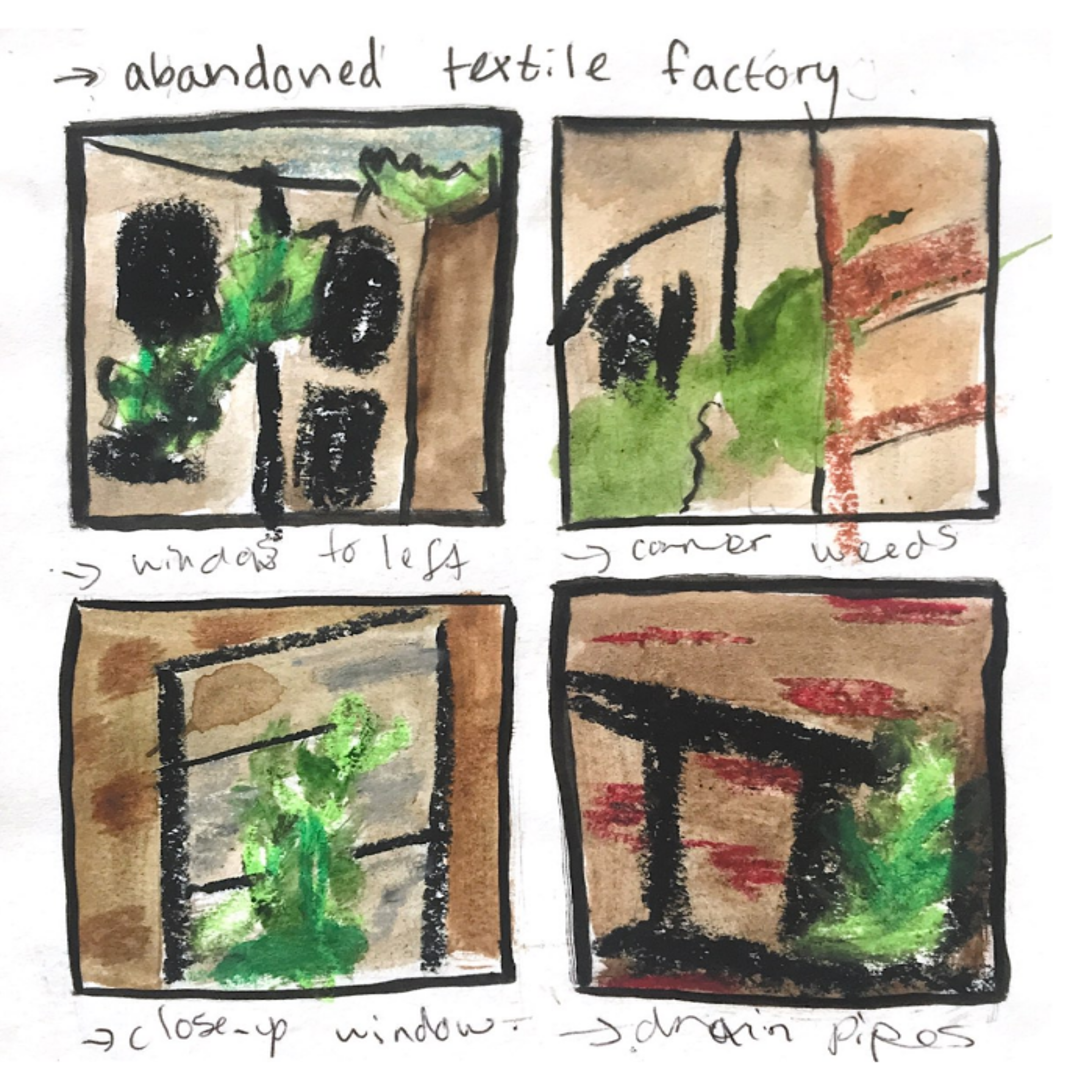
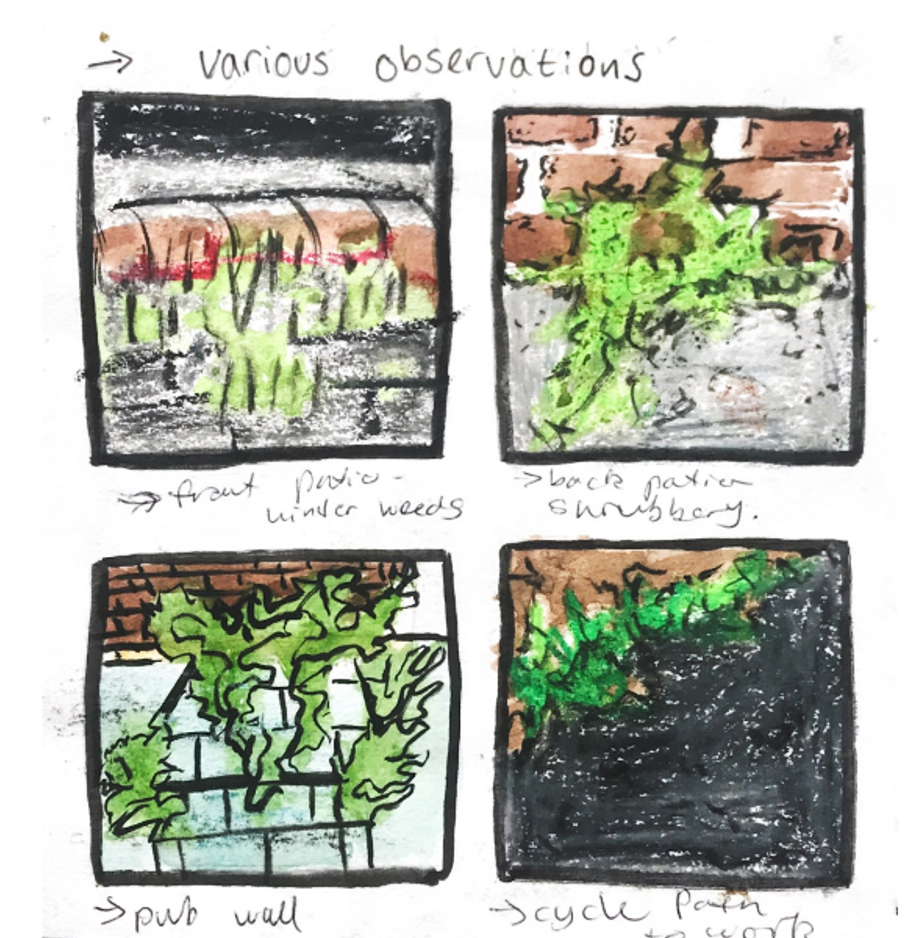
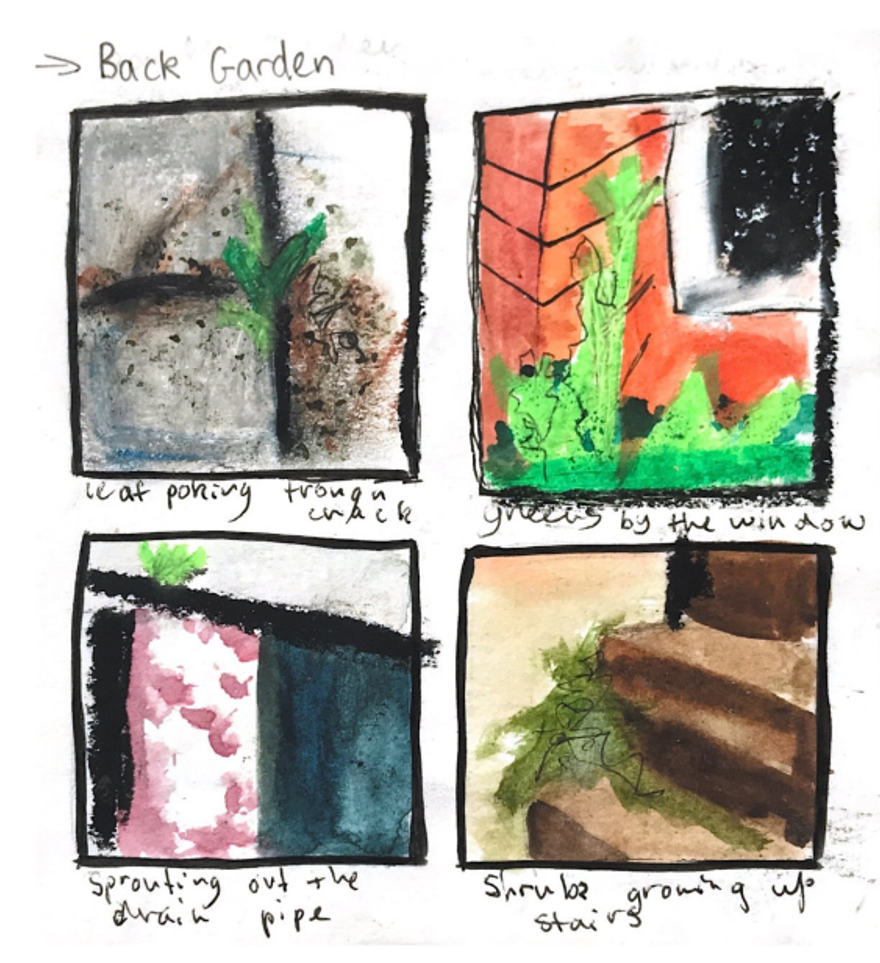
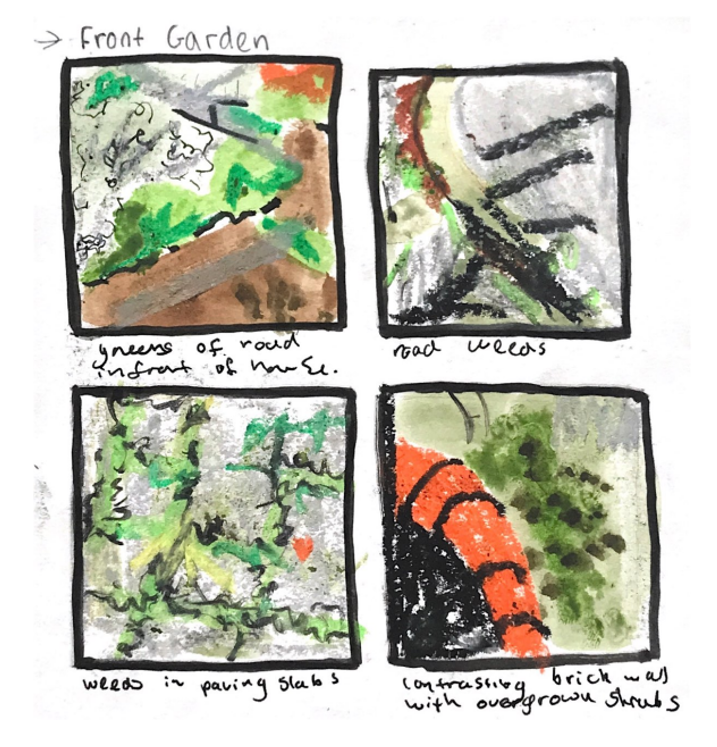
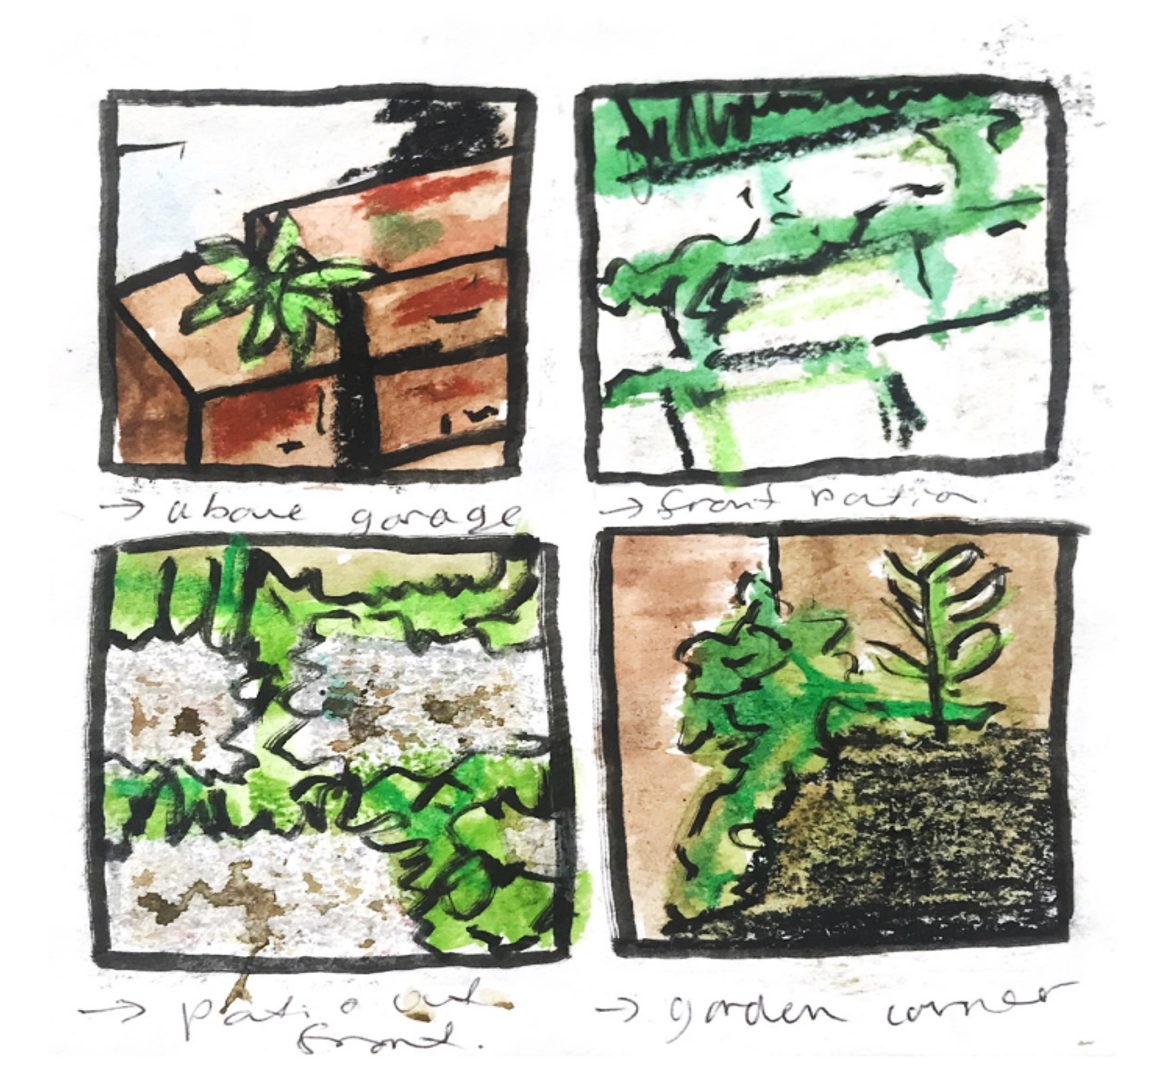
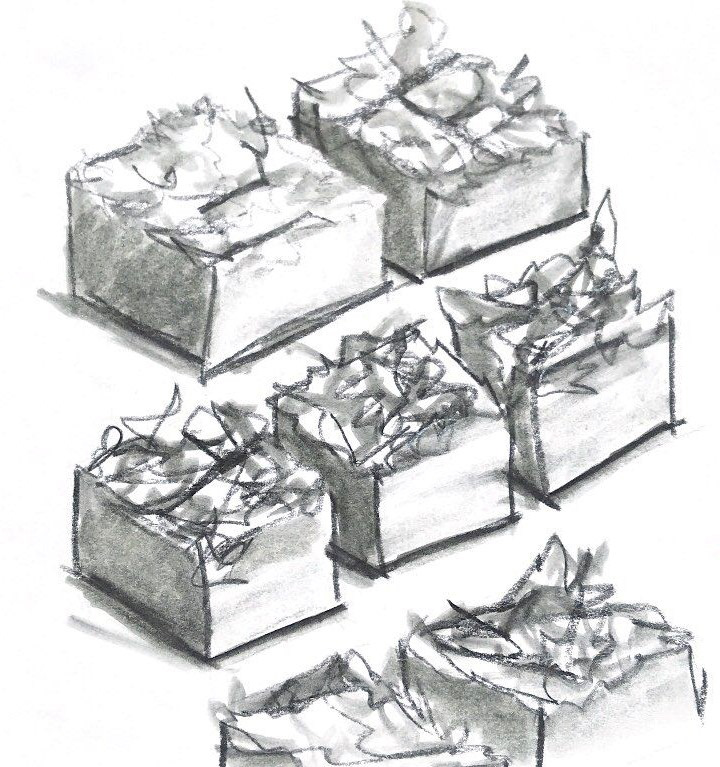
2-Minute Observational sketches
Various sketches from a walk through manchester, to gather an idea of colours, shapes and textures in relation to the topic

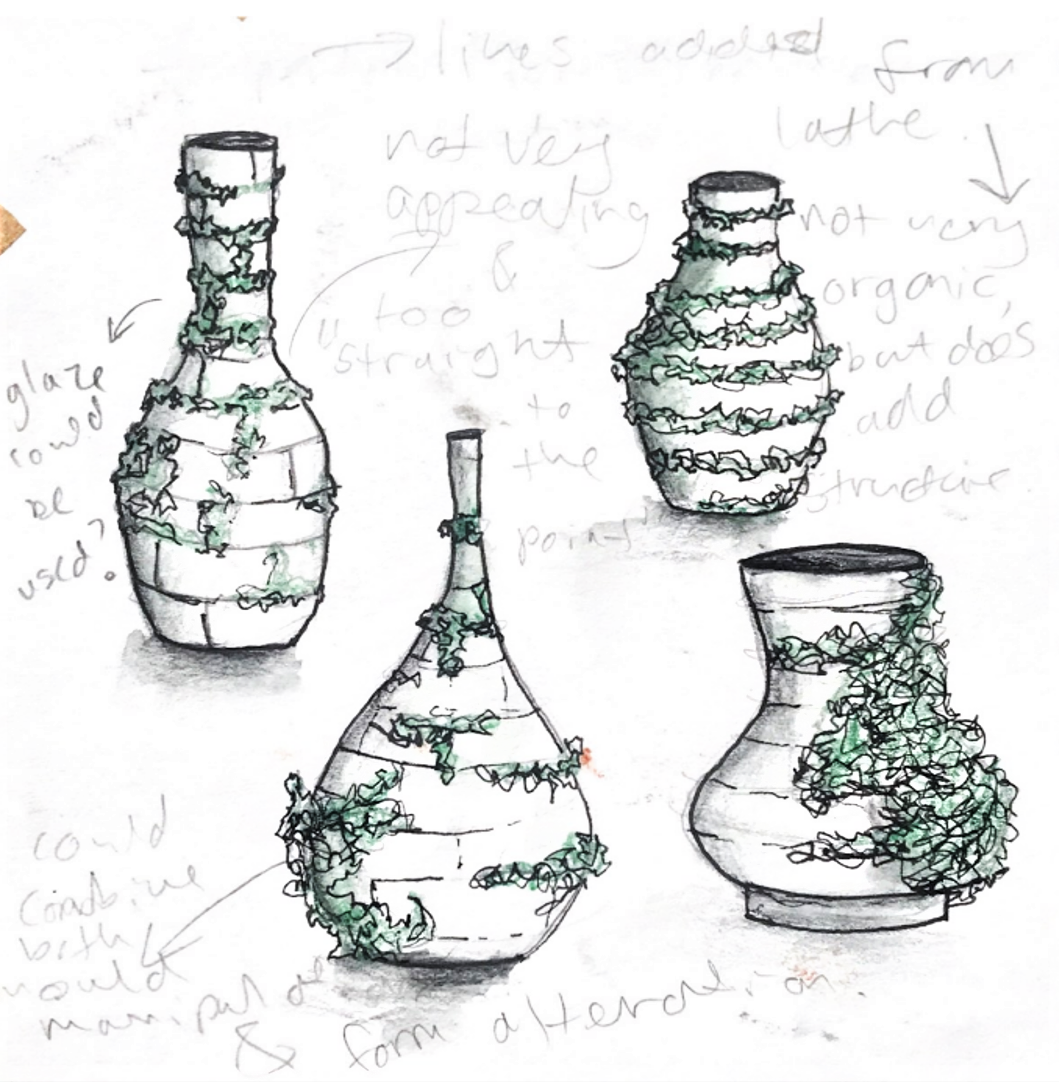
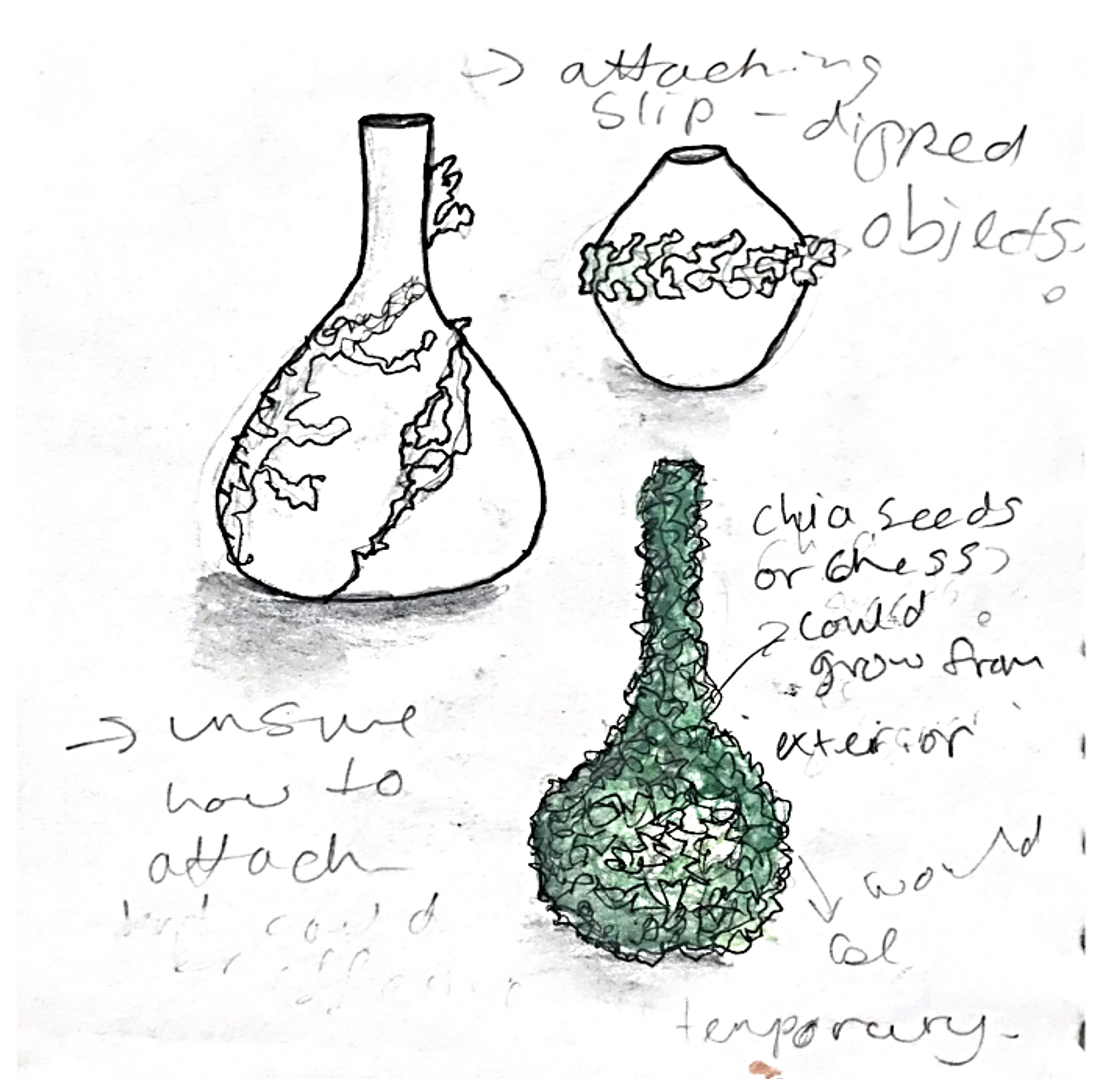
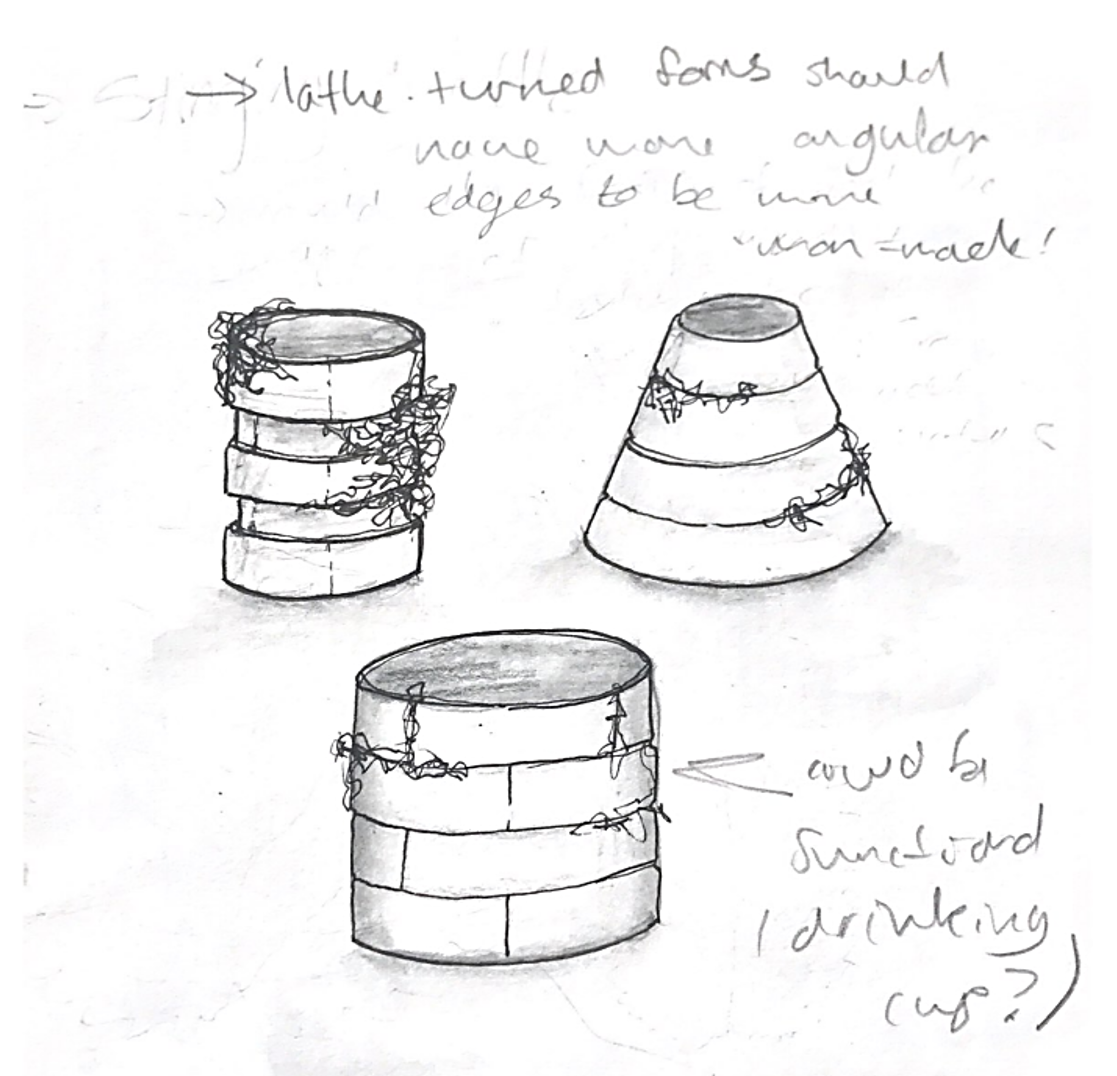
Initial Idea Generating
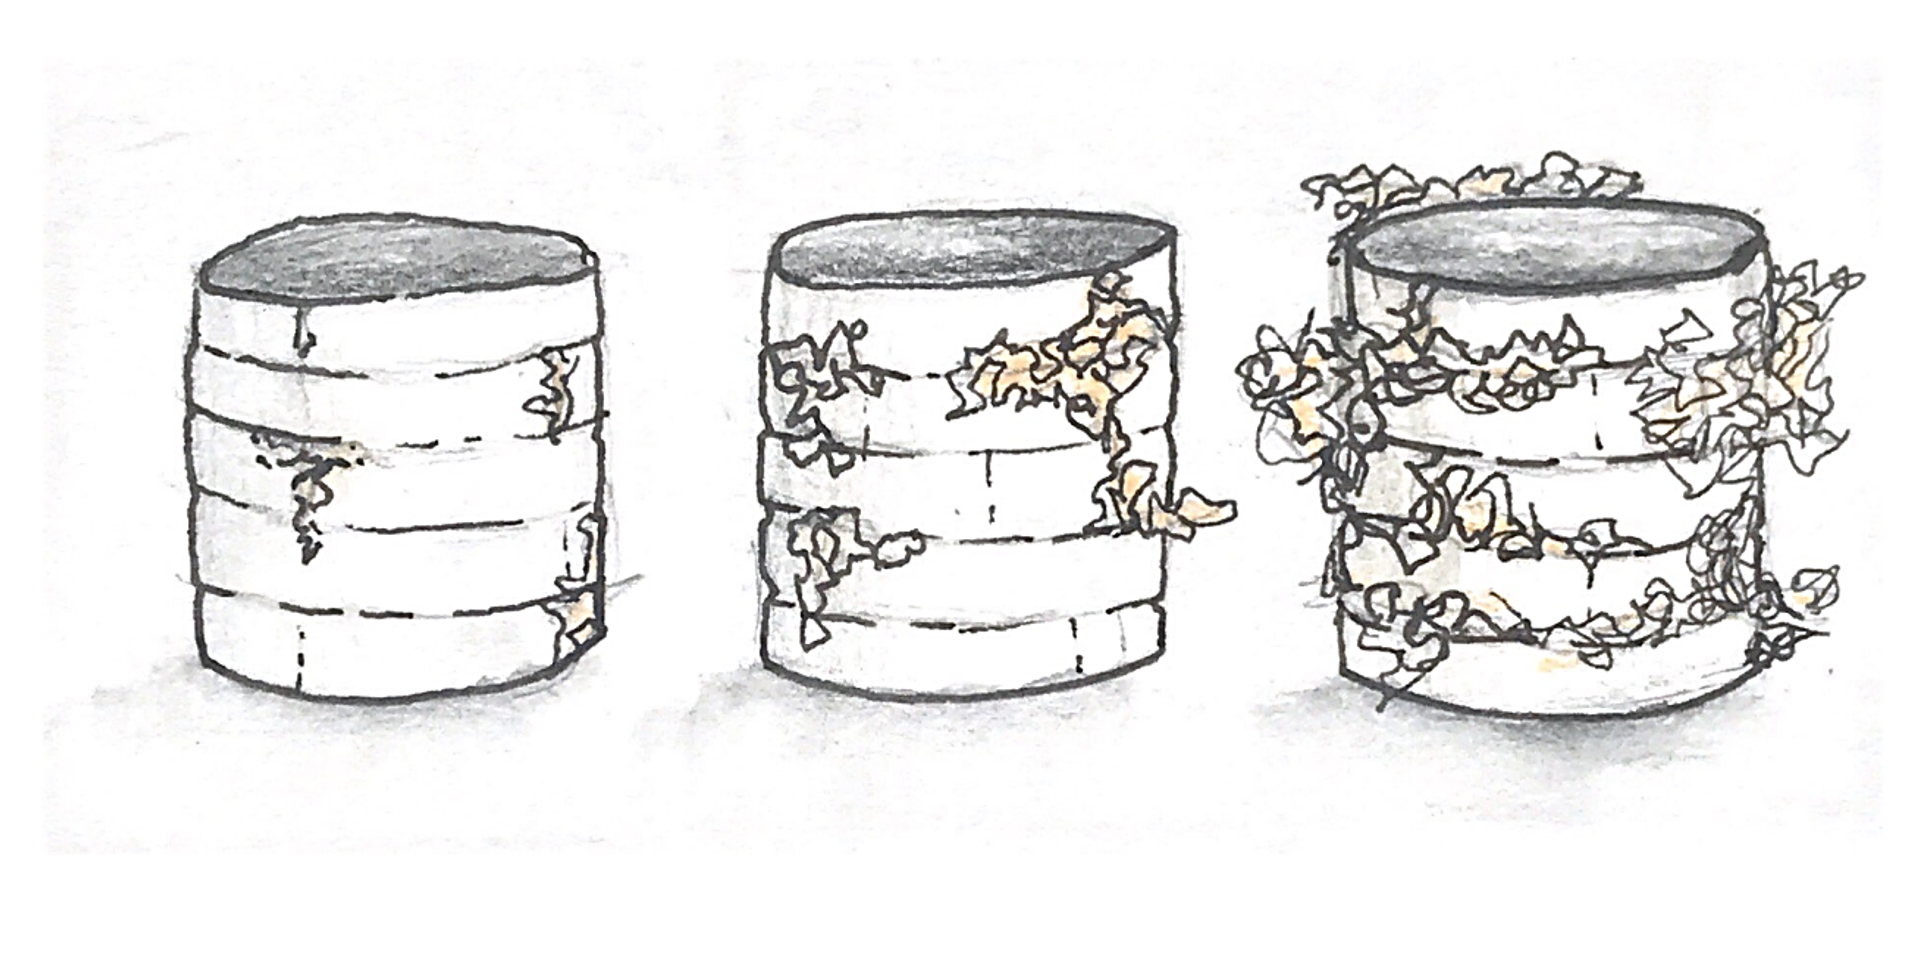
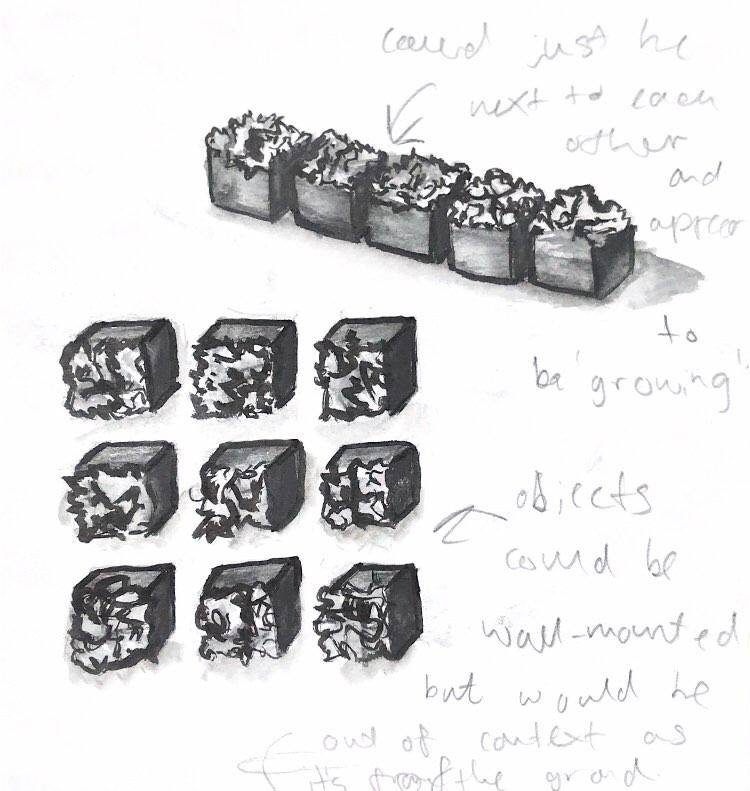
Establishing an effective way to create a texture and form contrast within ceramic. Would real plants growing from the surface be impractical? (eg. cress, chia seeds) Deliberate imperfections, such as additional seam lines could be more long-lasting and achievable.
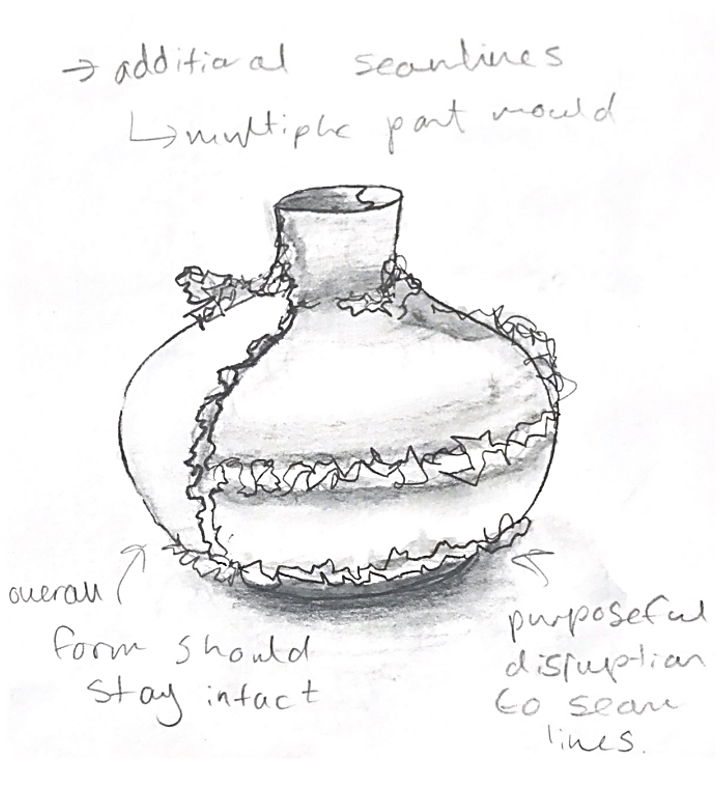
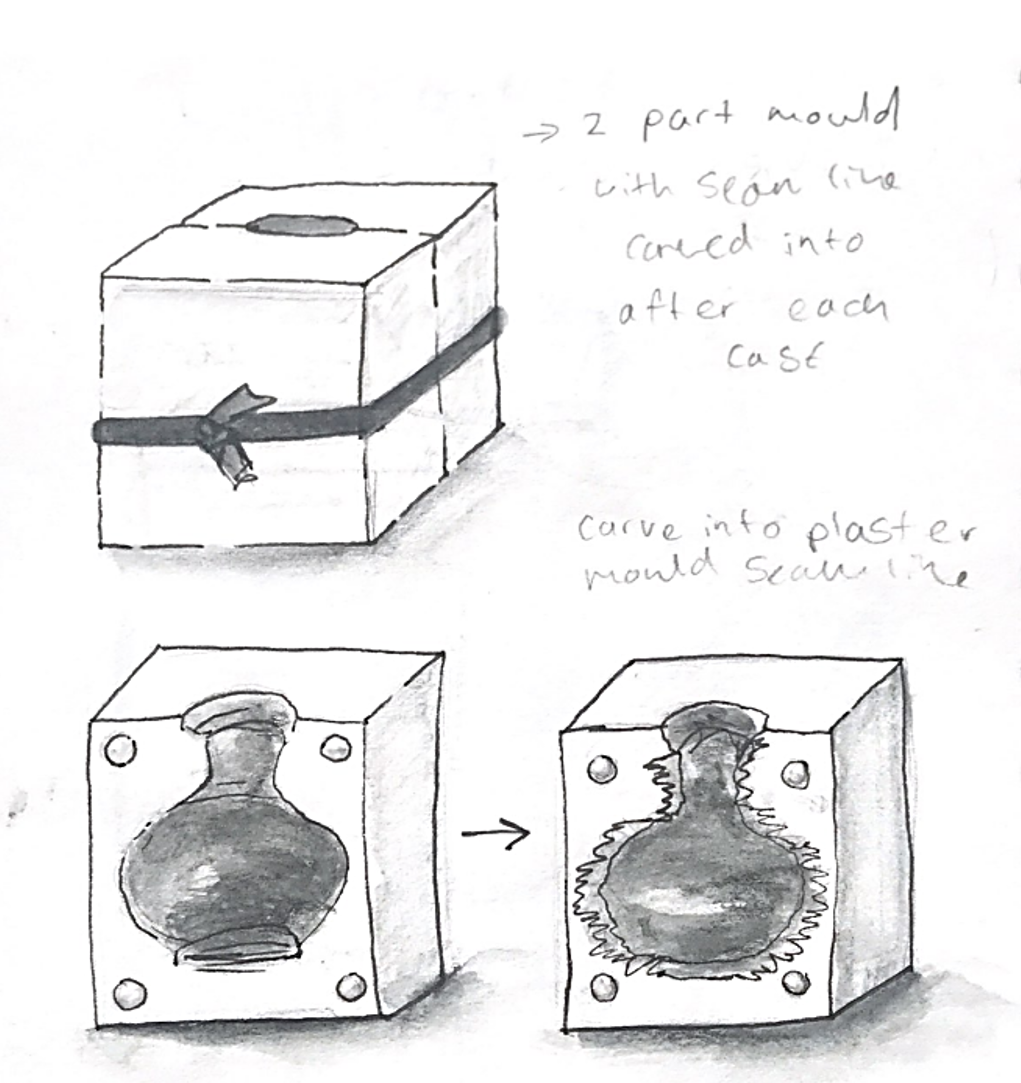
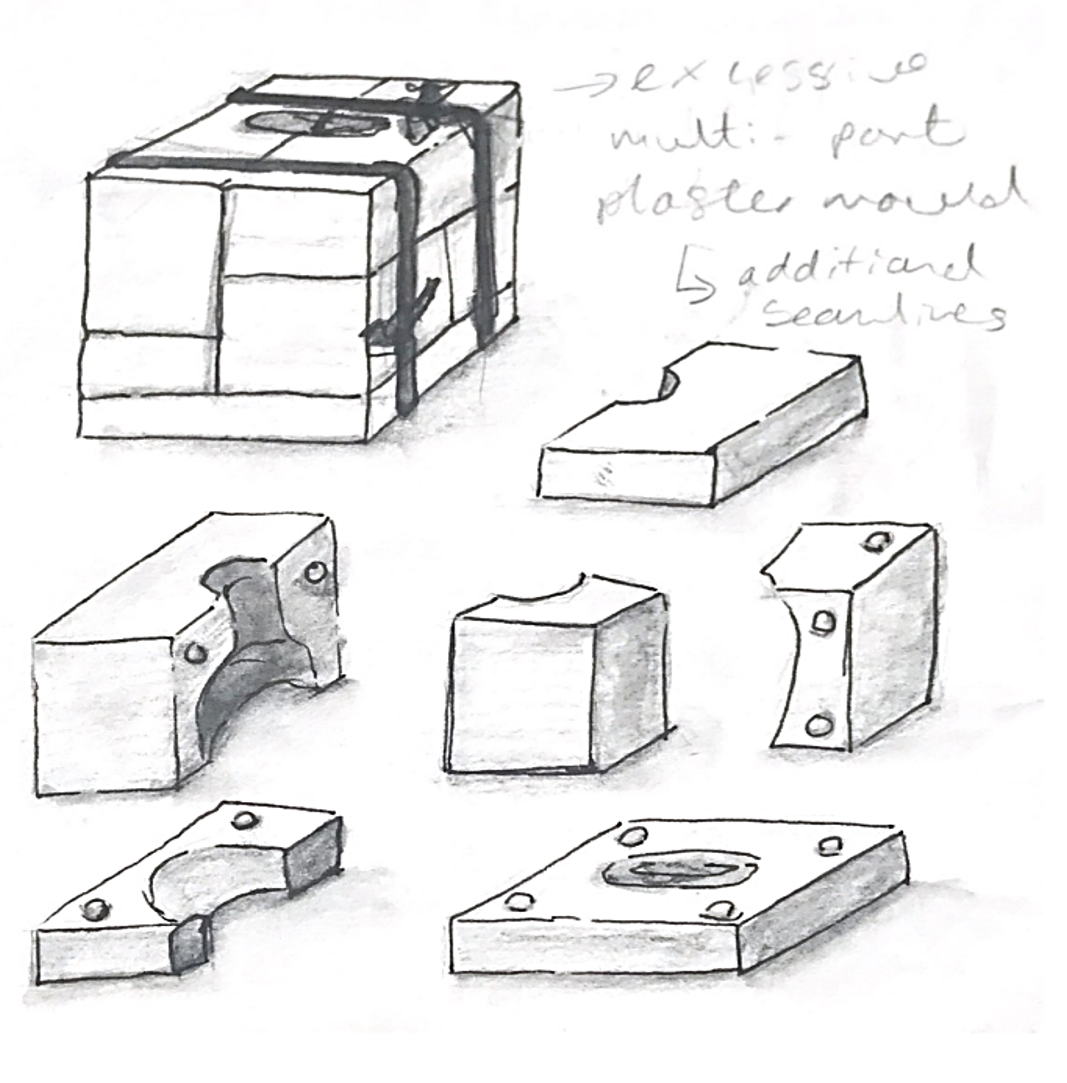
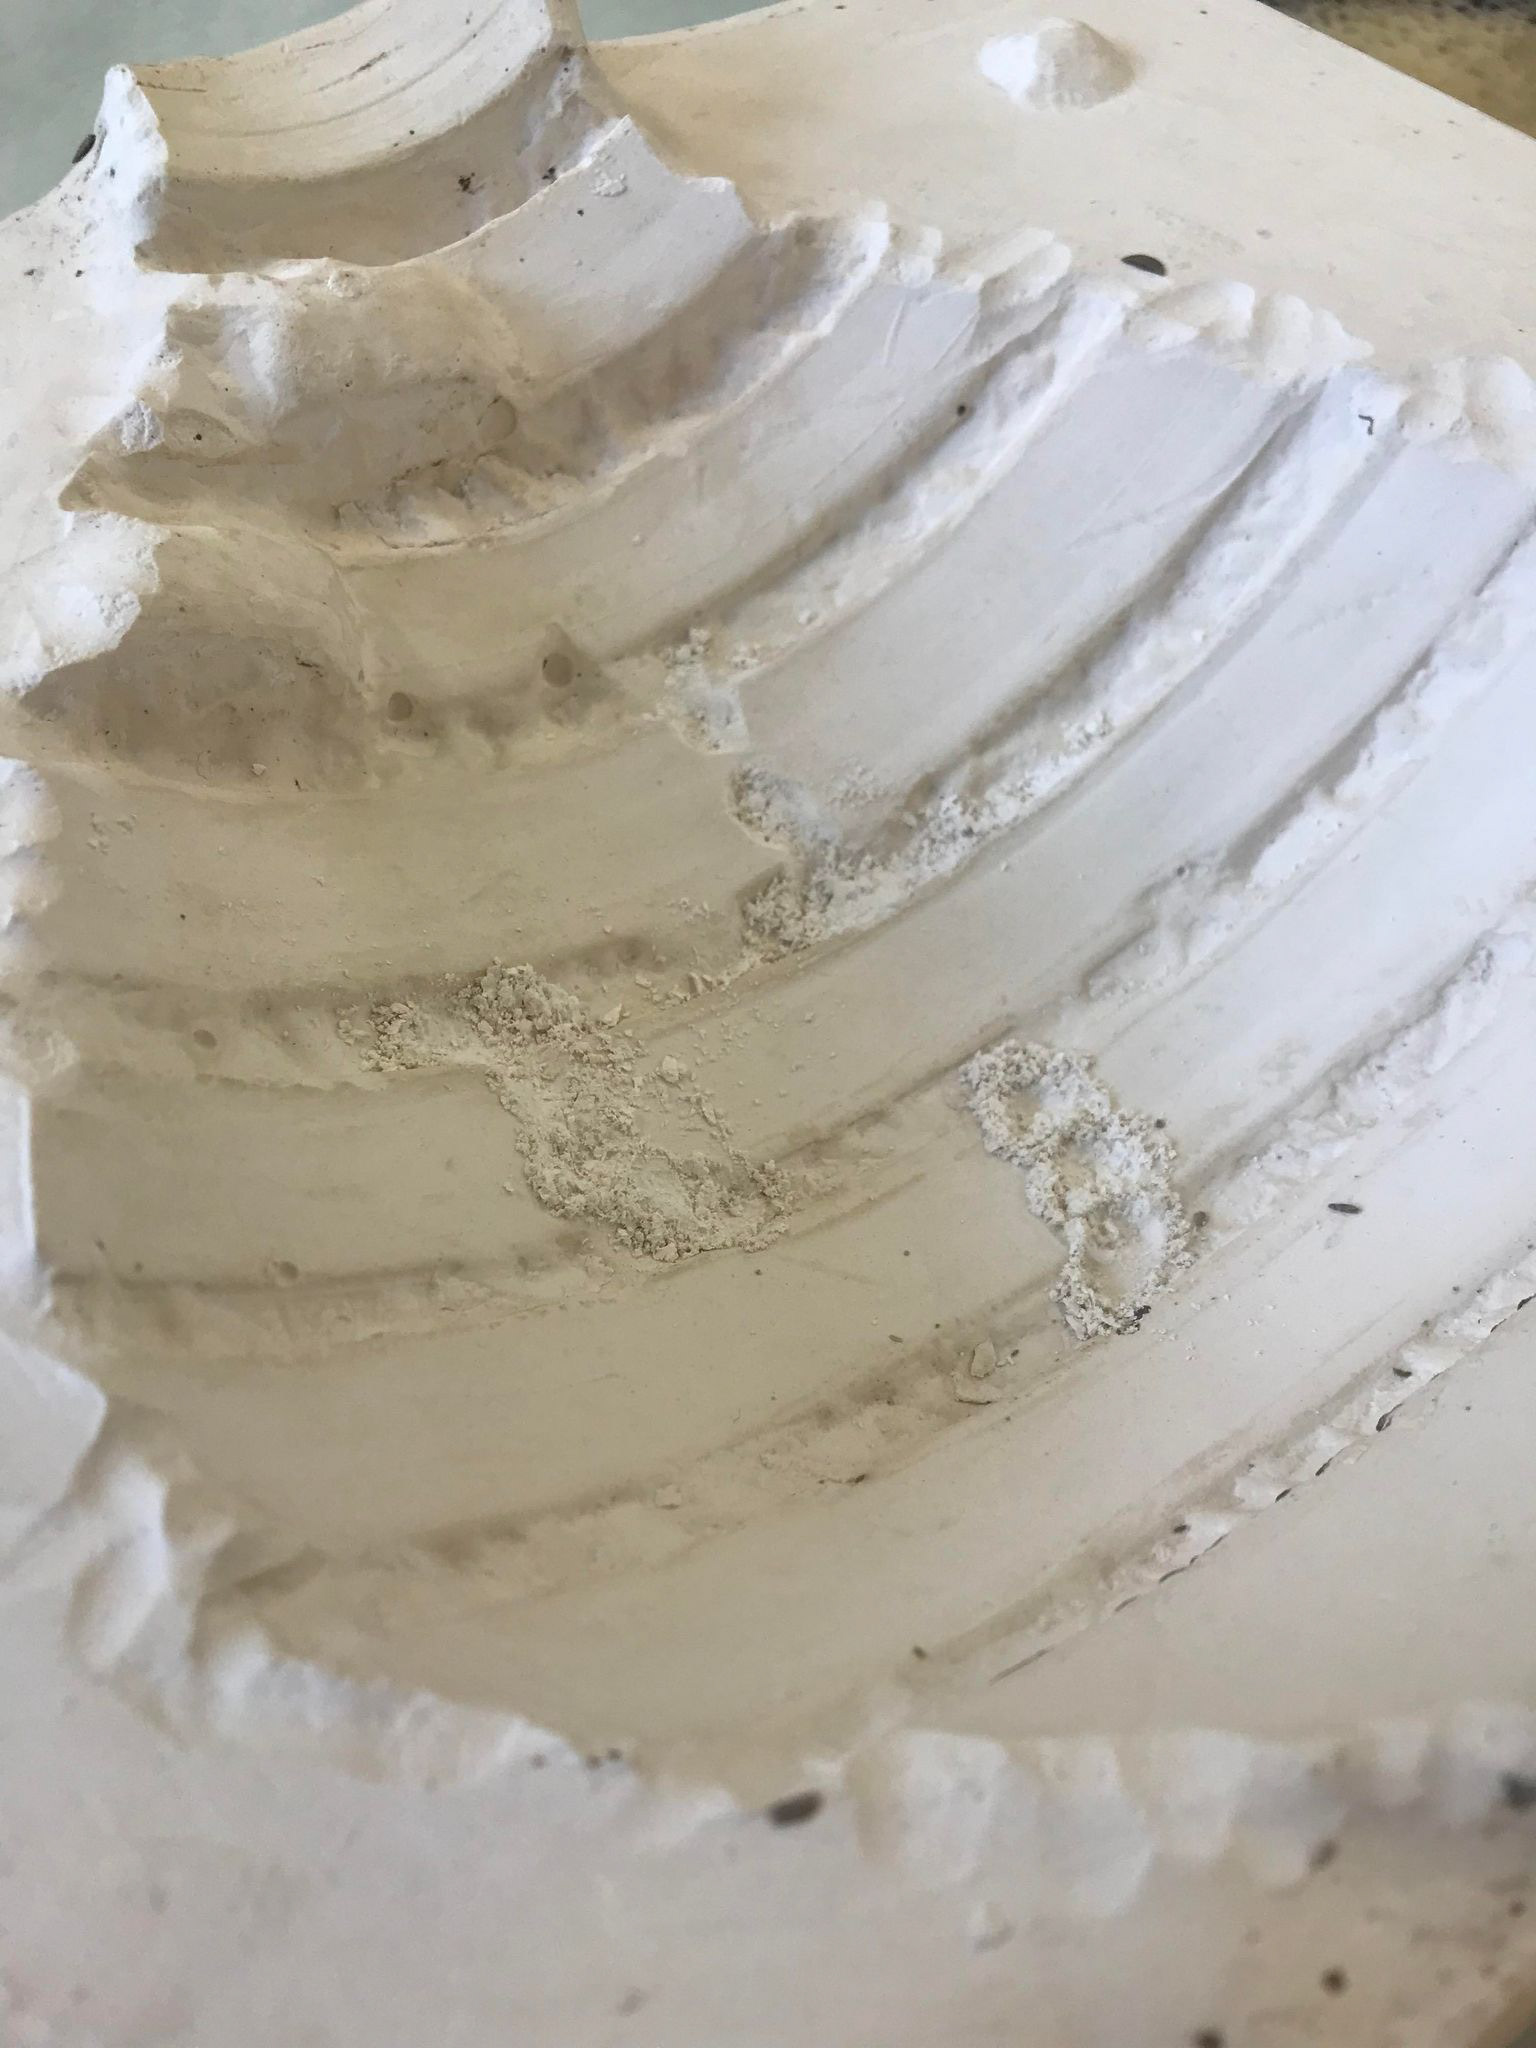
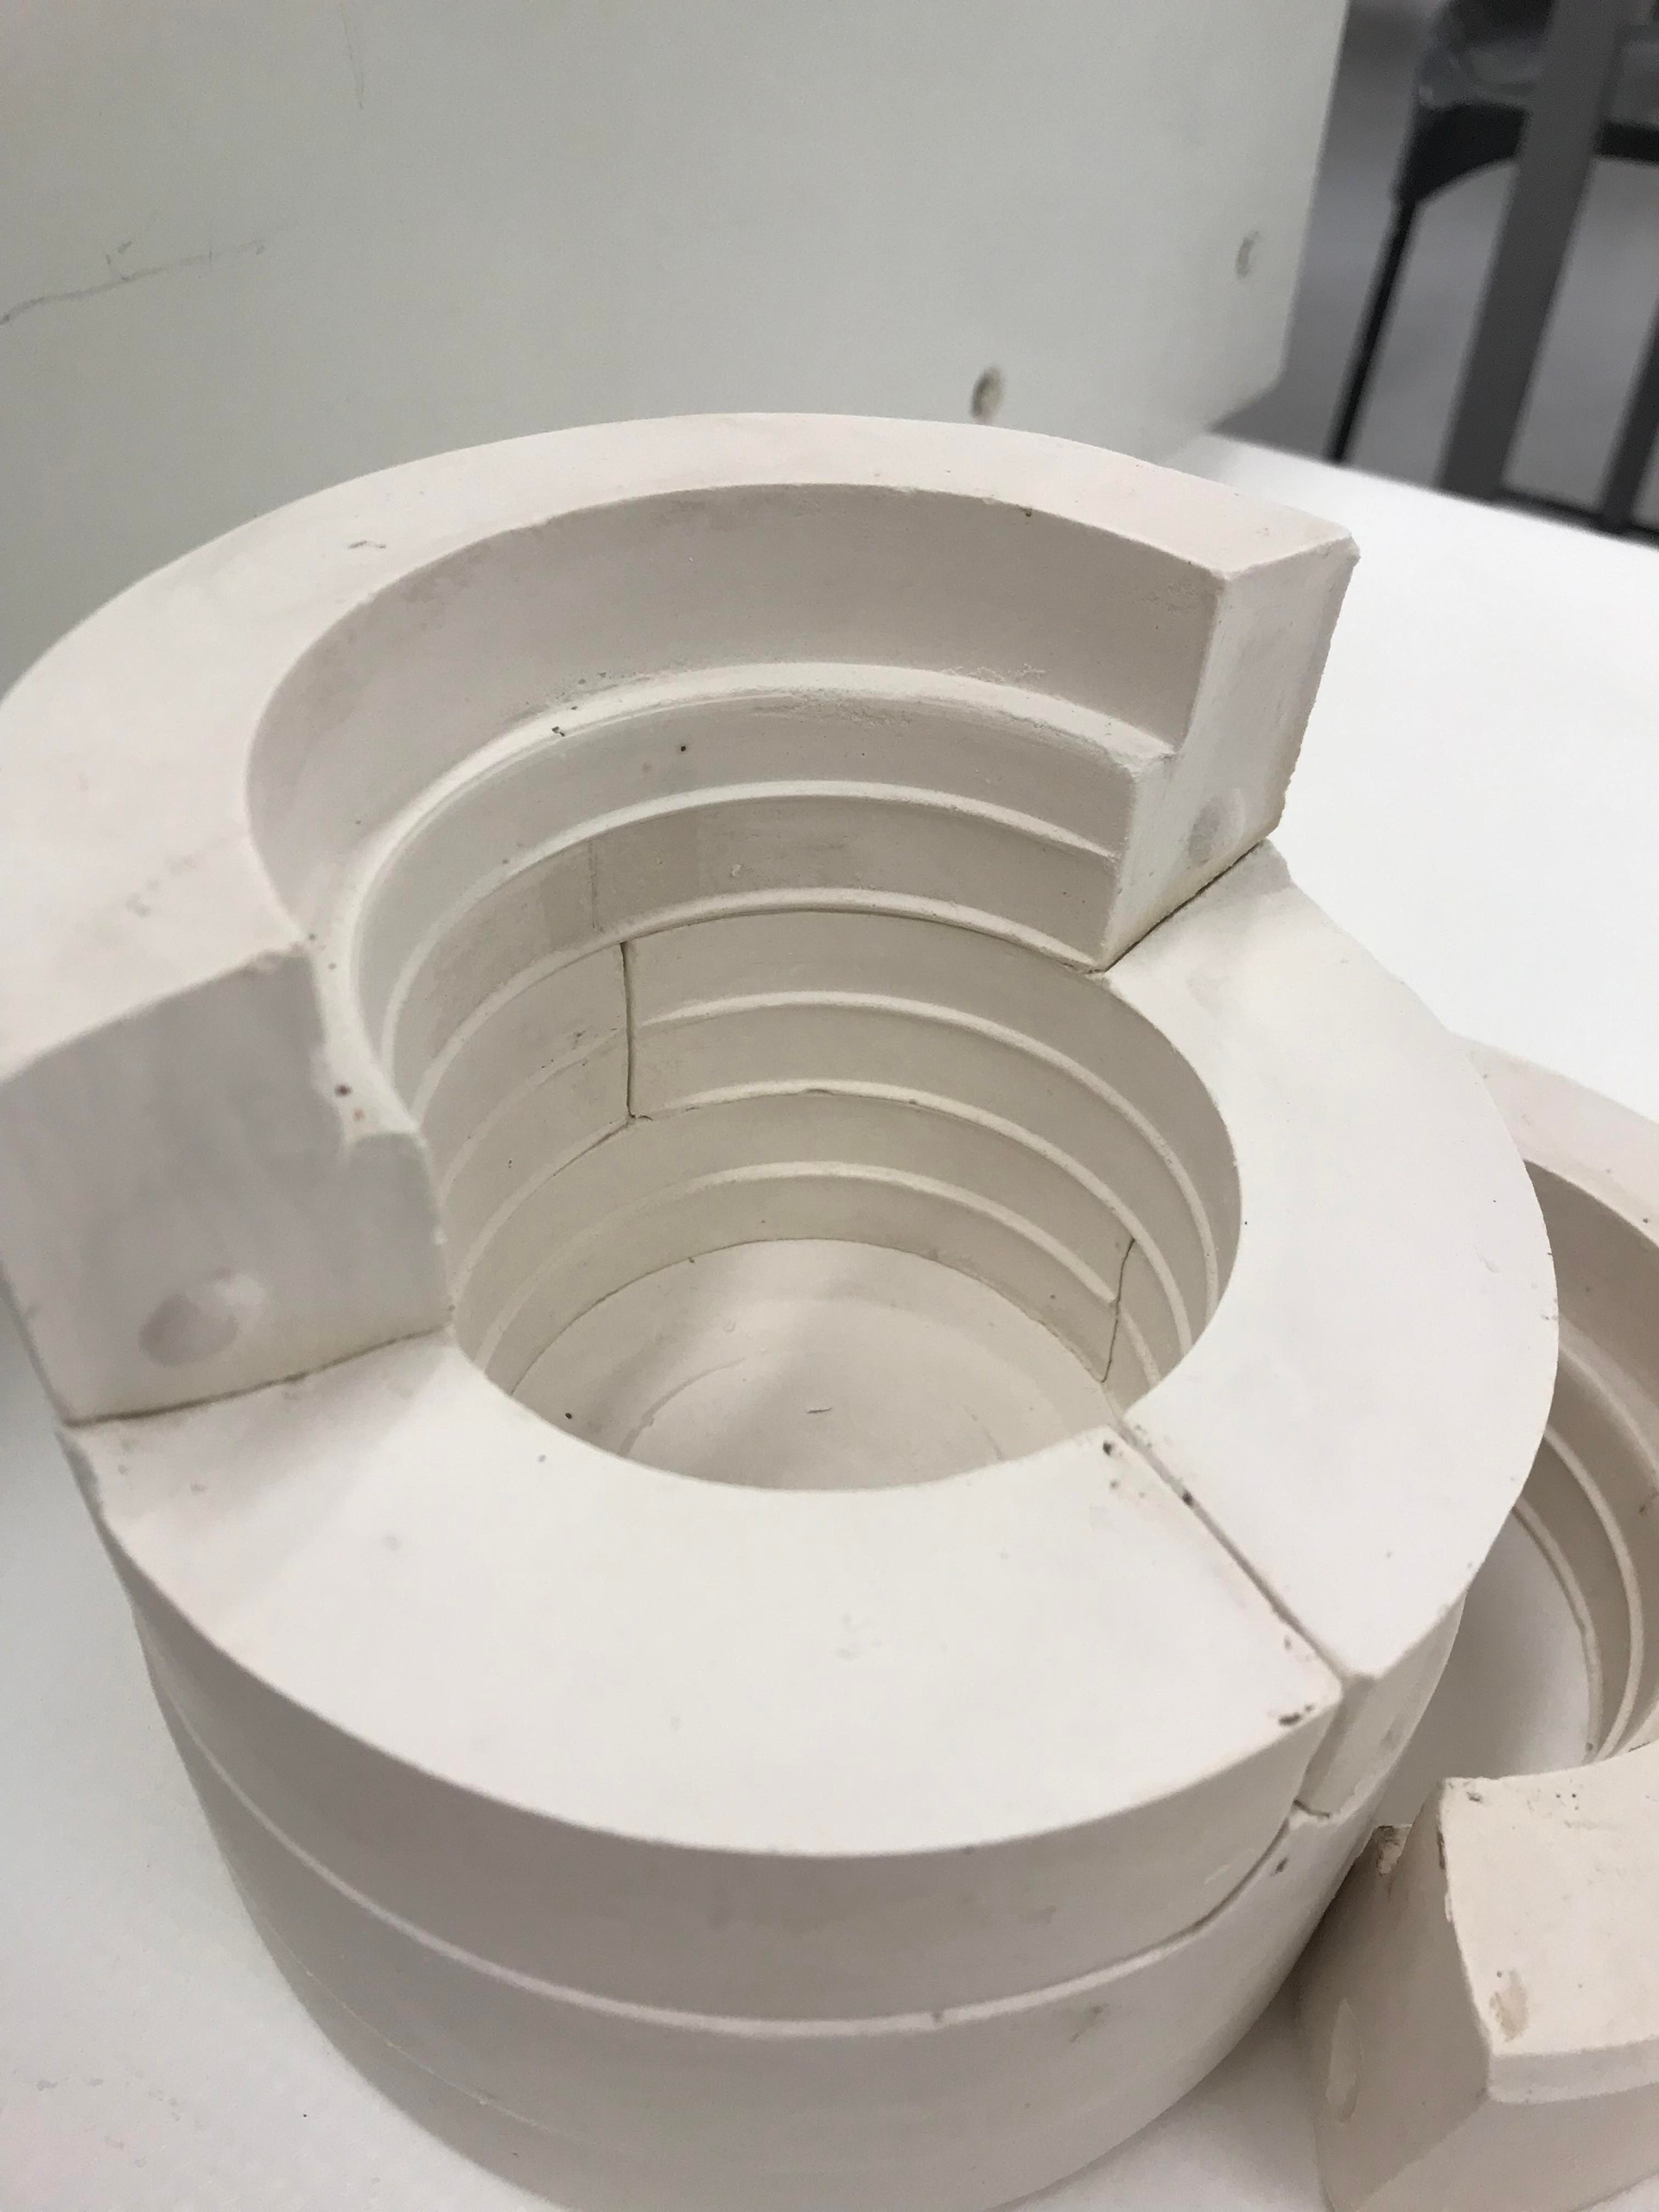
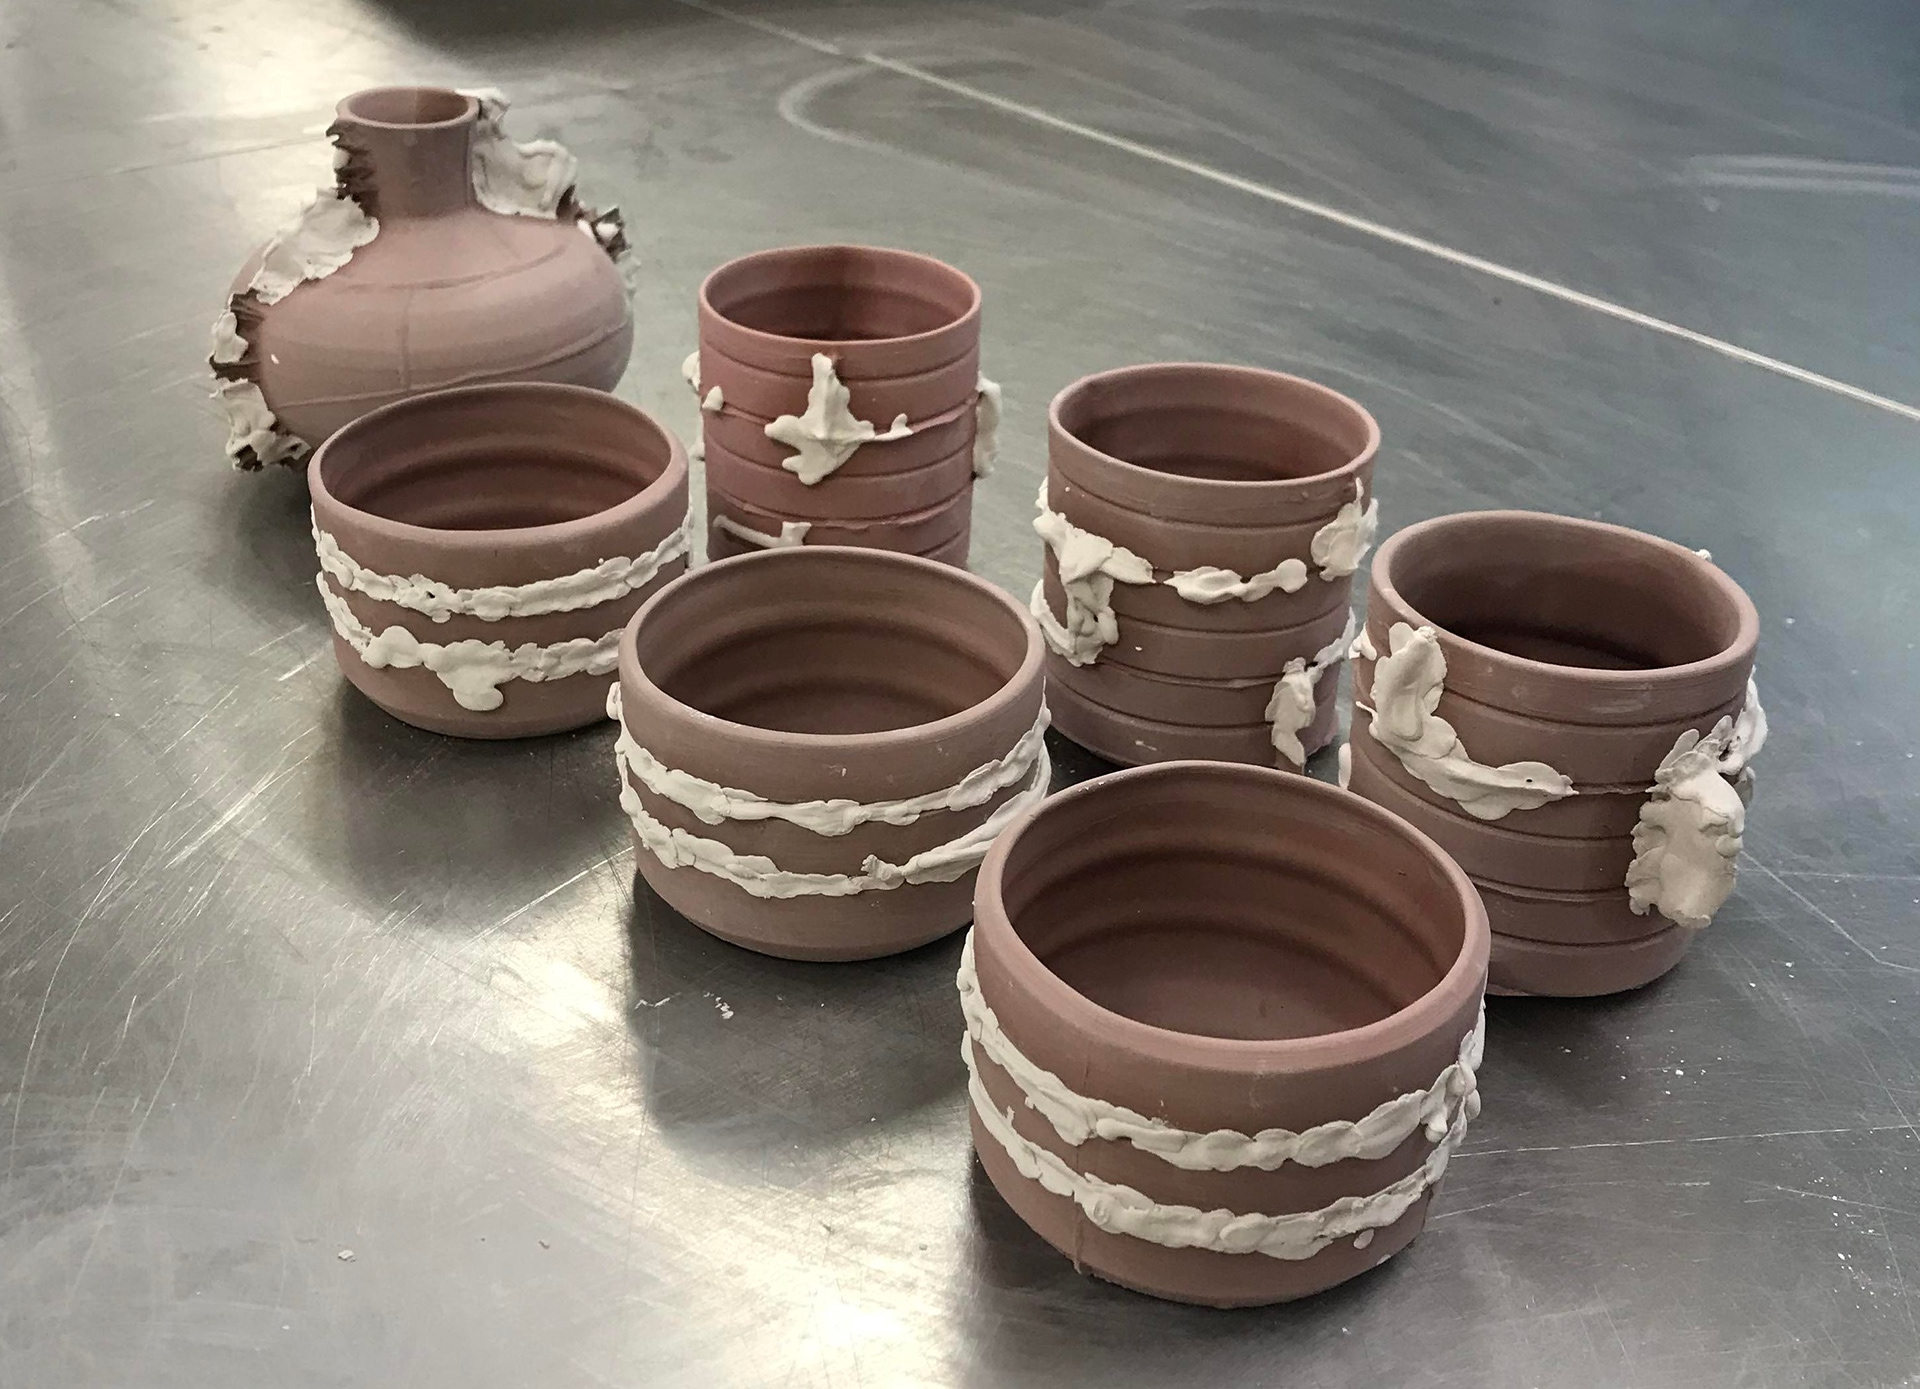
Exposed seam lines
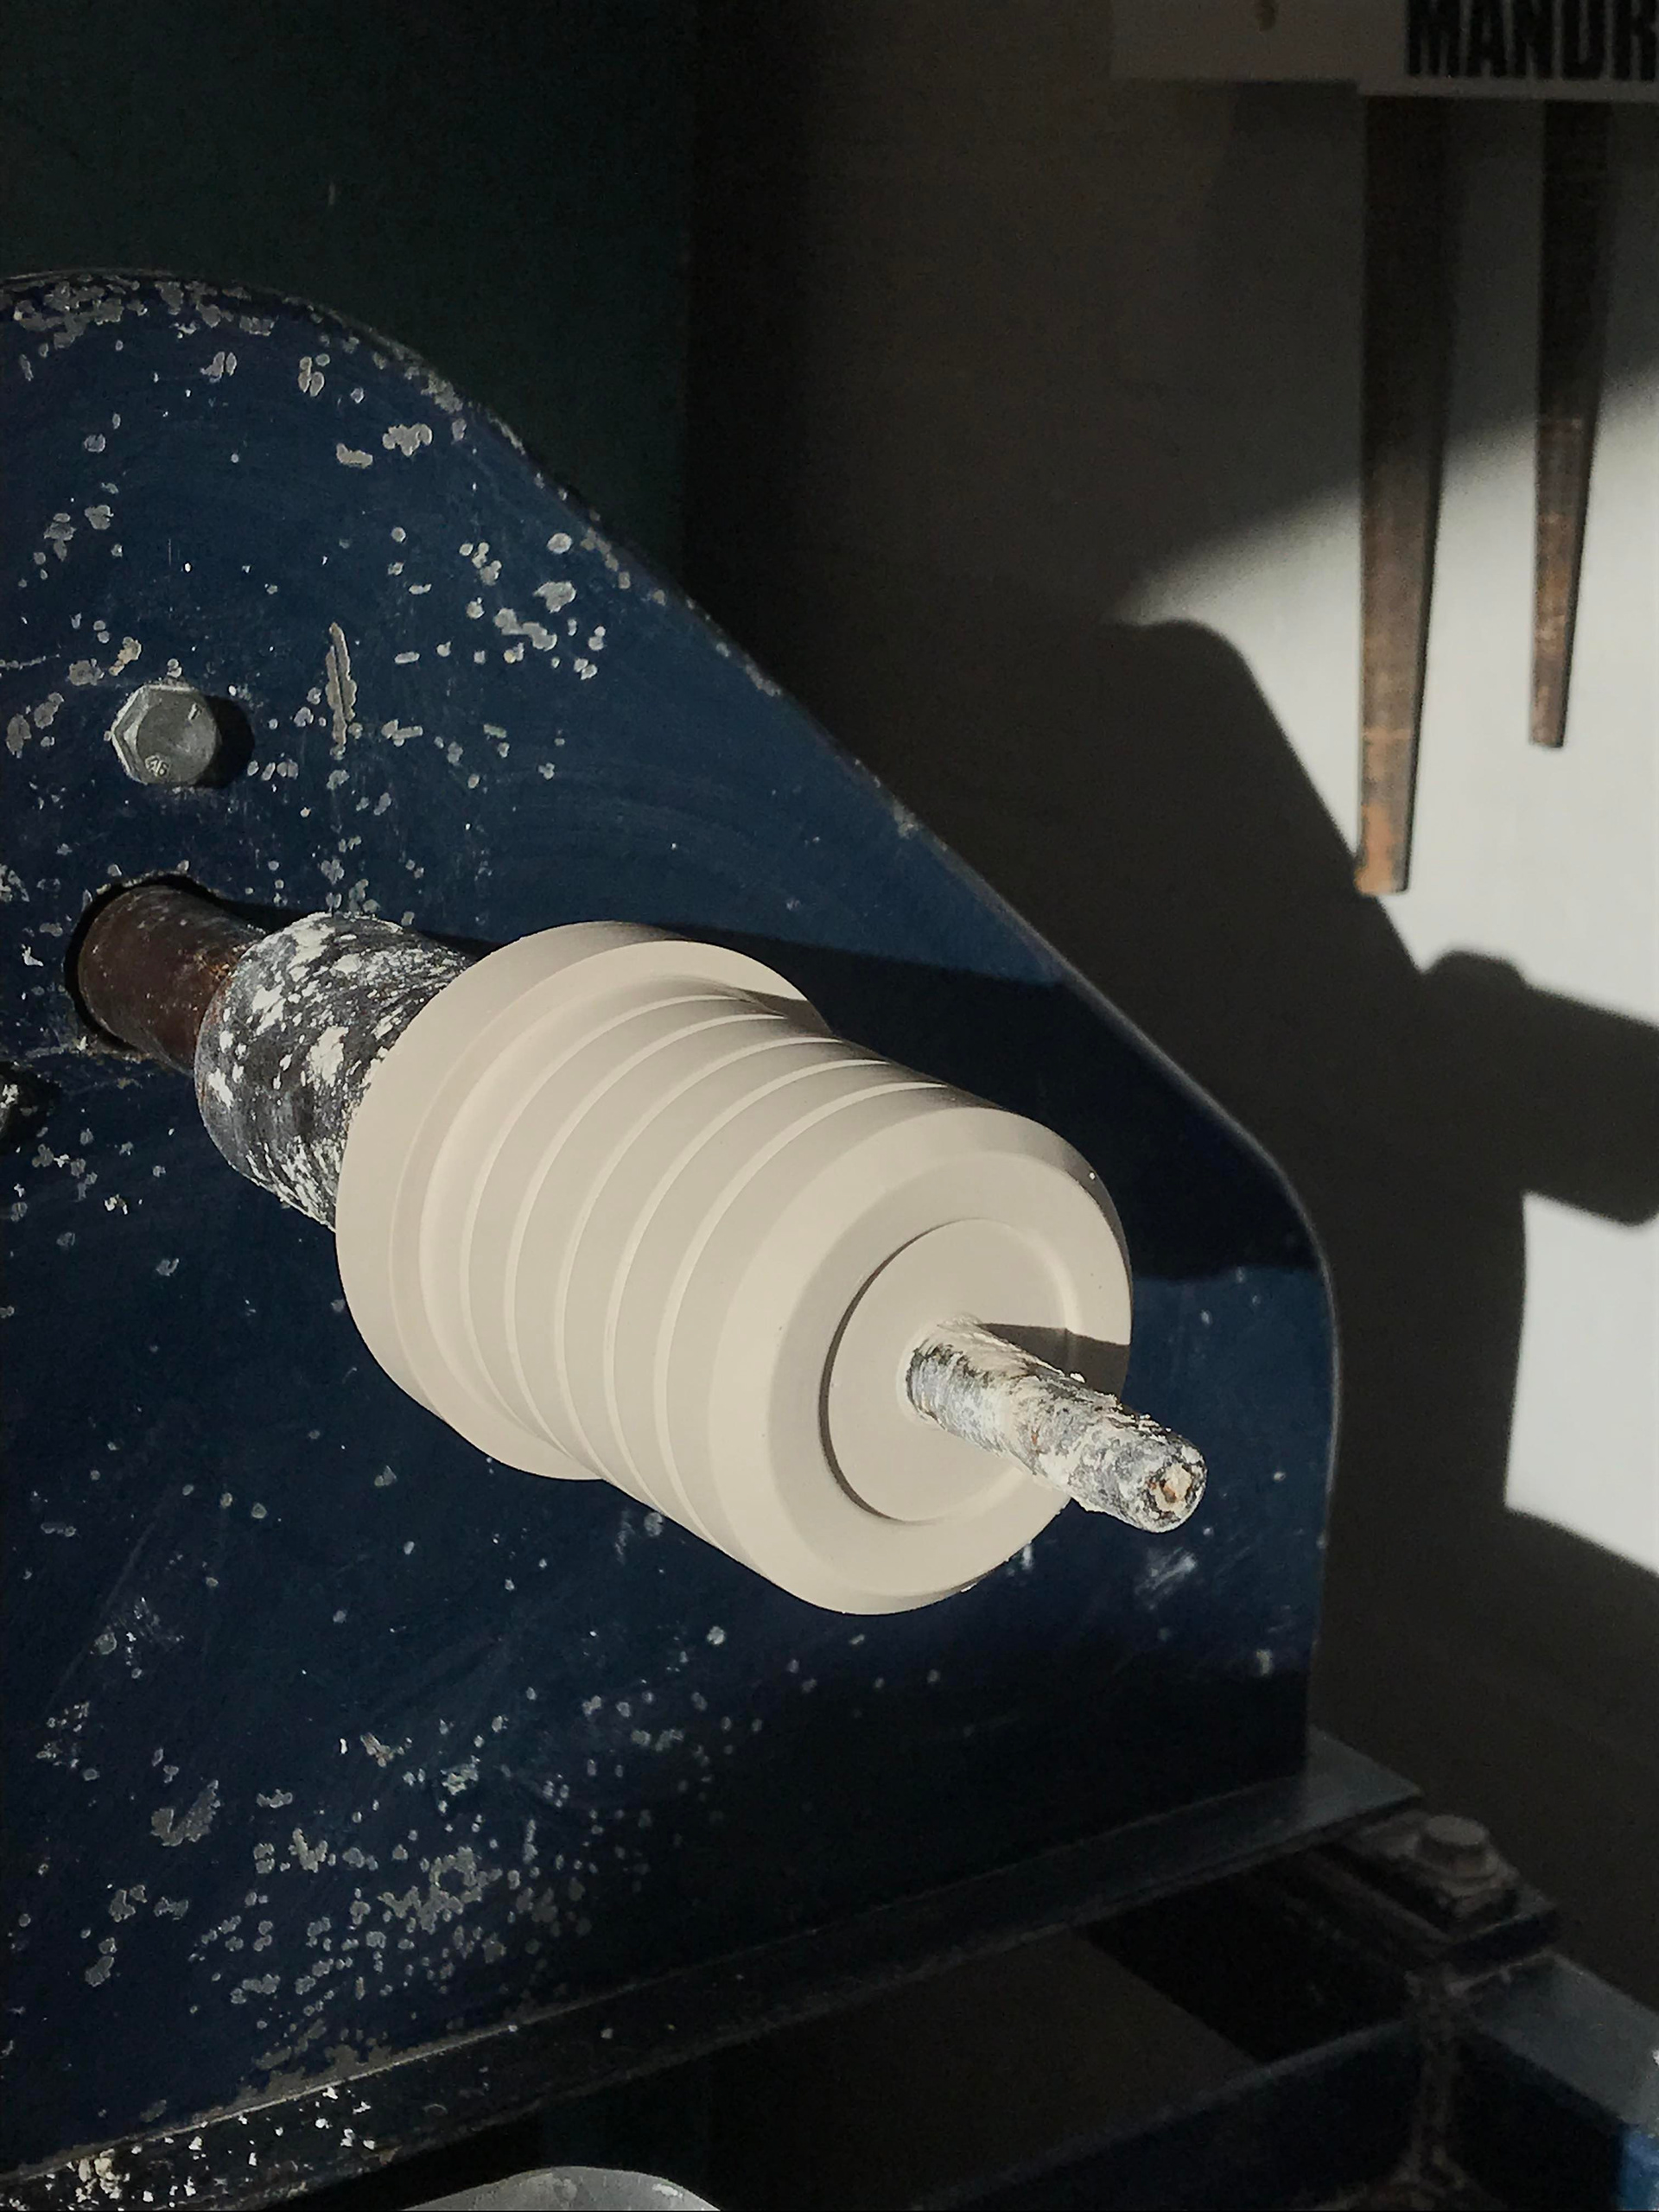
I began by turning a small form on the plaster lathe, followed by creating a 2-part mould and an 8-part mould. I then carved into the edges of both moulds, creating a gap for the slip to seep into, resulting in exaggerated seam lines.
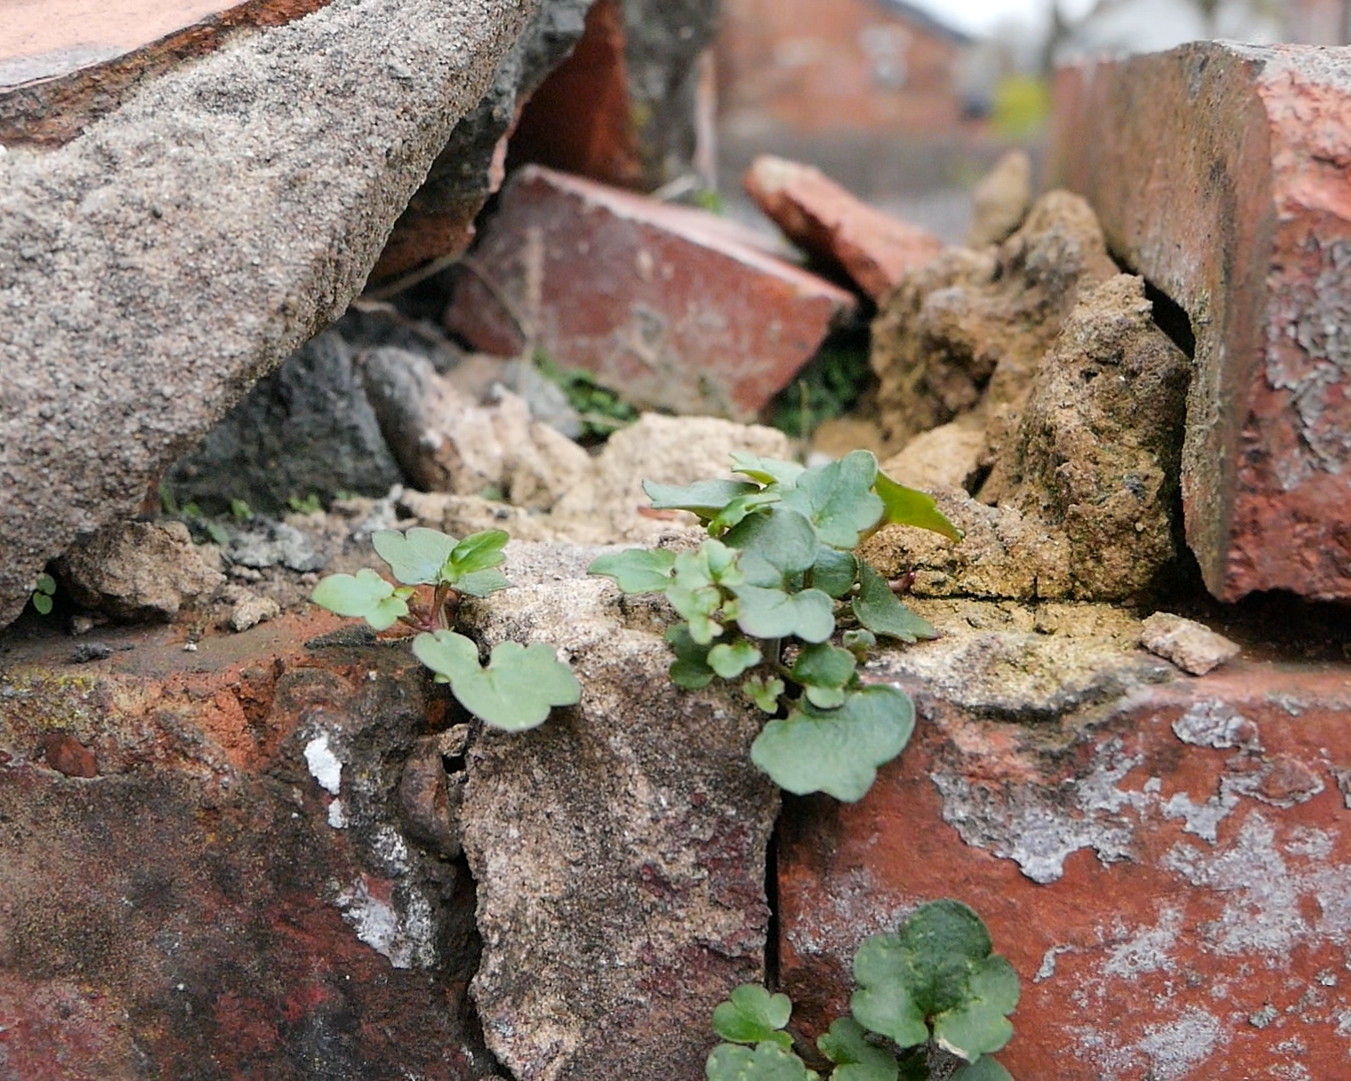
The contrast between flat surface against the irregular, organic seams reminded me of plants emerging between human-made structures.


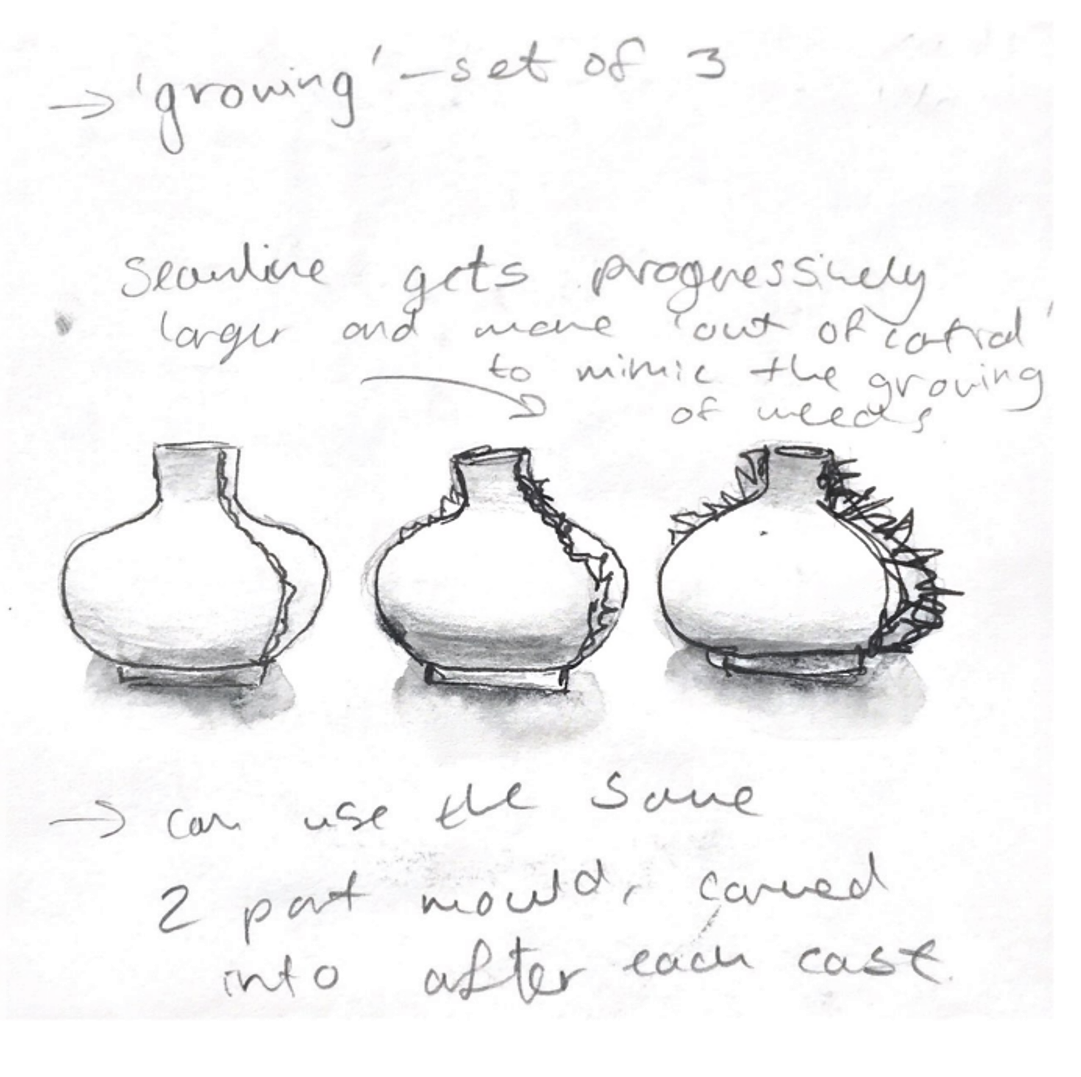
Form and scale exploration
In order to explore a variety of ways to embody the intersection between the natural and man-made, I adapted my approach by modifying the form before casting the object.
I cast the form into a multi-part mould to add additional seam lines across the casted vessel.
The forms were a success in establishing my ability working on a larger scale. However, the overall exploration was unsuccessful in relation to the project, as the lines in the vessels appeared far too directed, lacking the organic feel of plants growing out of place.
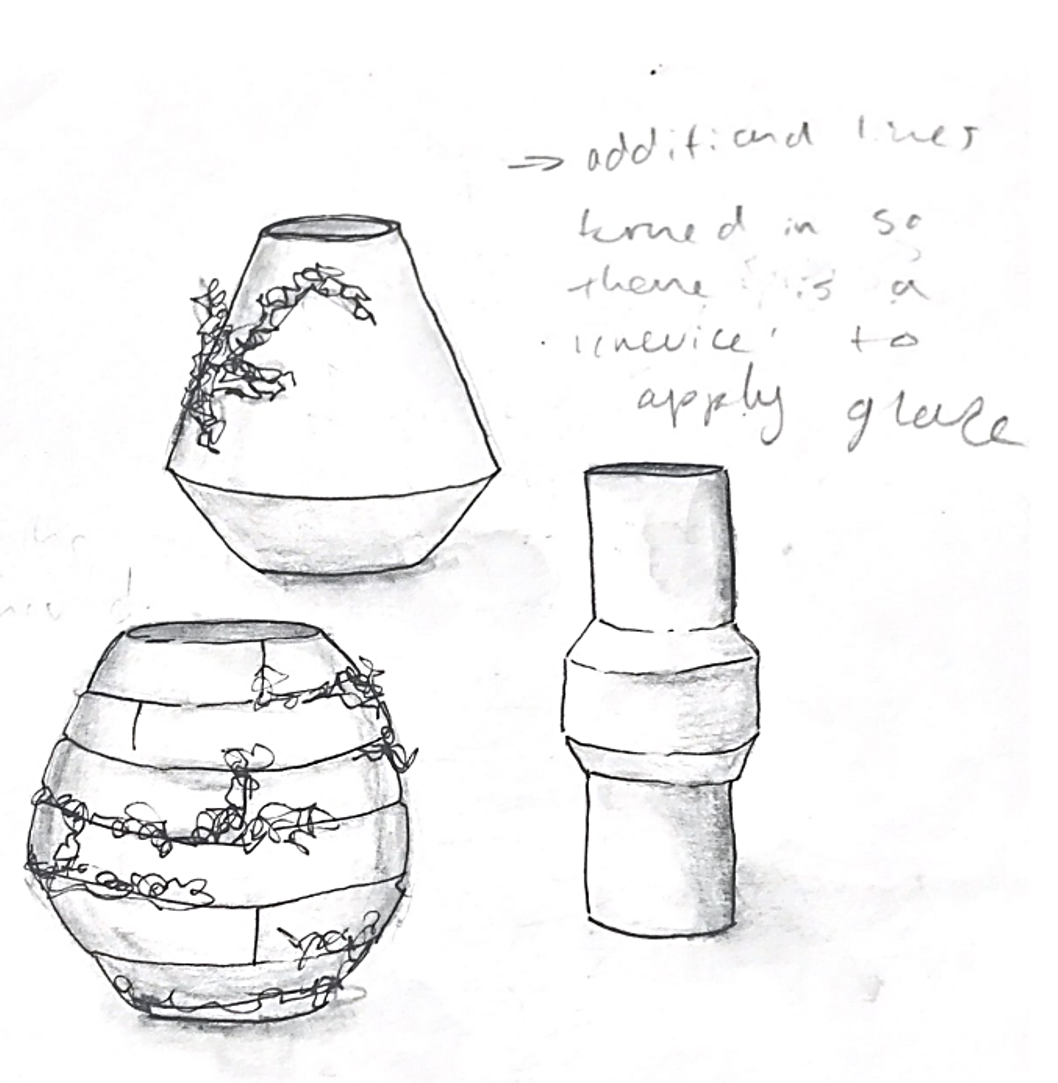
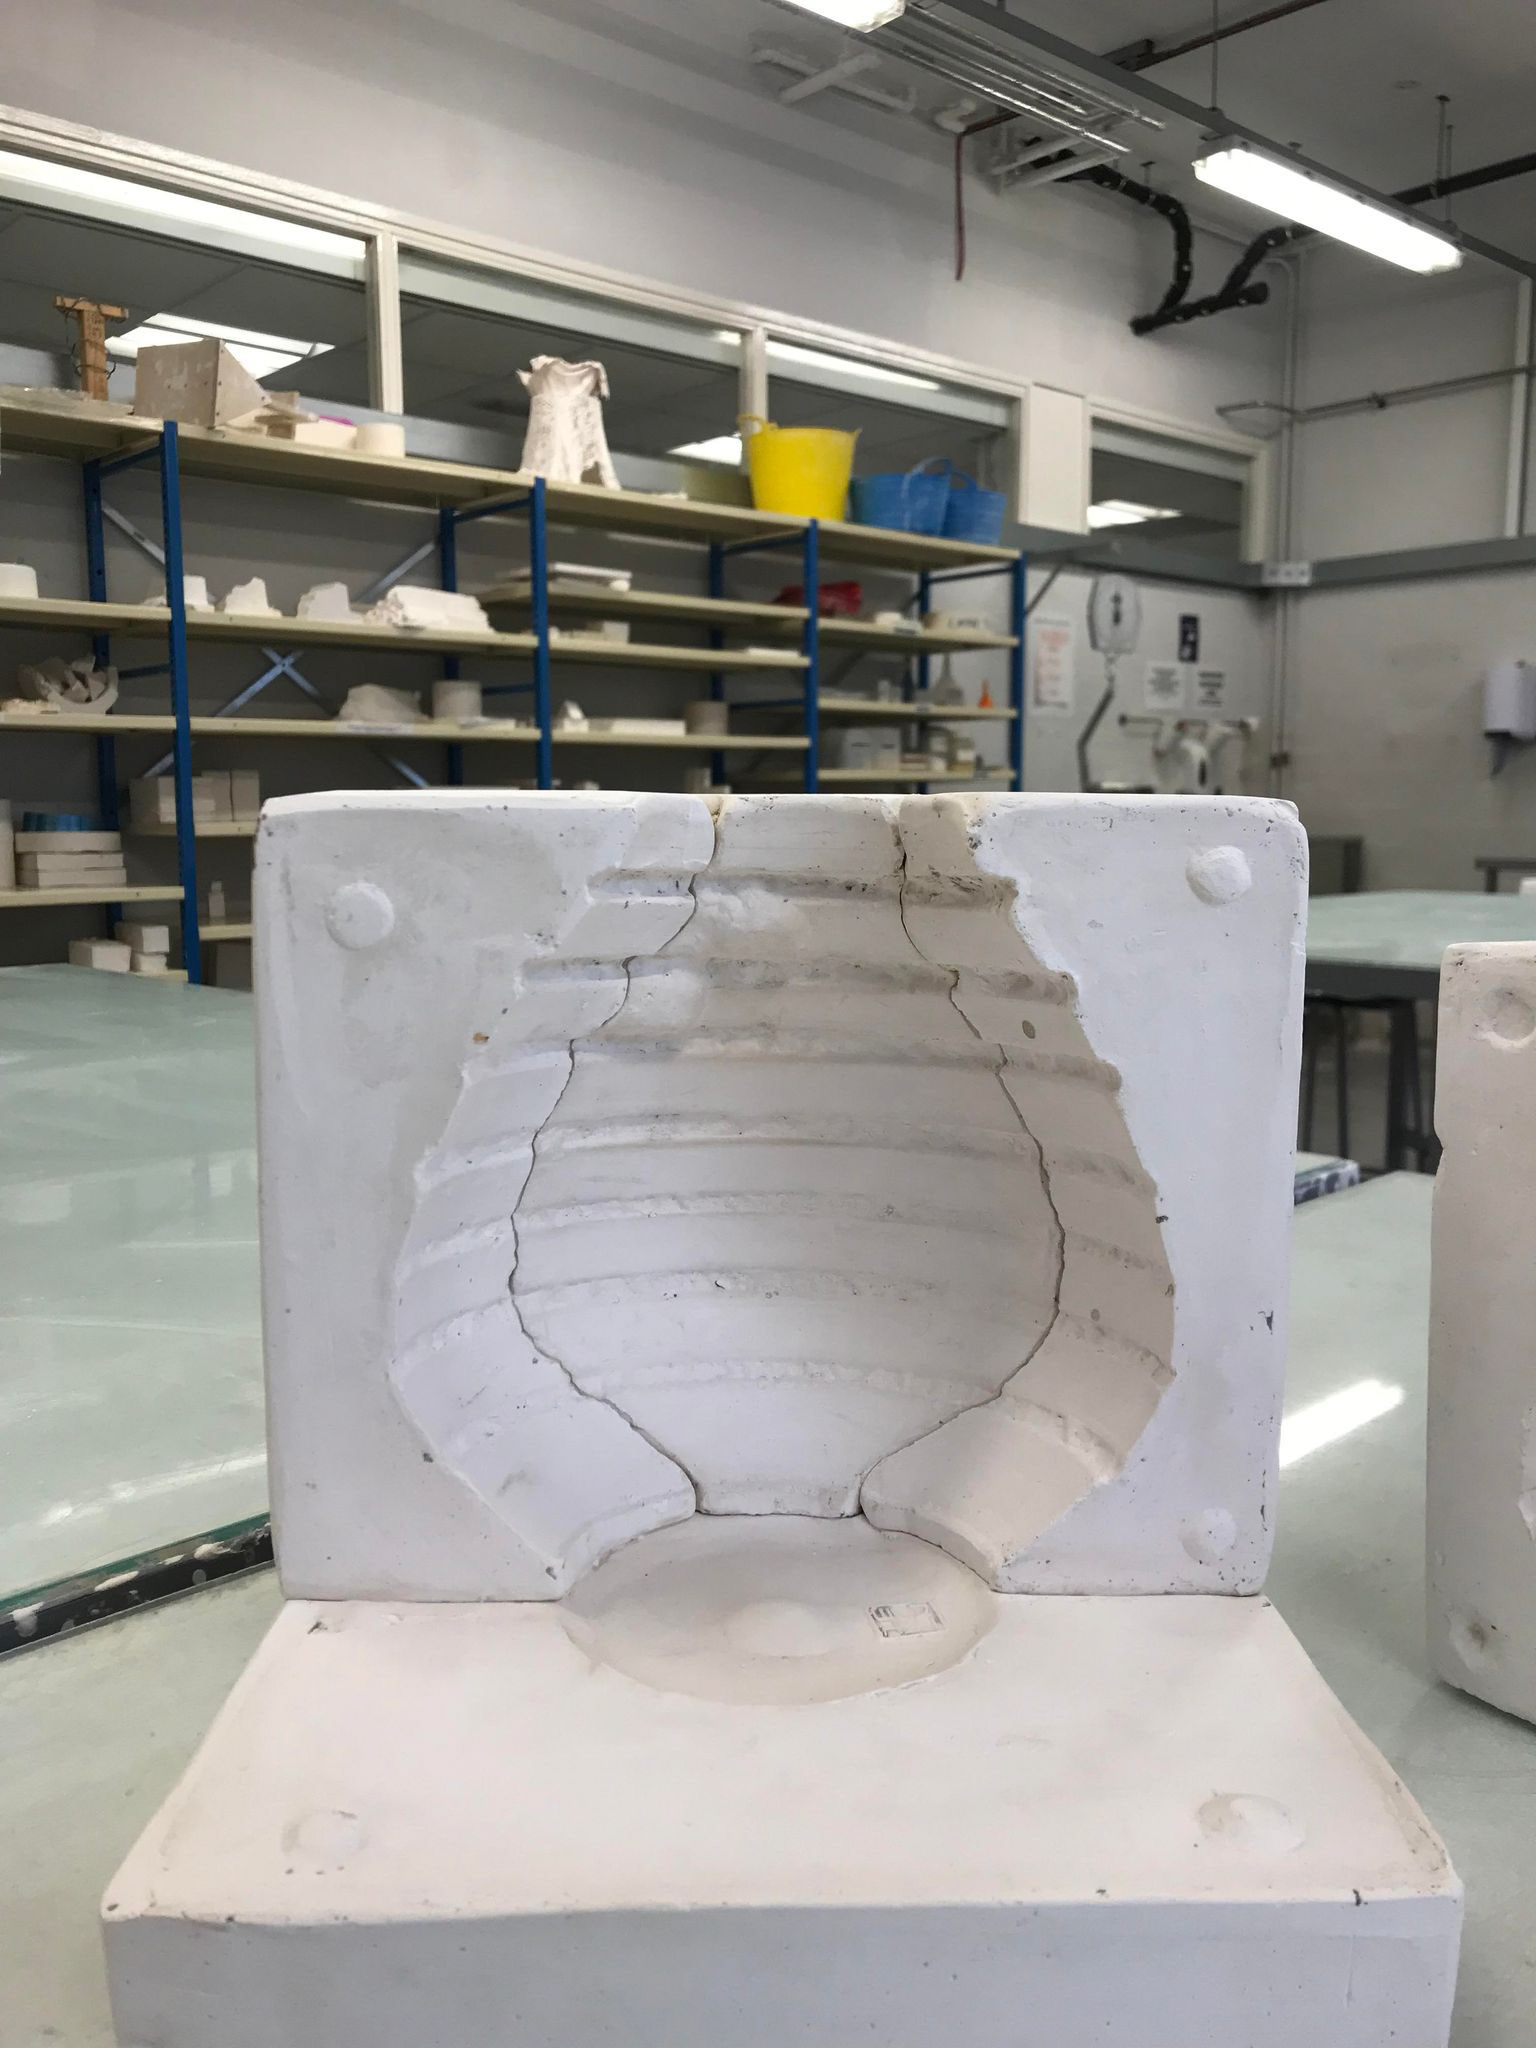
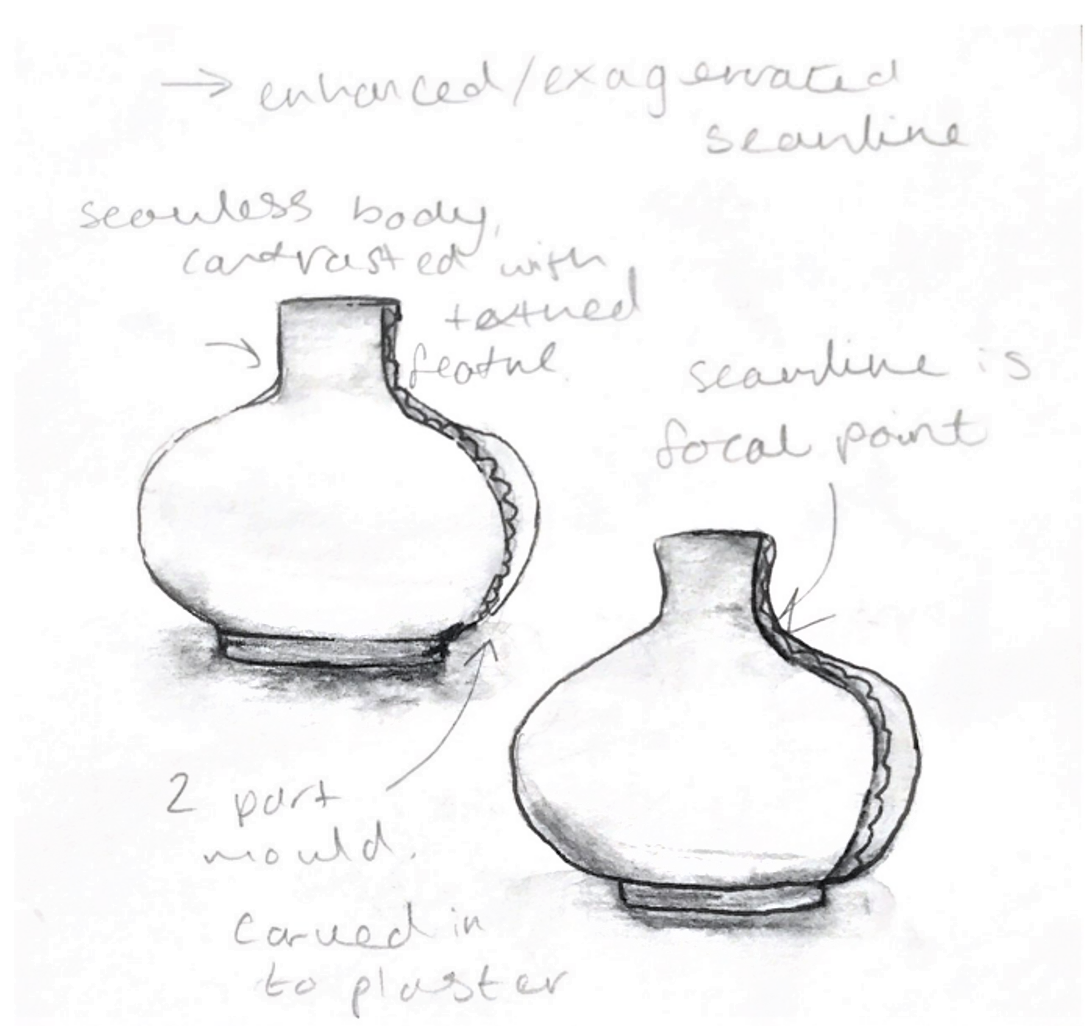
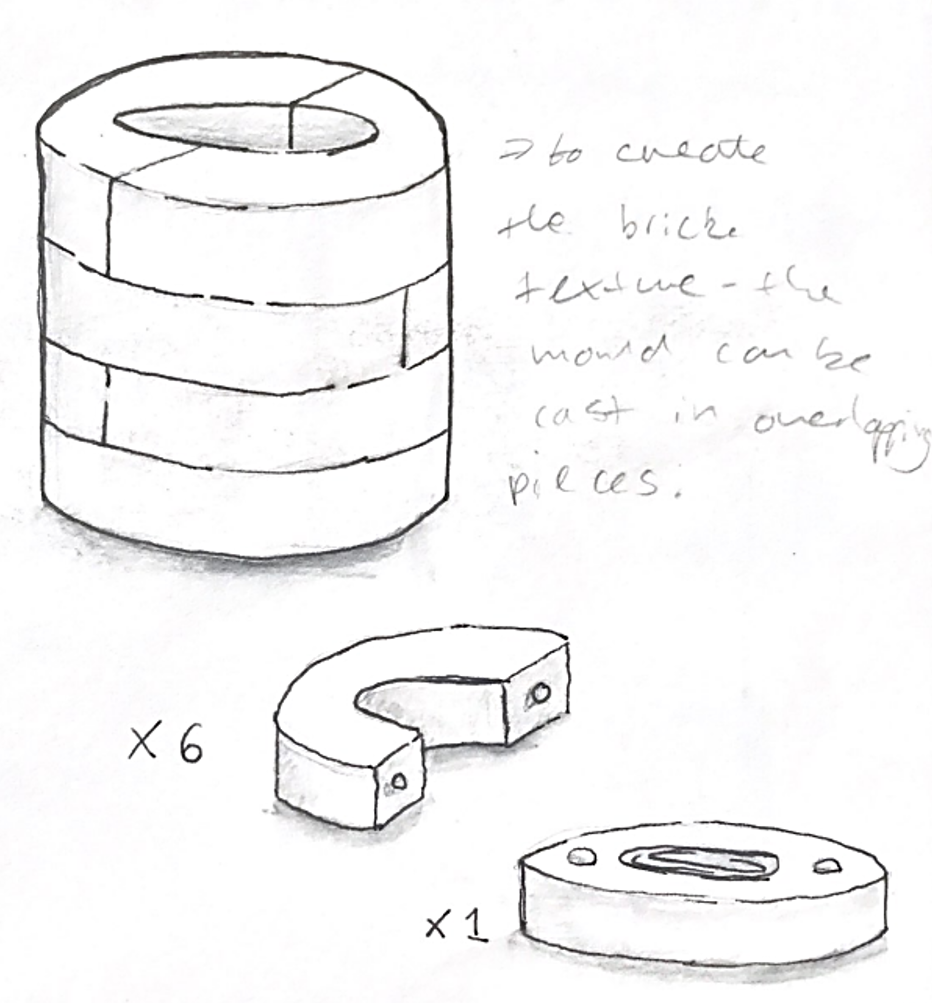
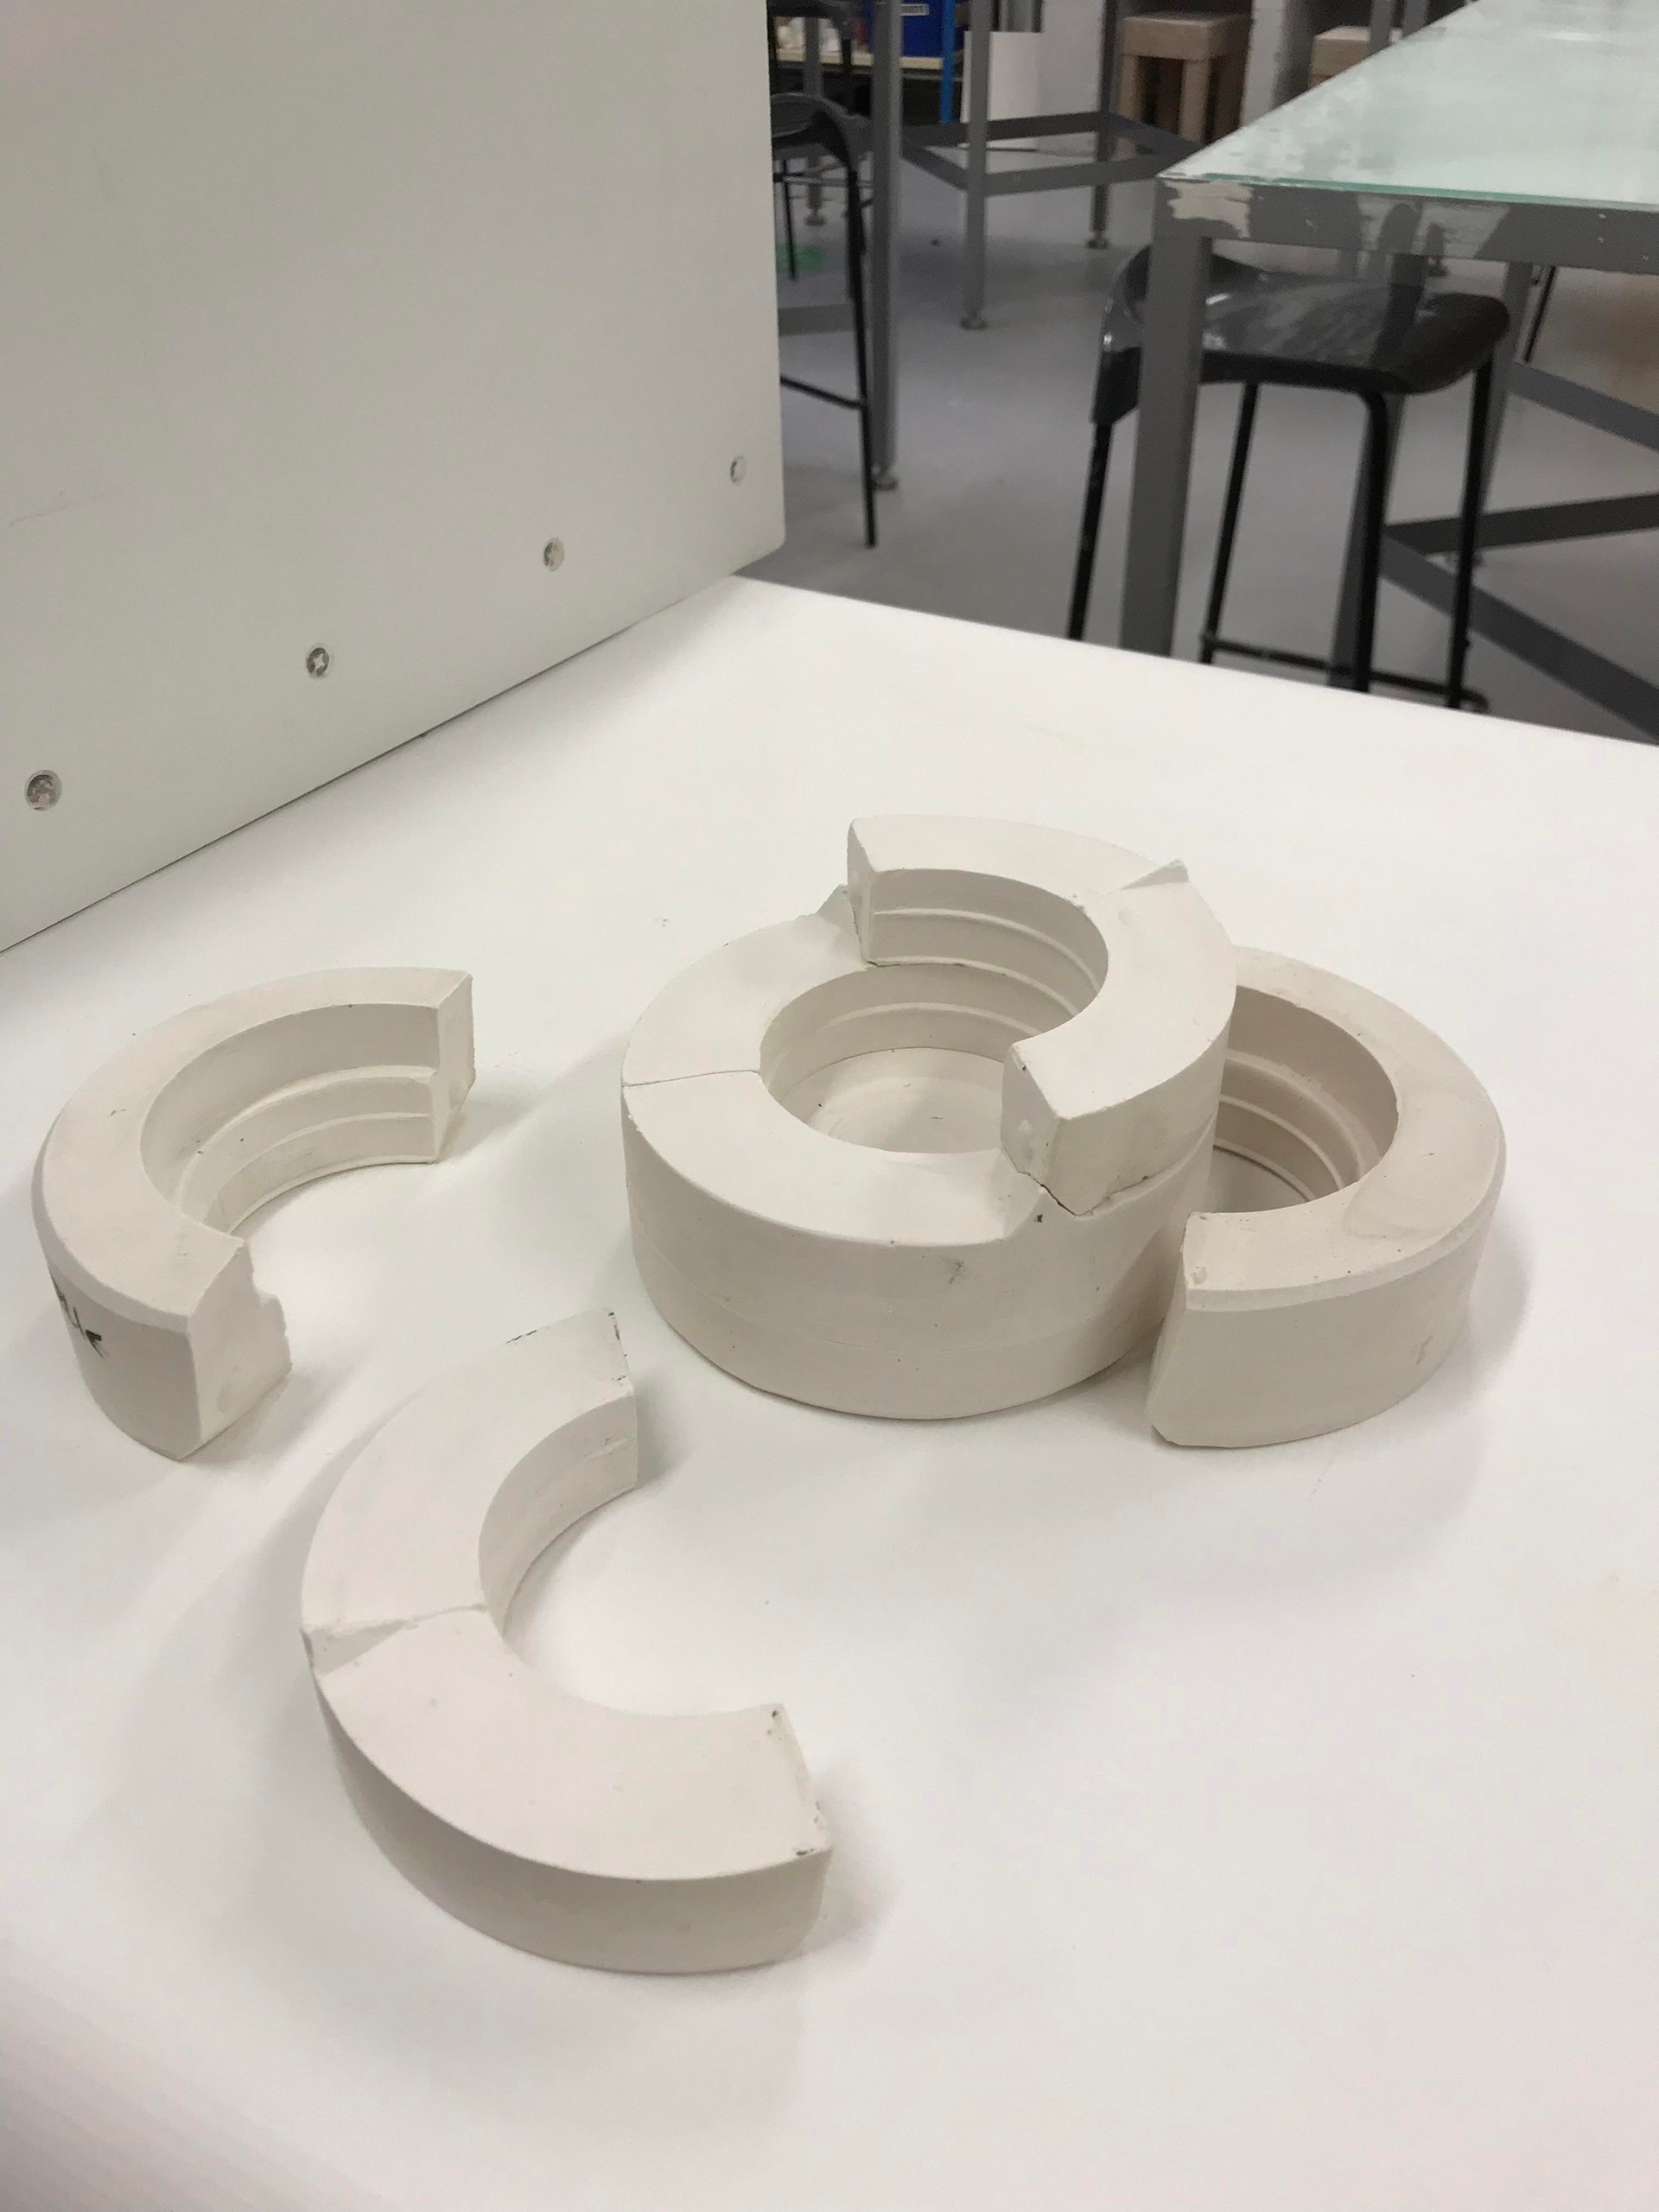
Mould manipulation
Following the unsuccessful previous attempt, I chose to work on a smaller scale whilst establishing the most effective way to depict the intersection more unpredictably.
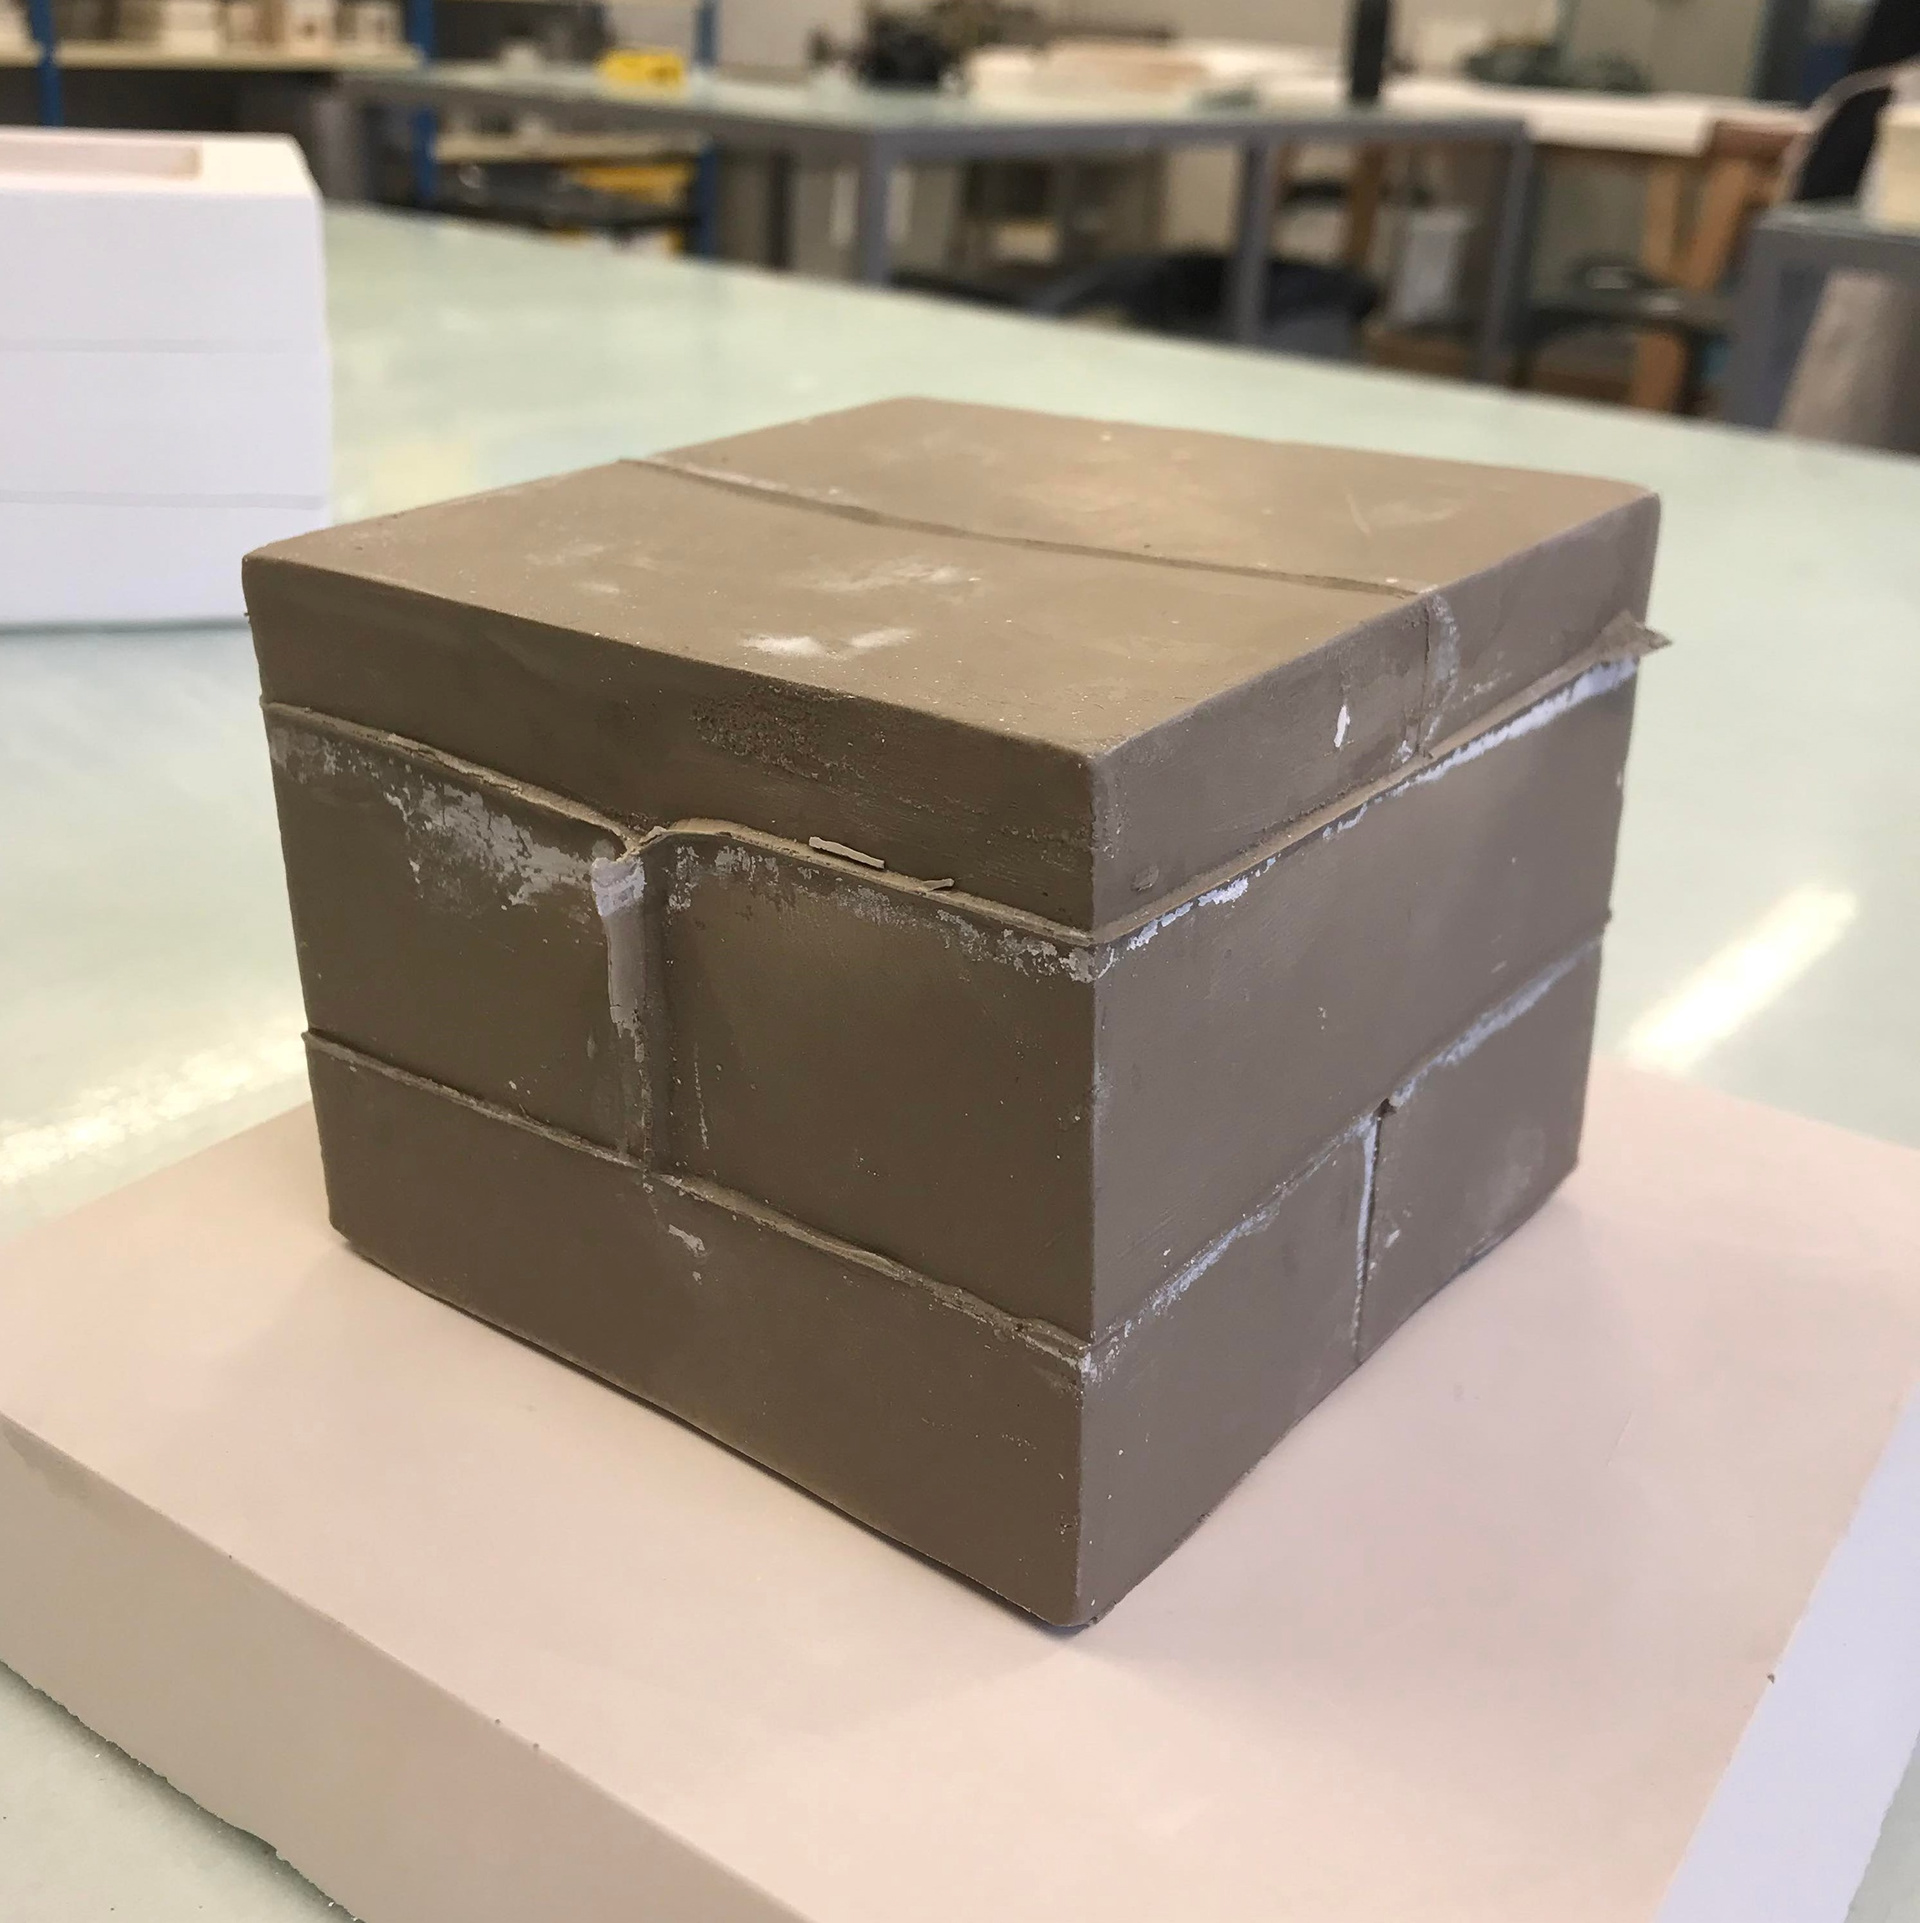
I turned a small form with straight edges, compared to the previous rounded form to better embody the man-made element of the project.
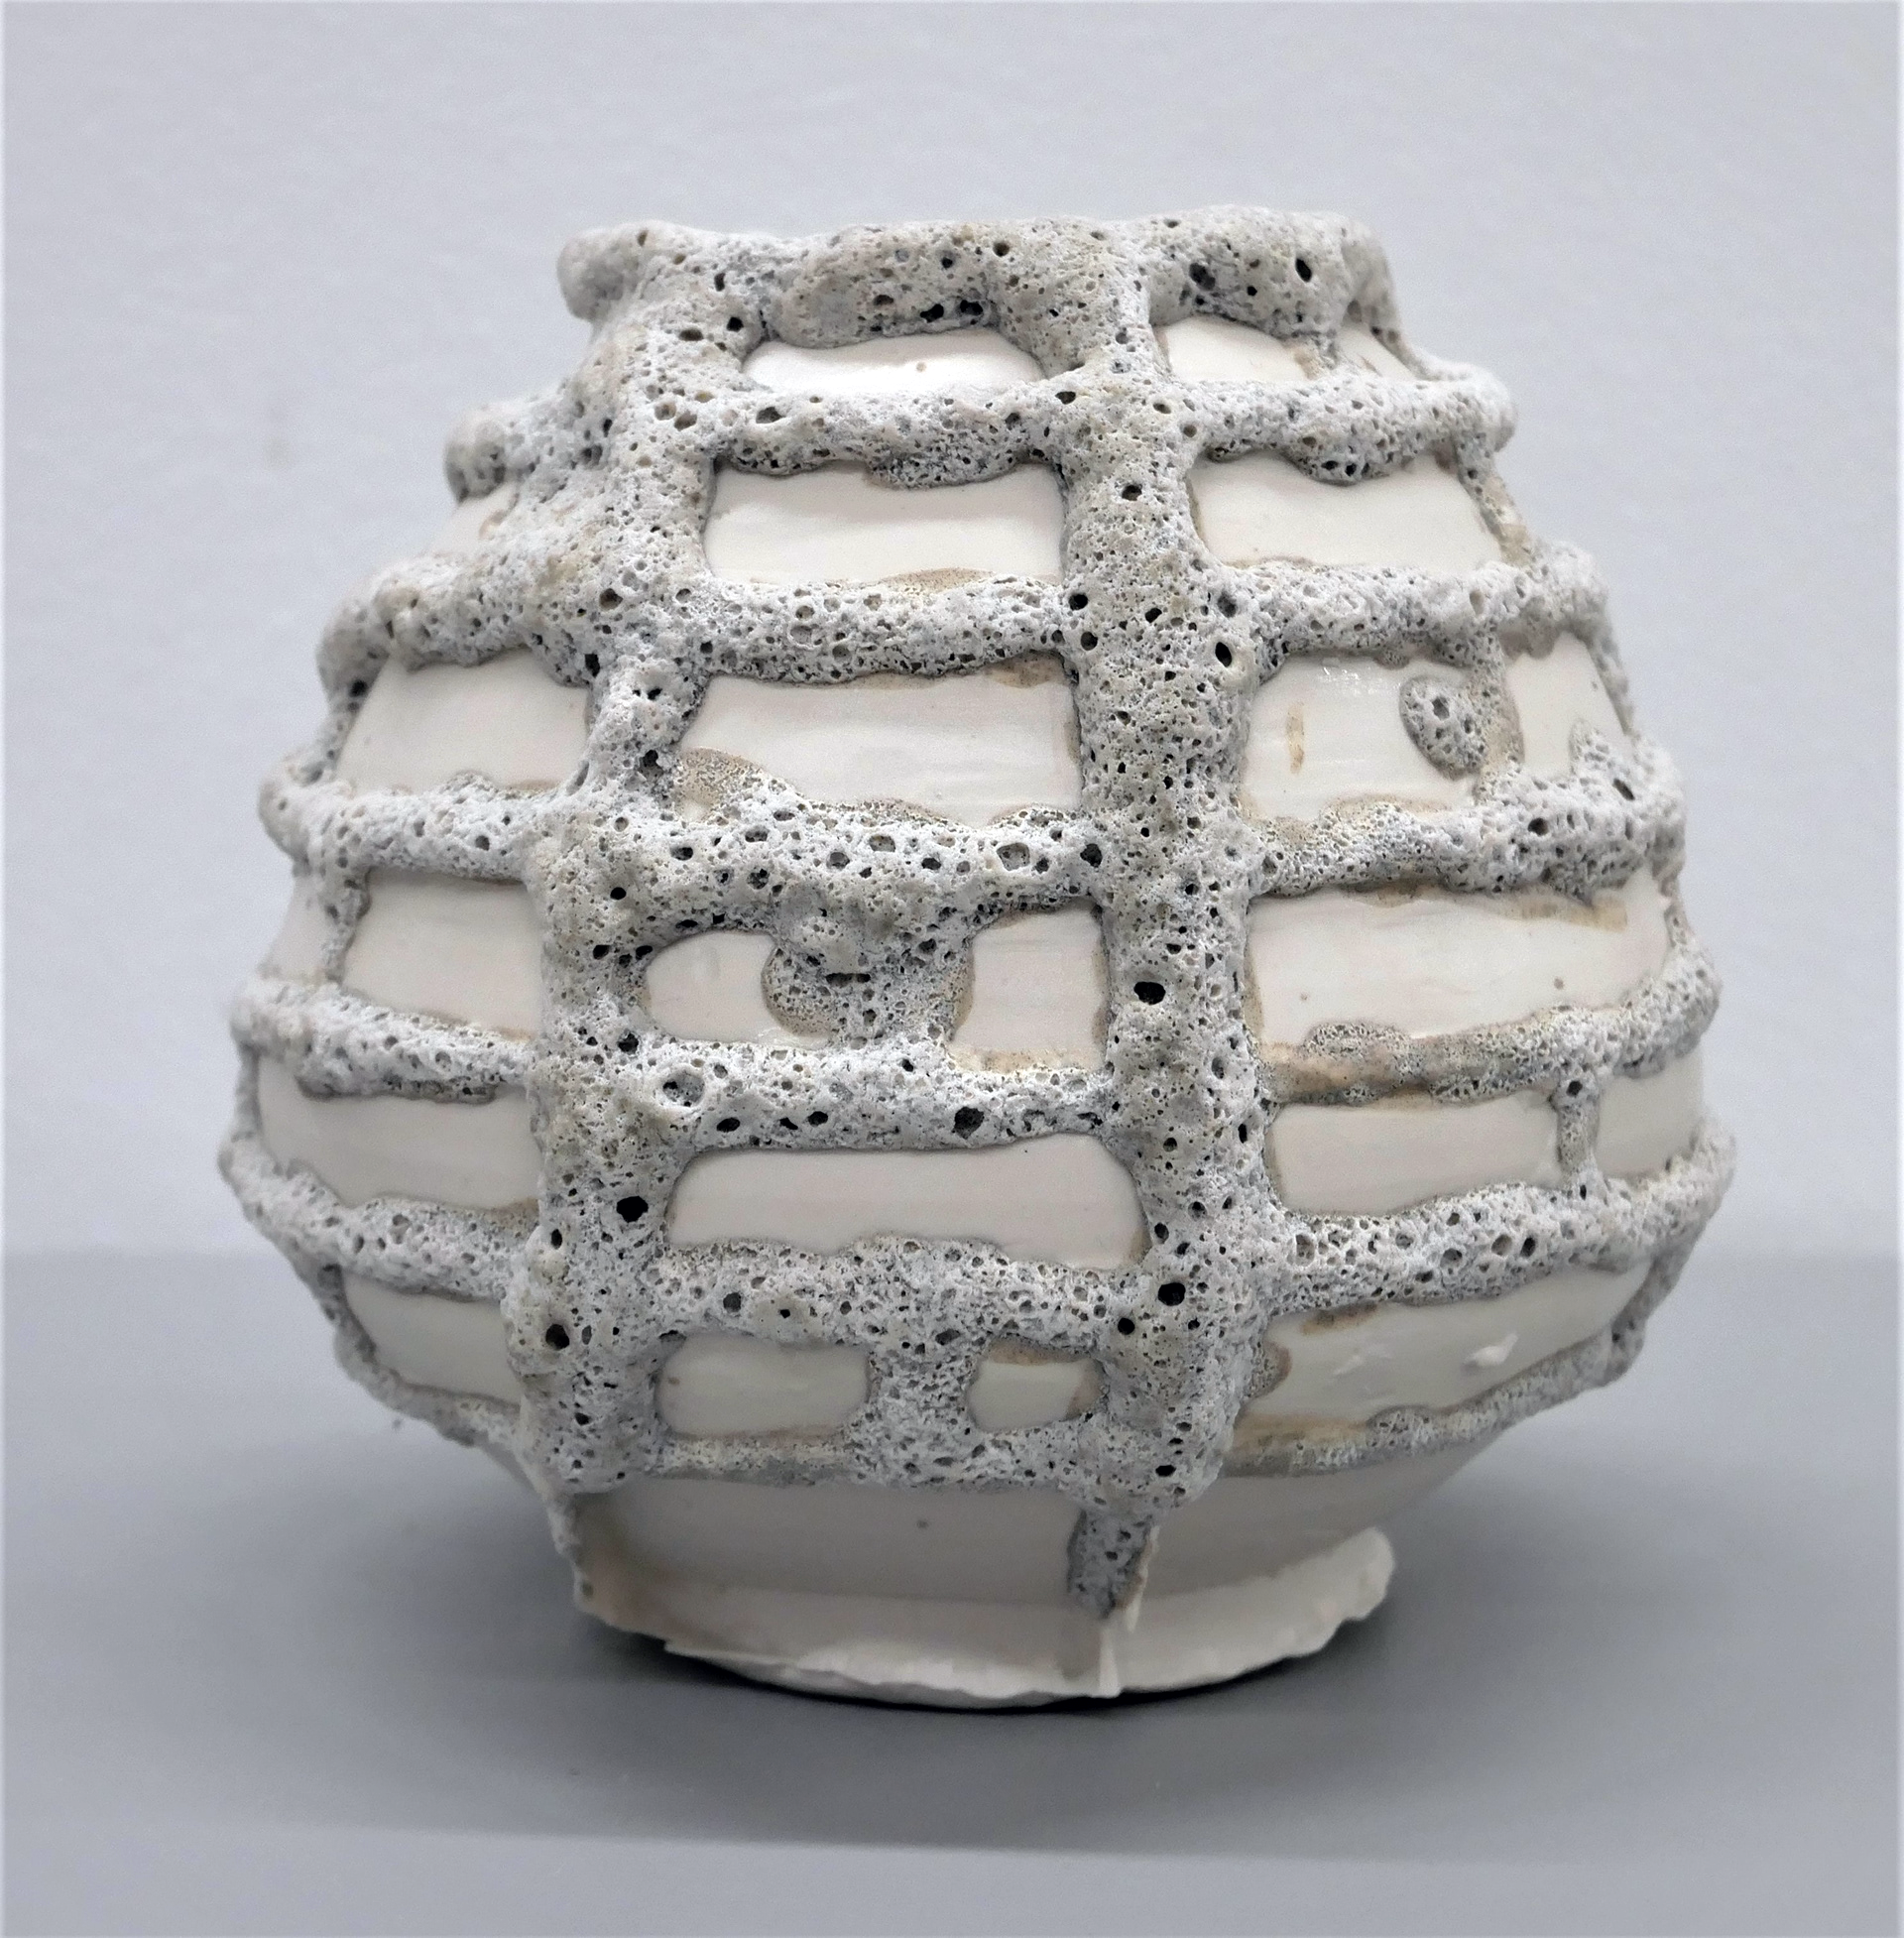
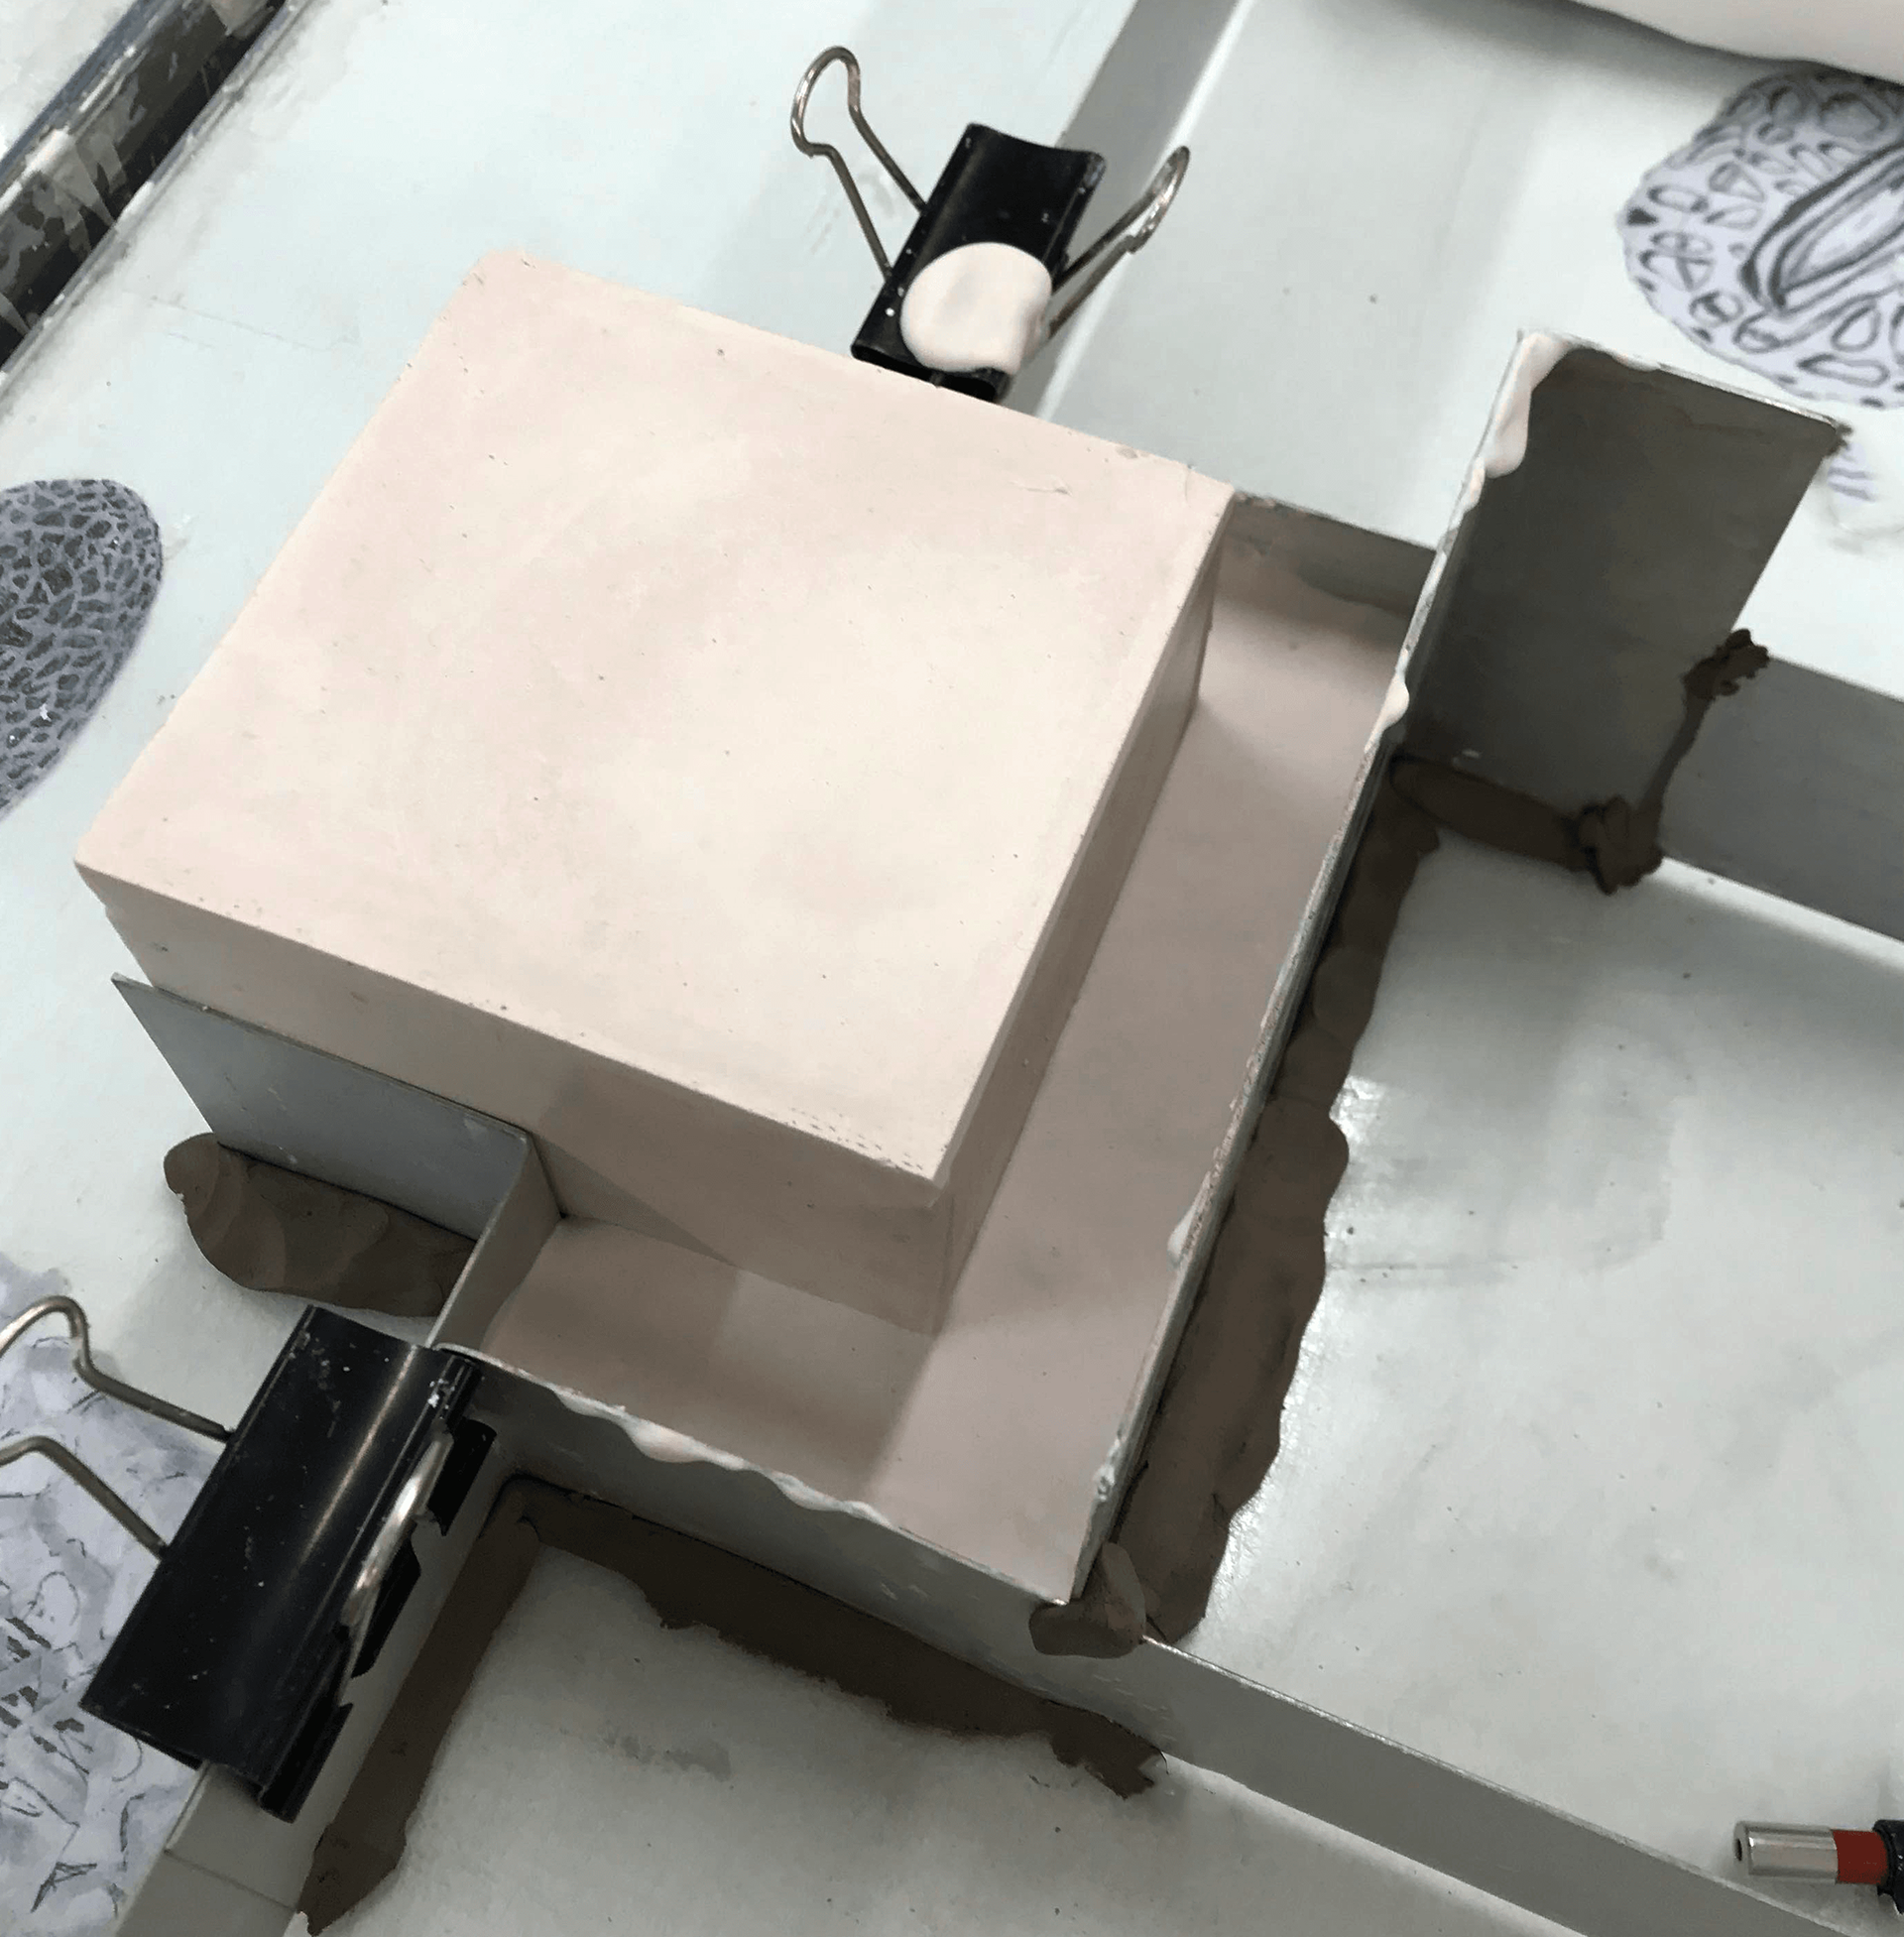
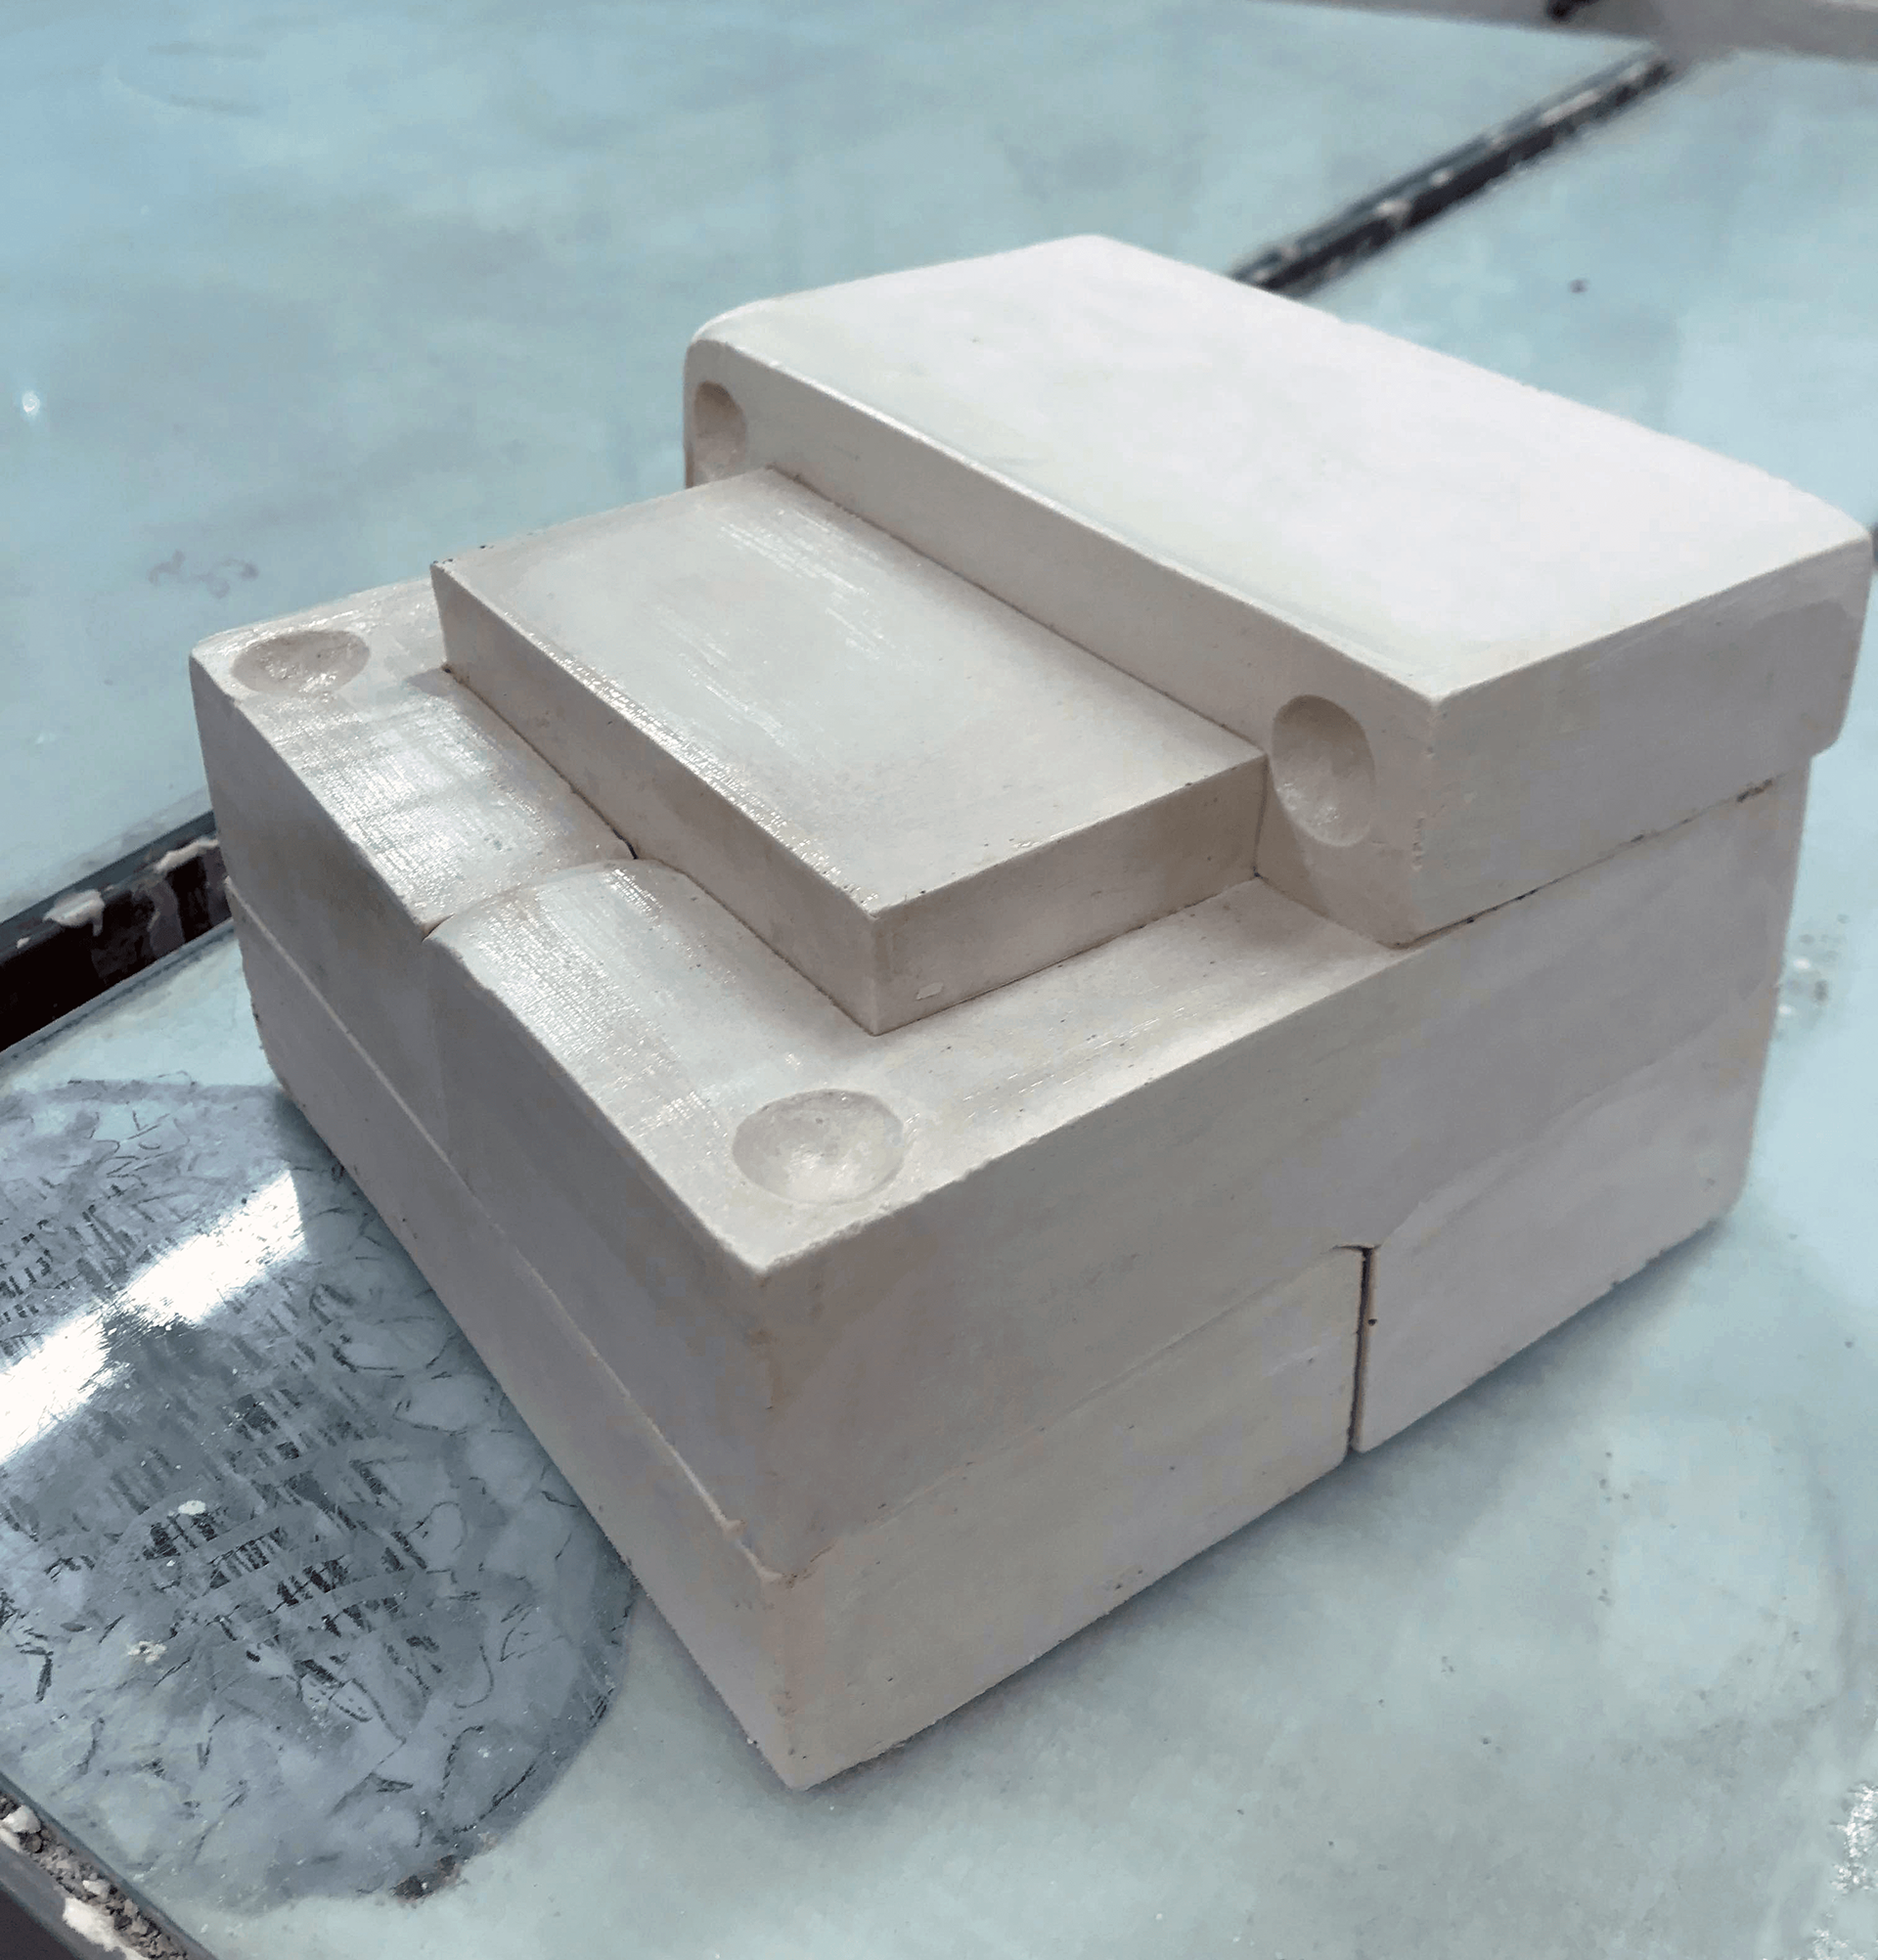
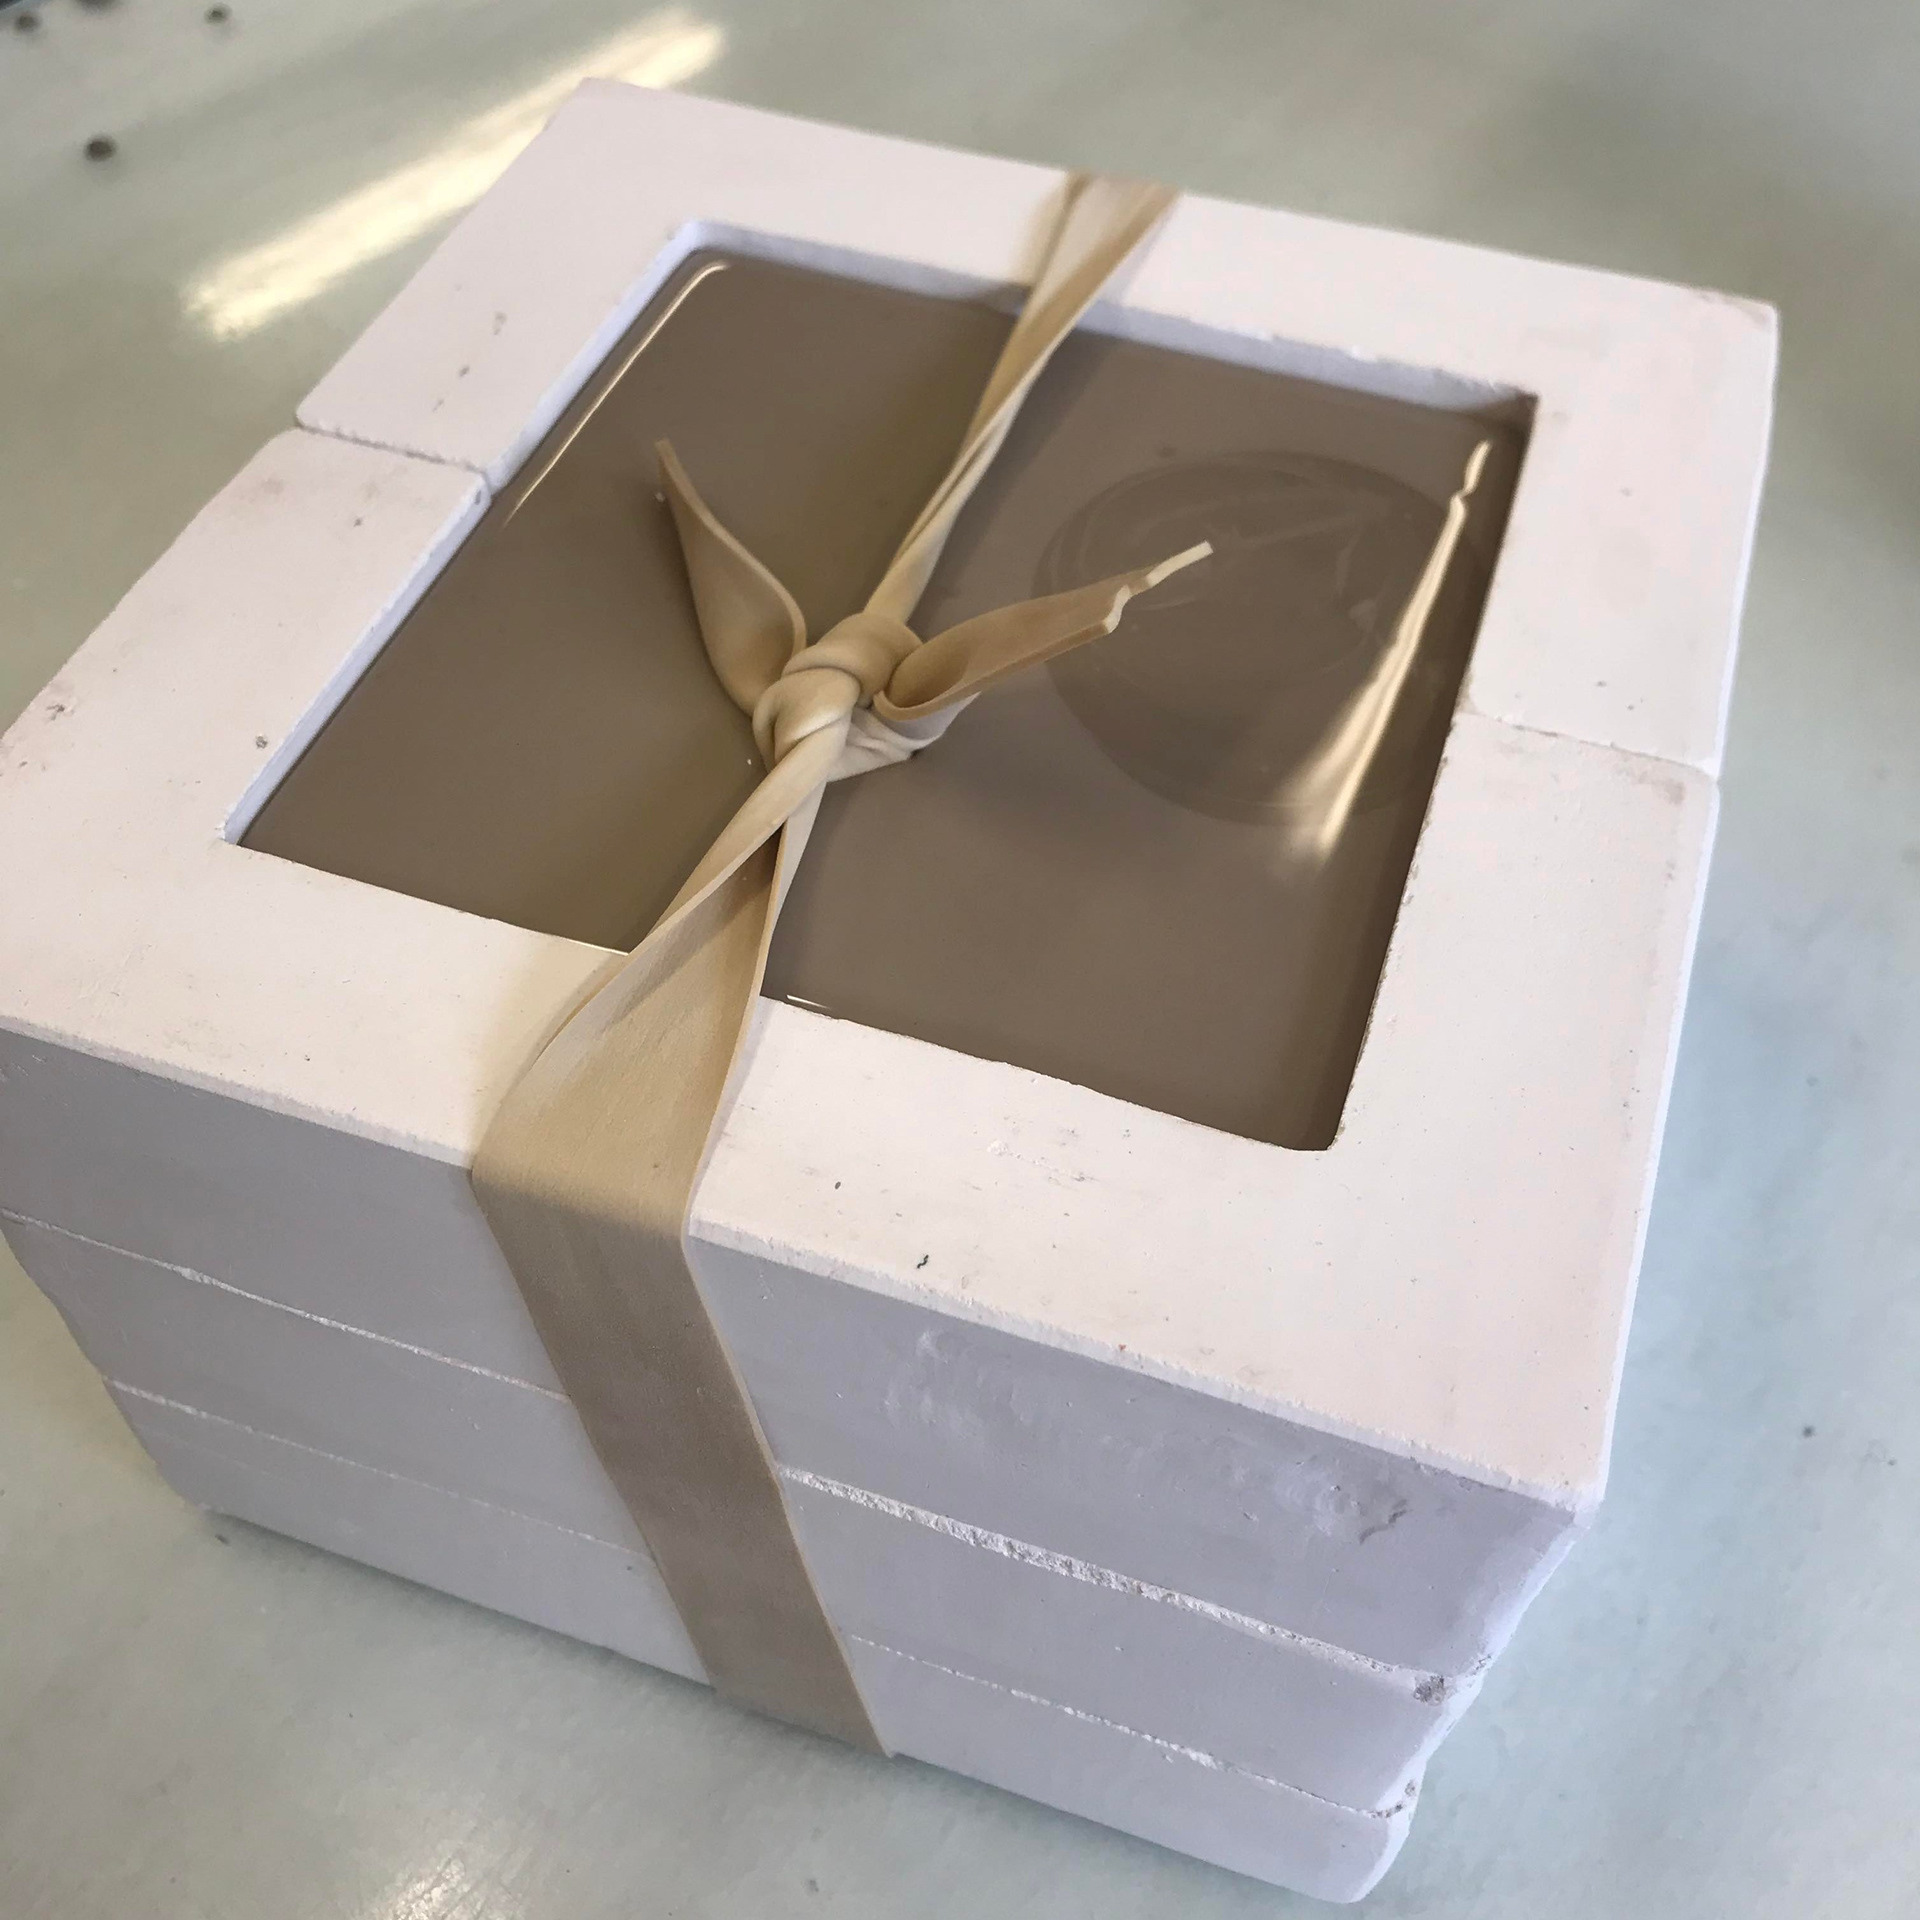
I made the mould into 7 overlocking parts, to mimic the layering of bricks.
When slip casting, I was able to adjust the placement of the mould pieces, encouraging the slip to creep into the cracks to form exaggerated seam lines.
This exploration was more successful as it maintained the 'untameable,' aspect; essential to the subject.
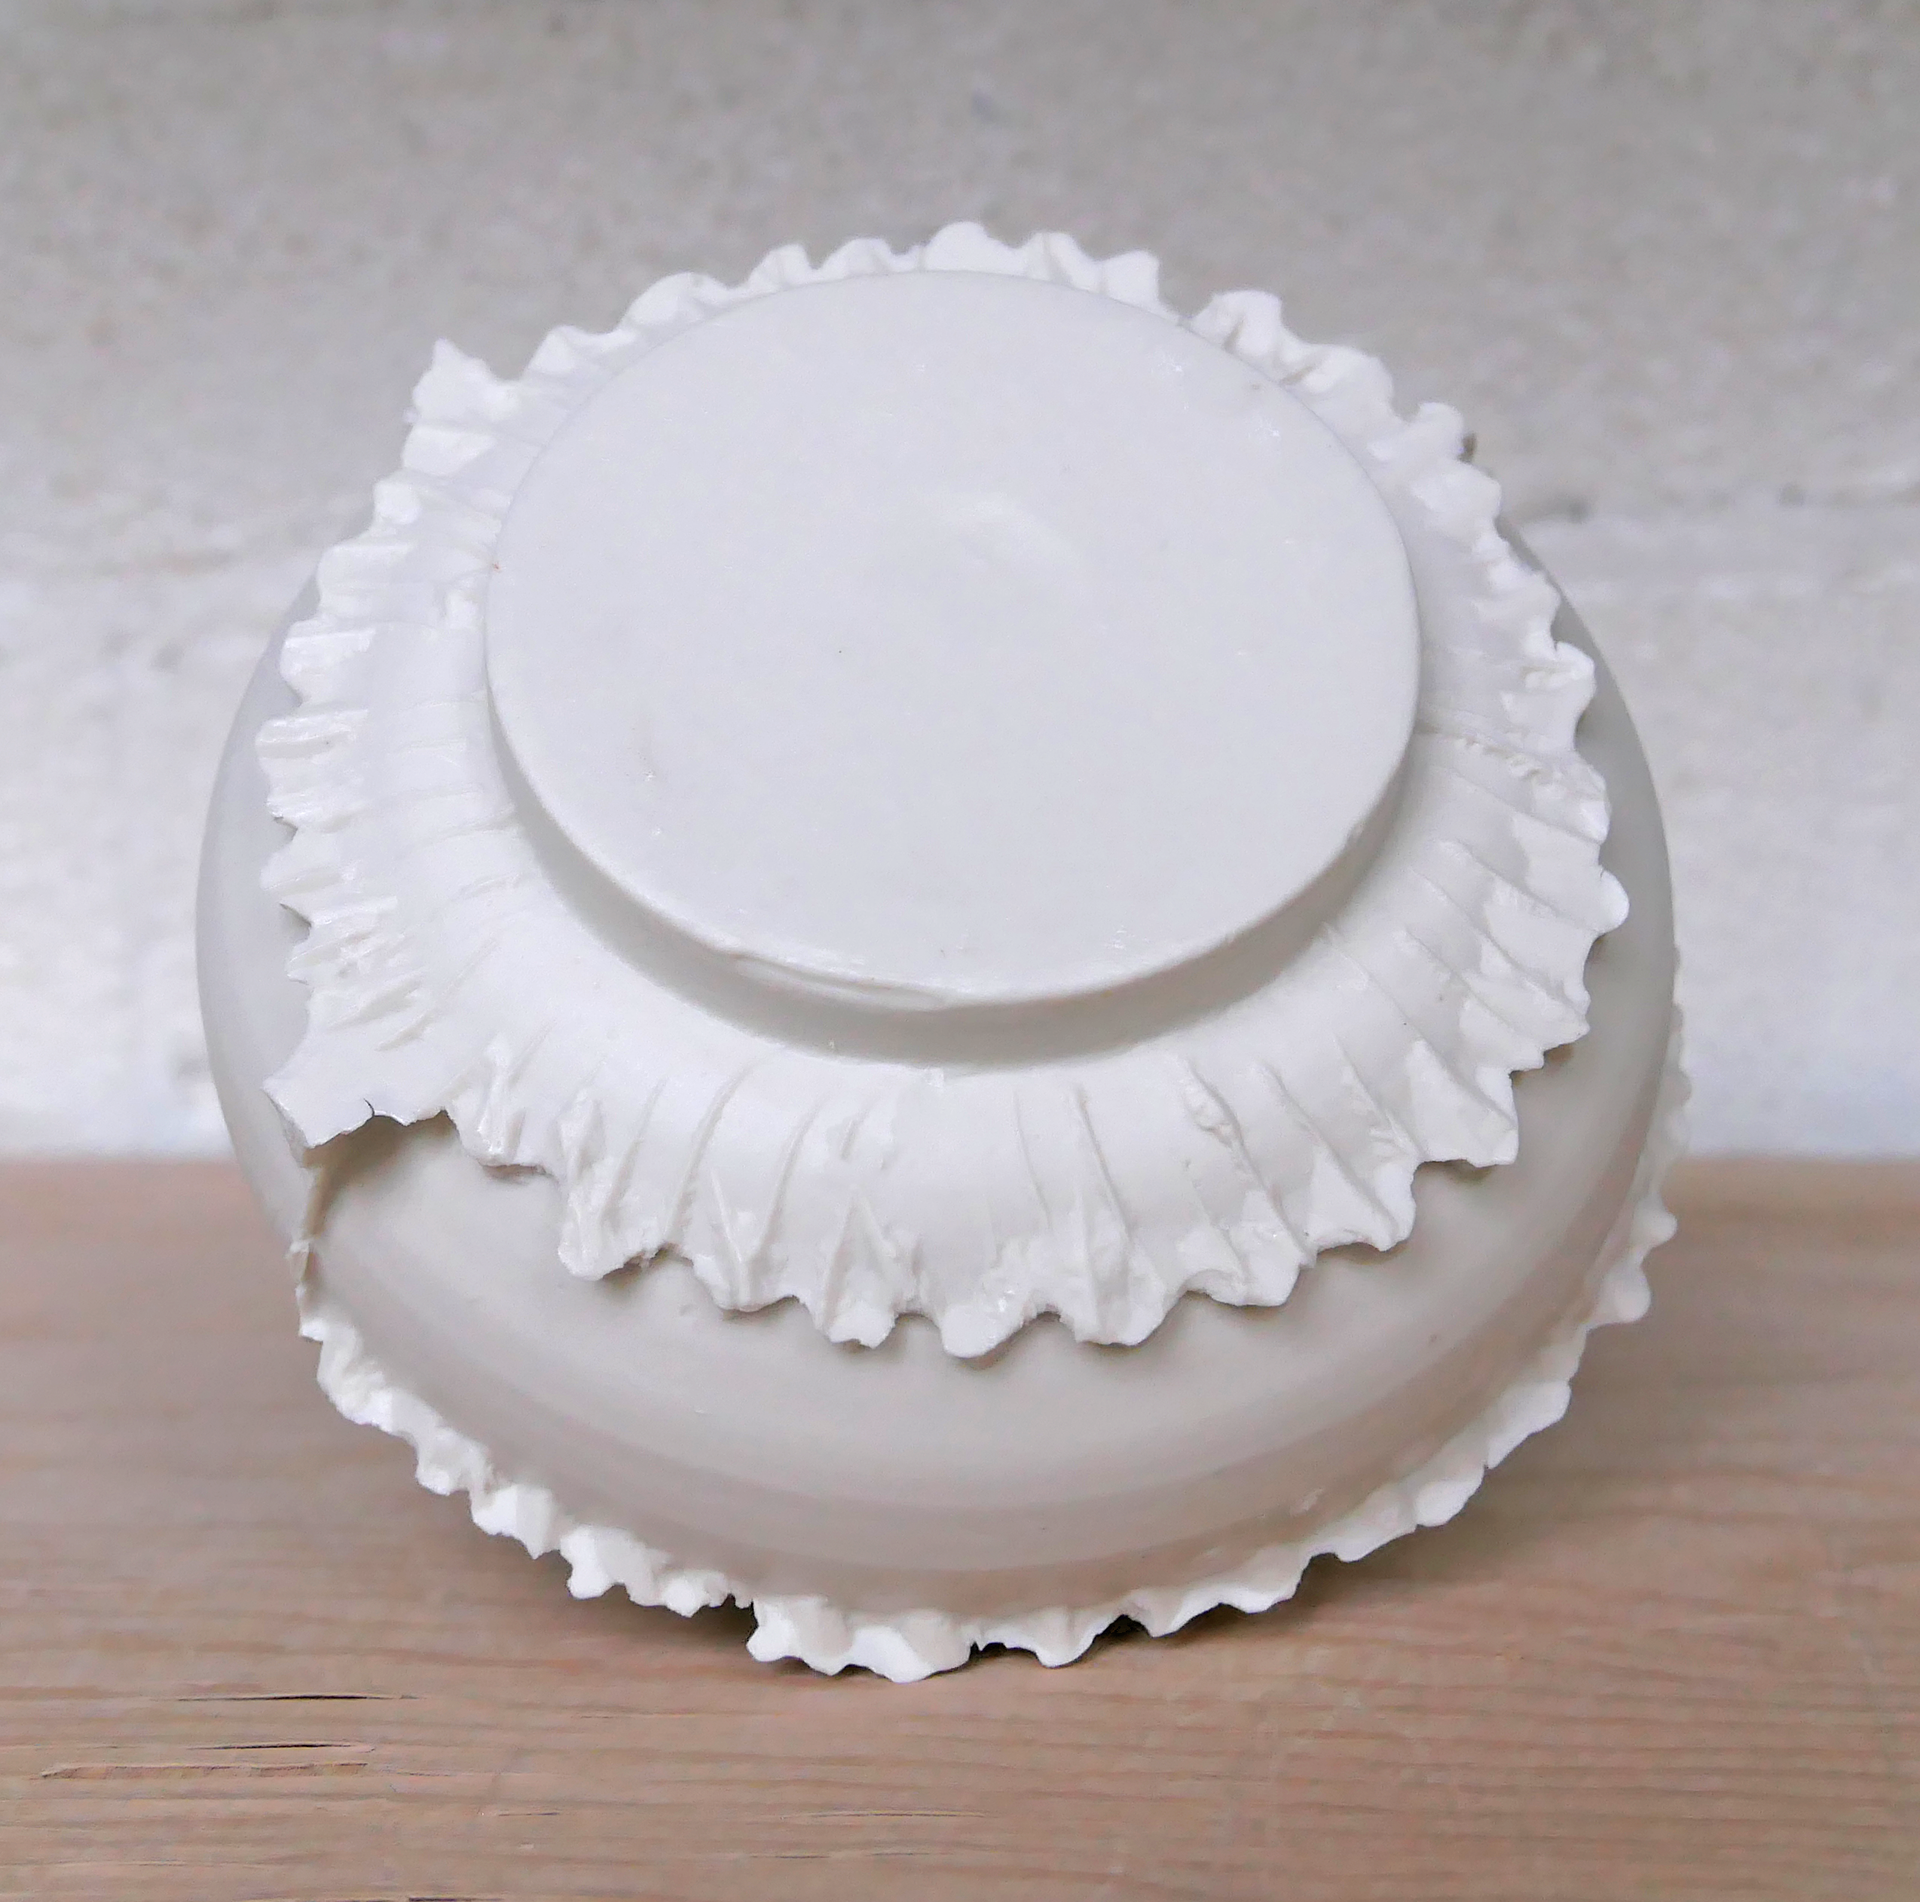
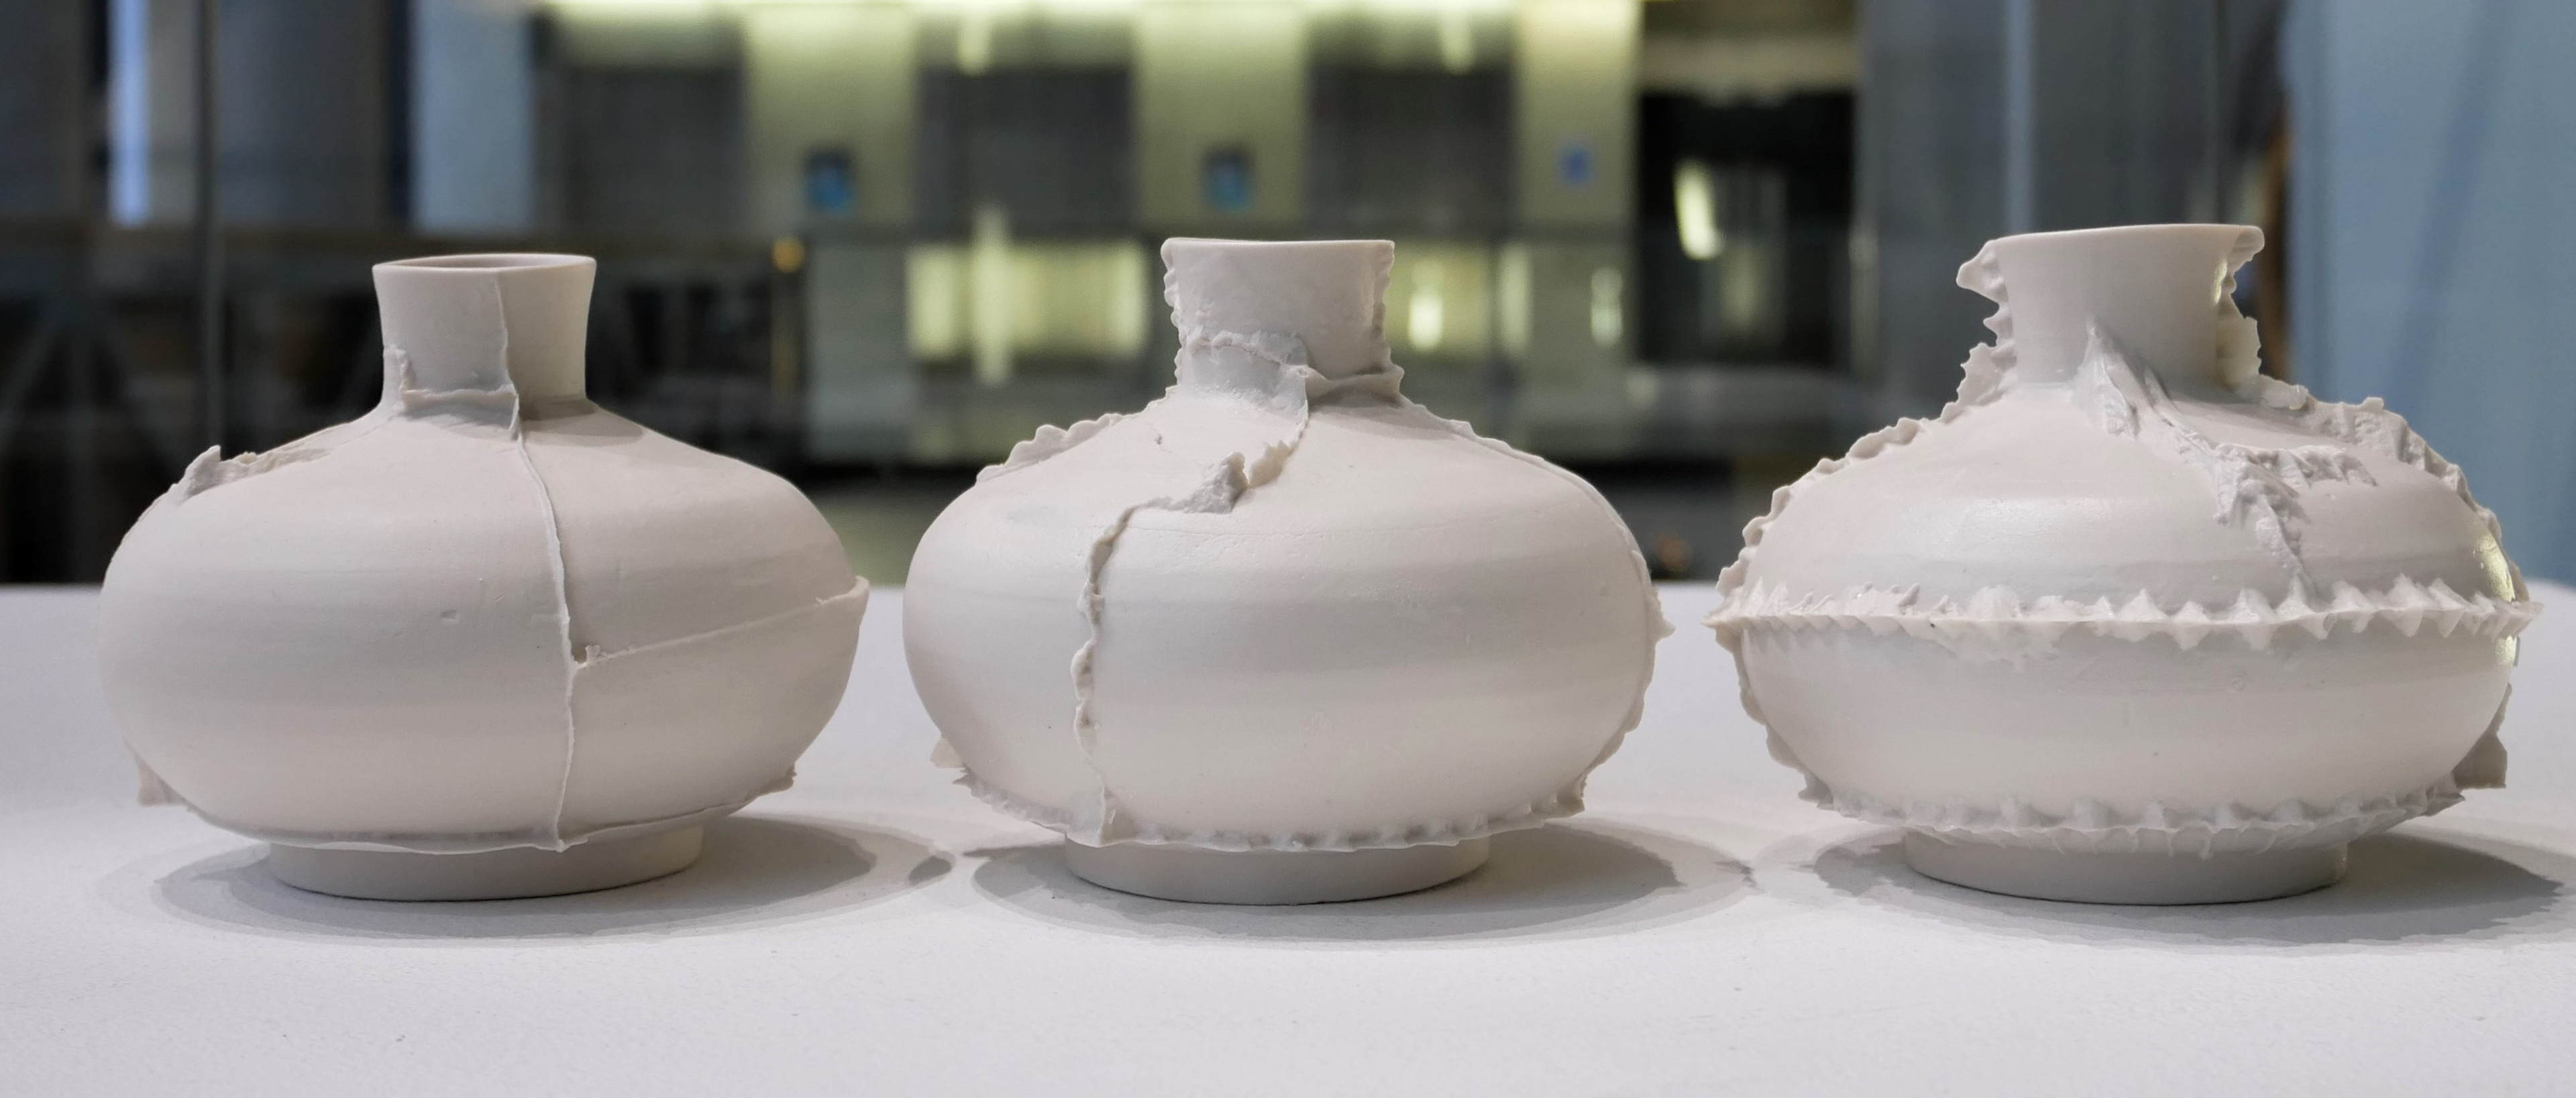
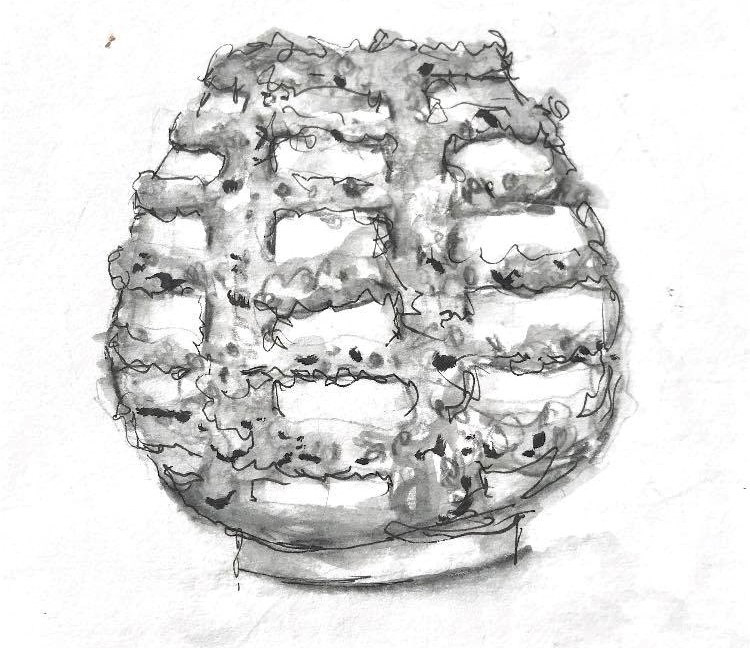
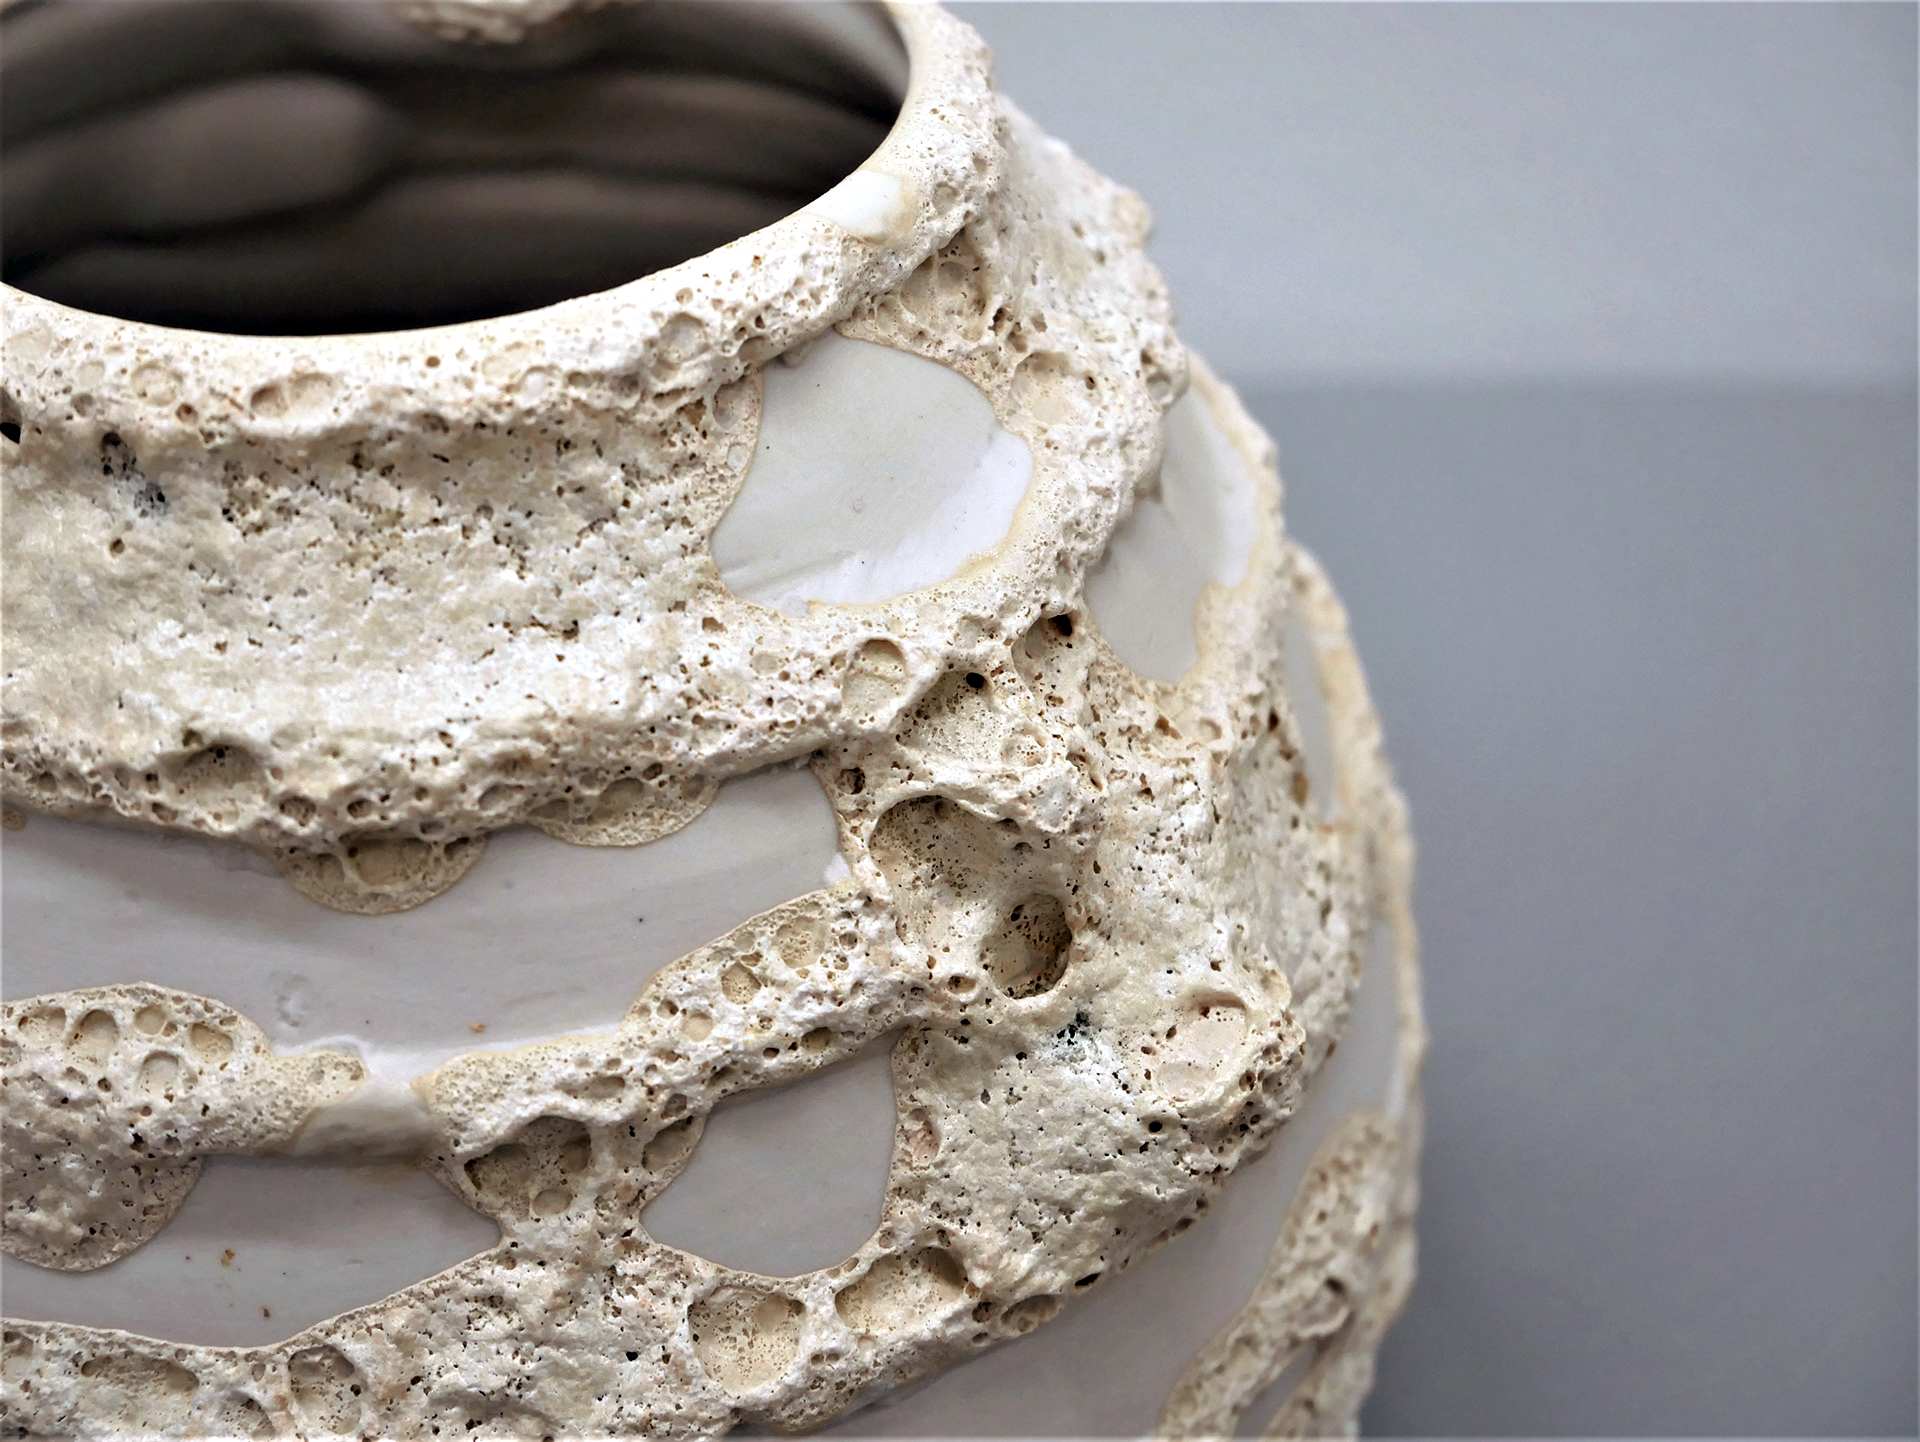
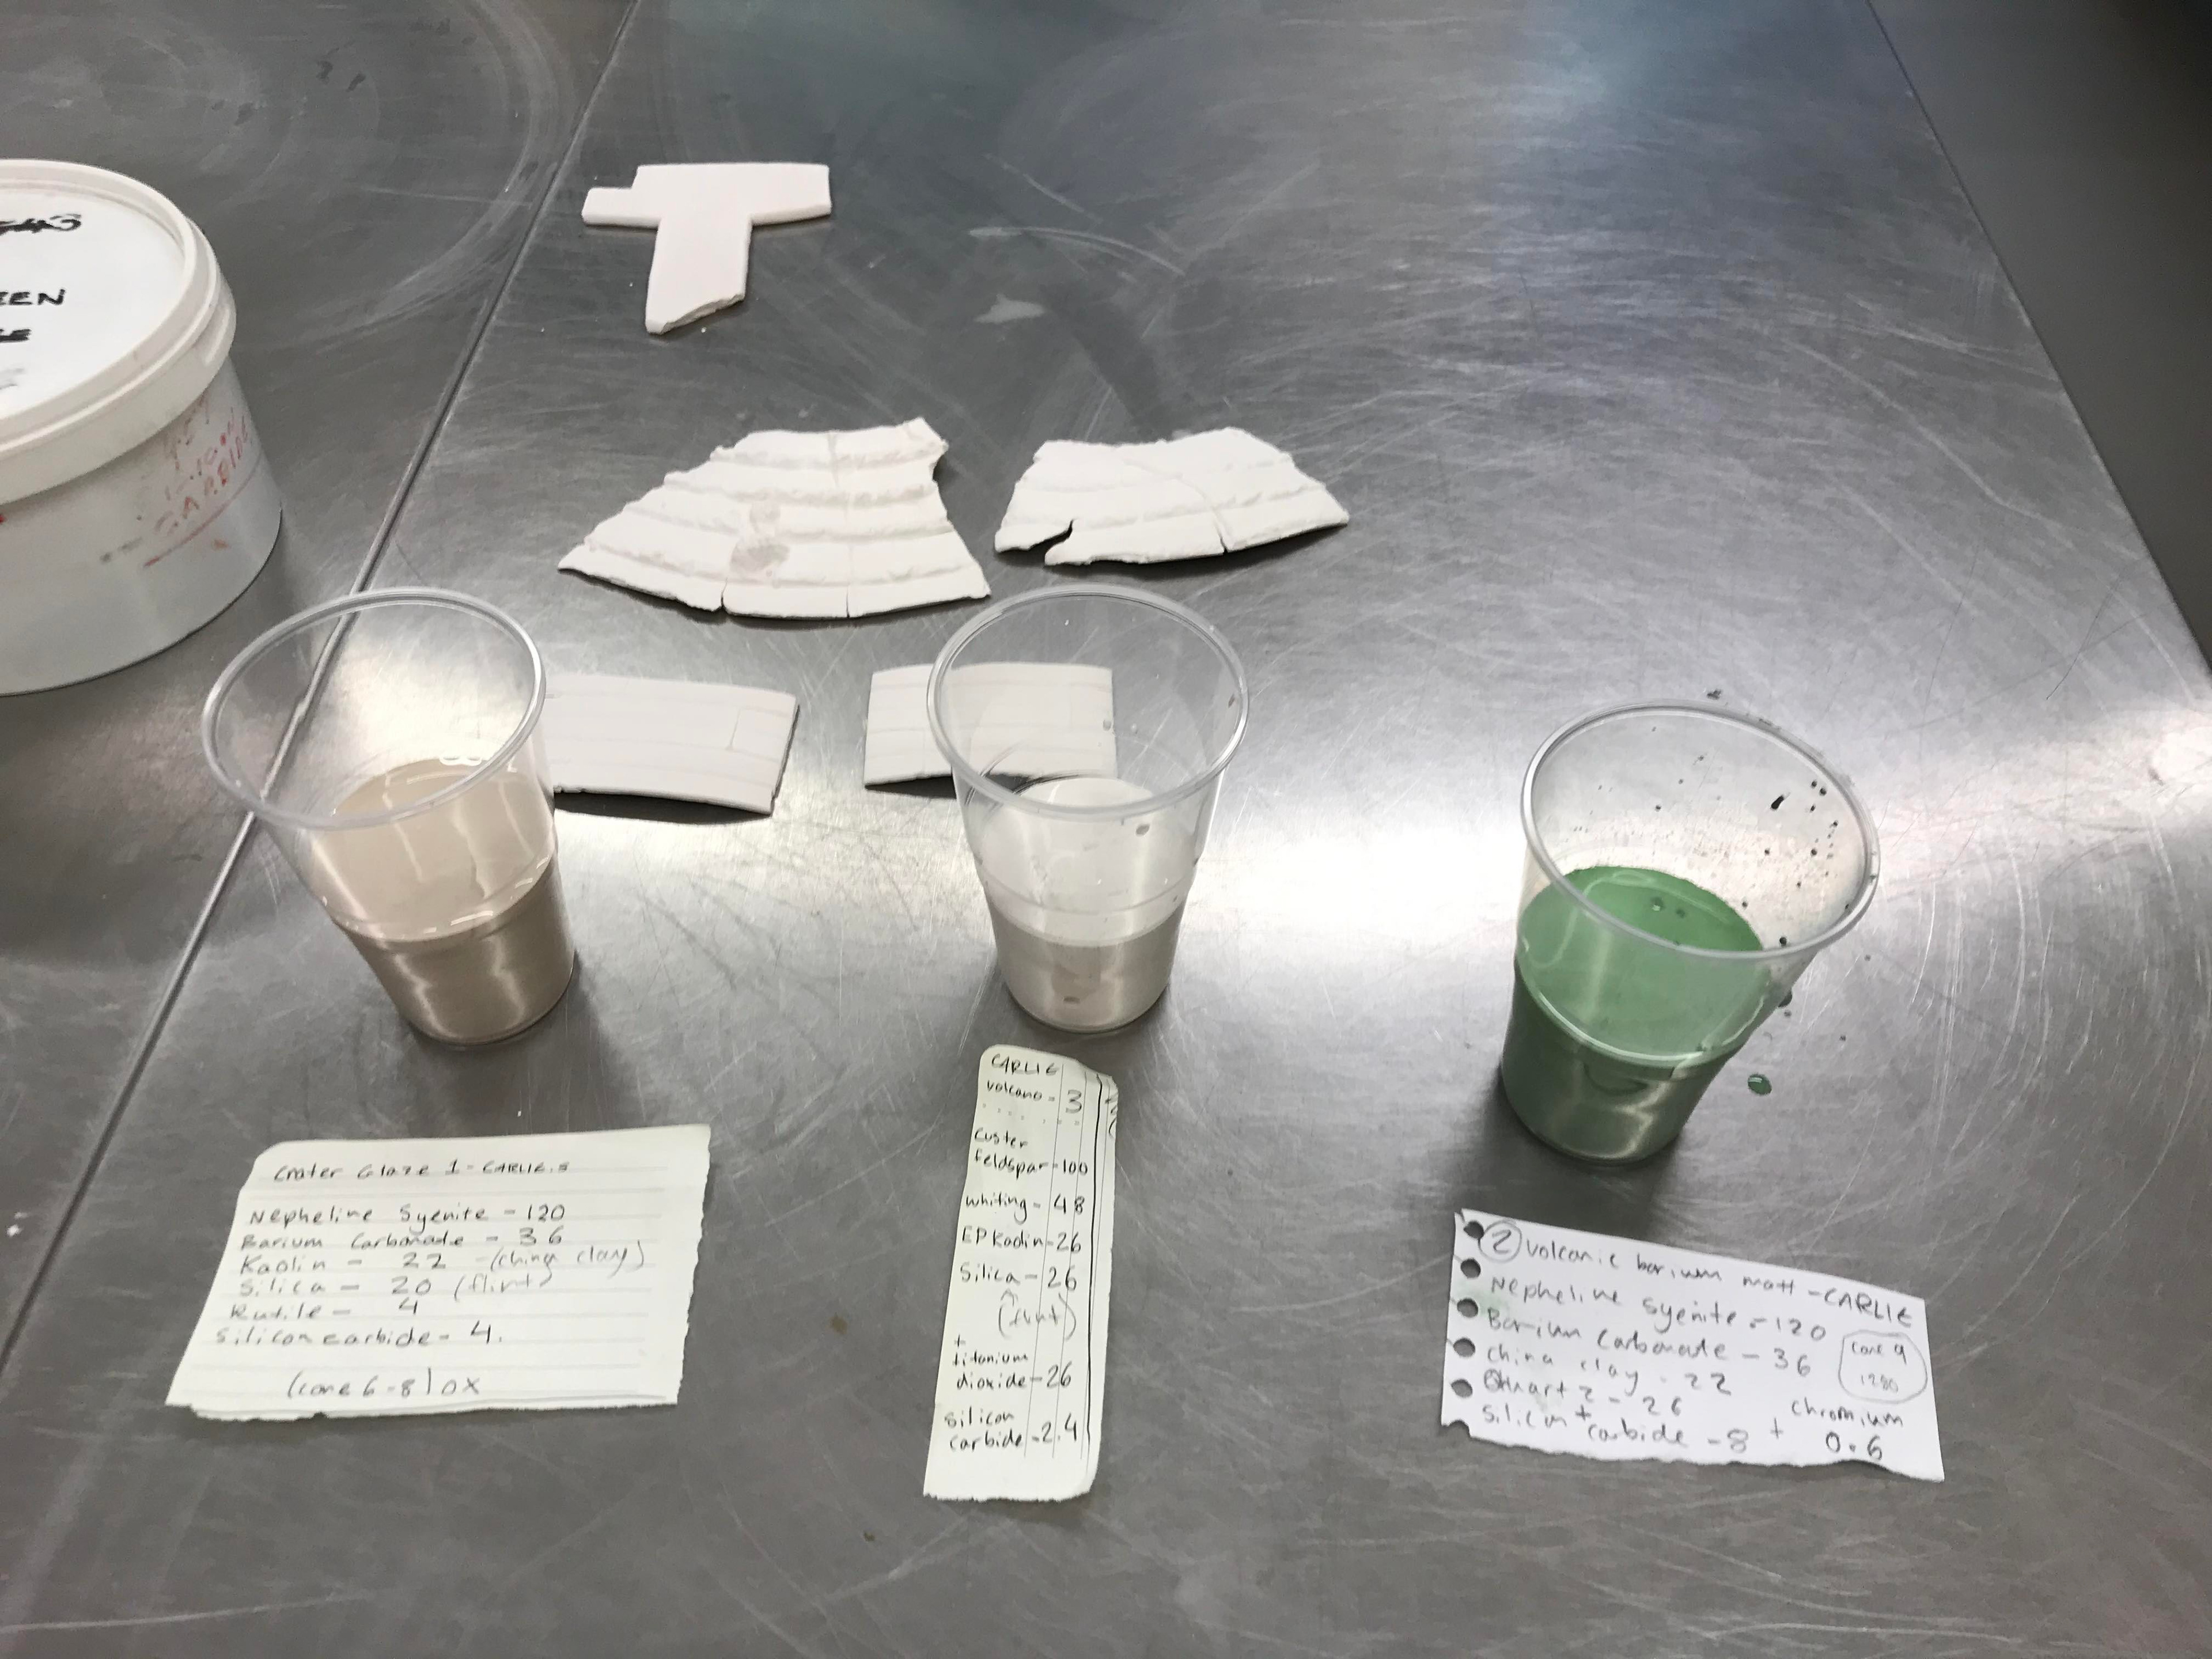
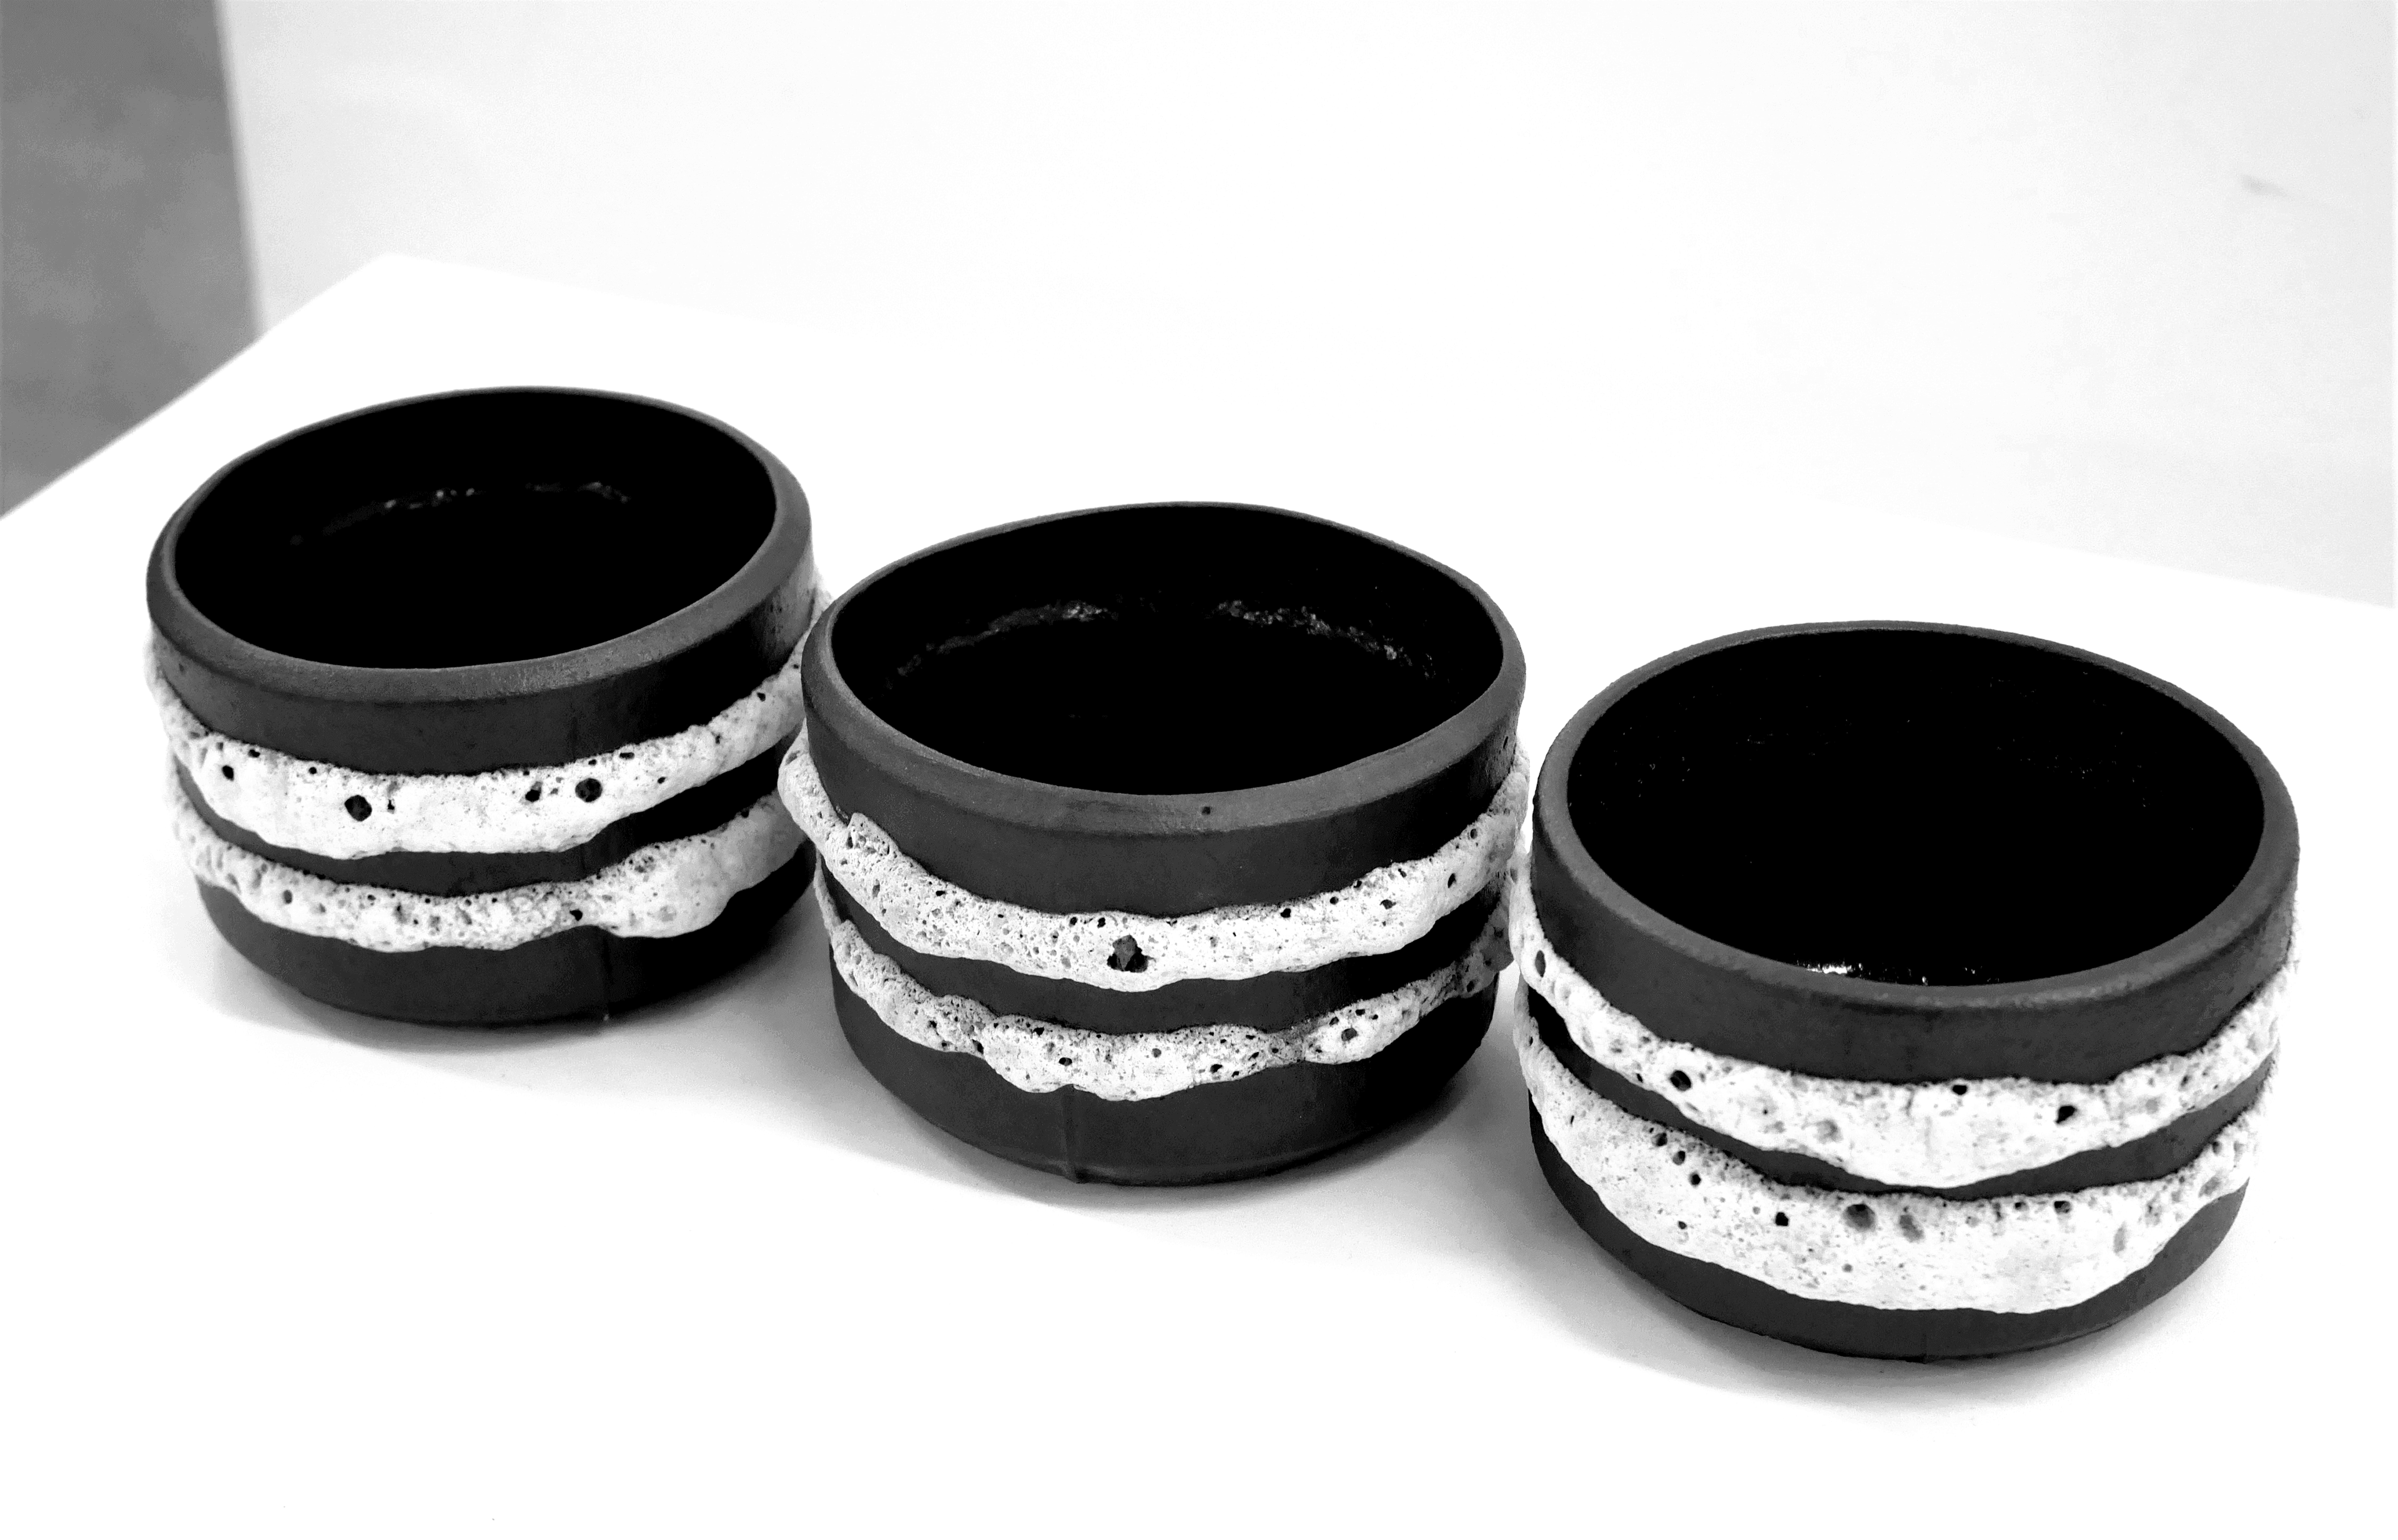
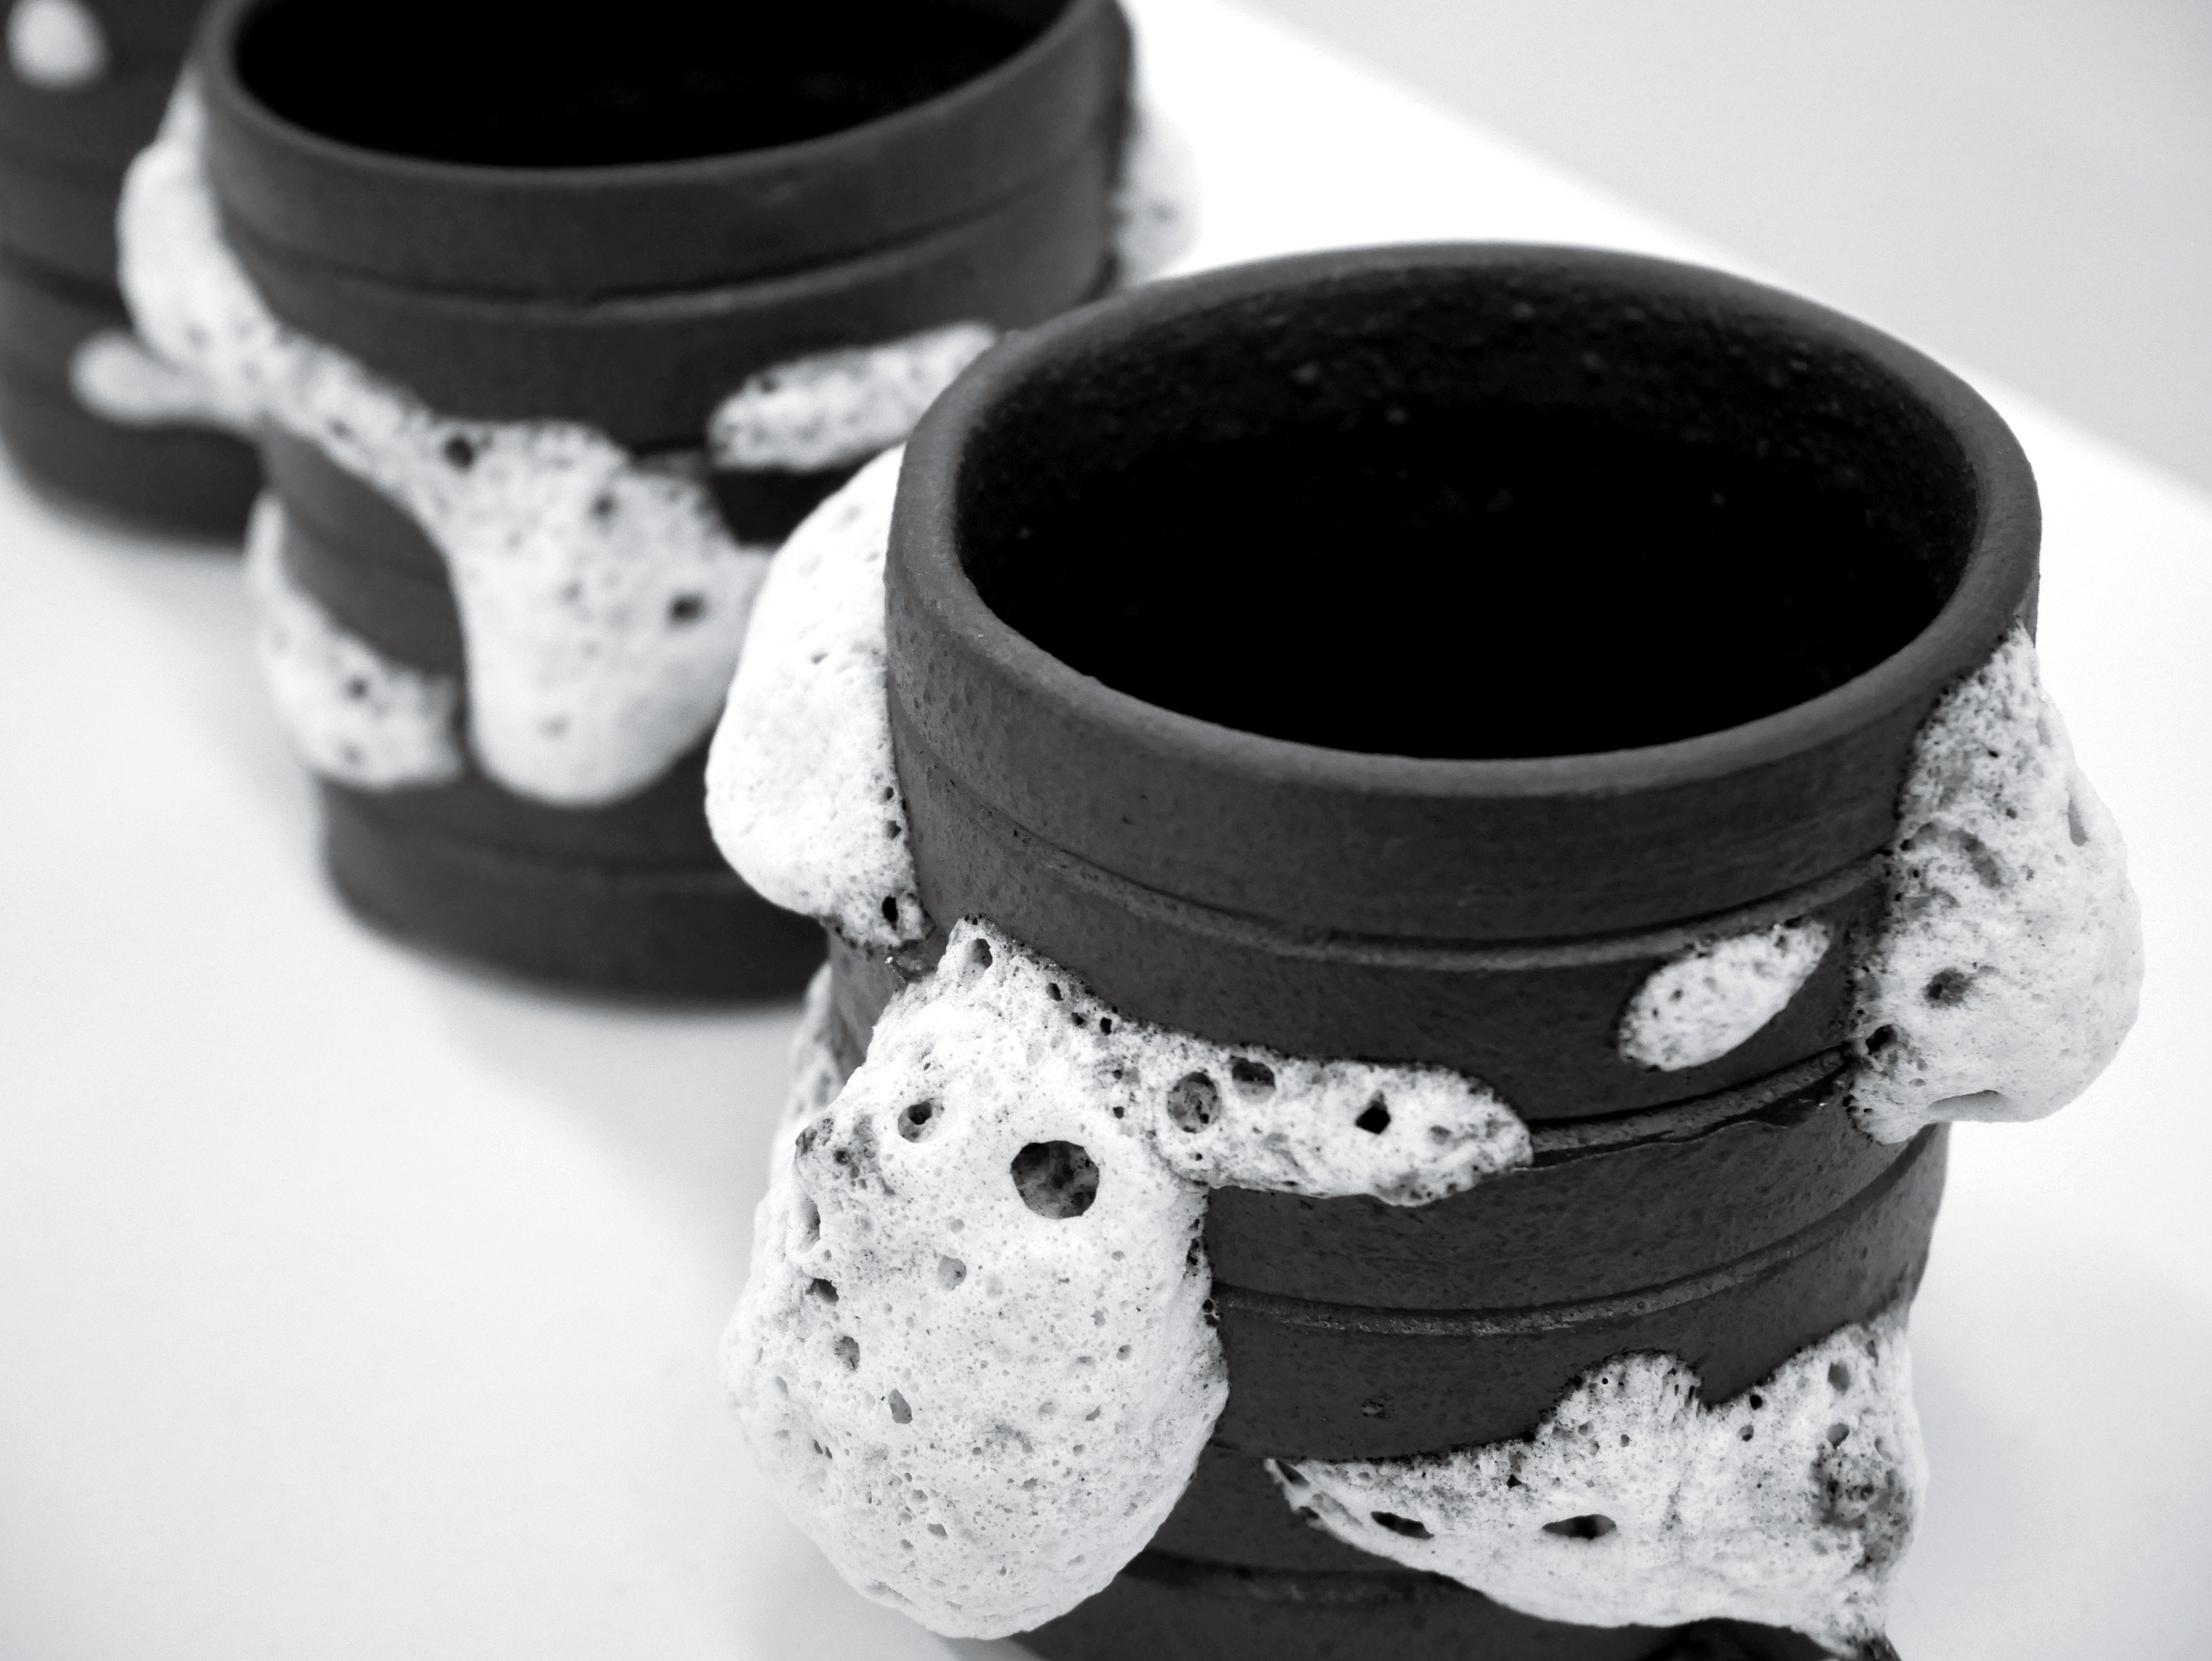
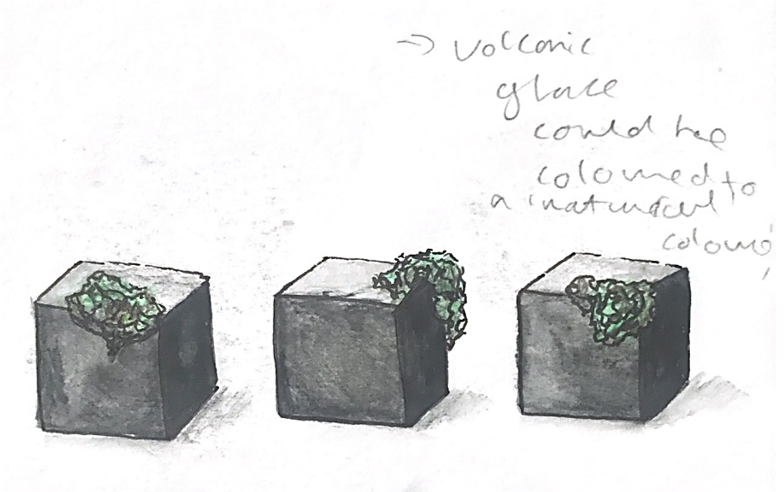
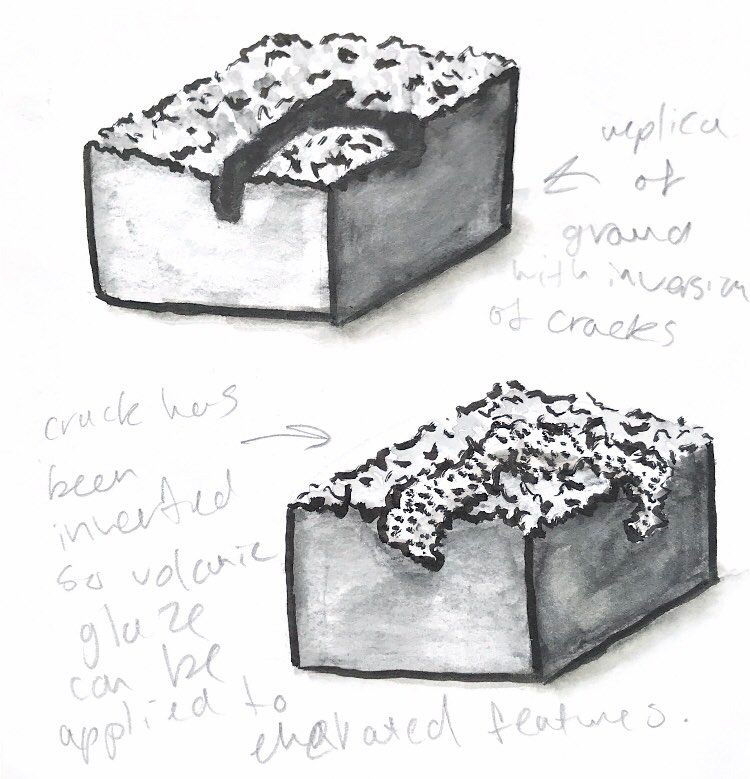
Volcanic glaze
Although the seam lines were beginning to create the contrast between two forms required to embody the natural and man-made, I felt there was still a lack in texture and the 'untameable' and unpredictable element of nature.
Through the use of volcanic glaze, the 'out of control' element is incorporated, in addition to a grotesque, tactile texture, which provokes a contrasting reaction.
I mixed three different volcanic glazes, varying in colour and texture. Each were successful in their own way. However the green glaze resulted in the rest of the vessel turning brown and metallic in appearance.


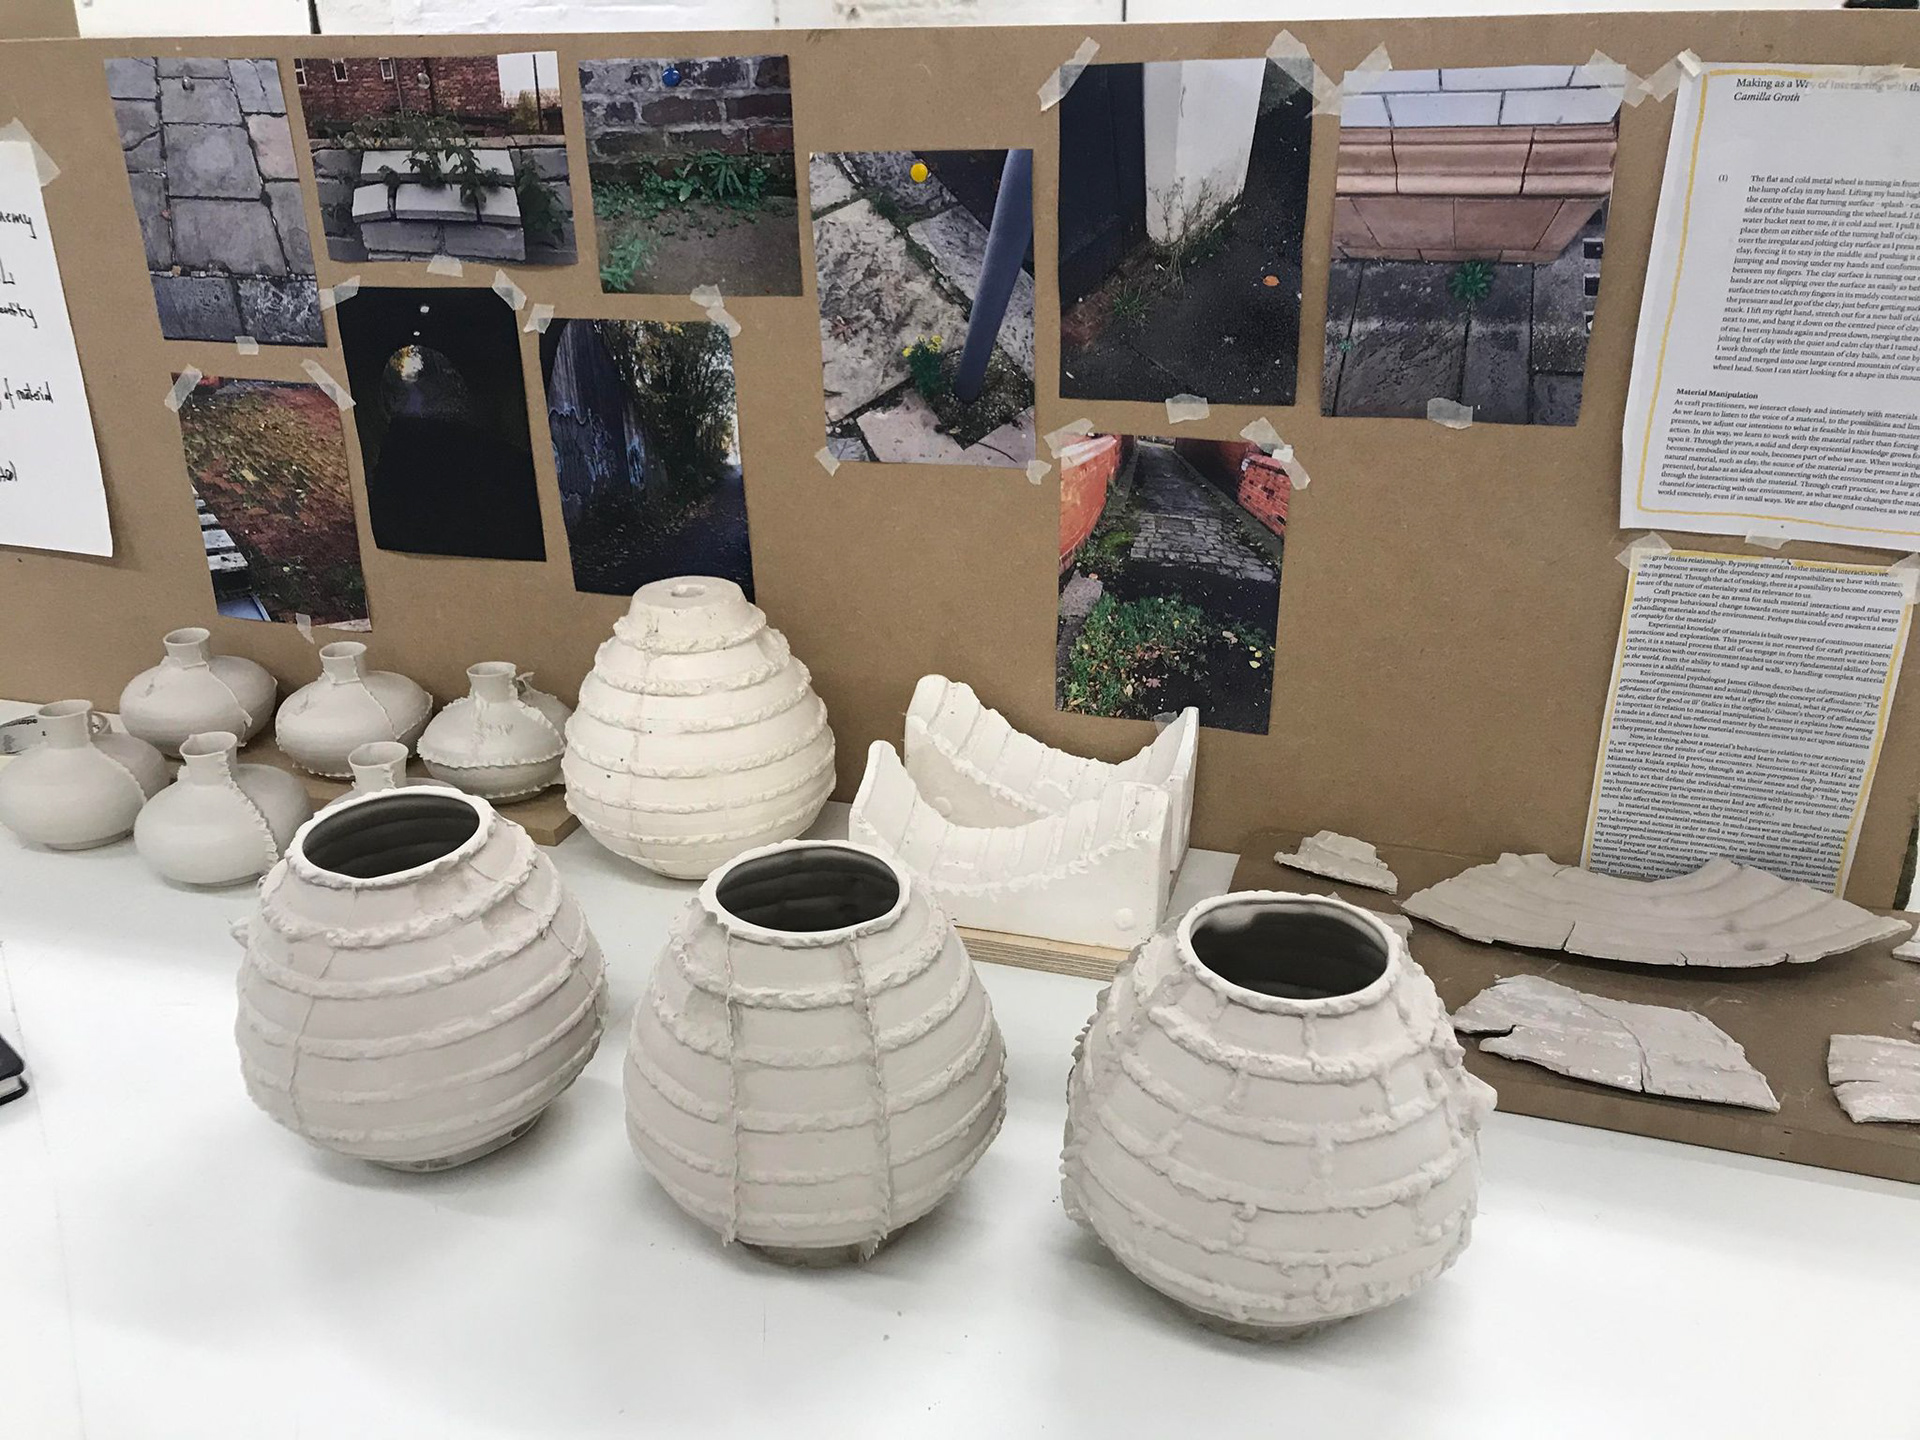
IN PROGRESS EXHIBITION
I chose to exhibit 3 vessels showing exposed seam lines and 3 of the forms with volcanic glaze, alongside a video presenting the inspiration behind the project.
I found the exhibition to be particularly beneficial in regards to both practicing curation, and also visualising my work in an exhibition environment.
In addition to this, I took on the role of coordinating the exhibition descriptions, which was a useful in gaining experience for future exhibitions.

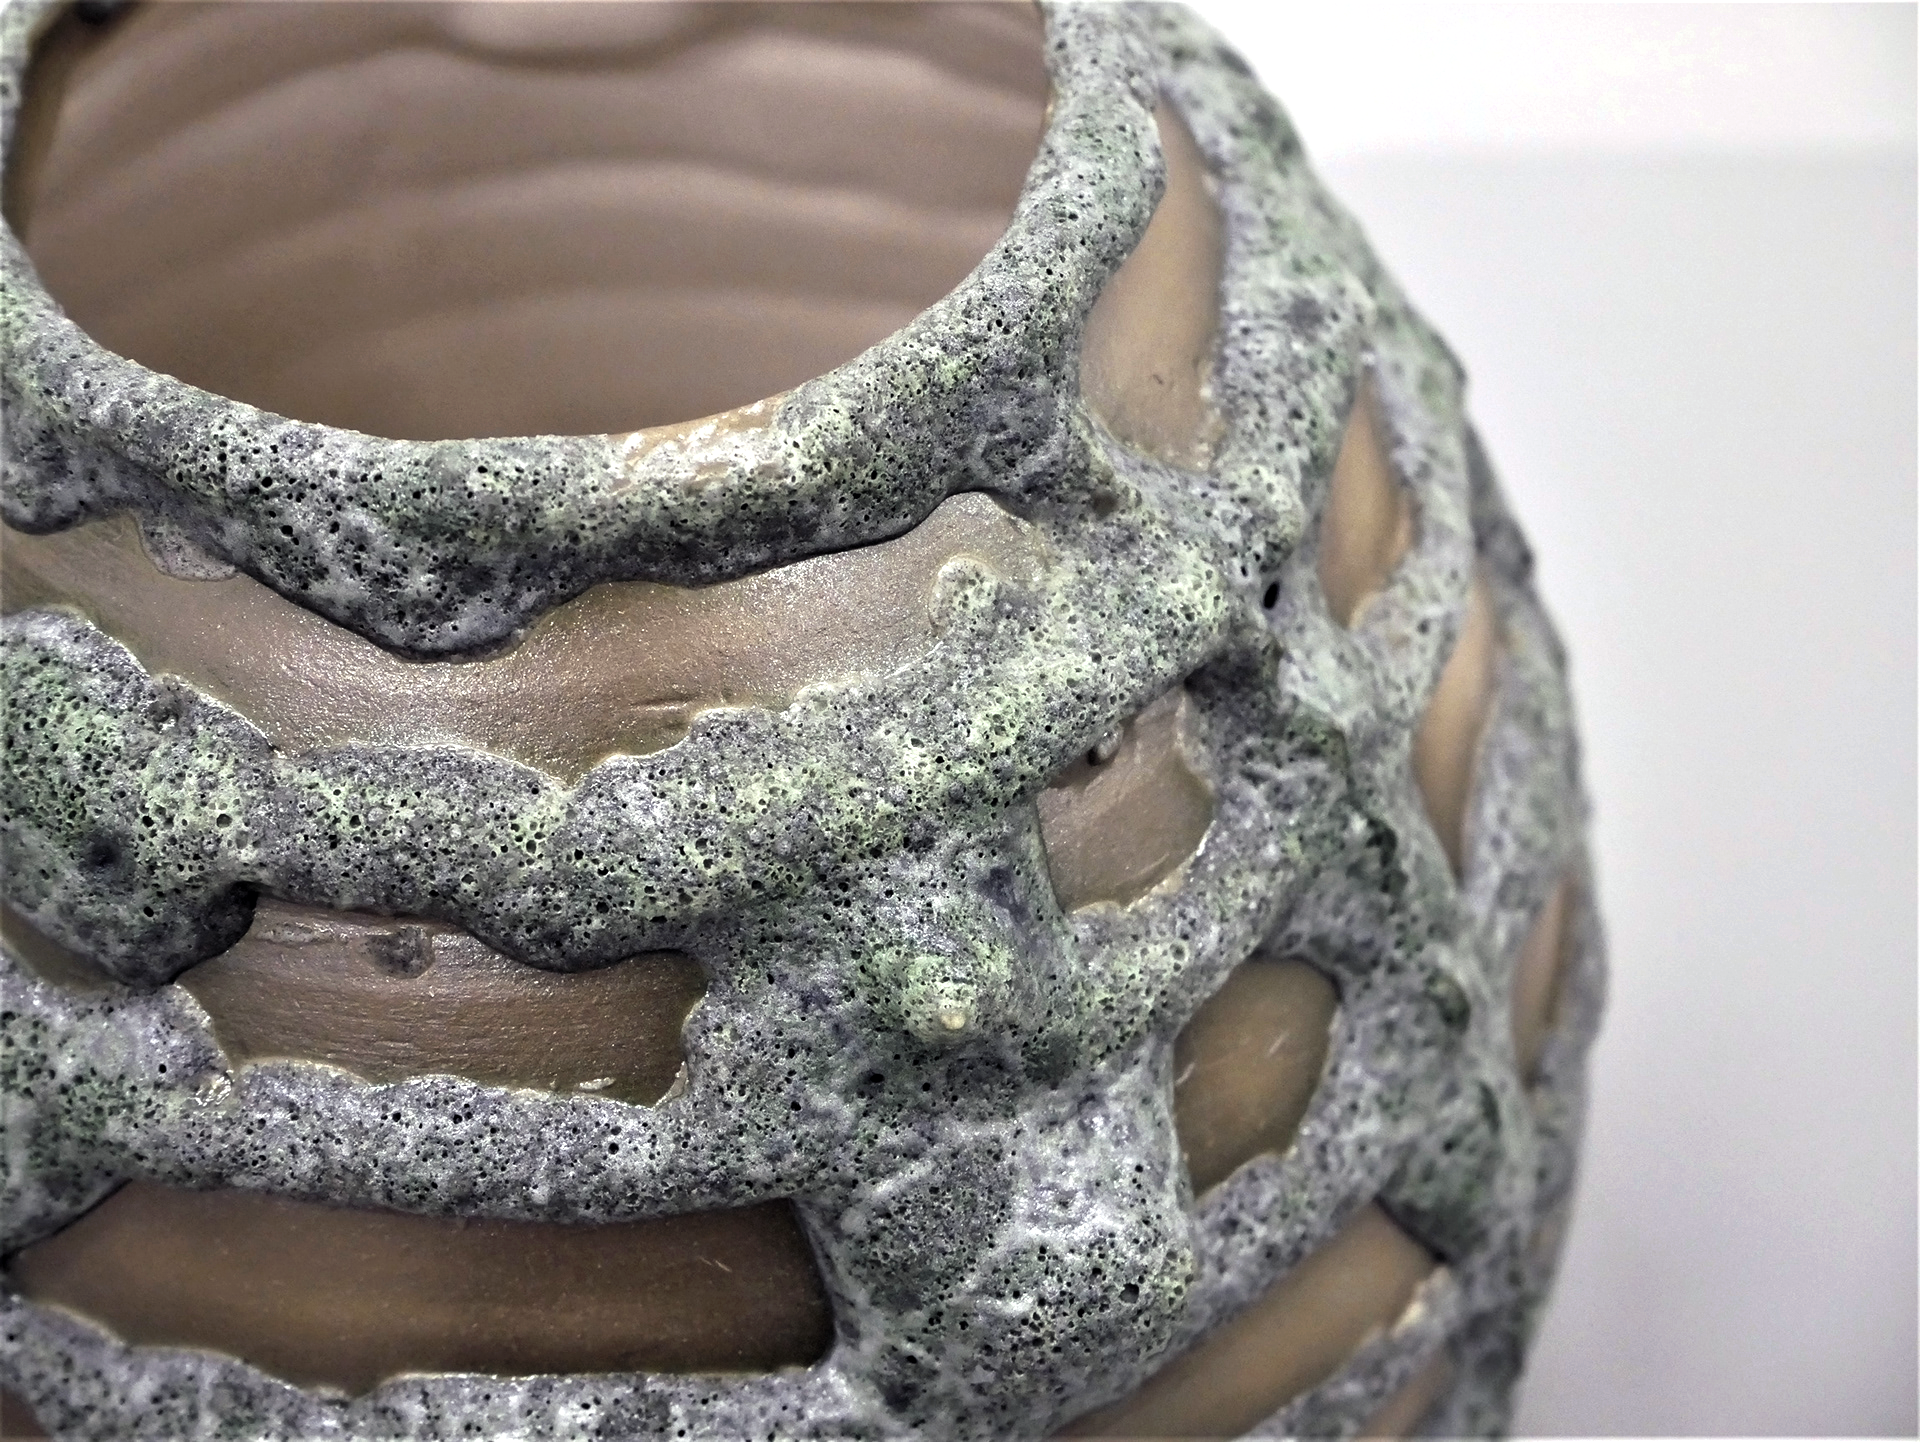
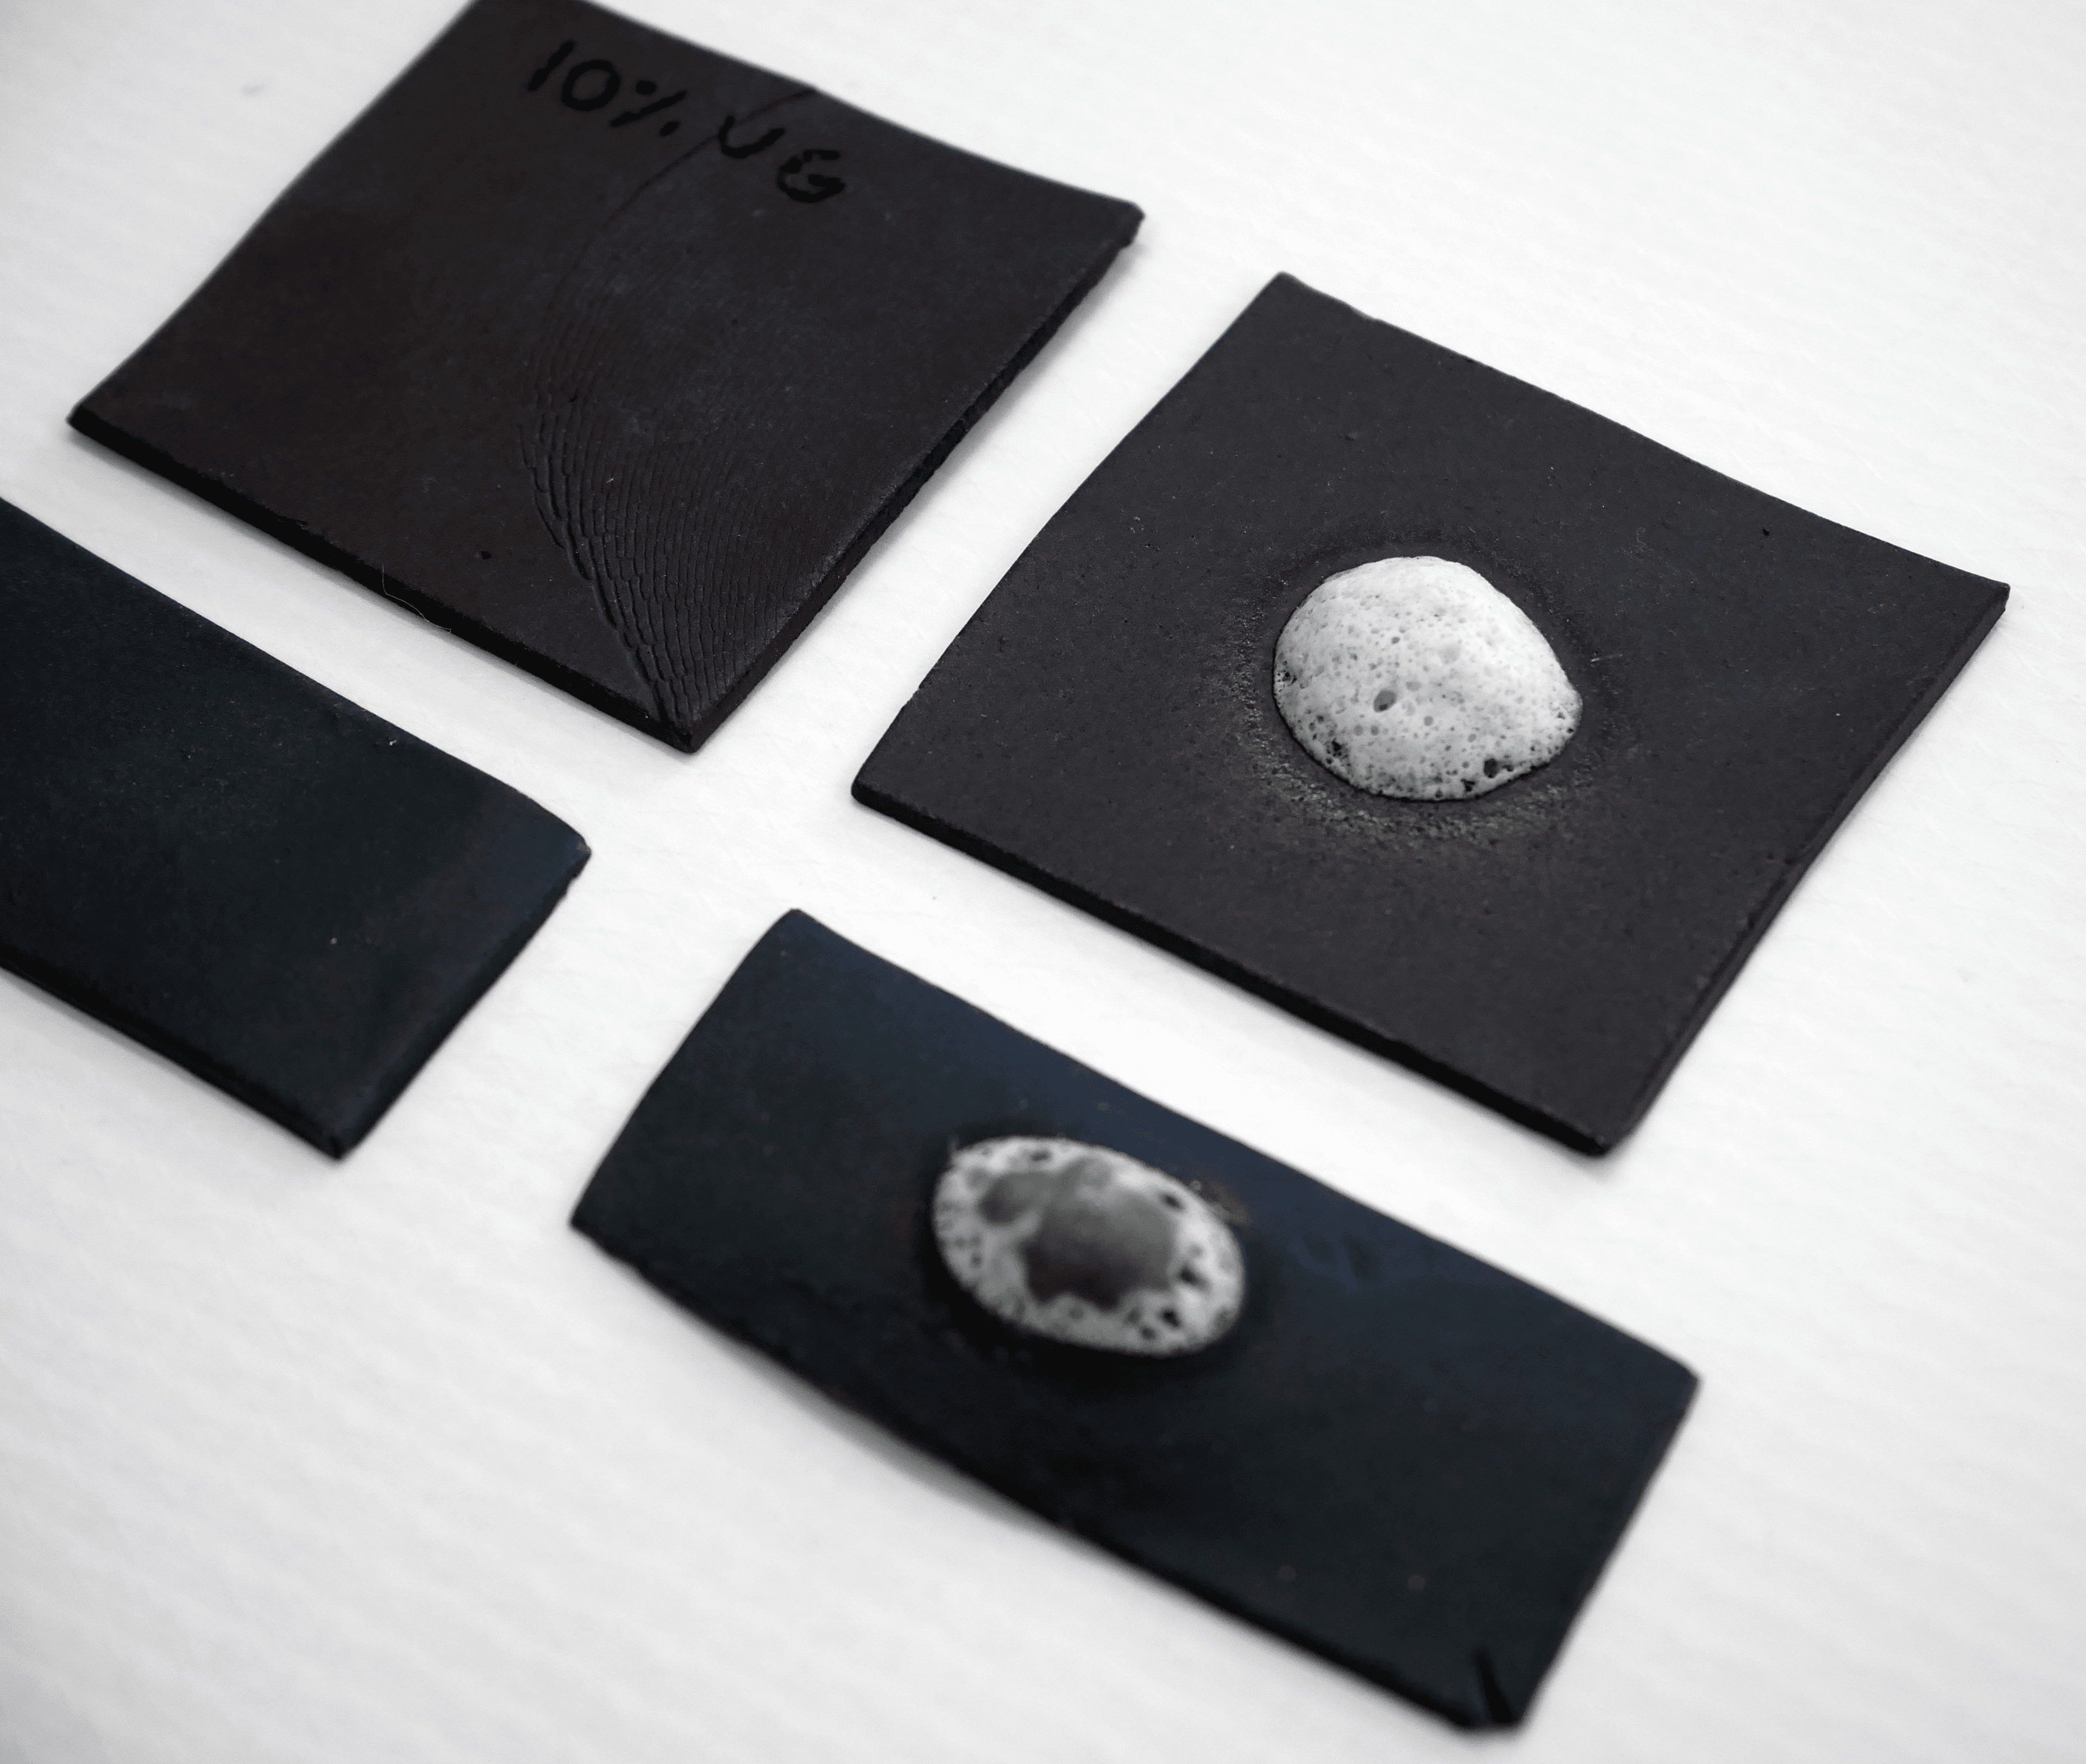
Black Slip tests - oxides
The glaze created a successful contrast in texture, however a contrast in colour was necessary too.
When colouring the glaze, the texture and overall appearance was altered. So as opposed to colouring the glaze, I added colour to the slip. I mixed 3 varying ratios of cobalt, manganese, and red iron oxides into white stoneware casting slip.
The second tests were most successful; reaching full saturation with the lowest amount of oxide.
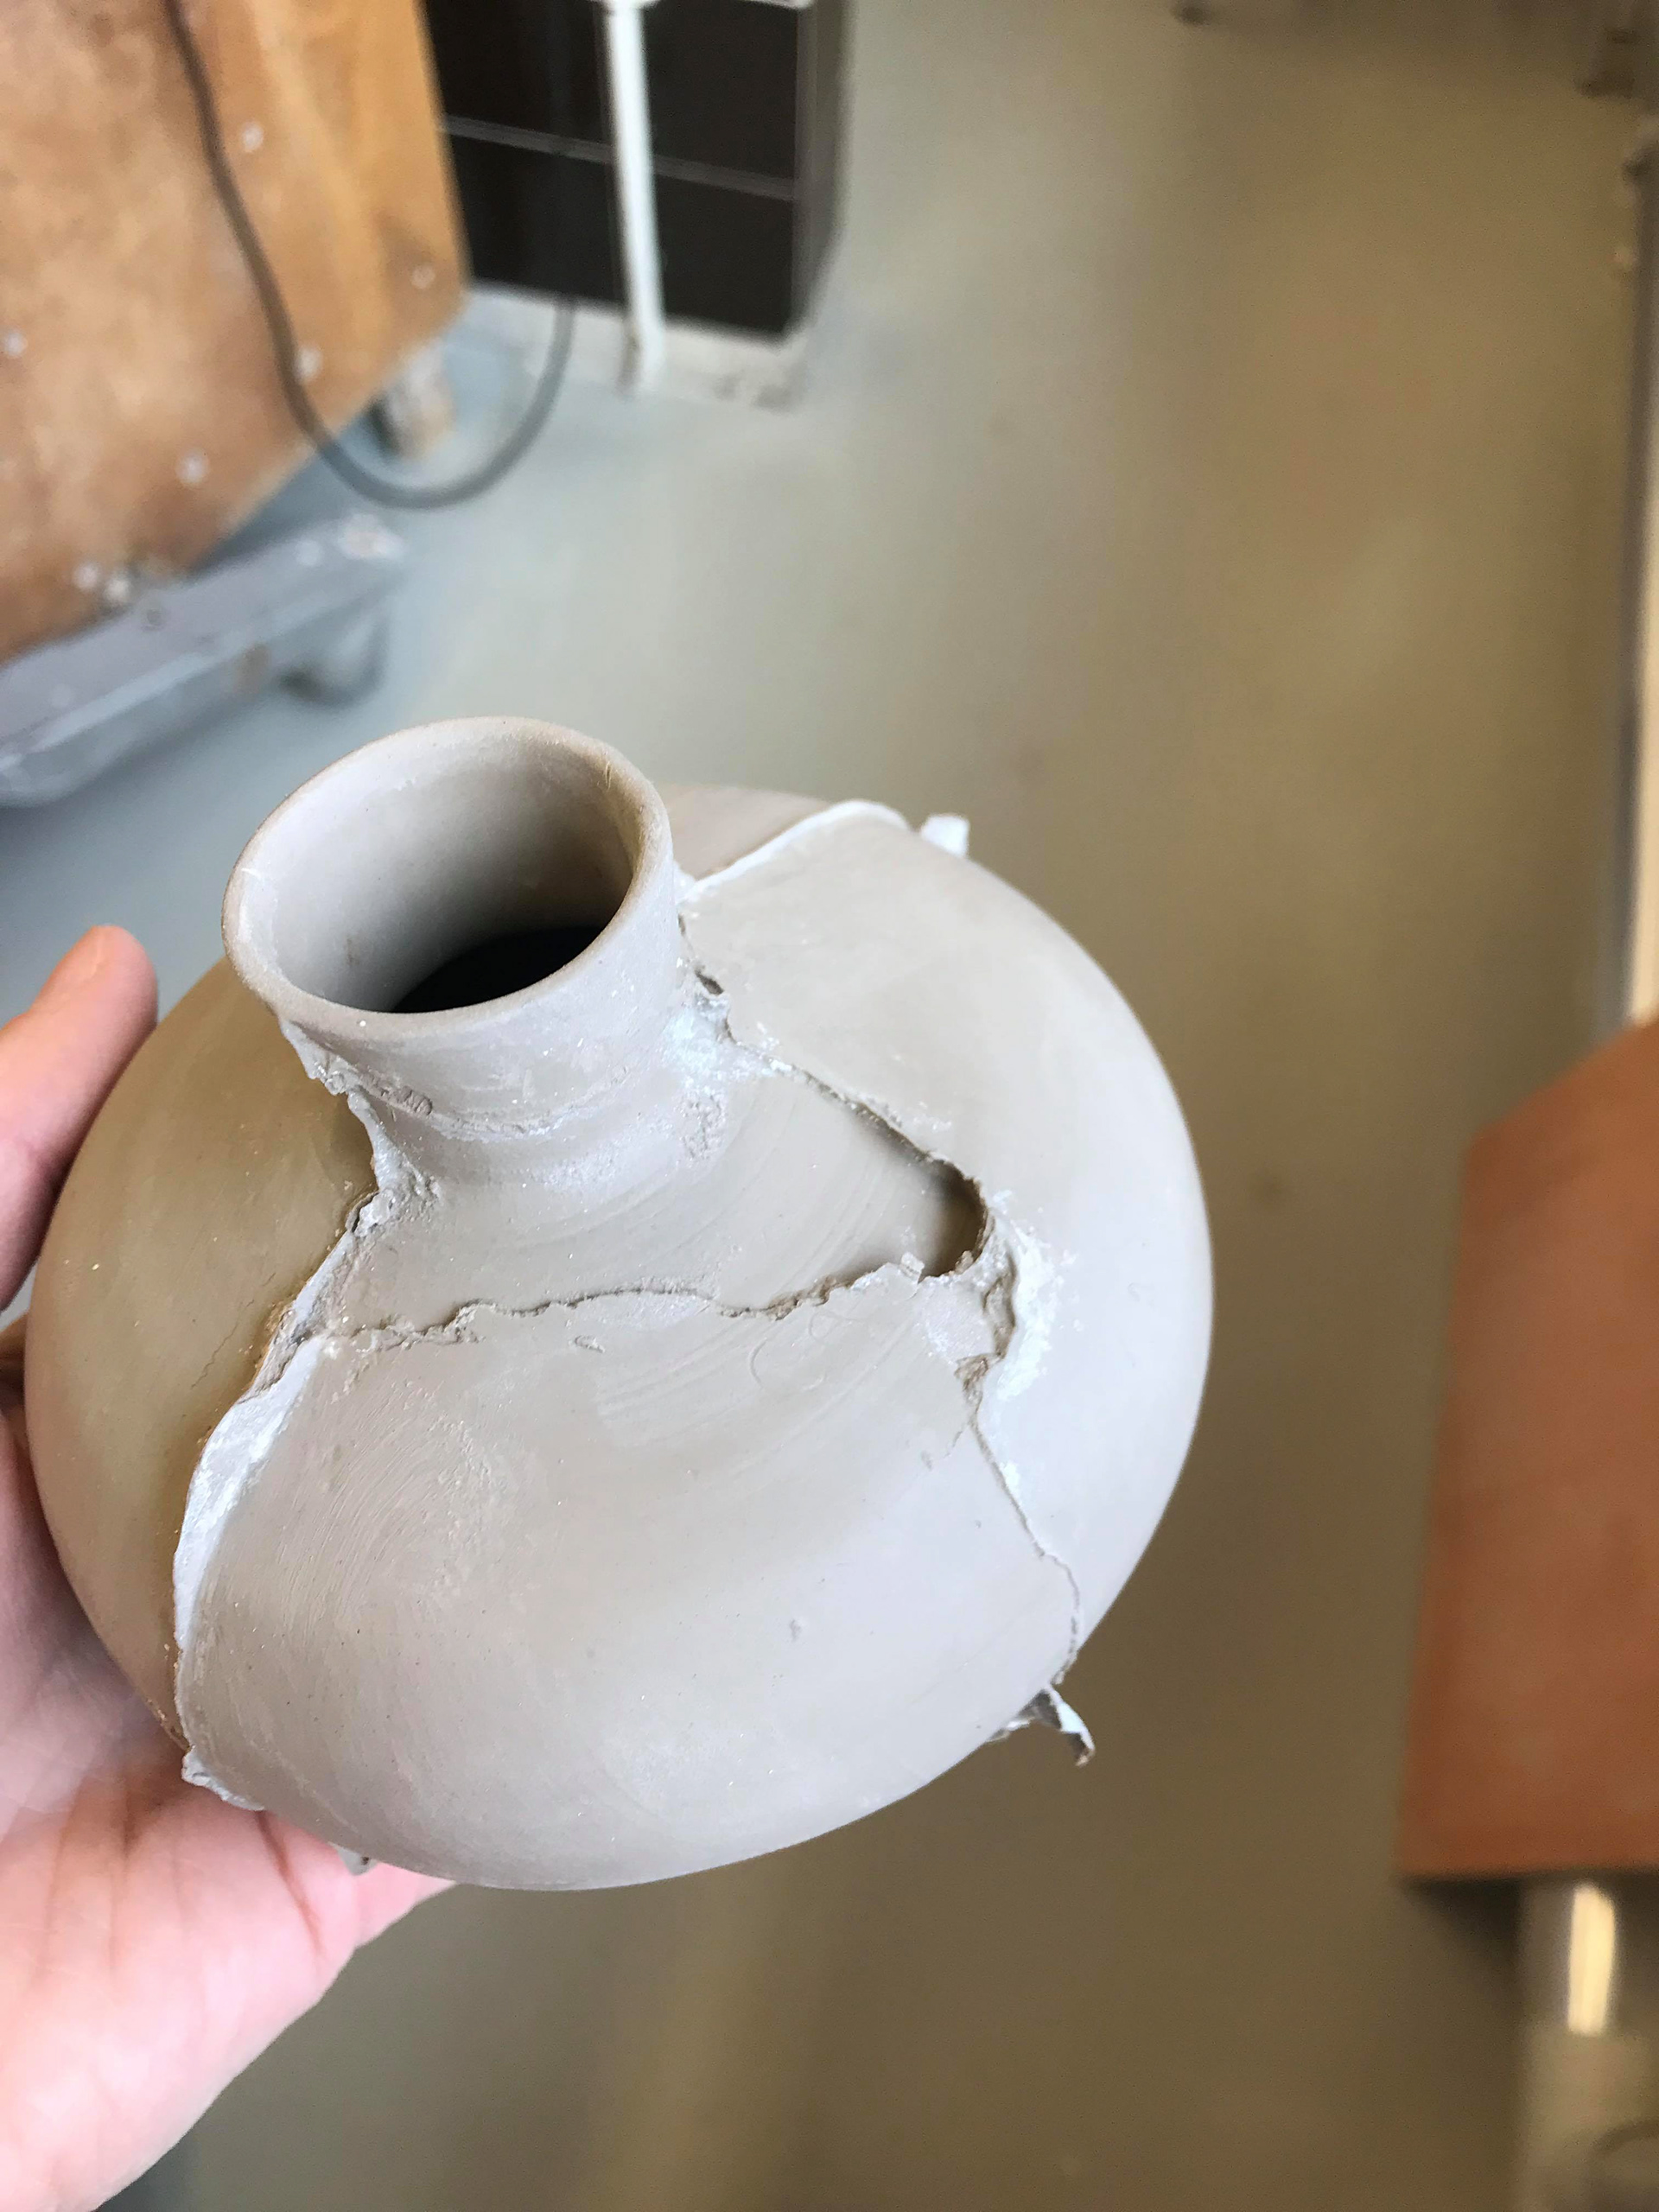
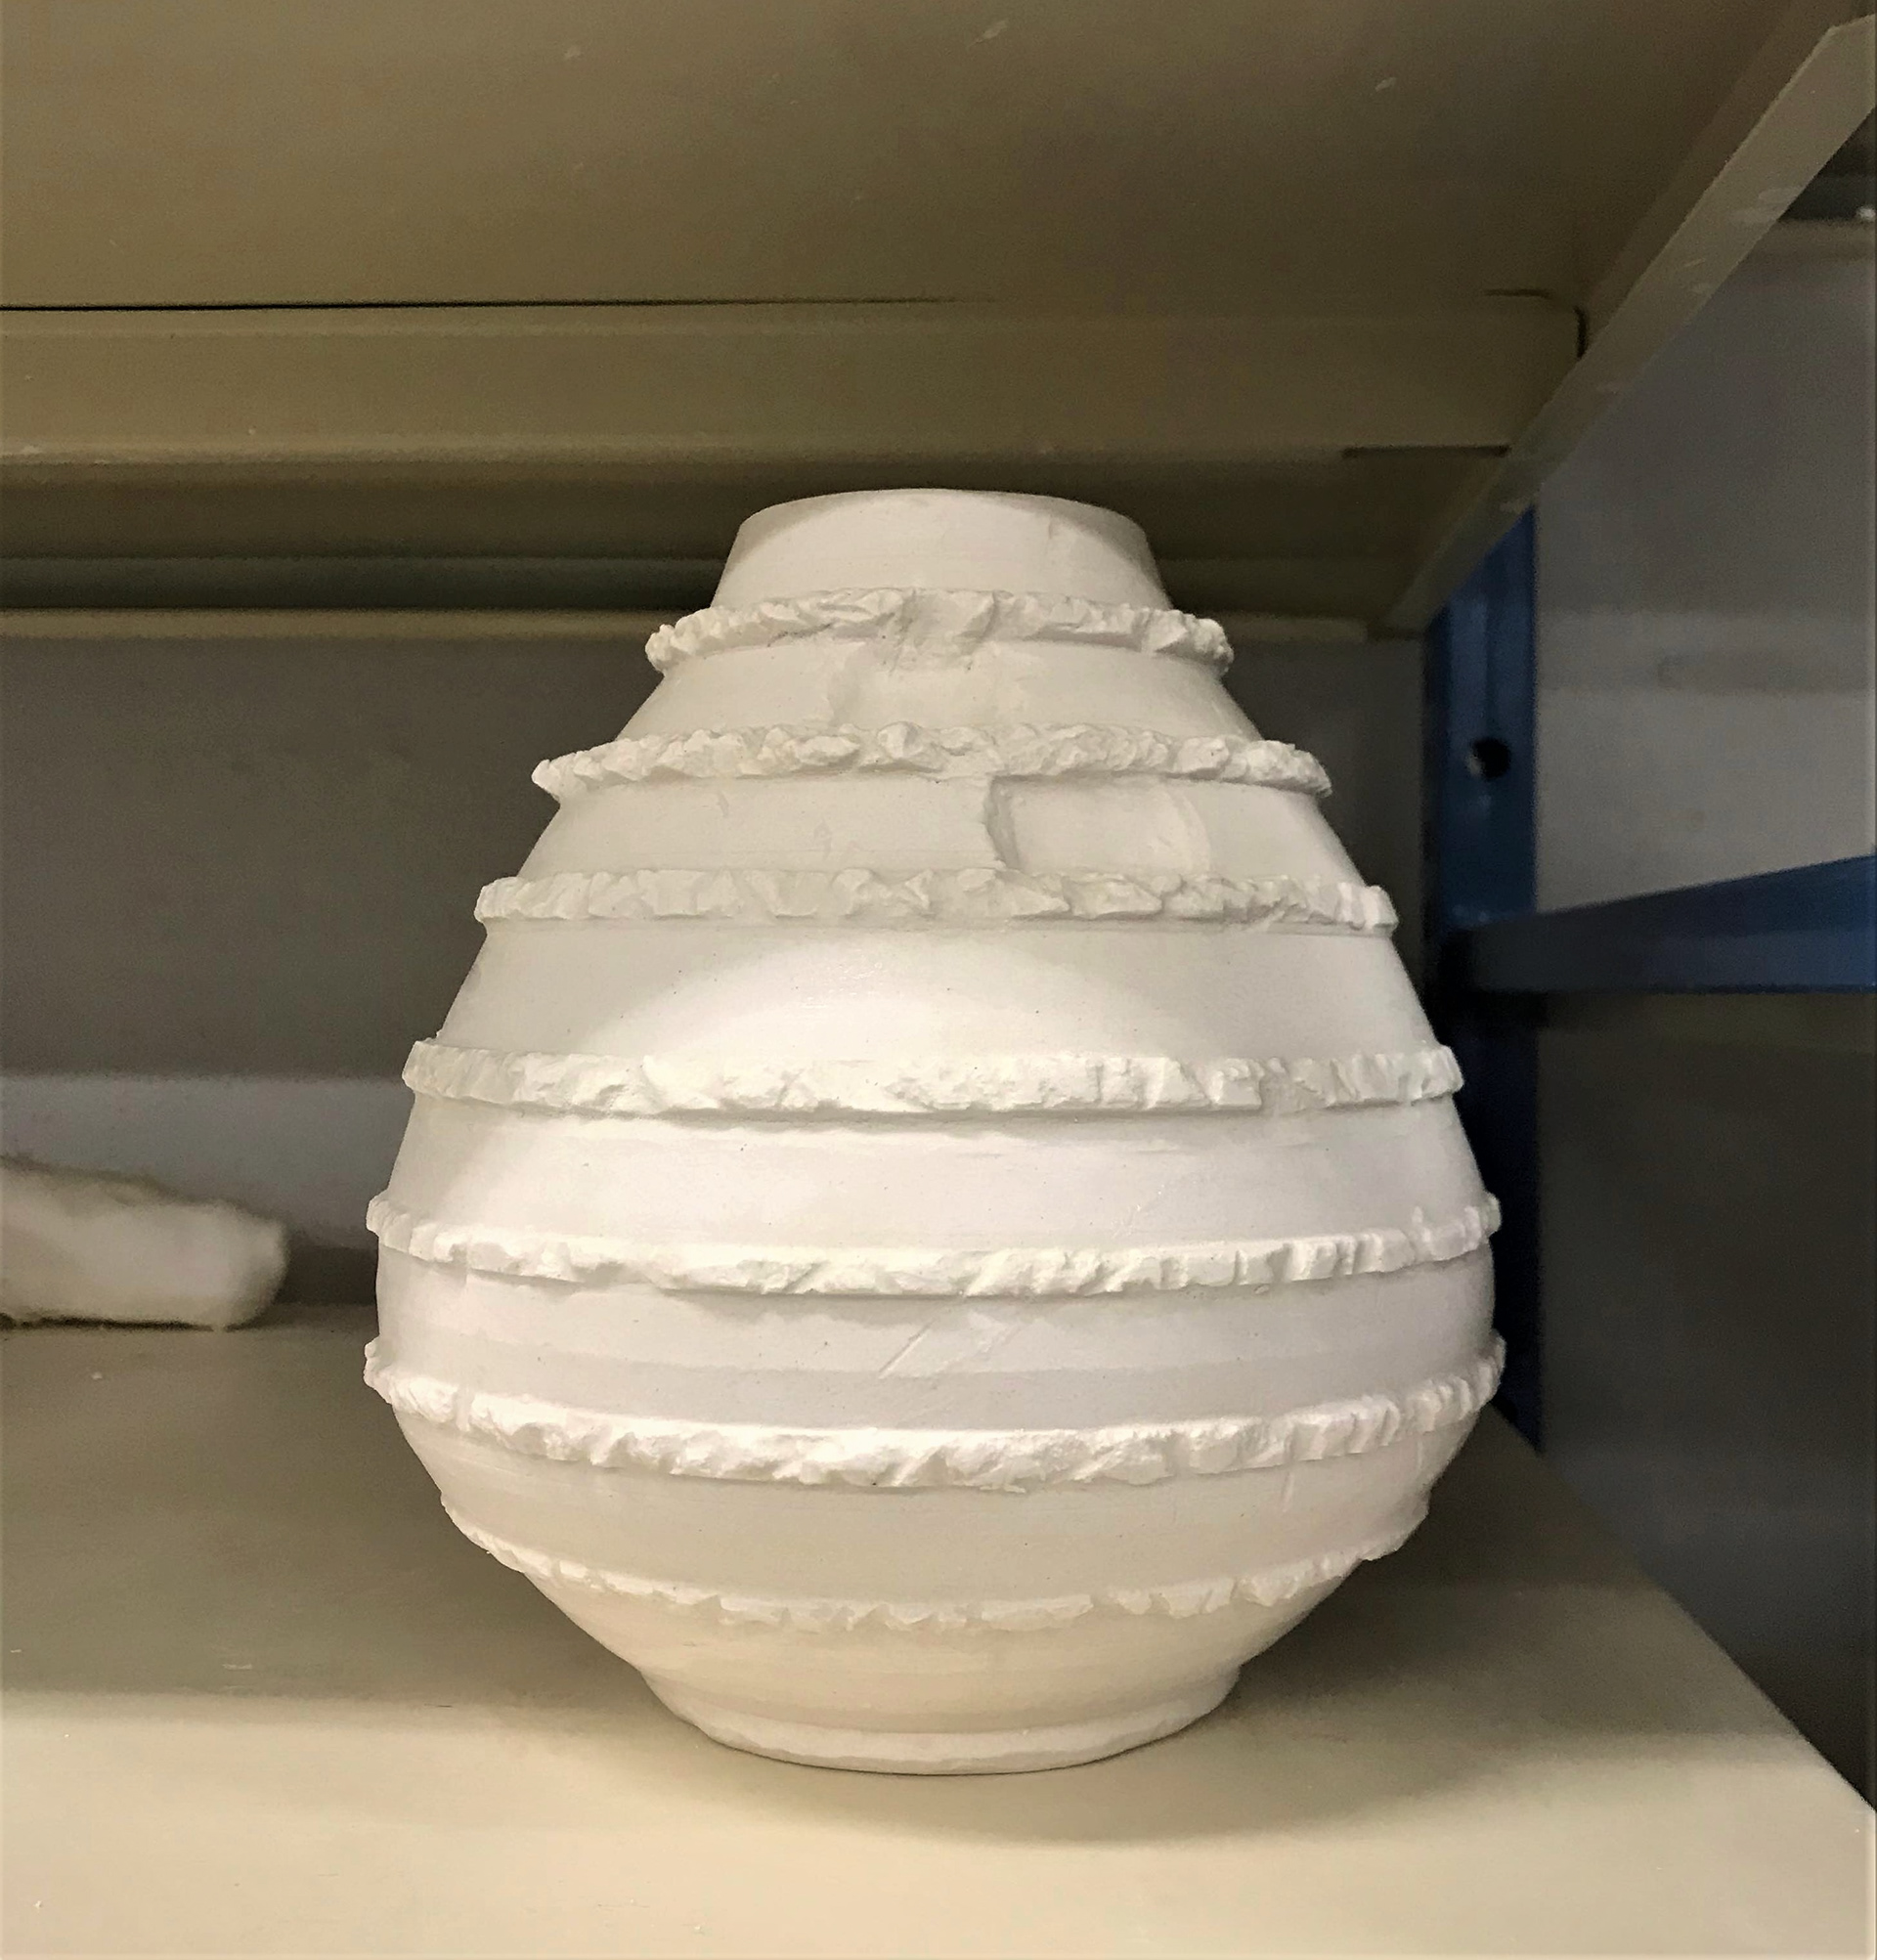
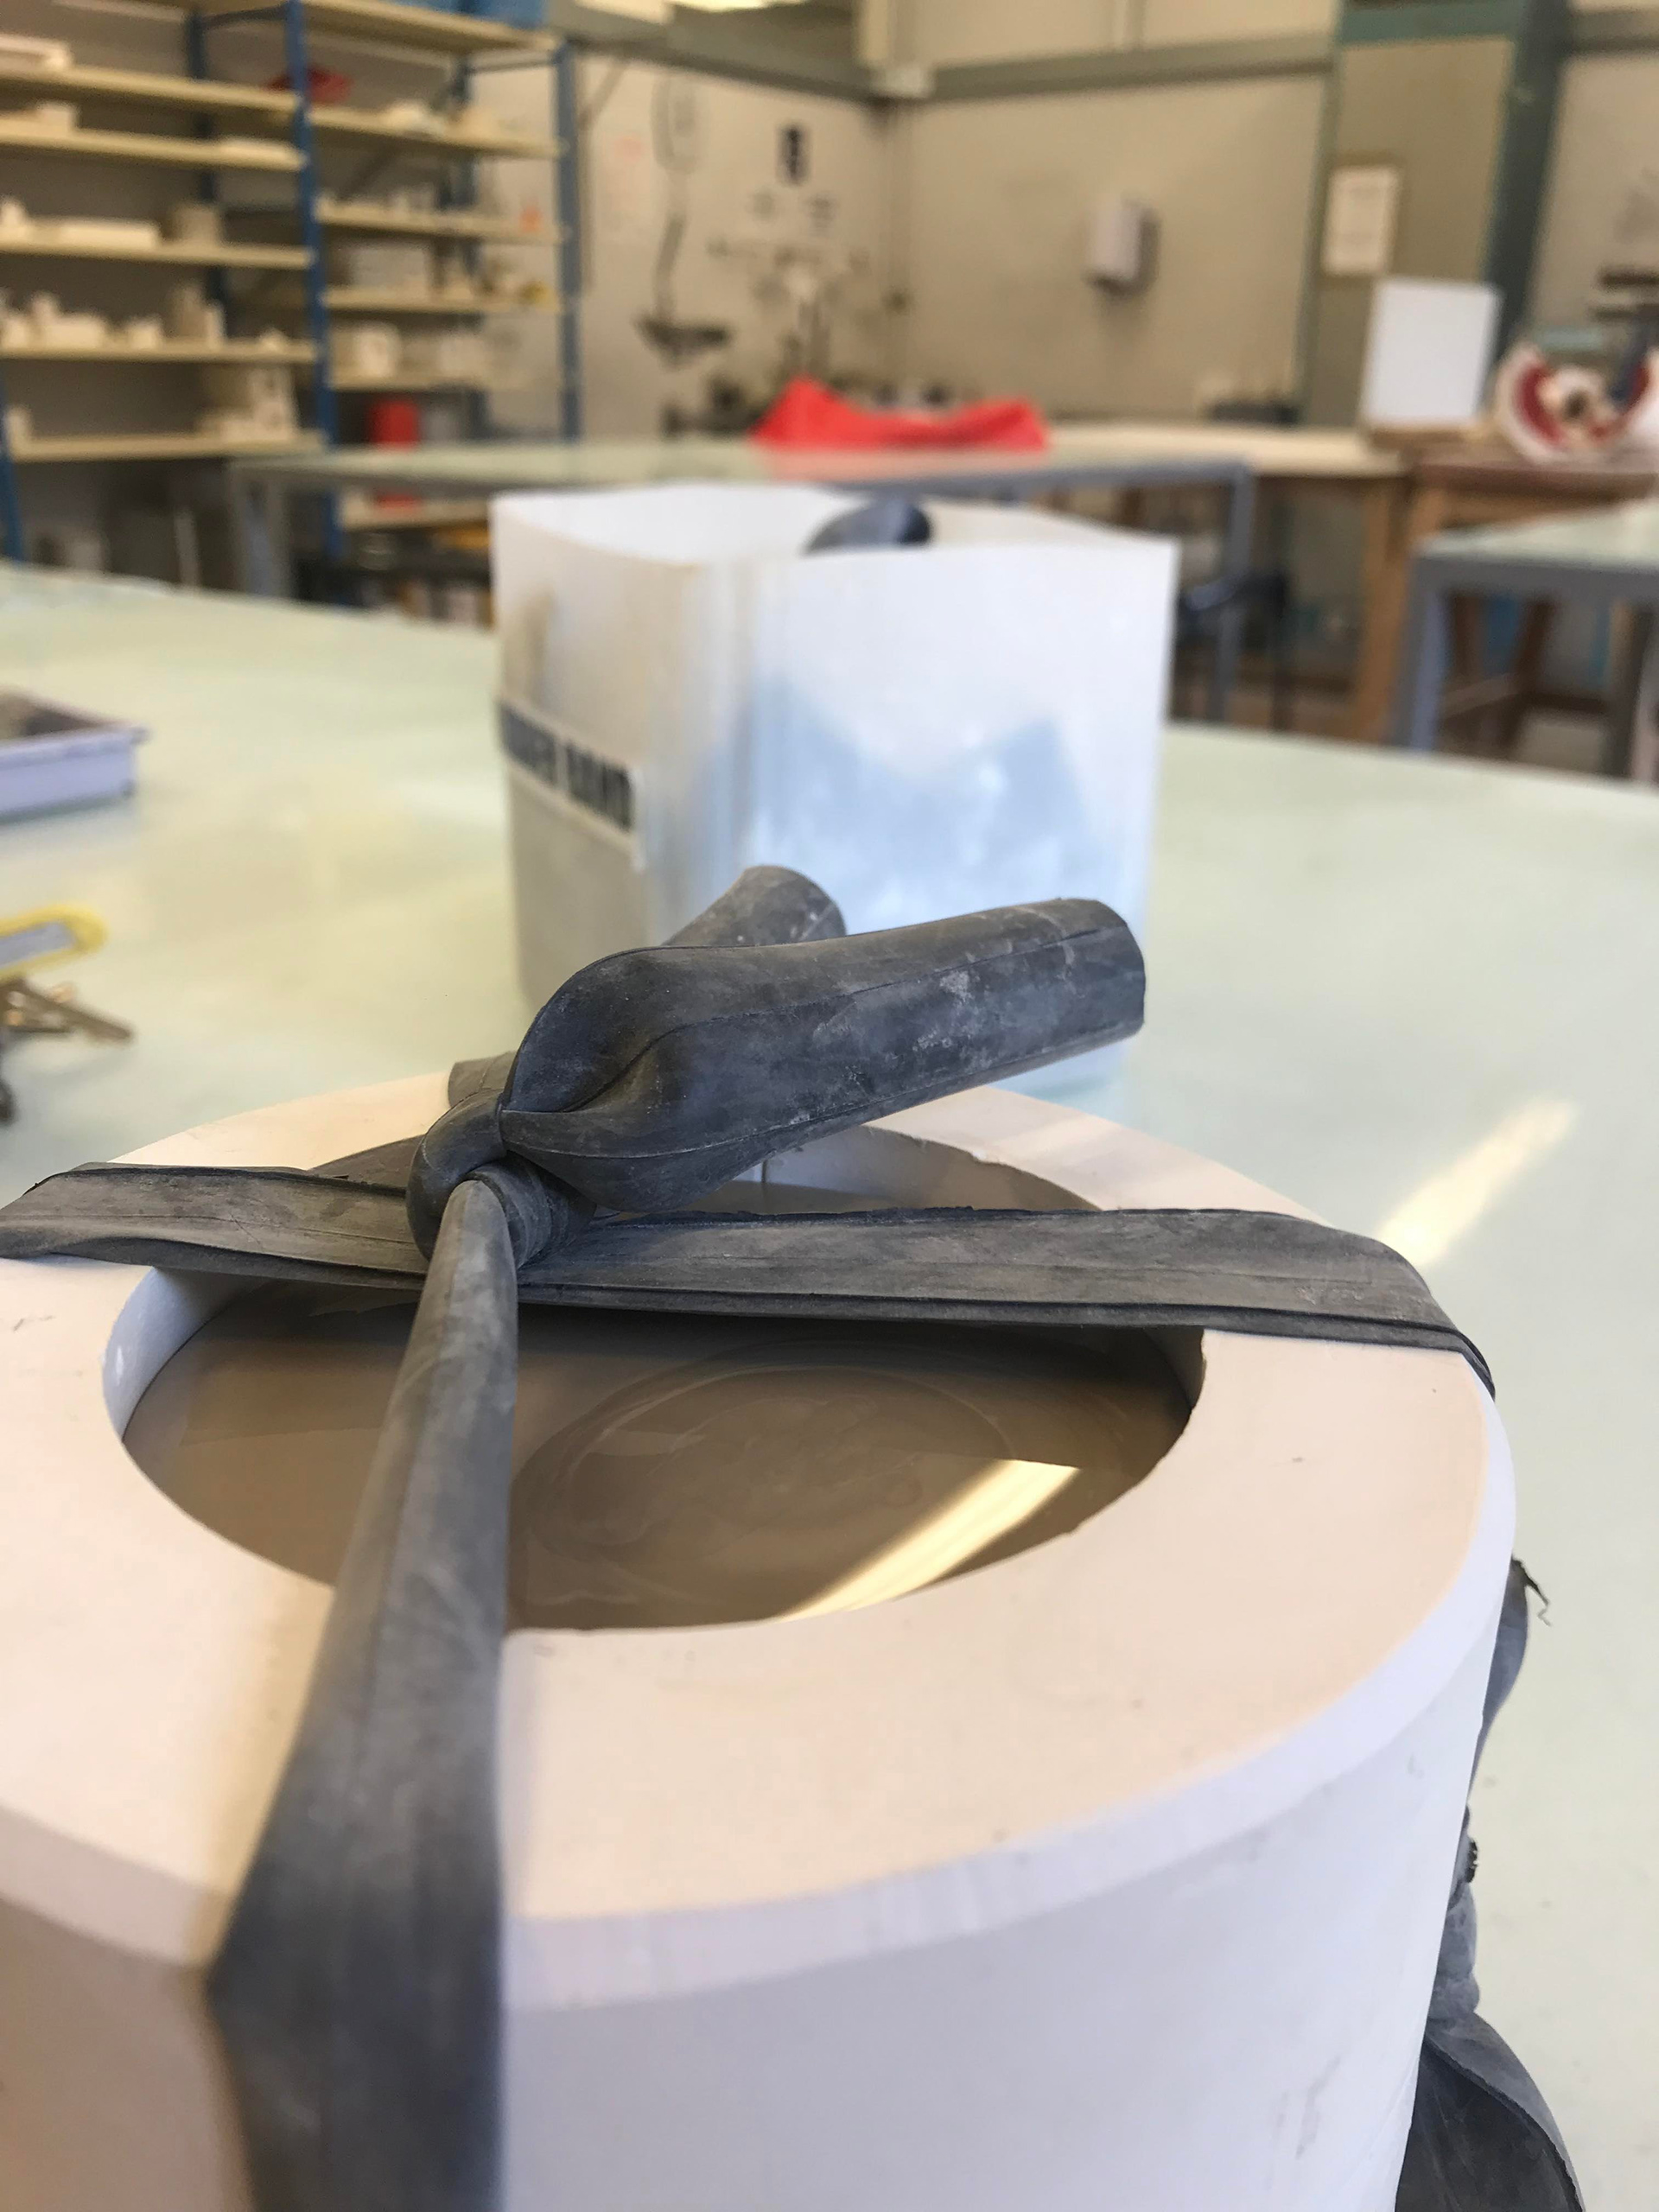
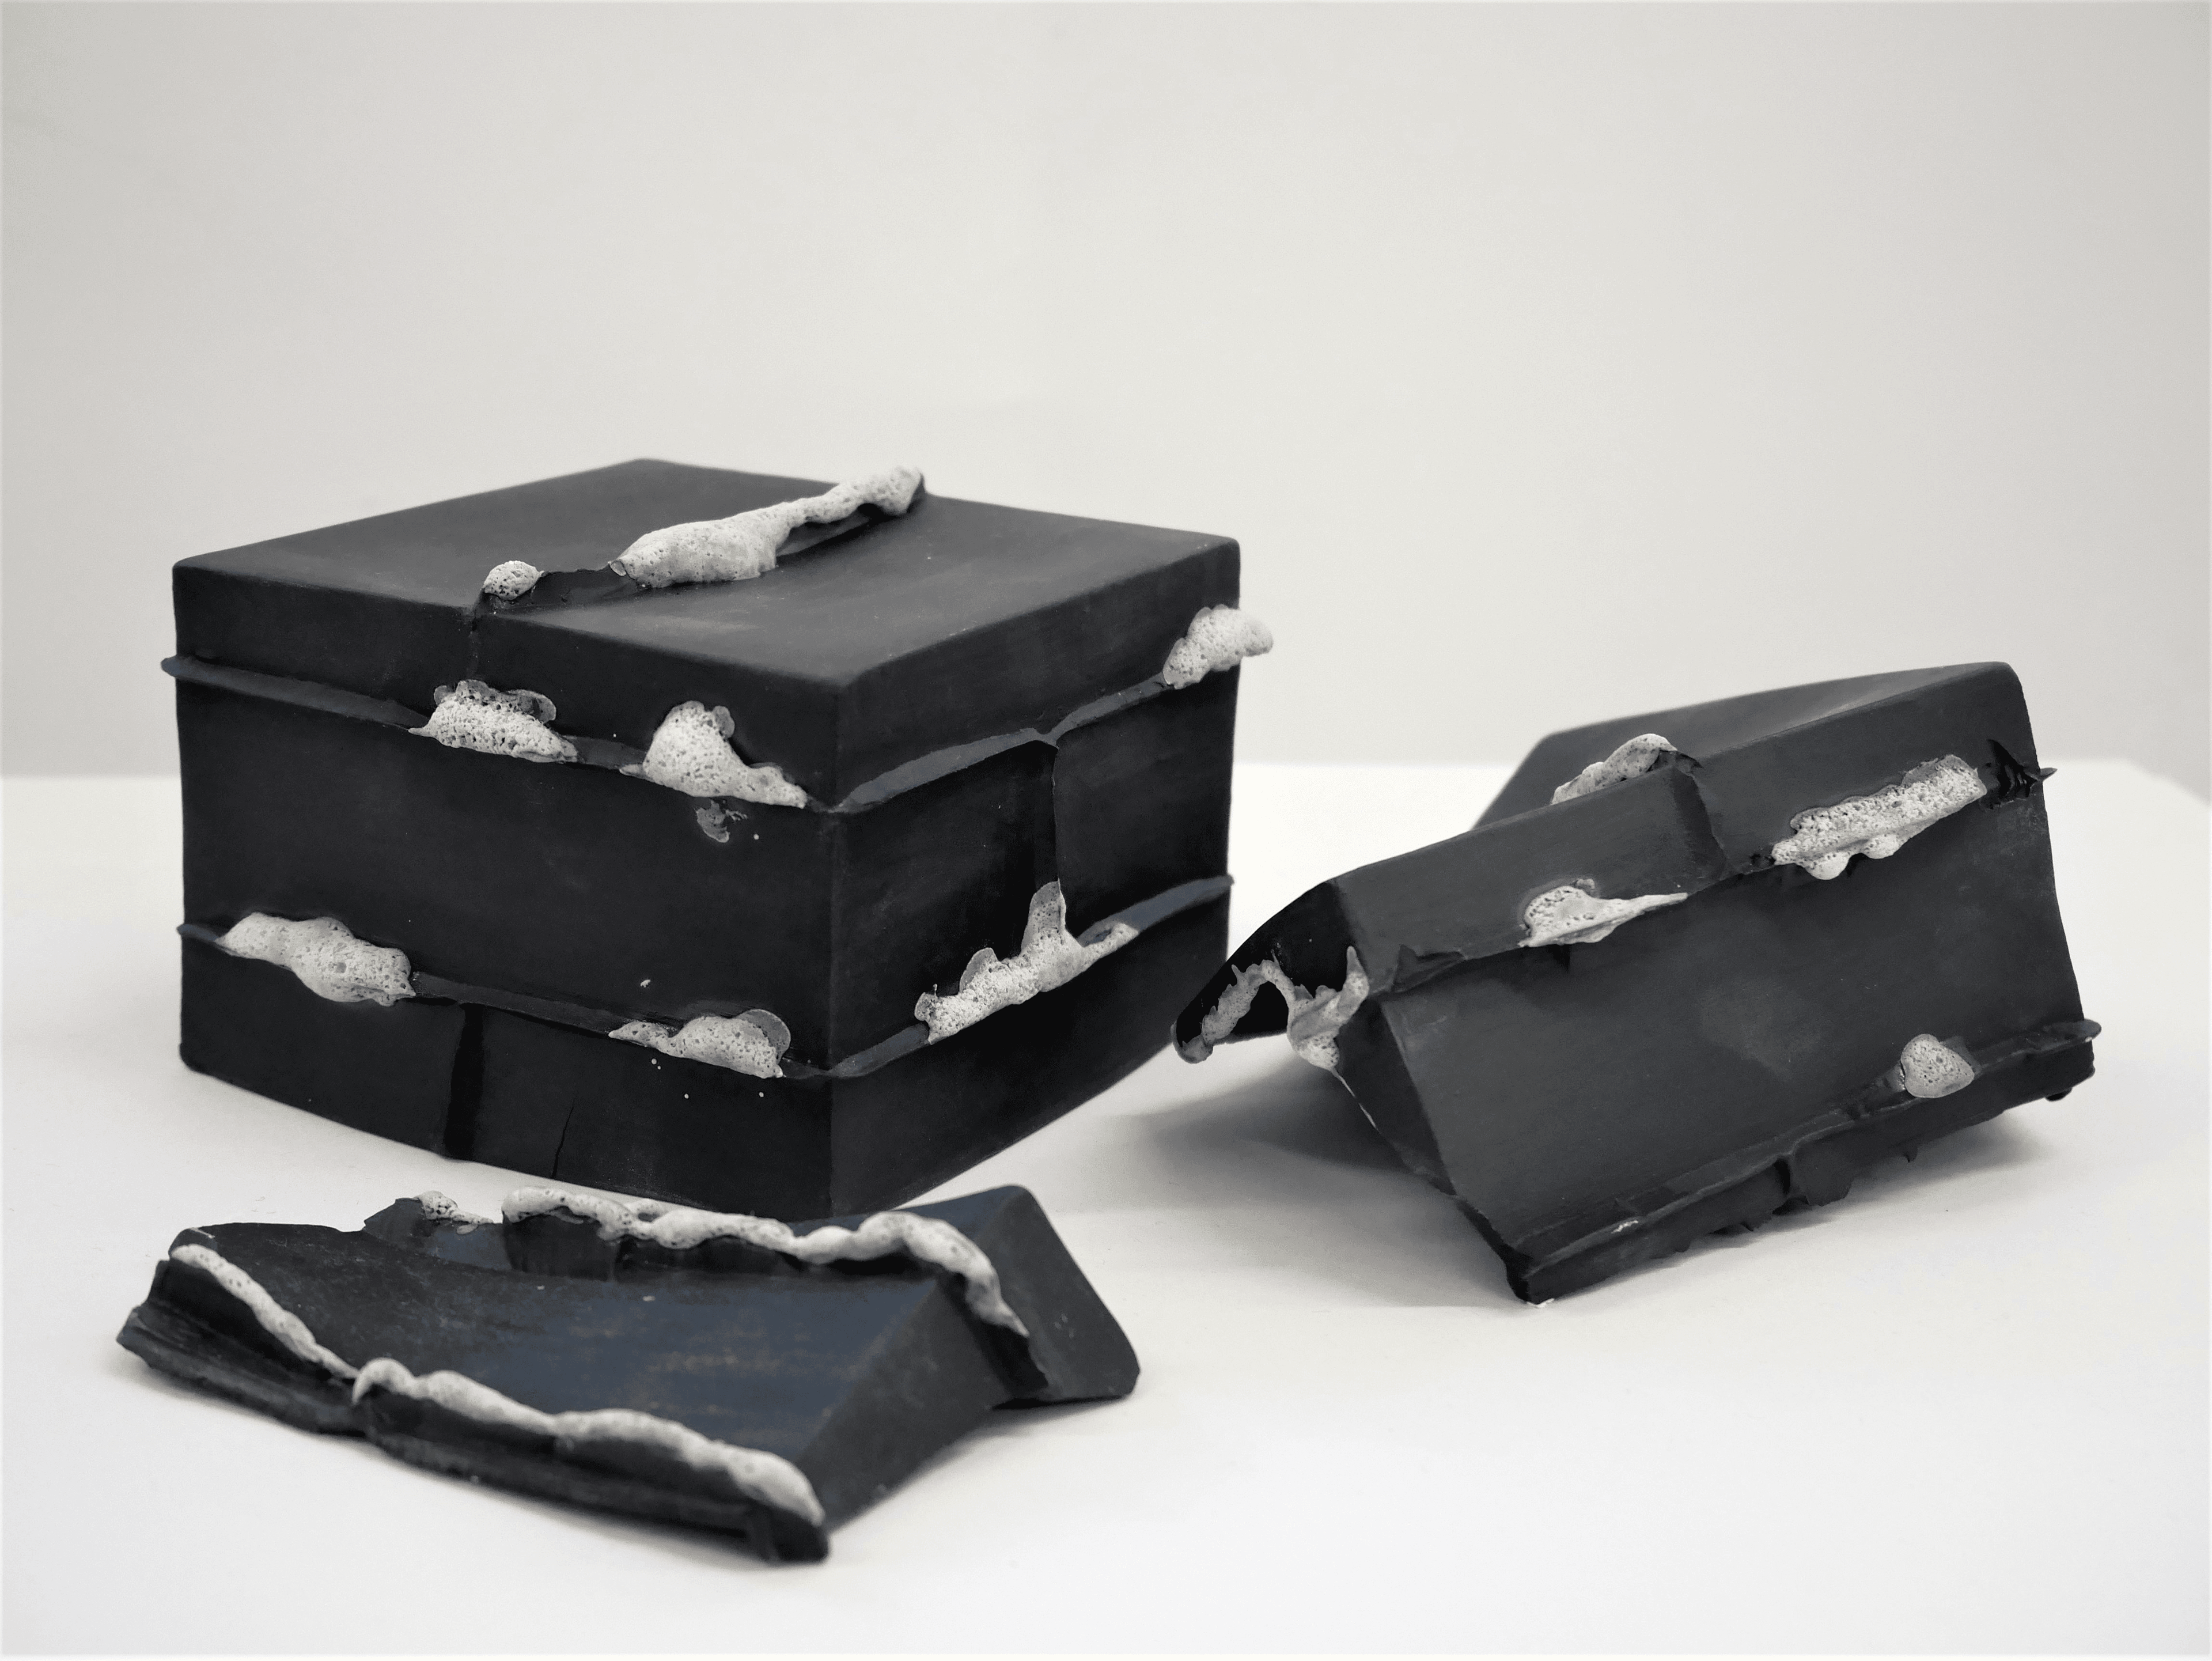
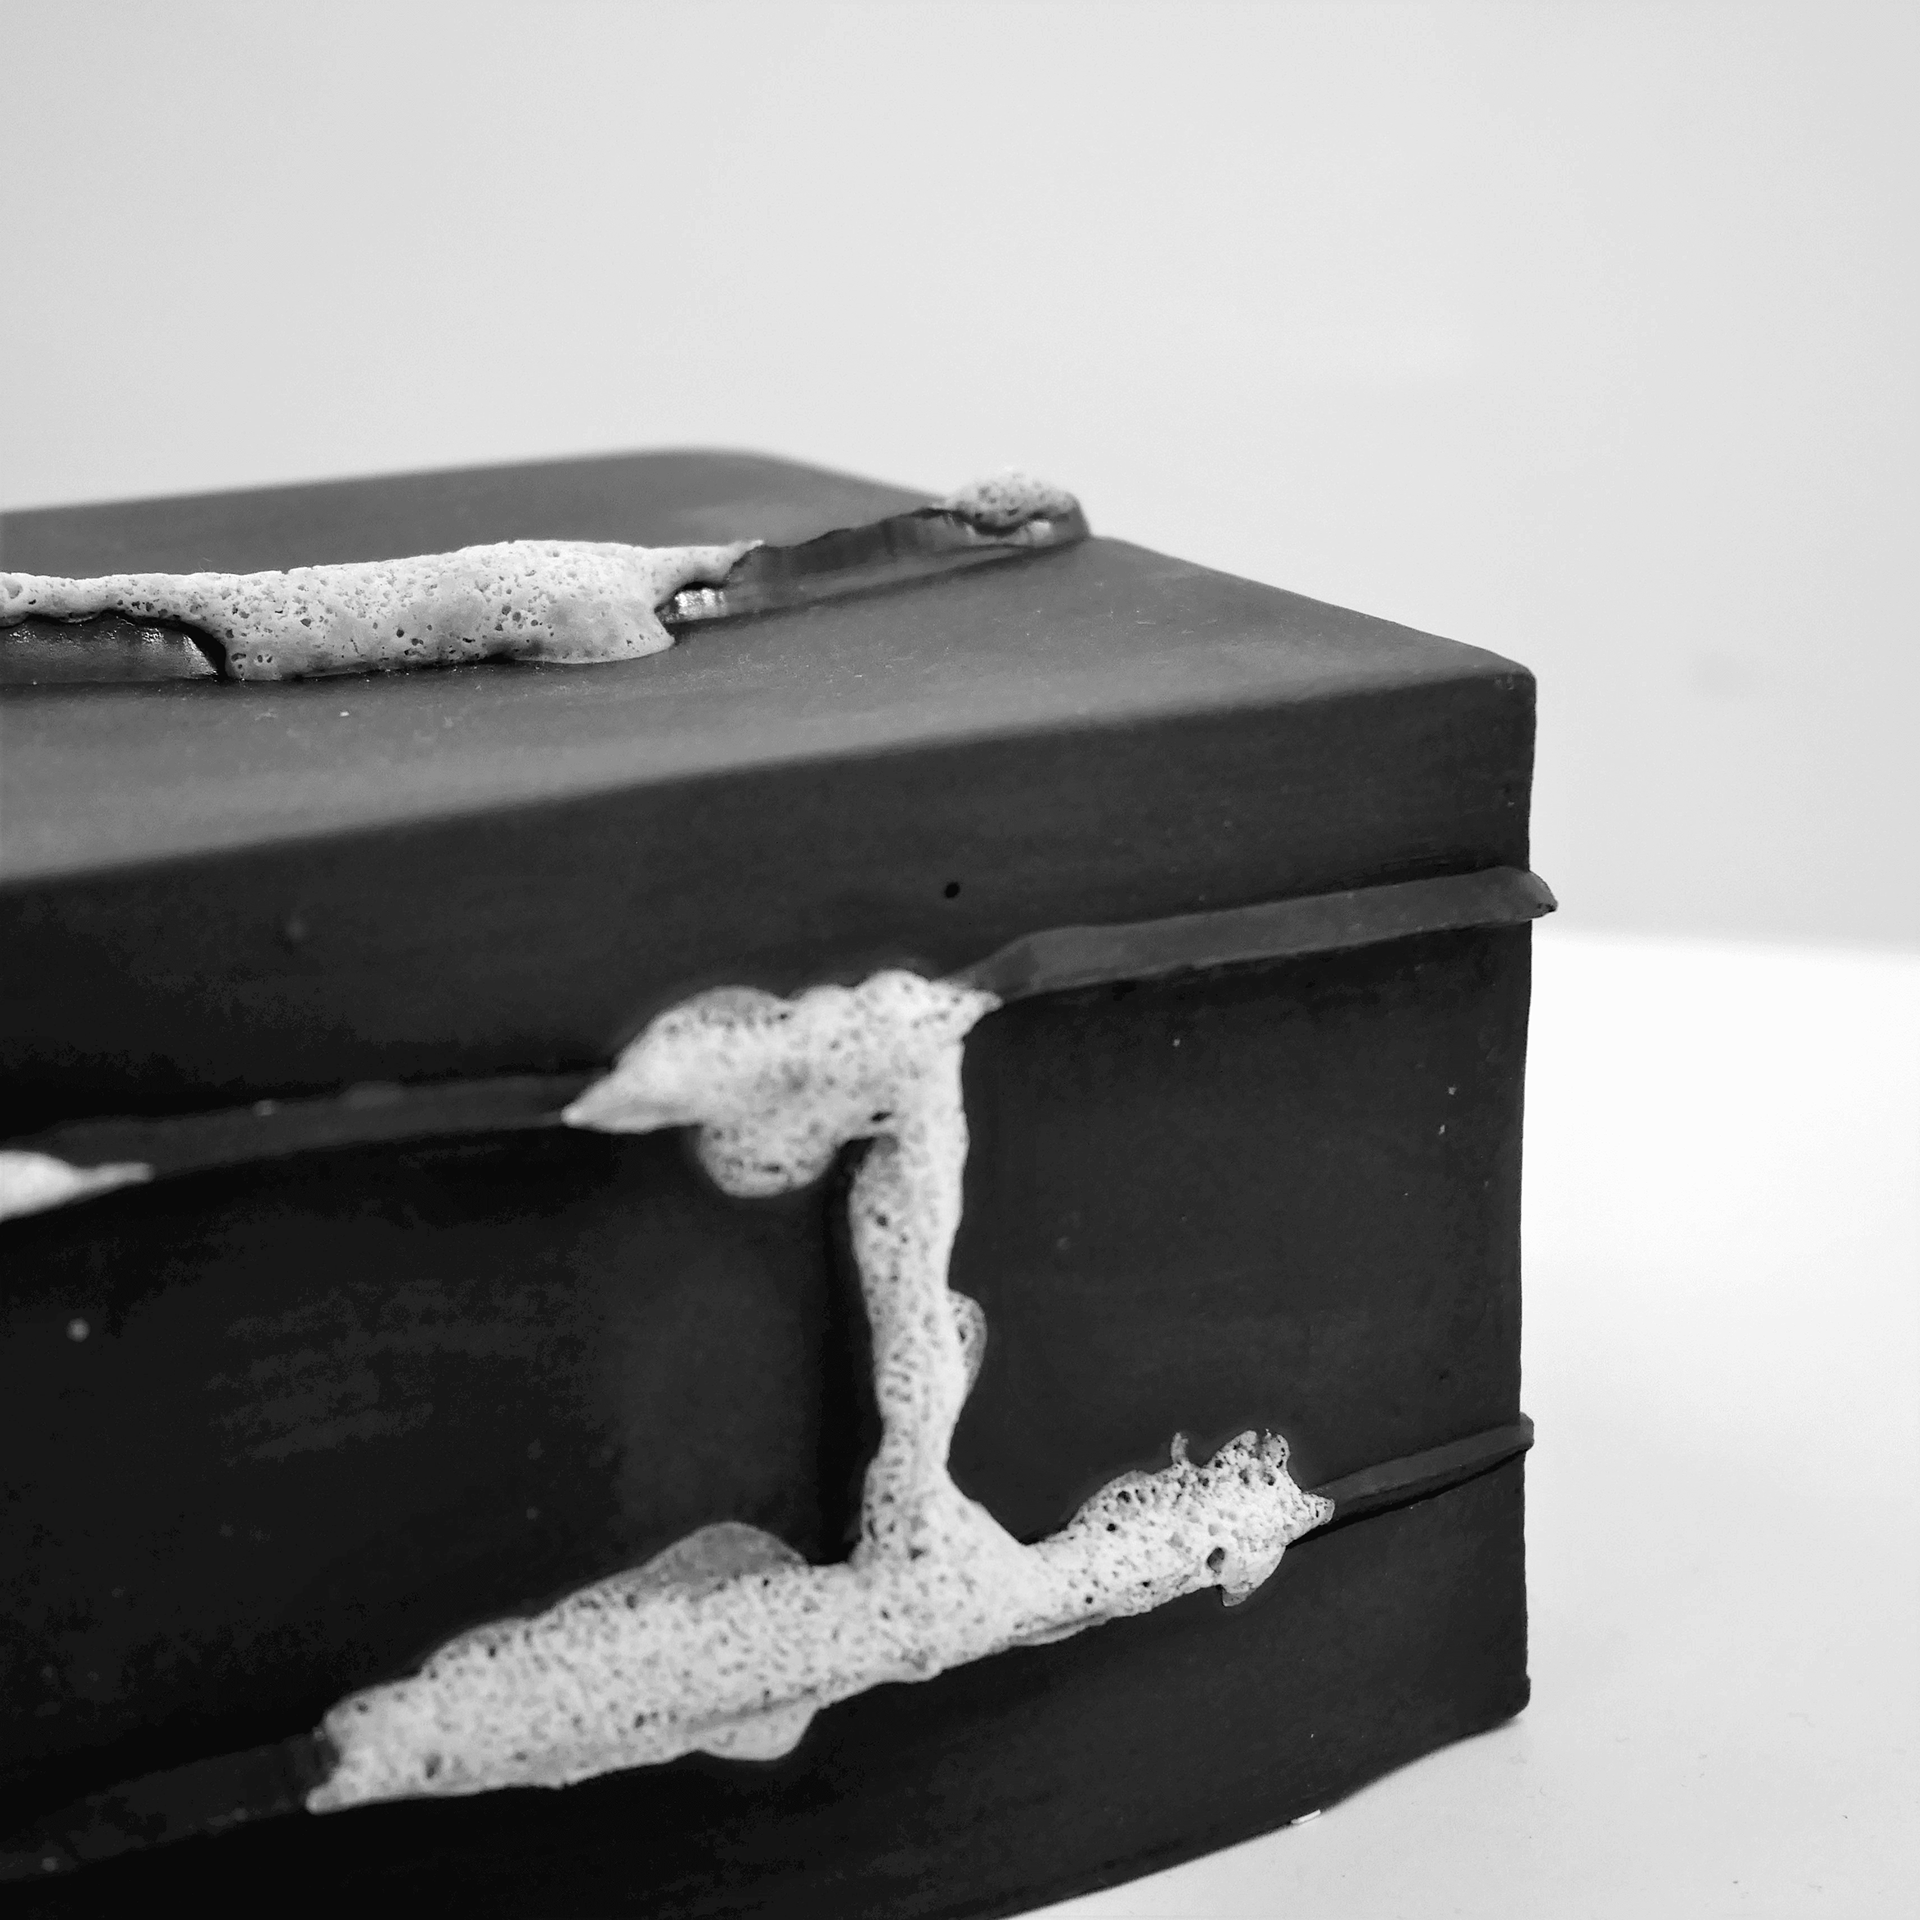
Casting with black slip
I mixed a larger batch of black slip to test the structural integrity of the material. I cast it into previous moulds from the project.
The slip was successful in holding structure and seeping into the seam lines.
I fired the pieces to bisque in order to apply volcanic glaze generously, without diminishing the quality.
I mixed a larger batch of the most successful volcanic glaze and applied it to the protruding features.
The tests were a success in determining the correct colour for representing the ‘man-made.’ However it developed a bumpy texture once fired, and stuck to the kiln shelf, which made me question whether it would be worth purchasing a black slip for regularity.
Mid-project reflection
Texture
After reflecting on my work to date, I felt the texture of the volcanic glaze against the smooth surface of the slip is a successful way of embodying the contrast between the natural and man-made, in addition to incorporating the 'unpredictable' element.
I am going to mix a larger batch of the glaze, and push how far it can be extended from a form.
Colour
A contrast in colour is definitely required, and upon reflection I feel that colouring the slip as opposed to the glaze is the most successful option. After colouring the glaze green, it altered the texture and appearance of the rest of the vessel.
Leaving the volcanic glaze white creates a more pure/natural colour which contrasts against the man-made black of the form.
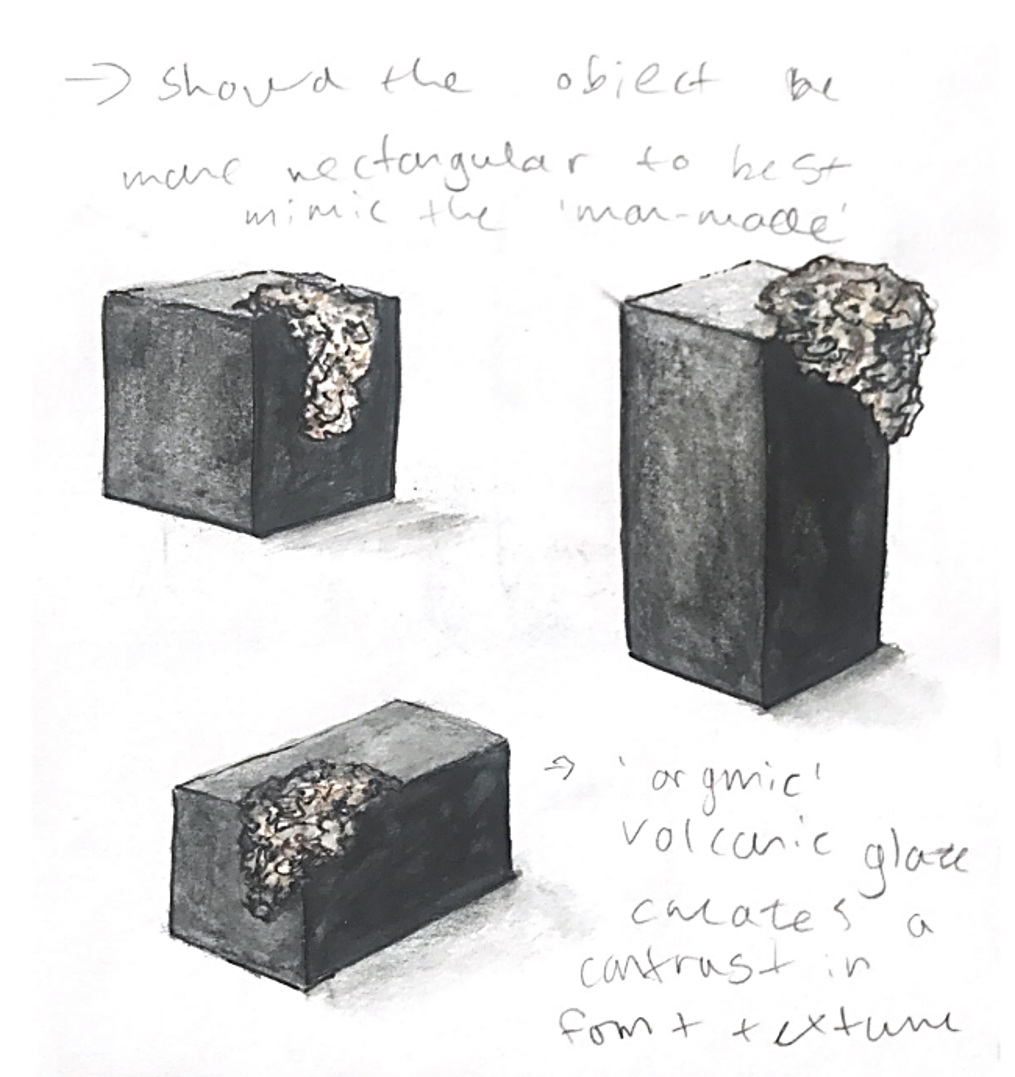
Form
To date, all my pieces have been rounded forms turned on the lathe. However, whilst reviewing this I was faced with the realisation that most man-made structures are straight lines and cuboid shaped.
I felt the rounded form of the vessels did not best represent the man-made structures I intend them to portray.
In addition to this, none of my pieces have been functional, nor do they need to be. I may not necessarily need to continue creating vessels, and could instead create more angular, less functional and more sculptural objects.
Scale
Previously I had been aiming towards working on a larger scale. However upon reflection, I have realised it may not be the more effective way to develop the project.
Not only would mixing up large batches of black slip be unnecessary, but also difficult for me to handle.
Furthermore, the feedback I have received from peers, was that the pieces are intriguing to handle, therefore I would like to keep that tactile element.
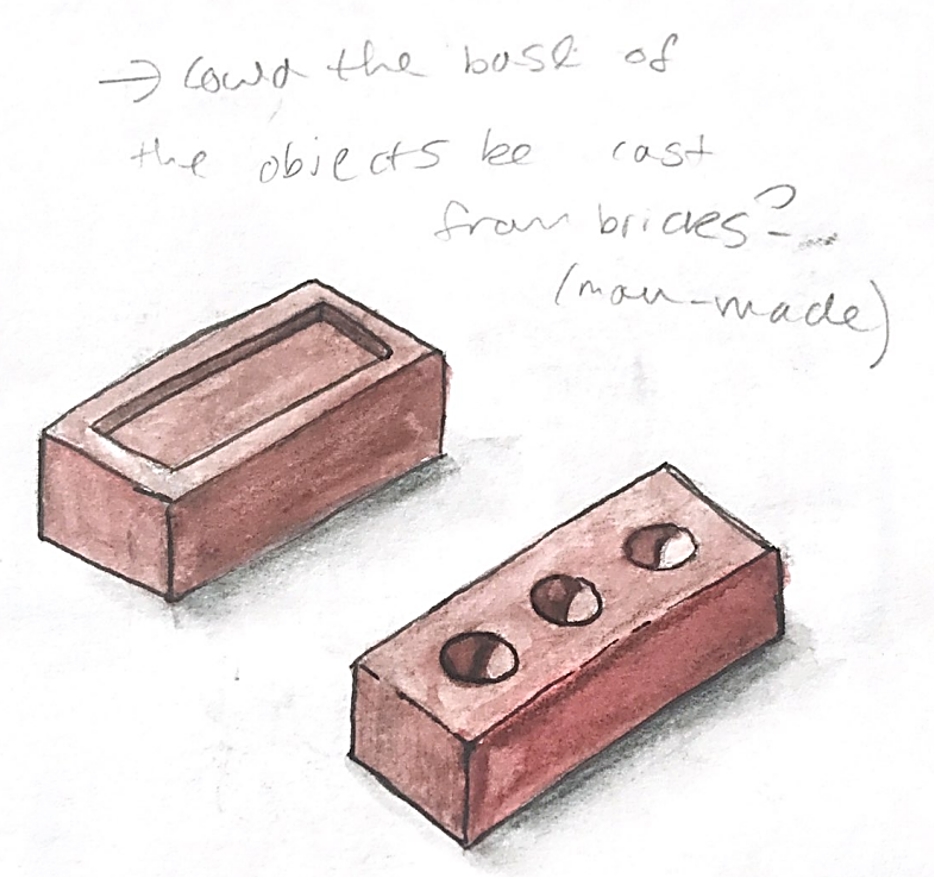
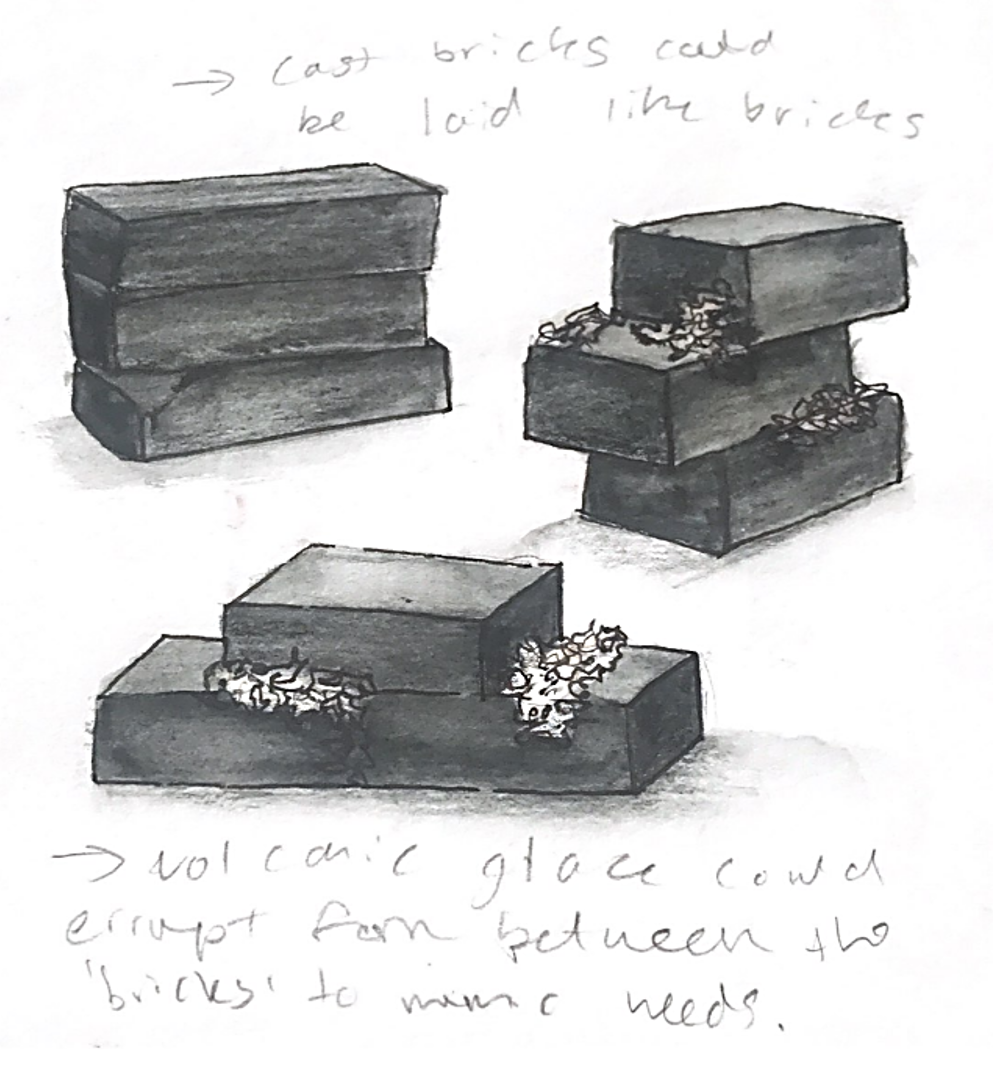
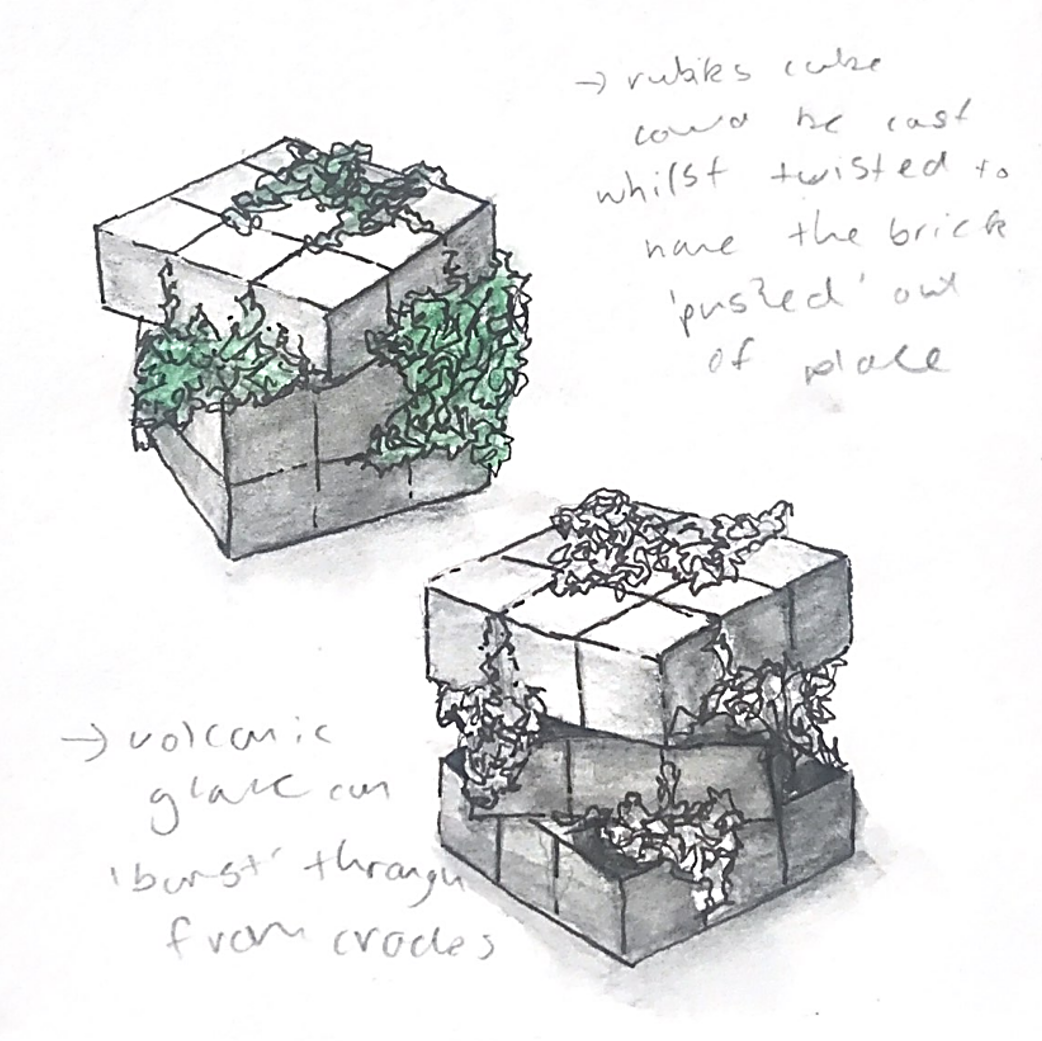
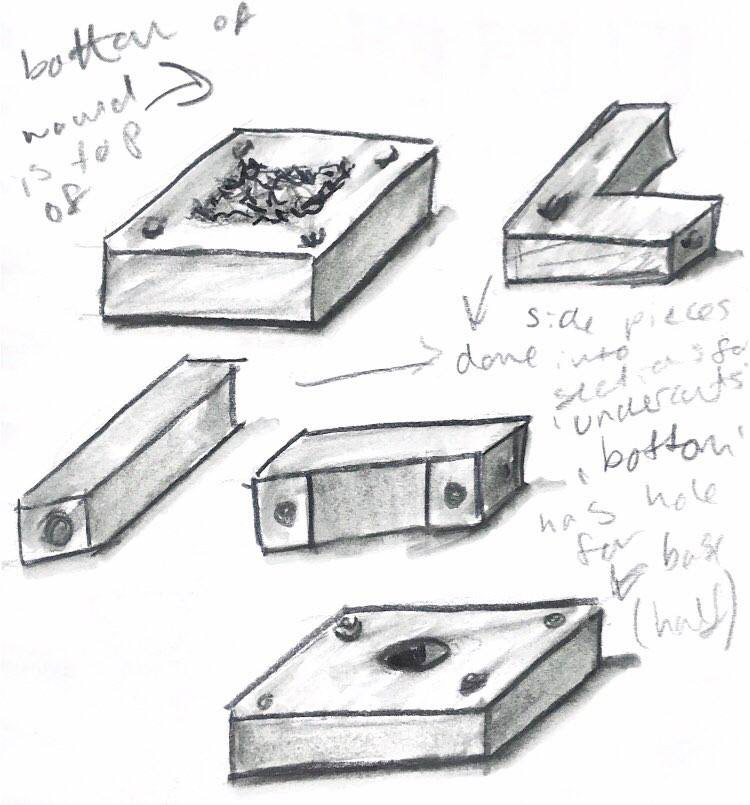
Form Development
I cast a cube into 6 over-locking pieces to create a brick formation with the seam-lines. This form was starting to appear more man-made. However I found that a cube was not a regular shape found within a city.
I realised I had to work directly with the environment of Manchester to capture shapes, textures and forms to use.

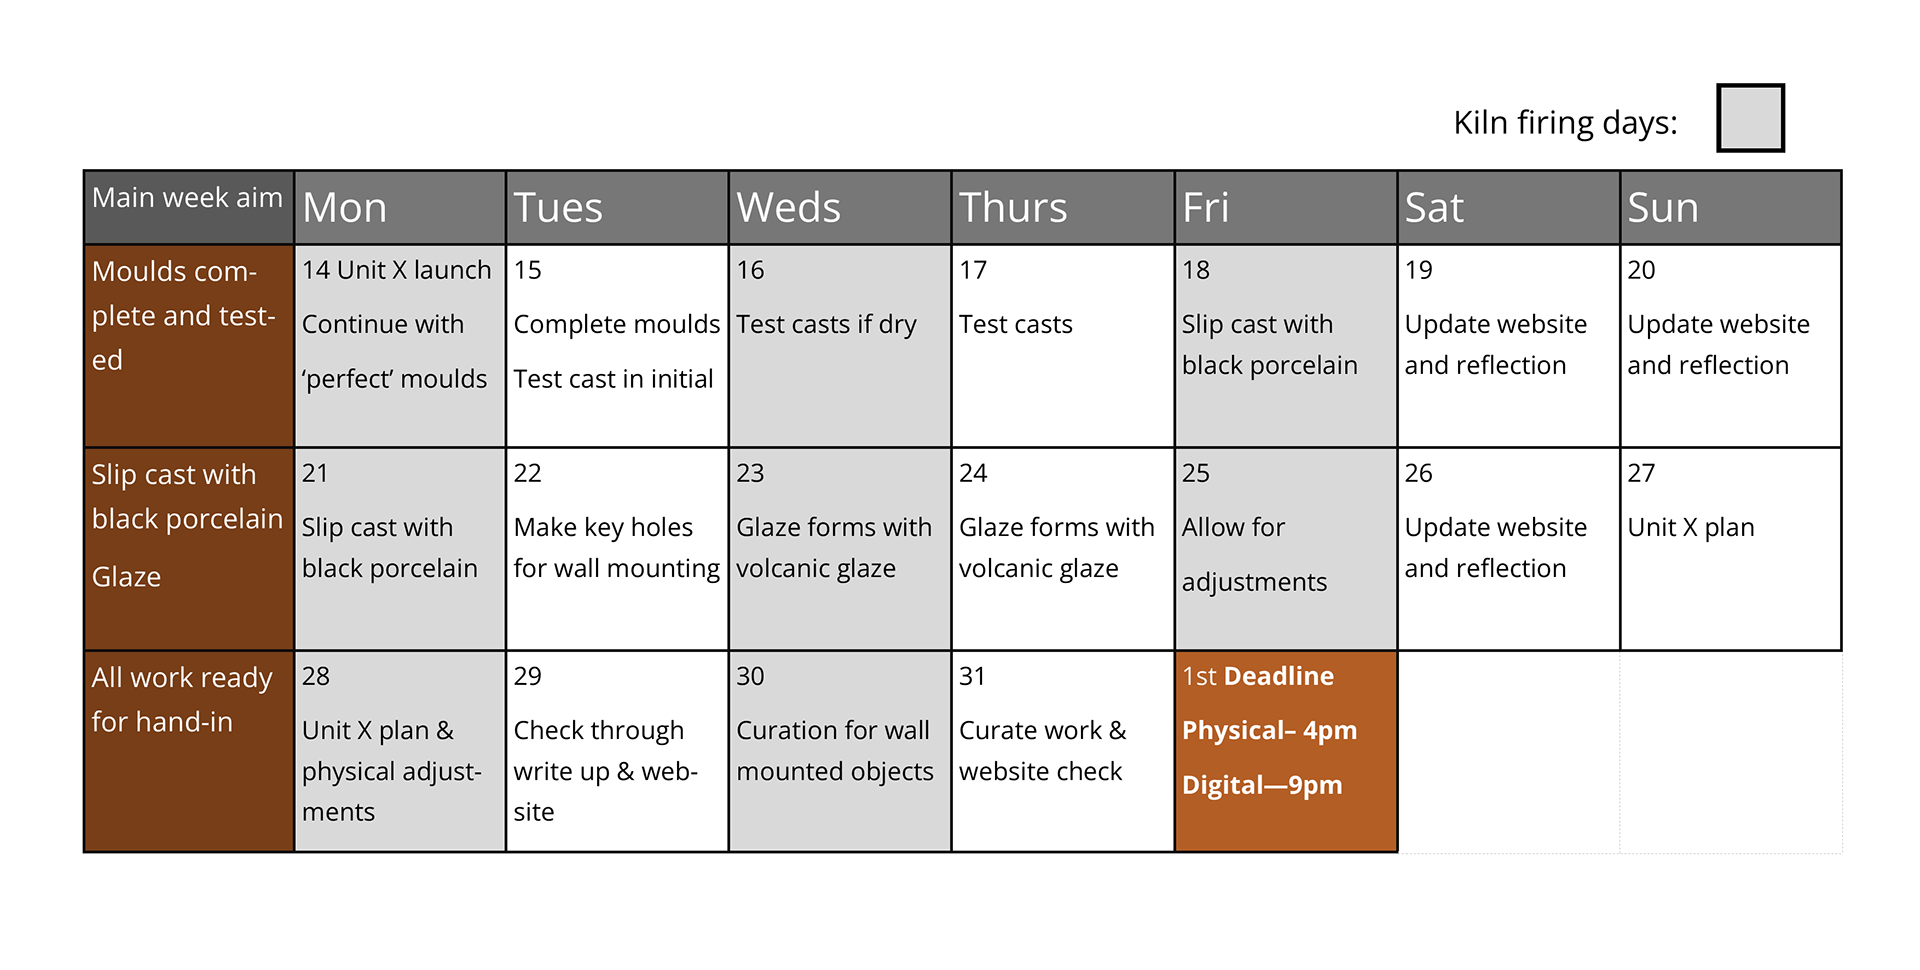
Time plan
To efficiently prepare for the remainder of the project, I created a time plan. This allowed me to take kiln firing times into consideration in addition to visualising and coordinating the work to be complete in time.
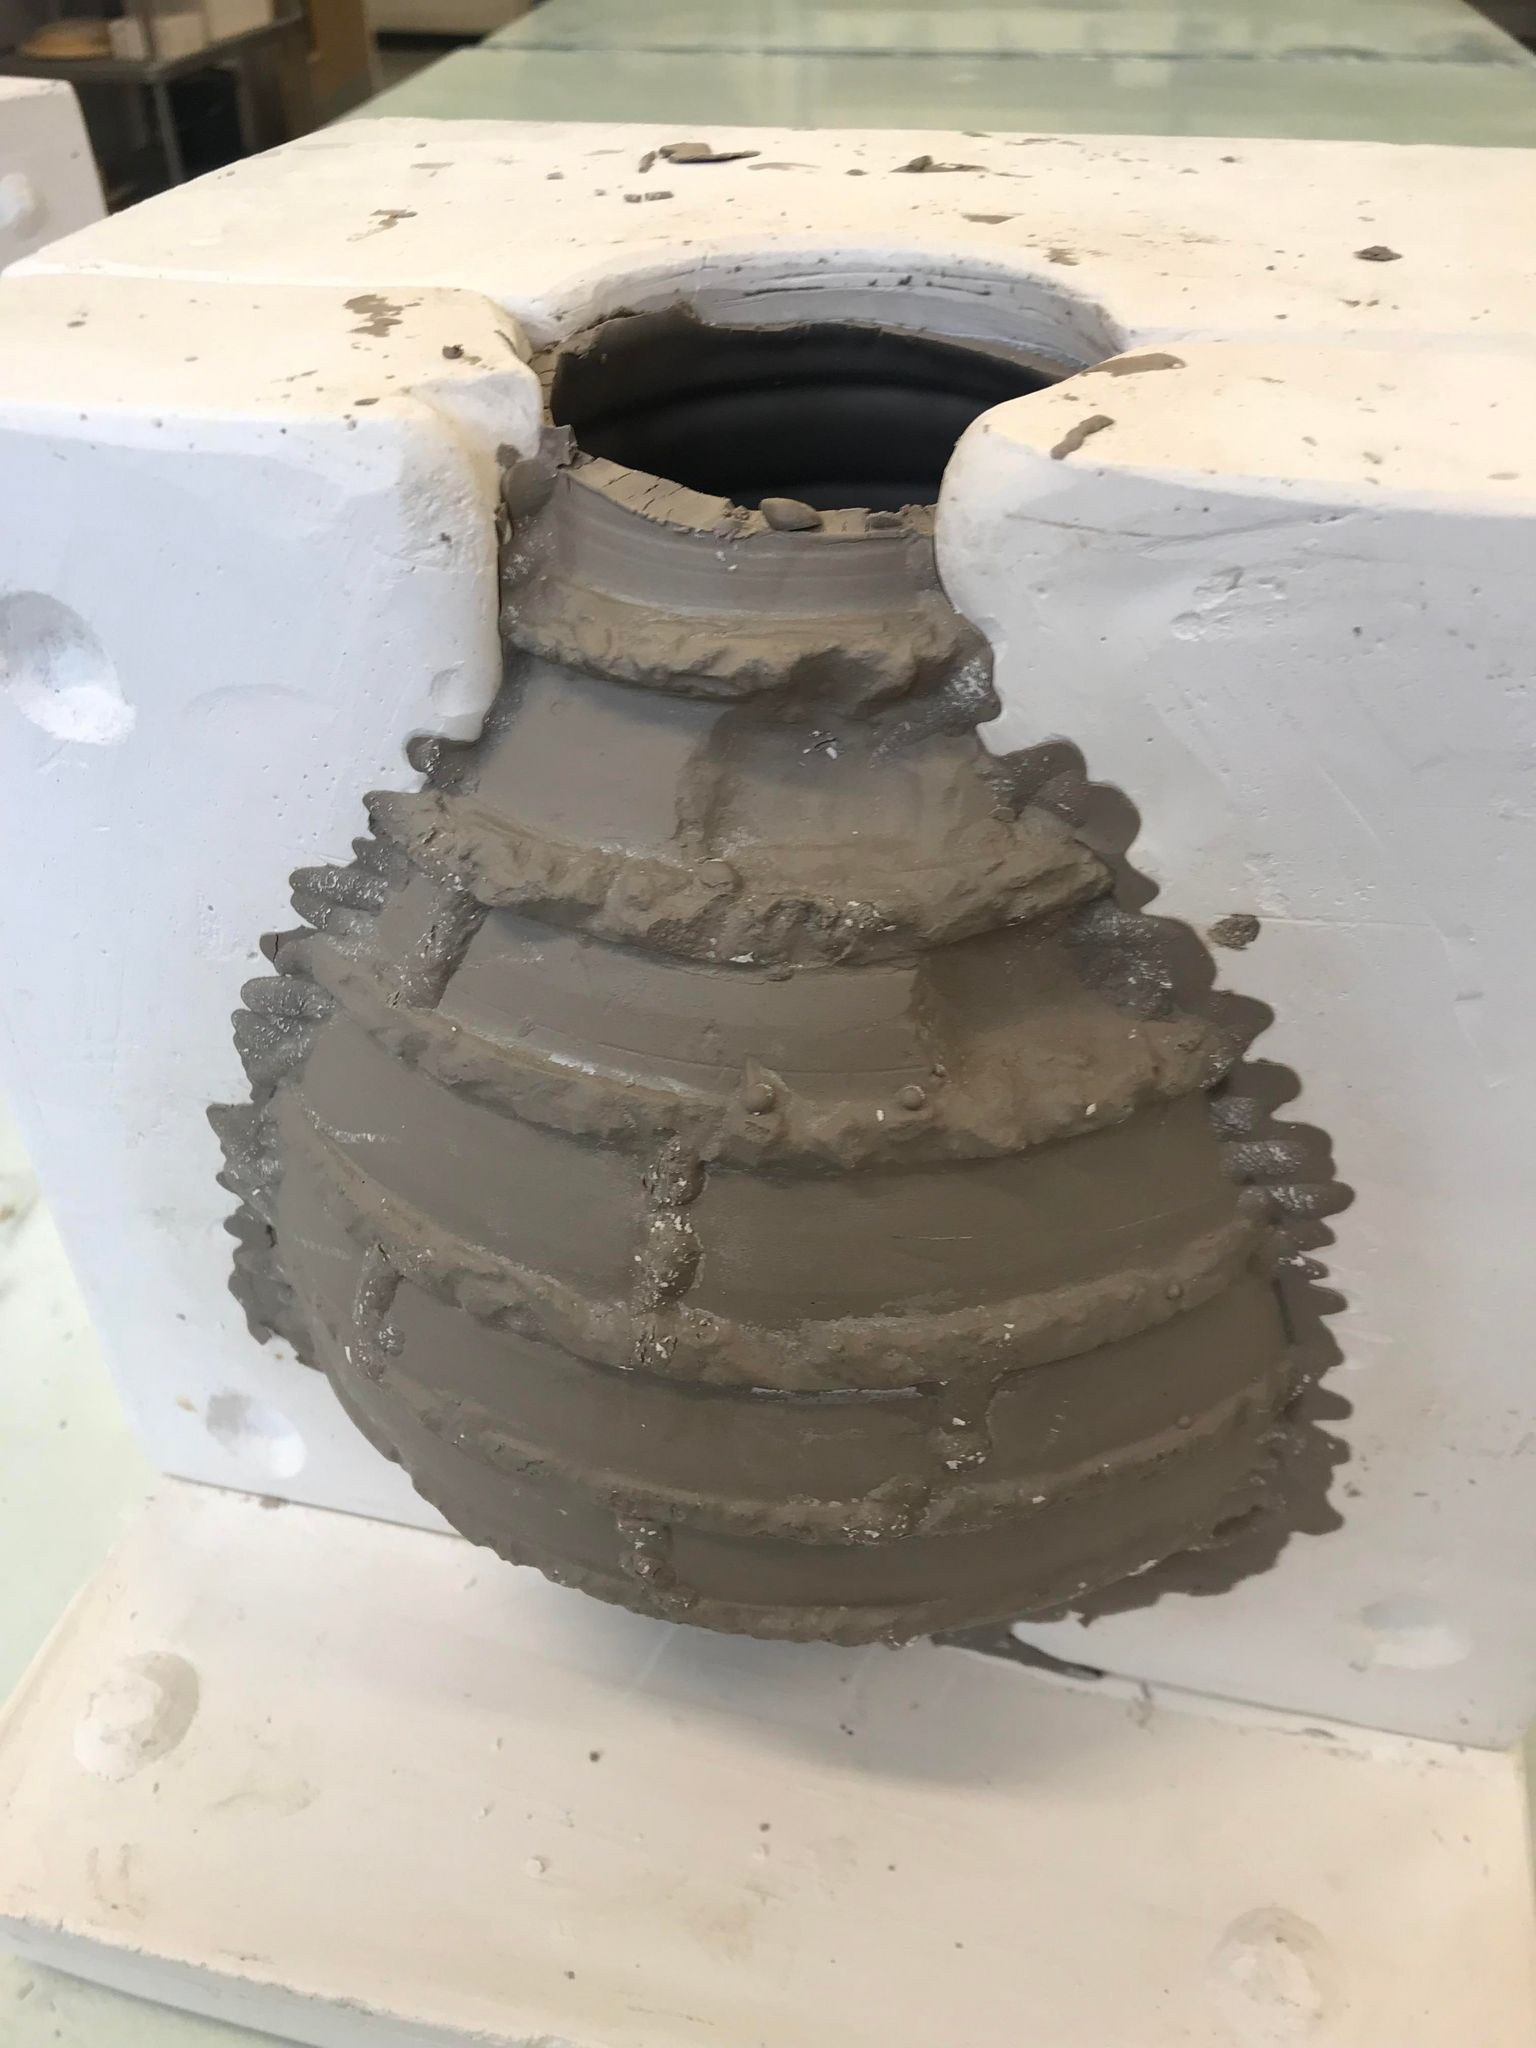
Casting with black porcelain
Following my attempt at mixing a black slip using oxides; despite the colour being correct, the texture remained lumpy and stuck to the kiln shelf.
I bought a black porcelain to compare the texture and overall appearance. The porcelain dried a lot quick quicker and thicker in the plaster mould, so I had to adapt the timings I was familiar with.
Furthermore, I found the porcelain to have a high shrinkage rate, which I will have to take into consideration with my future pieces.
Casting outside and Form Development
After casting the cube, it was obvious that a cuboid angular structure was more successful in portraying the man-made element of the project. However, I felt a cube was not quite related strong enough to the environment of Manchester in which I have been taking inspiration.
After observing the work of Katie Spragg, Nicole Seisler and Phoebe Cummings, I felt it would be beneficial to work directly with the environment.
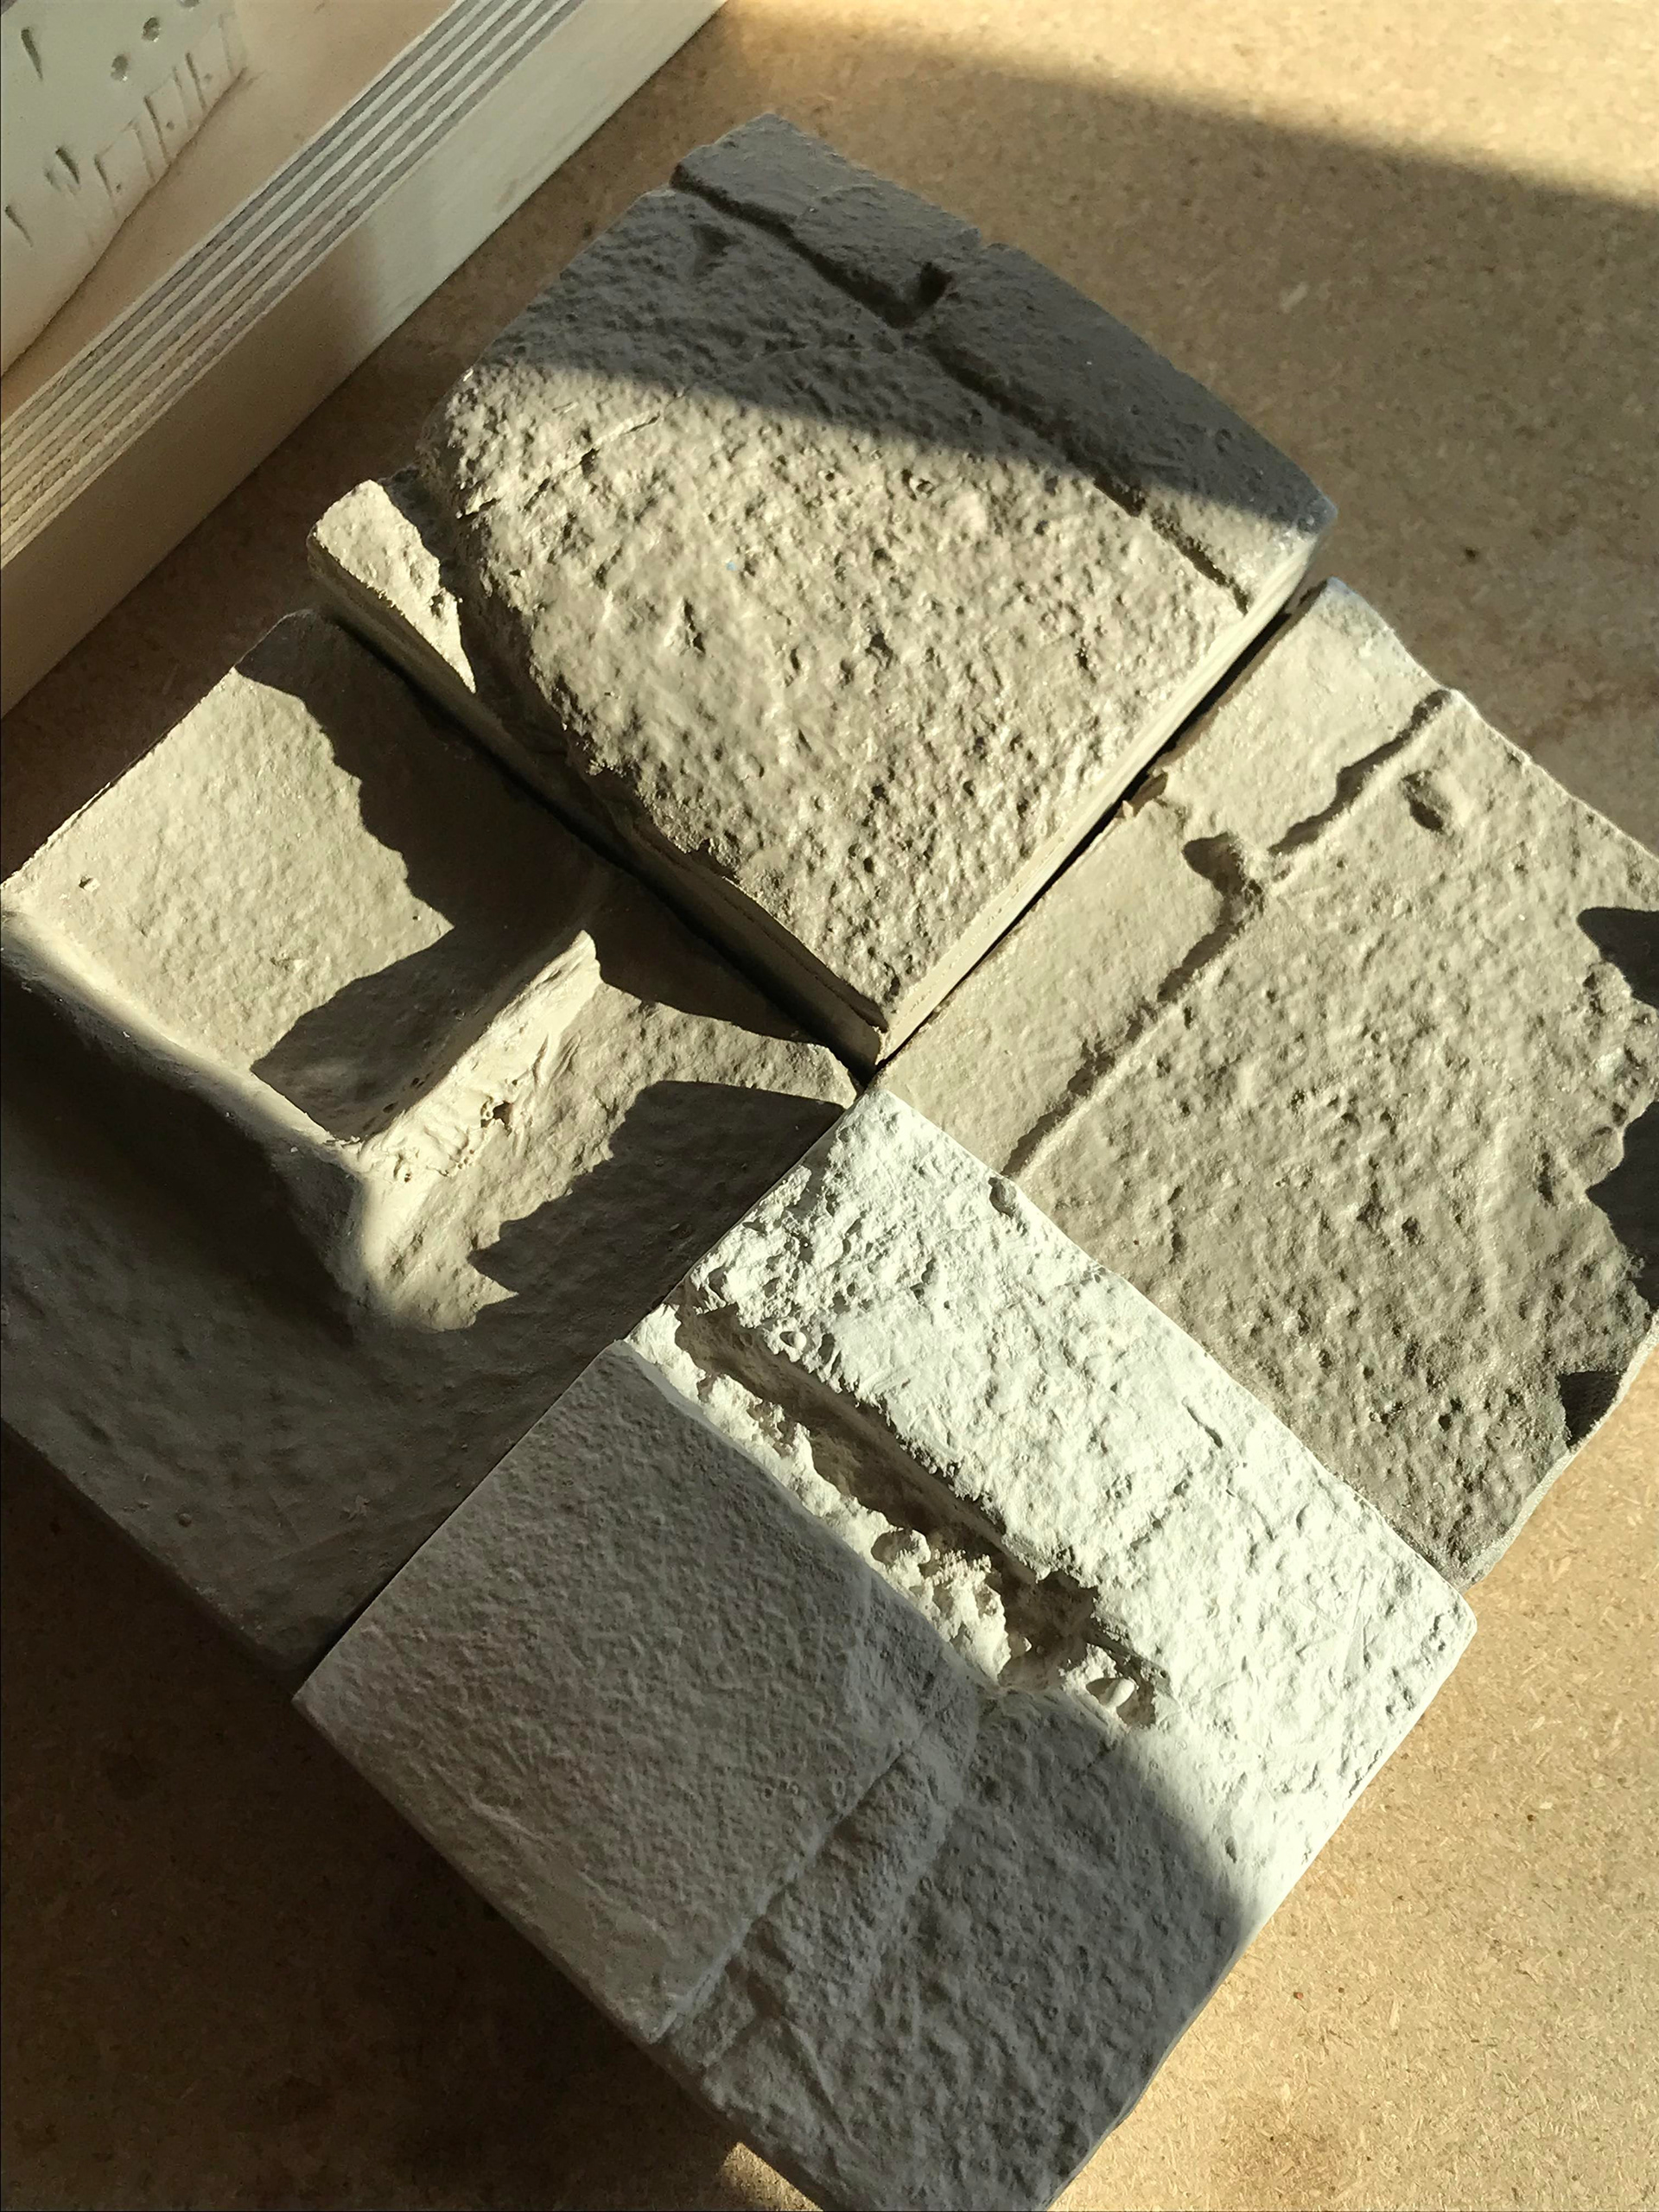
My first experiment consisted of pressing clay into man-made surfaces to capture shapes, patterns and textures.


The clay created marks, shapes and textures I would not be able to replicate just from viewing the area.


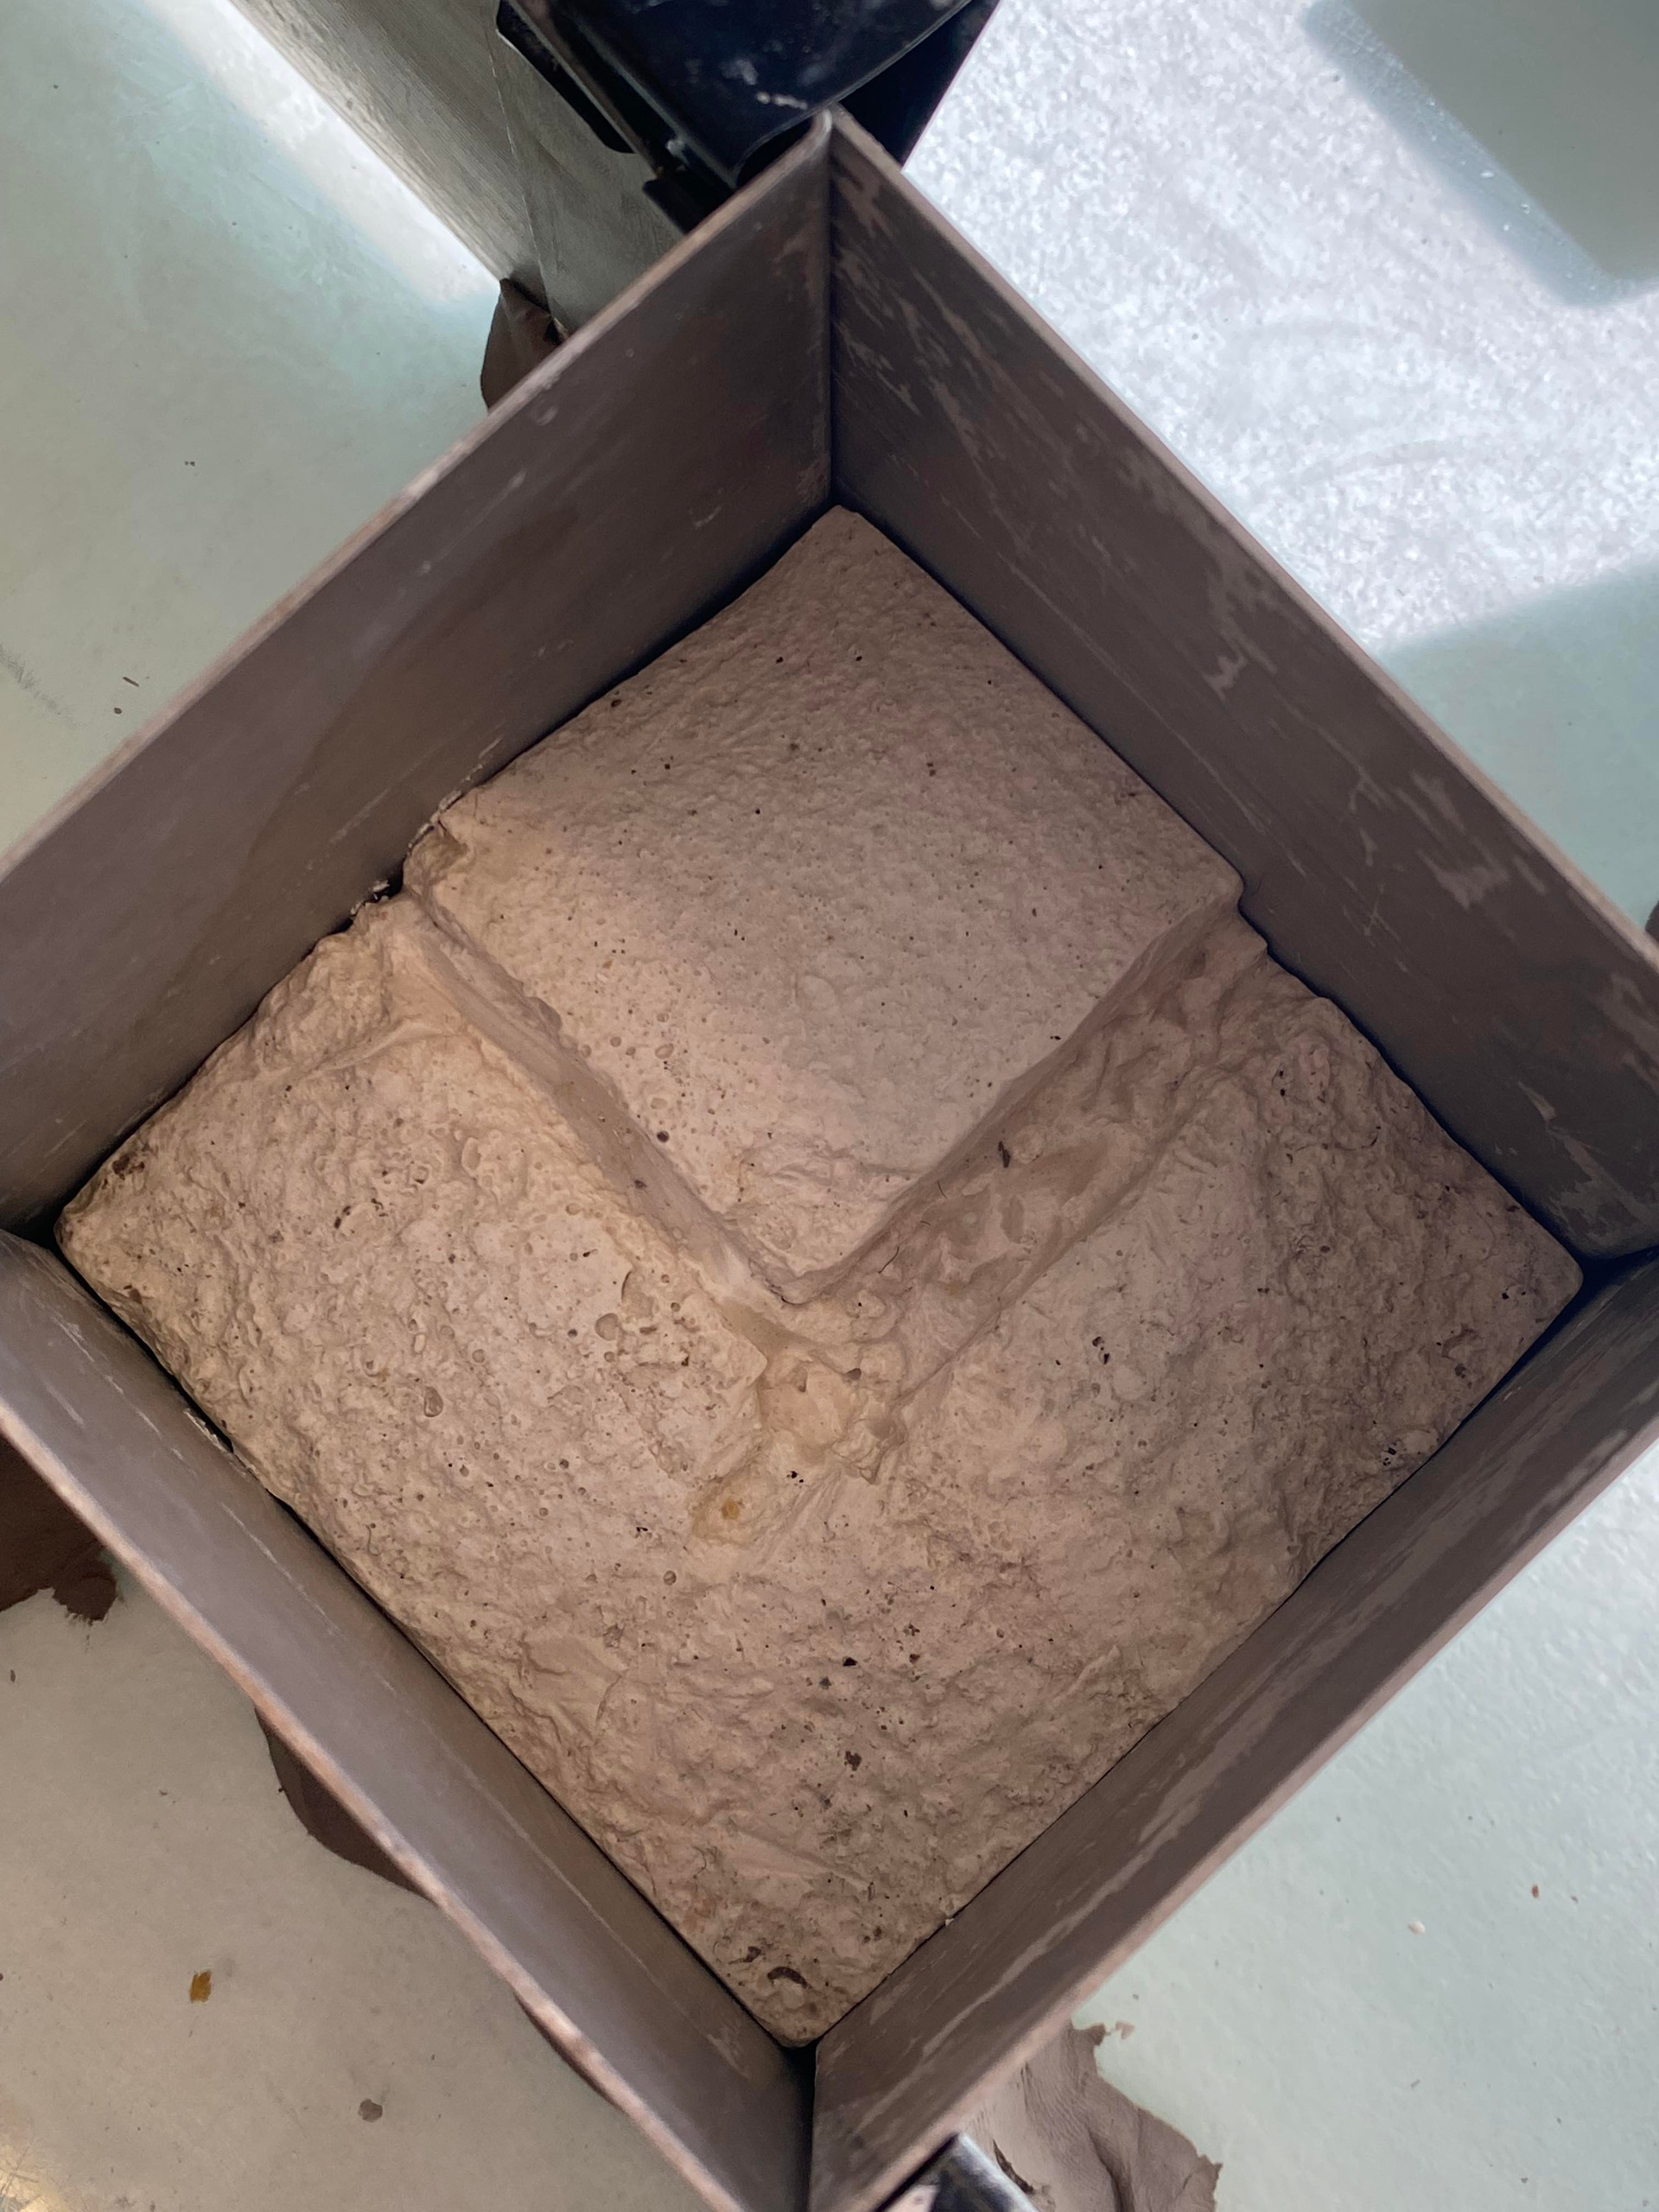
Casting areas using Vinamold
I found the most successful material to cast with was Vinamold as it could be melted and re-used. The Vinamold is also able to hold its shape without deteriorating.


I found it very intriguing viewing the casts, as they showed the imprint in reverse; presenting the empty space between the bricks which usually goes ignored.
Although I cottled around the edge of my mould, the liquid still managed to seep out beneath the cracks which created some obscure forms. This reminded me of erratic seam lines within some of my slip-casts.


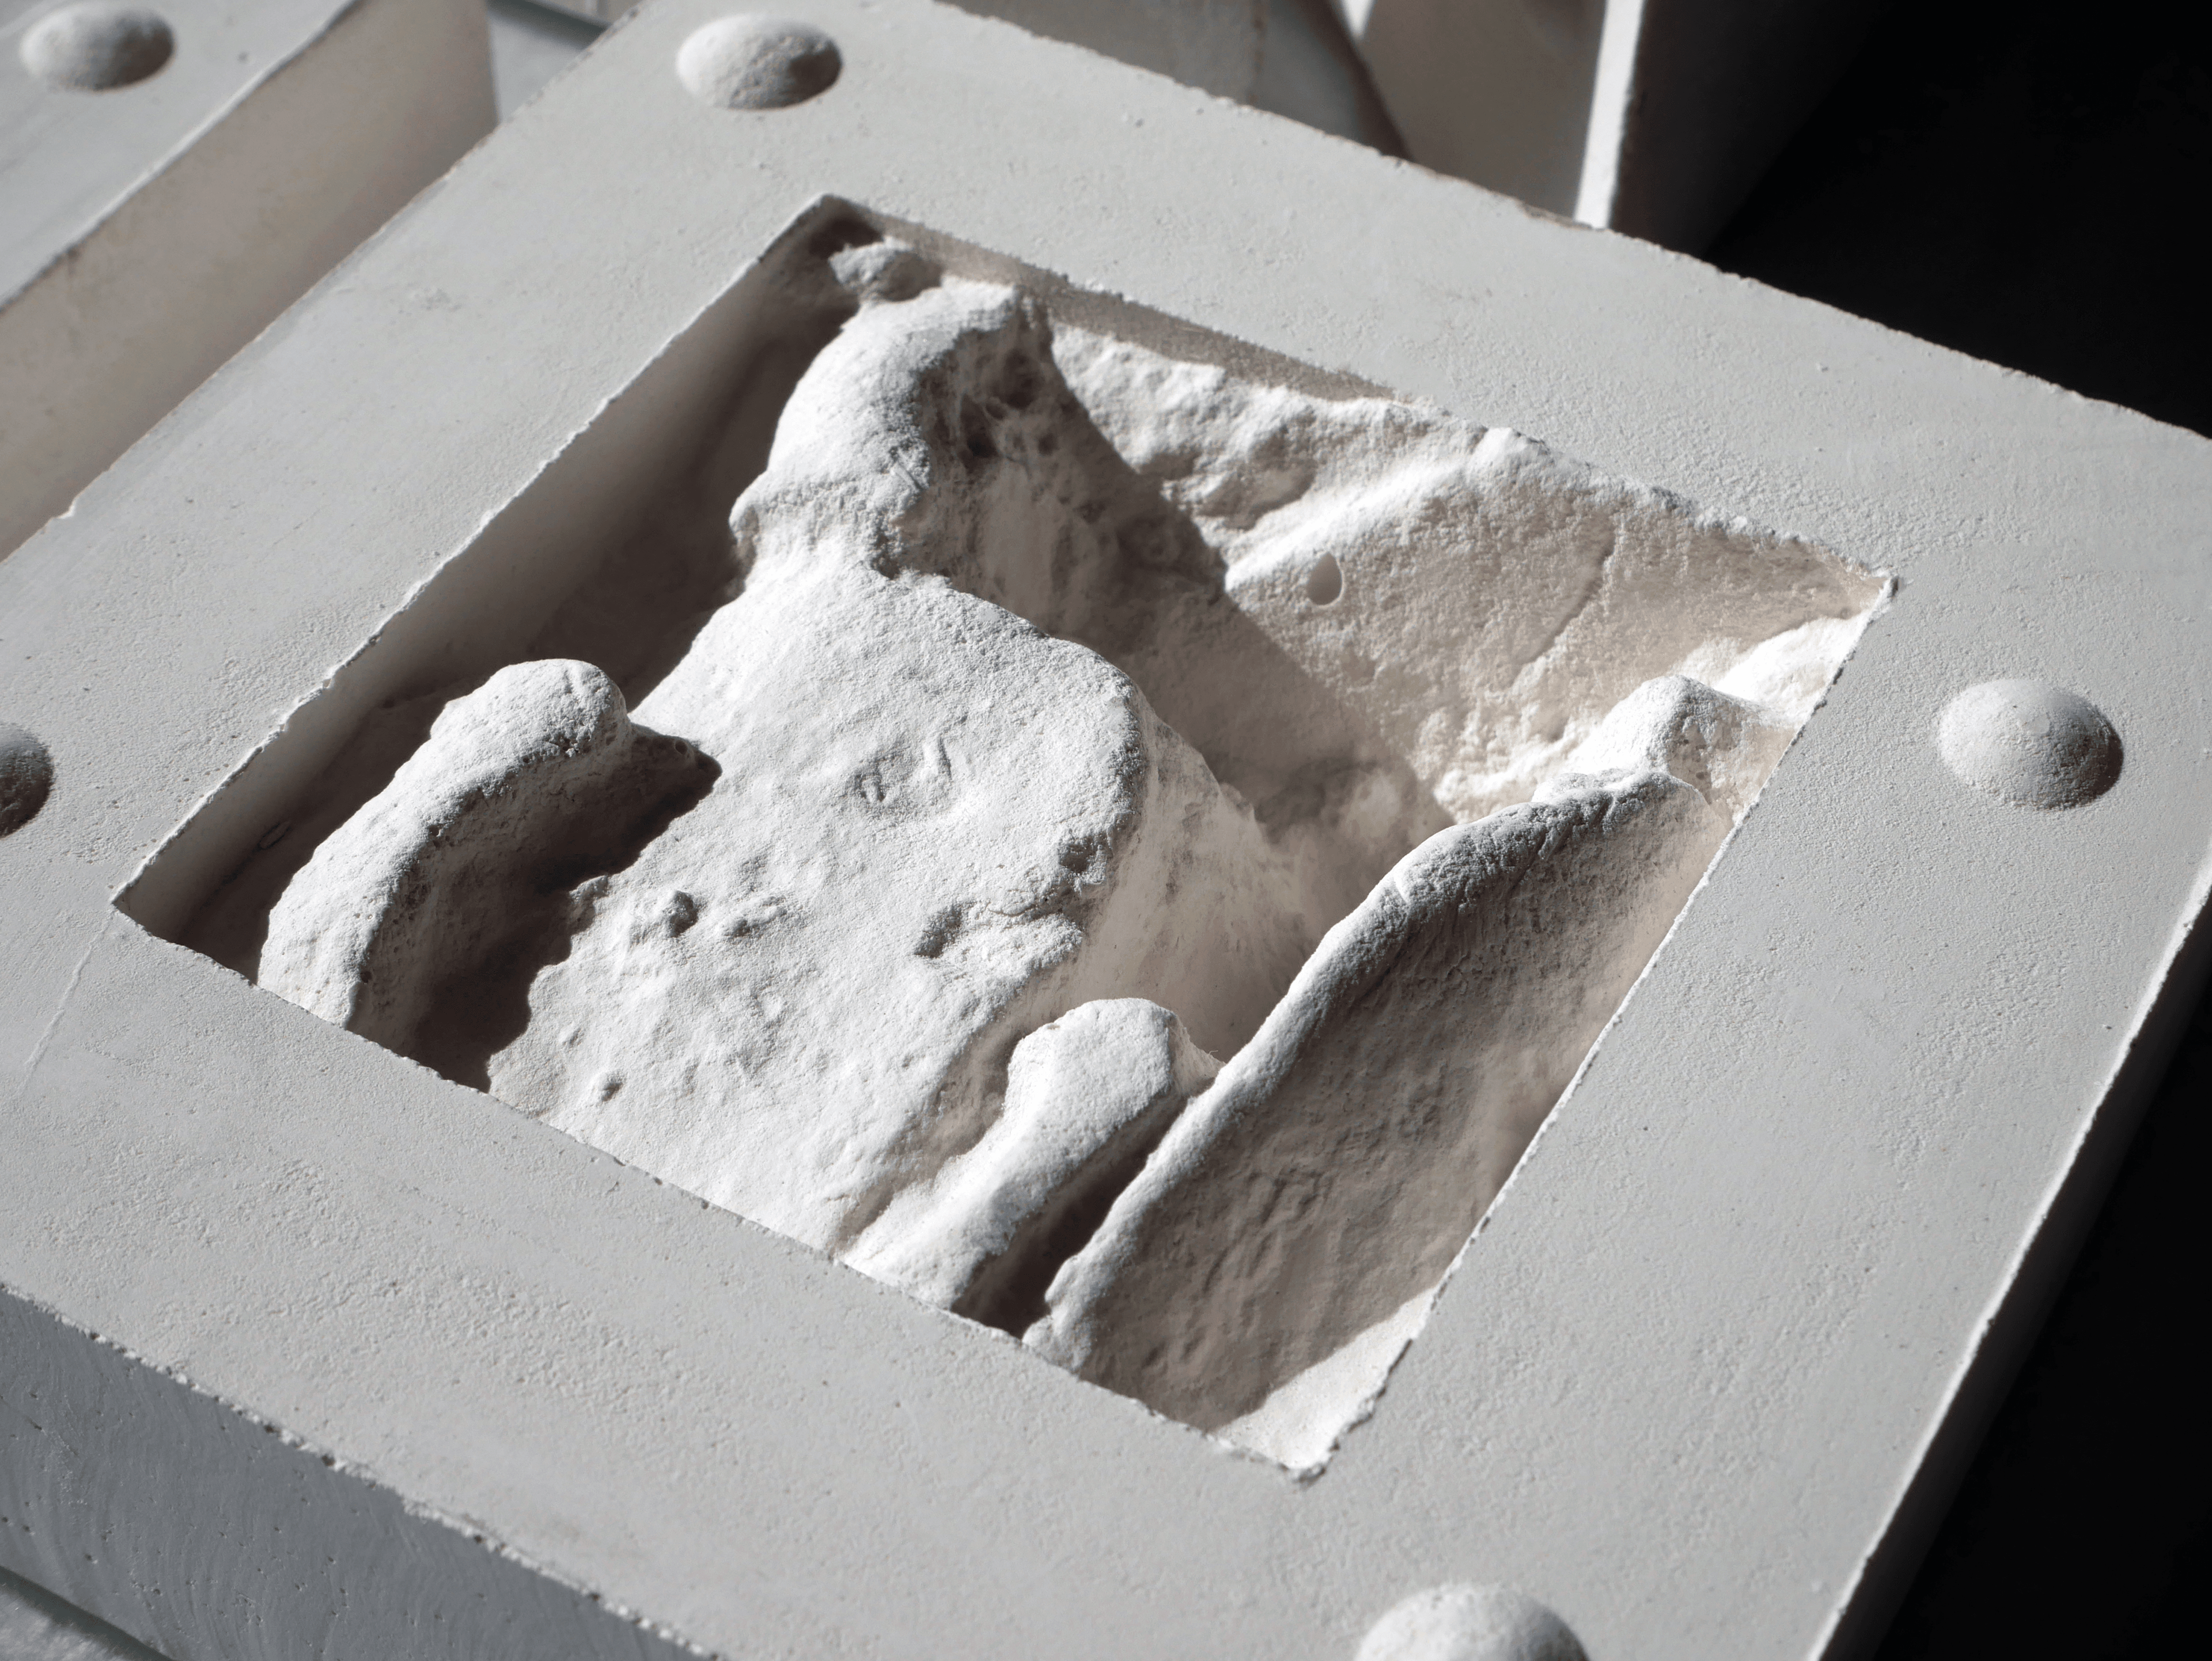
Casting plaster objects from the Vinamold casts
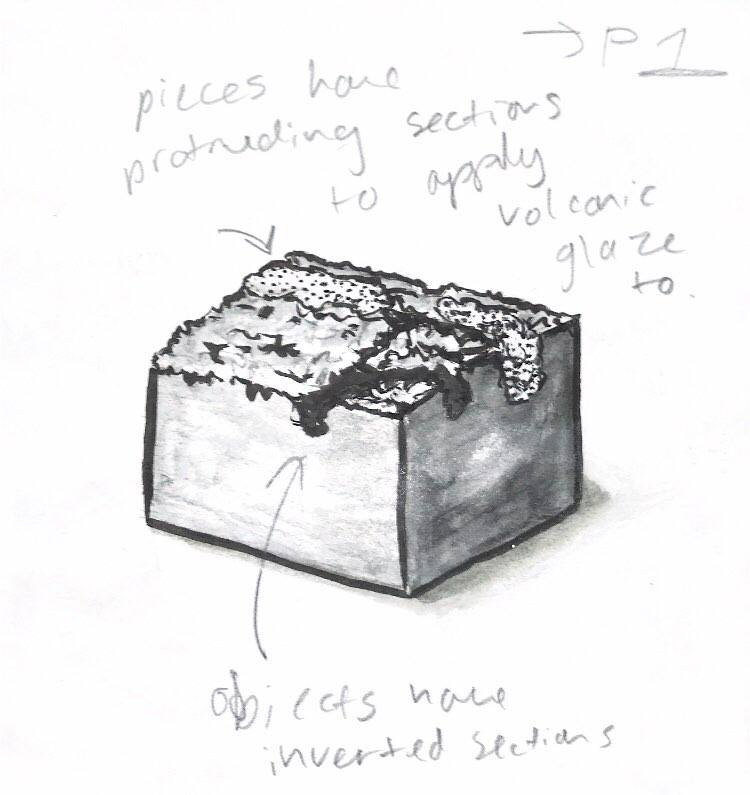
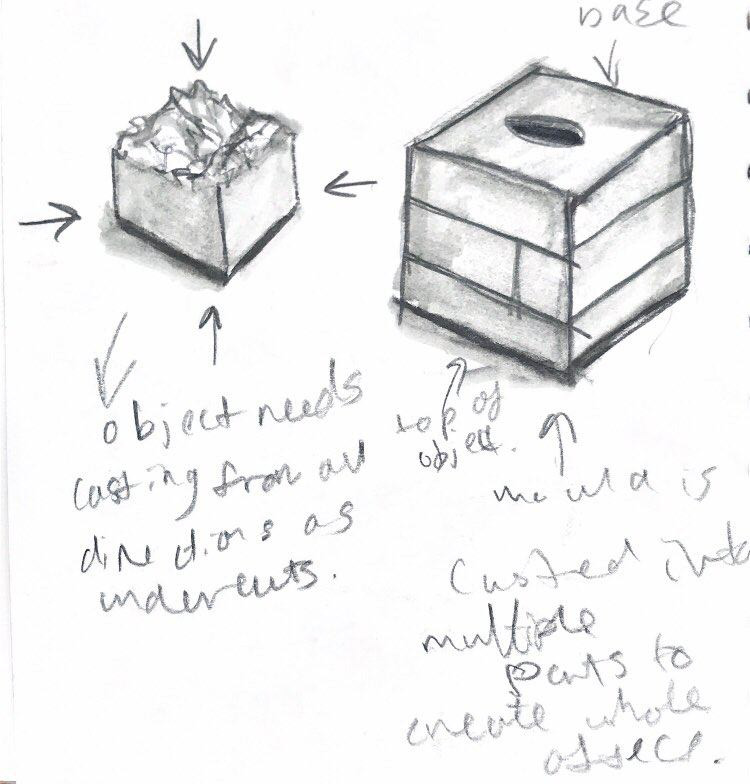
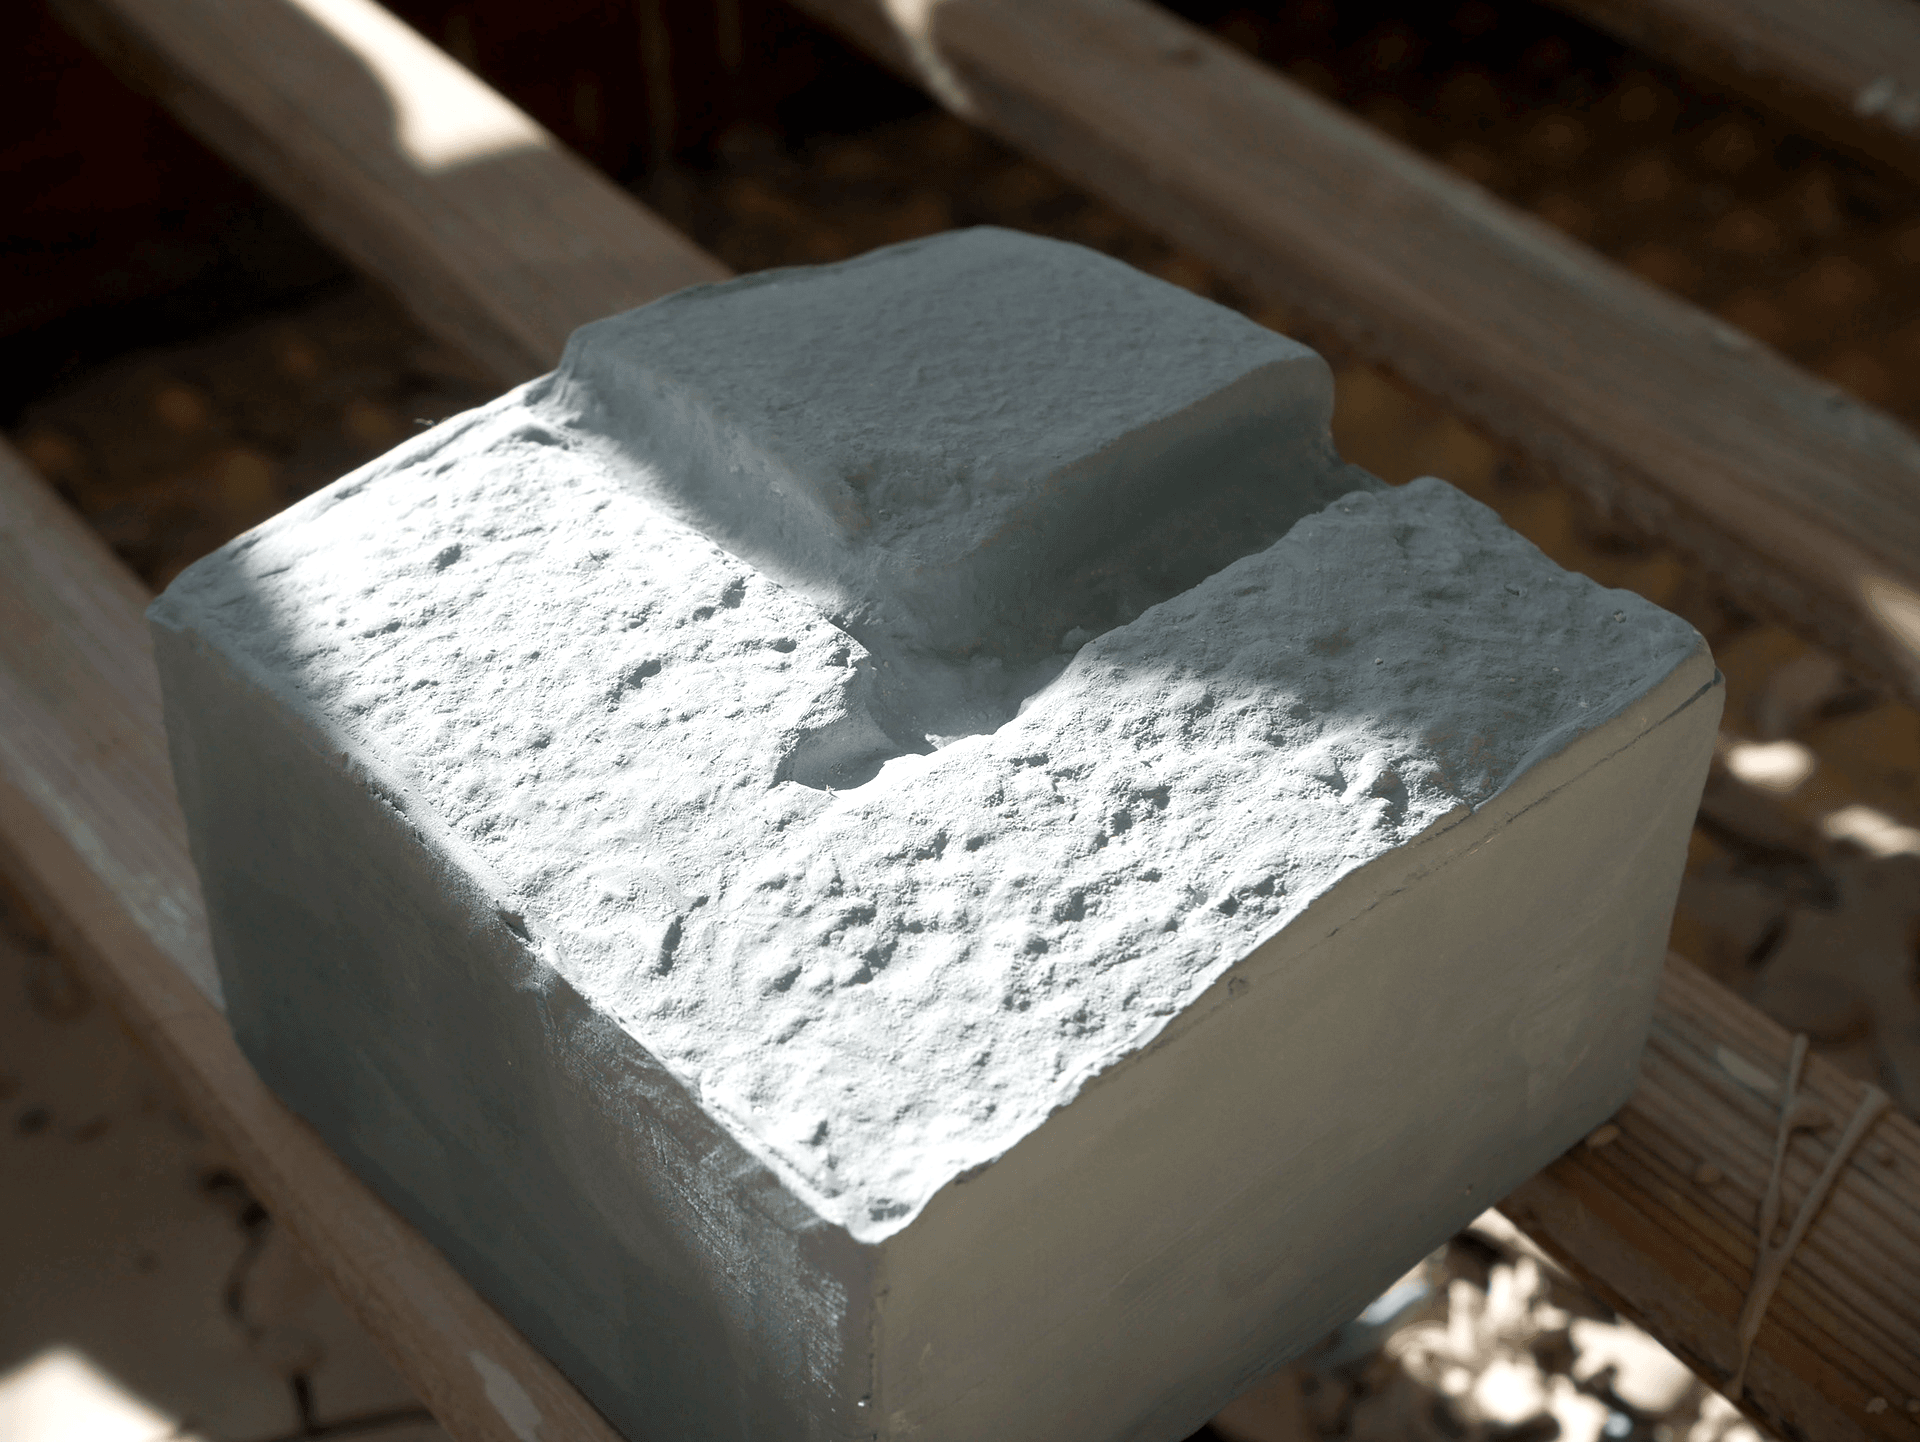
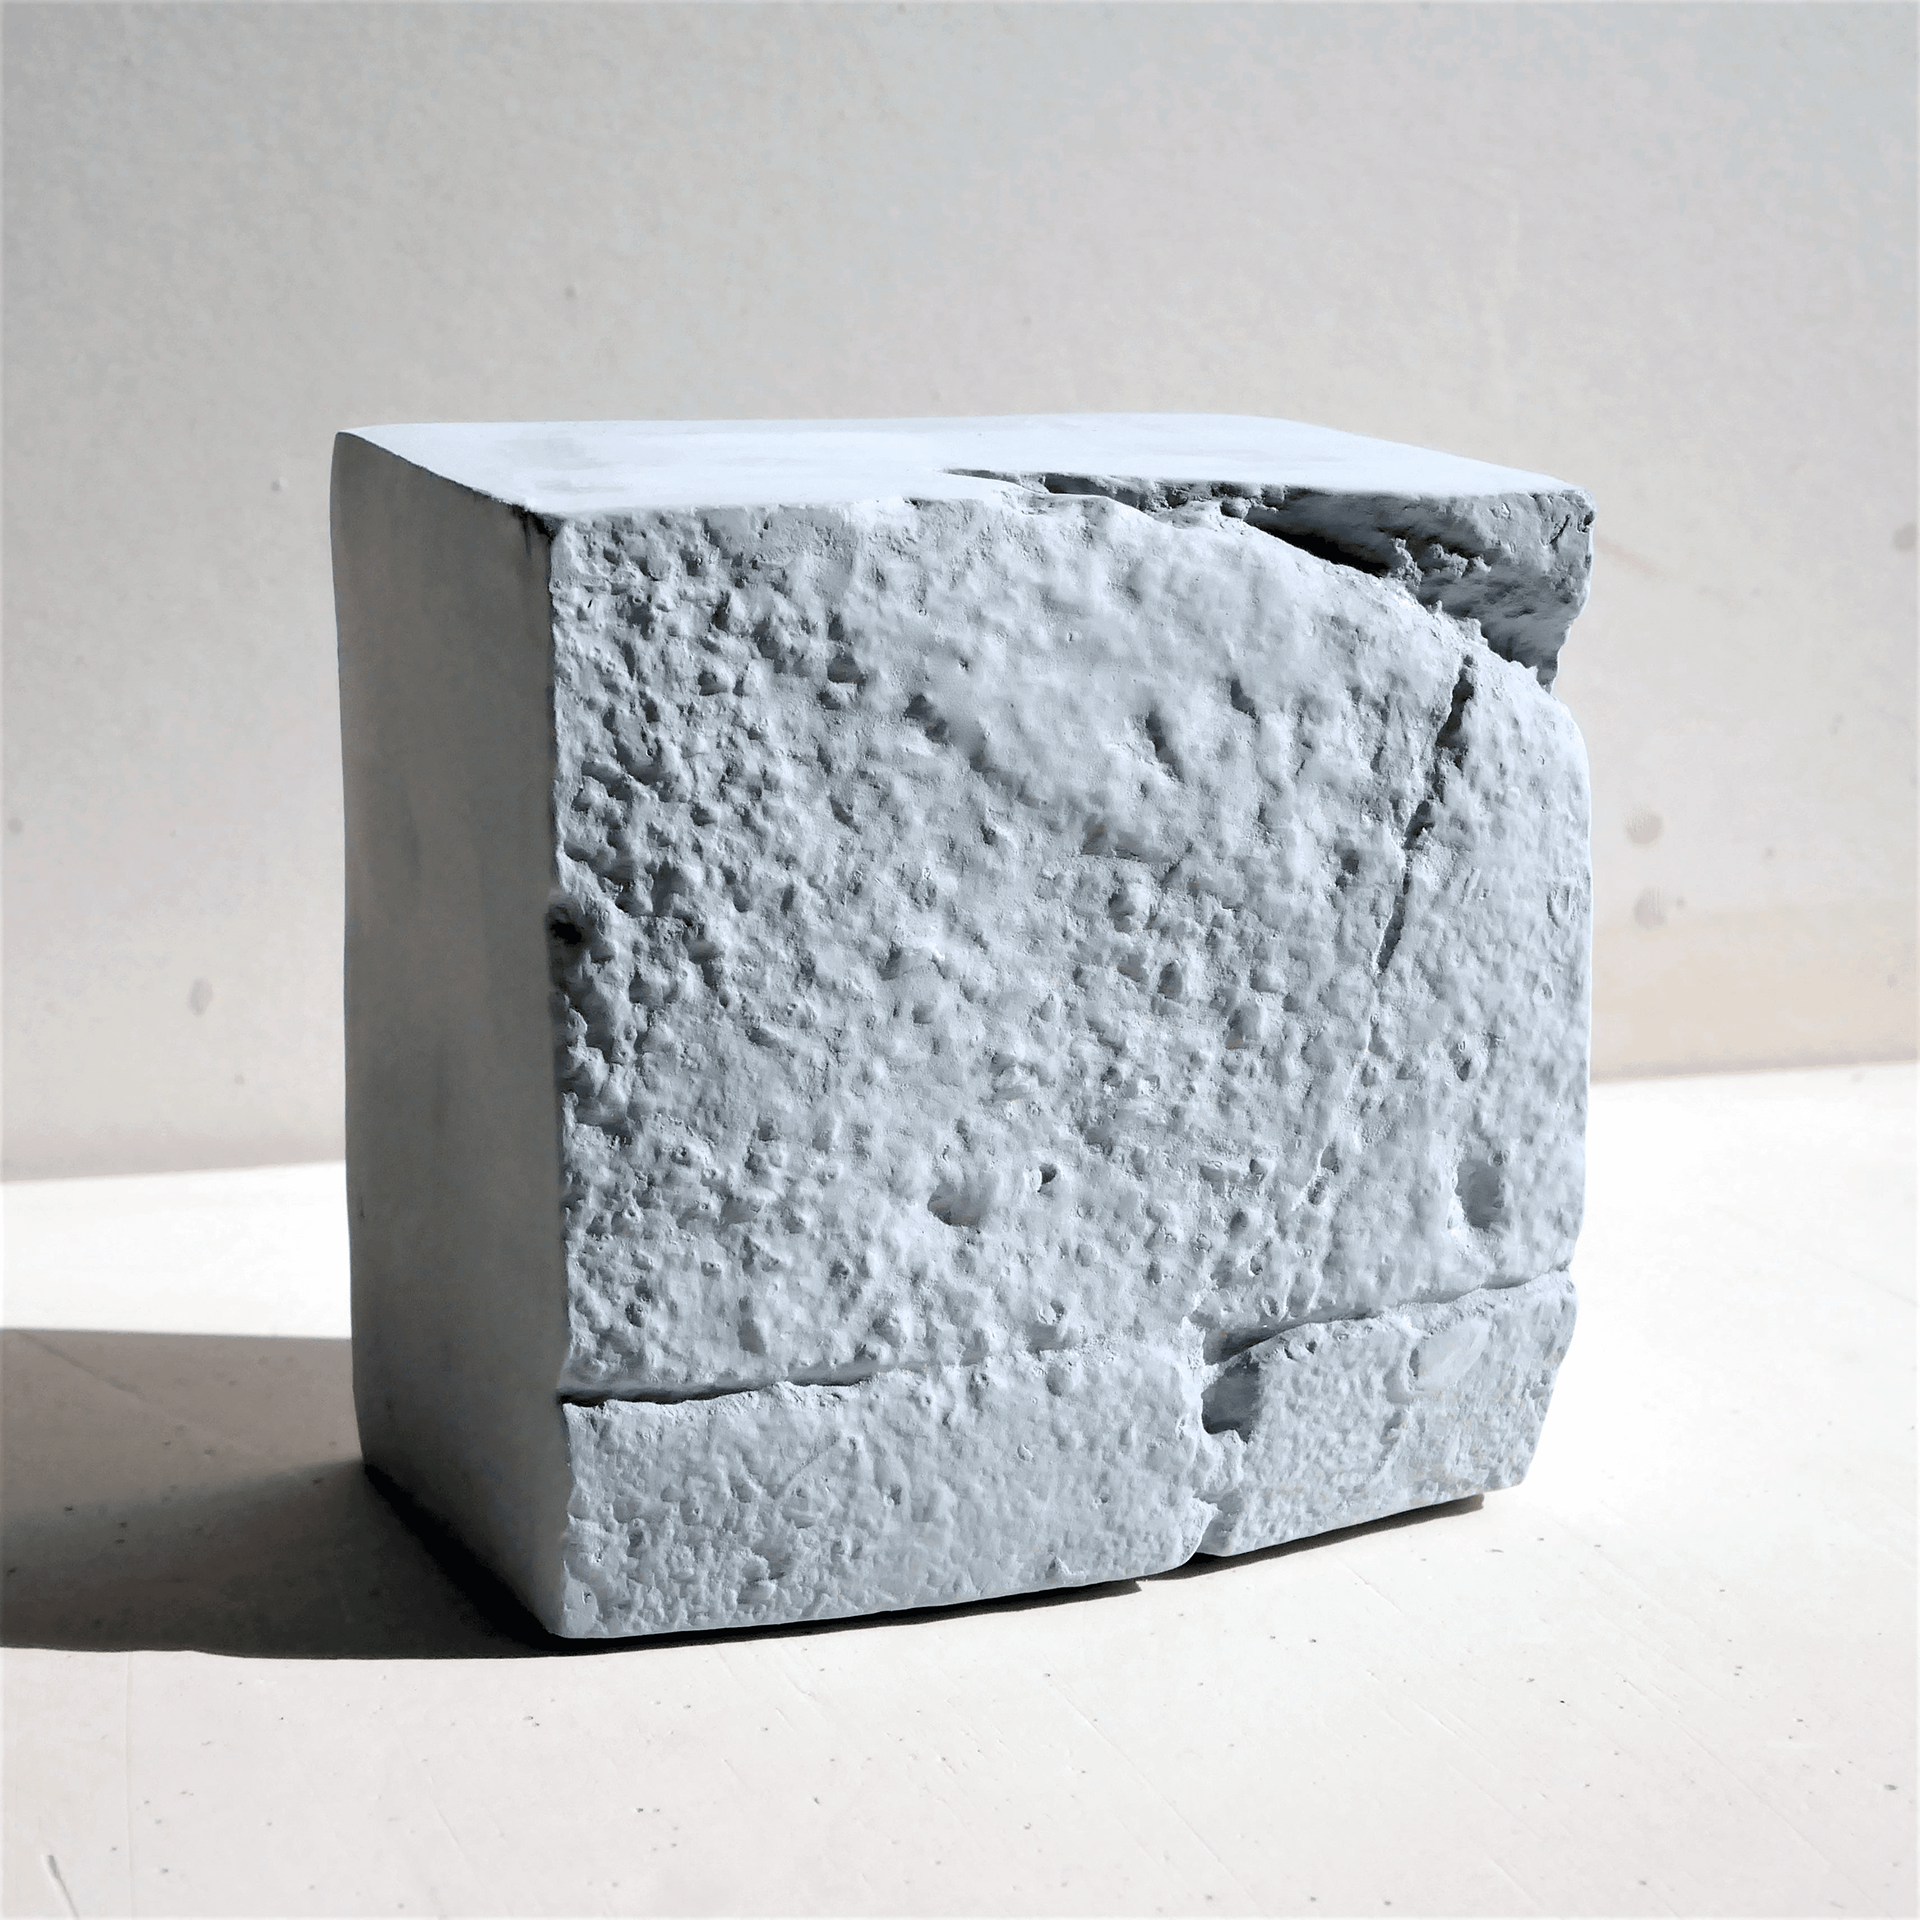
I casted the objects in both positive and negative to create the true impression of the ground in addition to protruding features to apply the volcanic glaze to.
I initially questioned how to adapt the form to avoid being 'cube-like,' however after consideration I felt it was successful as the square shape appears man-made, and the textured top creates a contrast against the smooth sides.
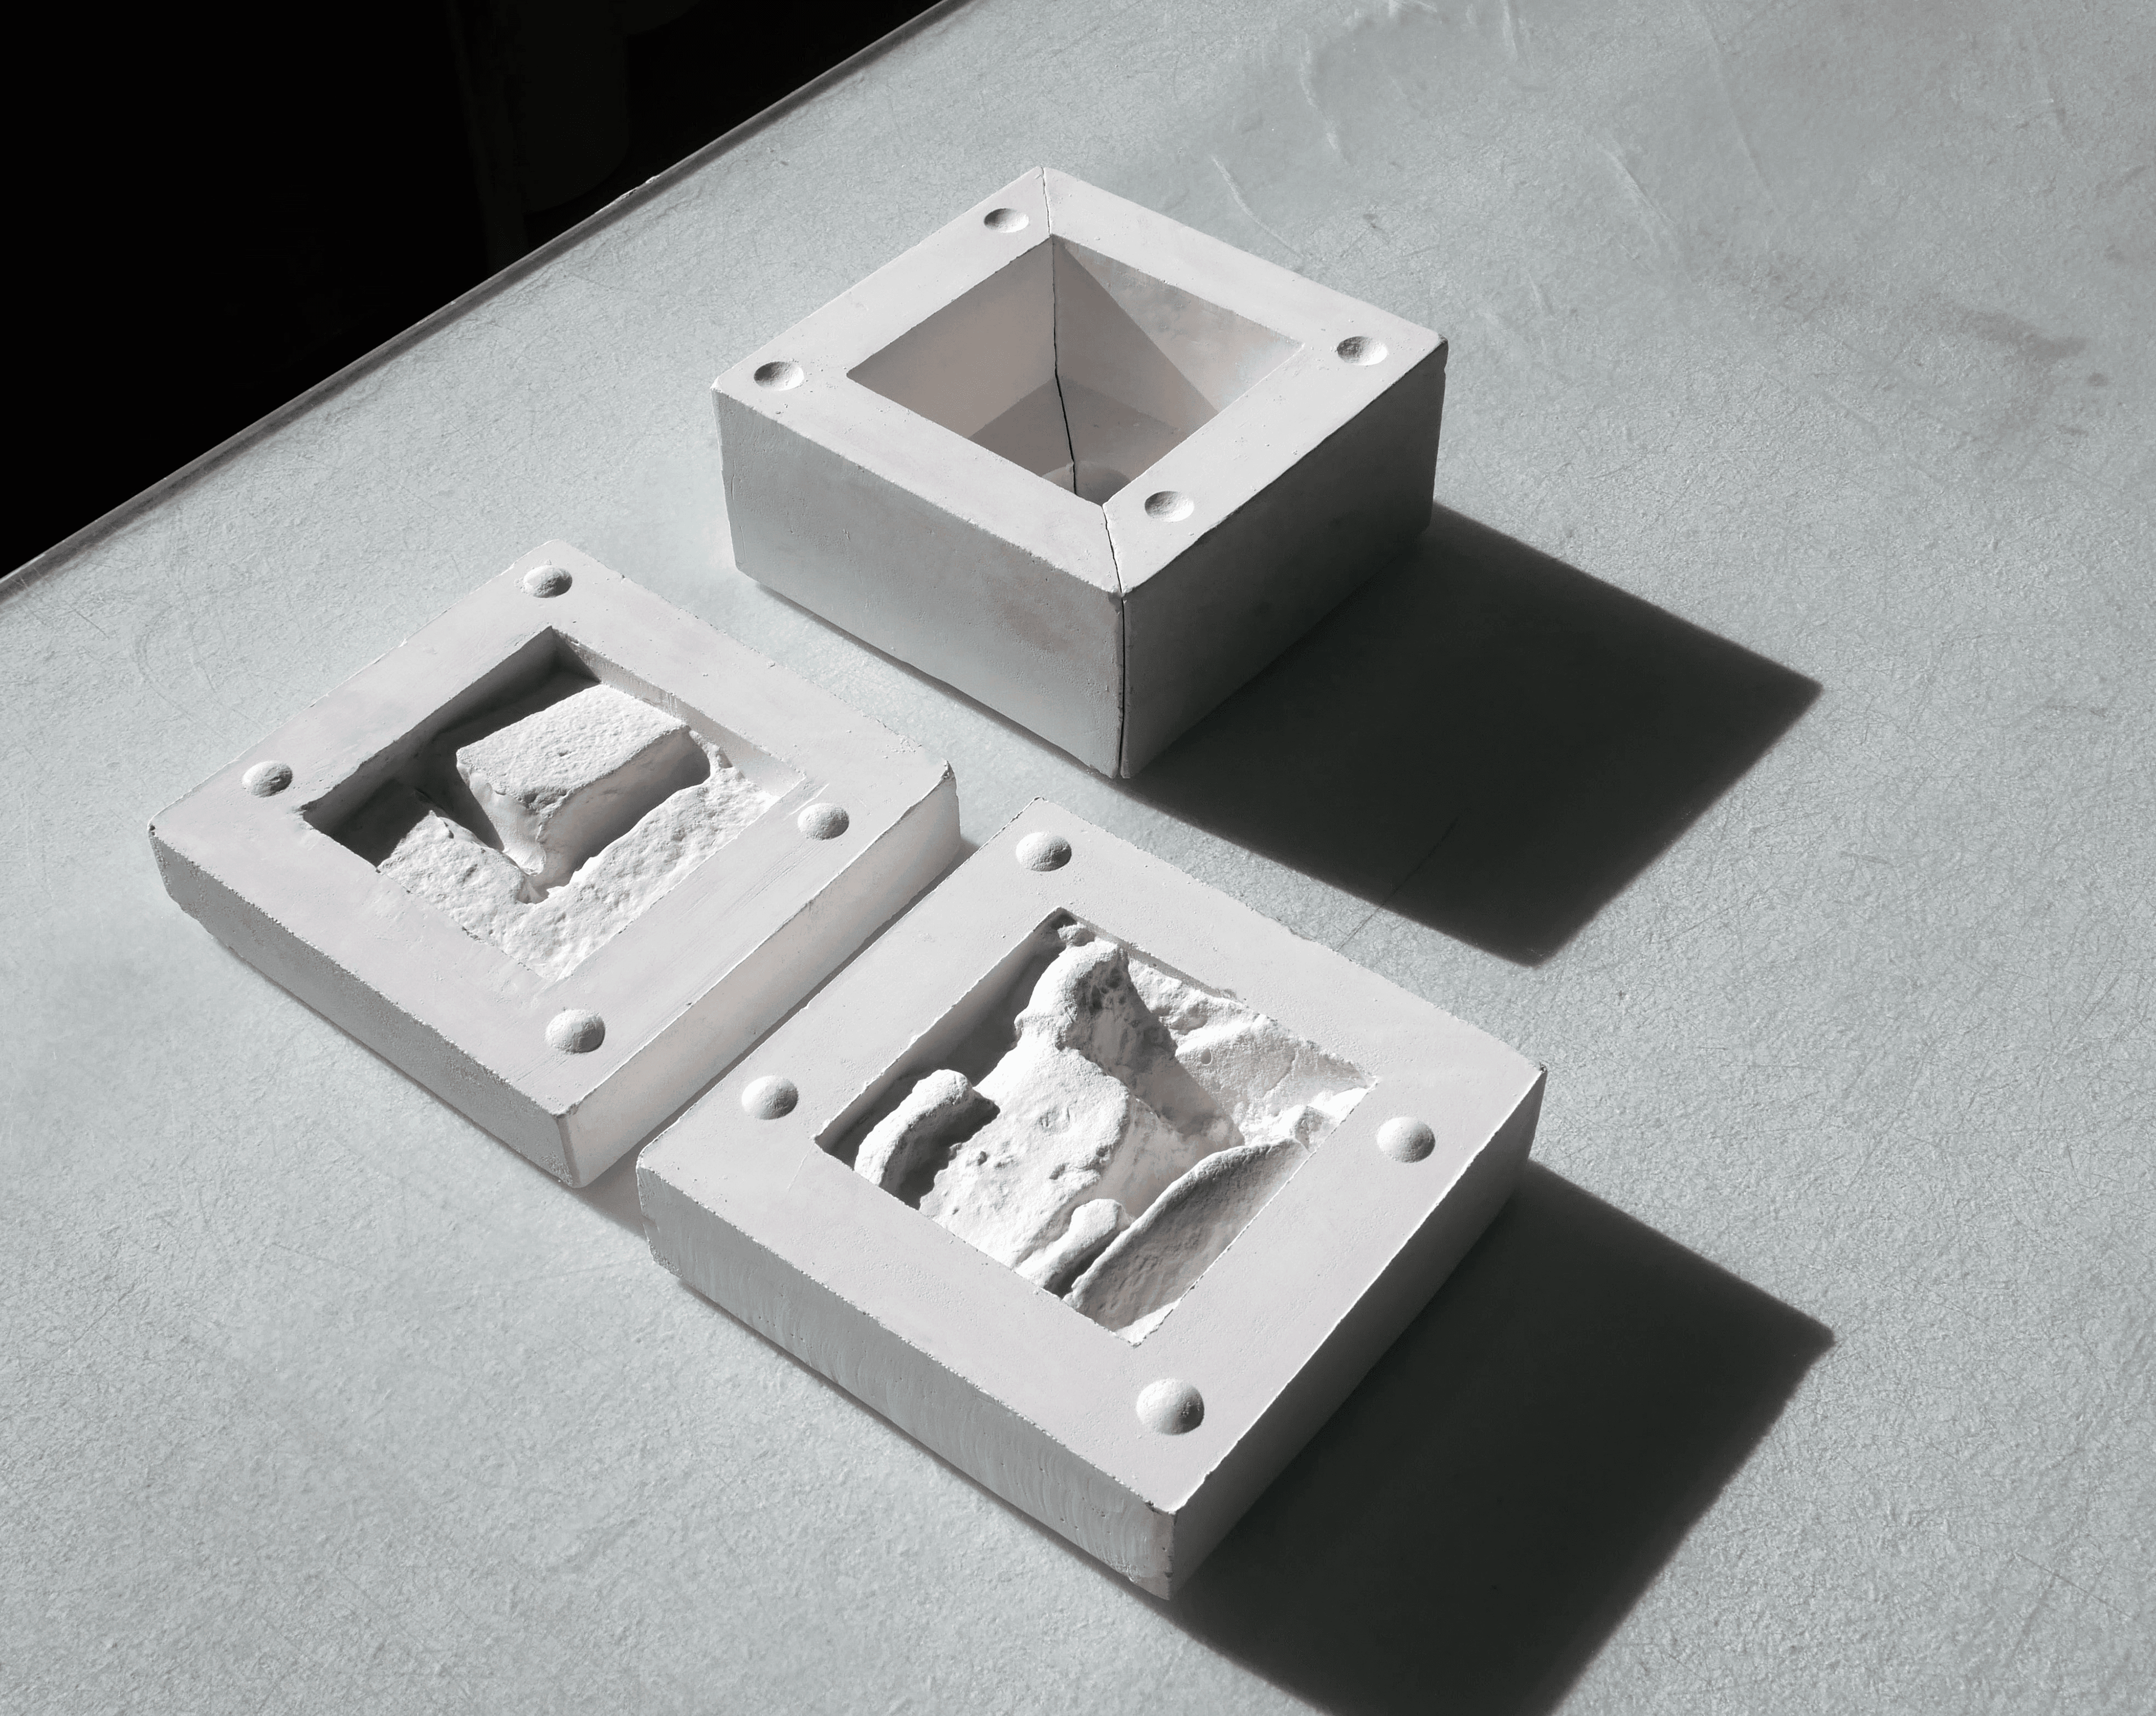
making moulds from the casts
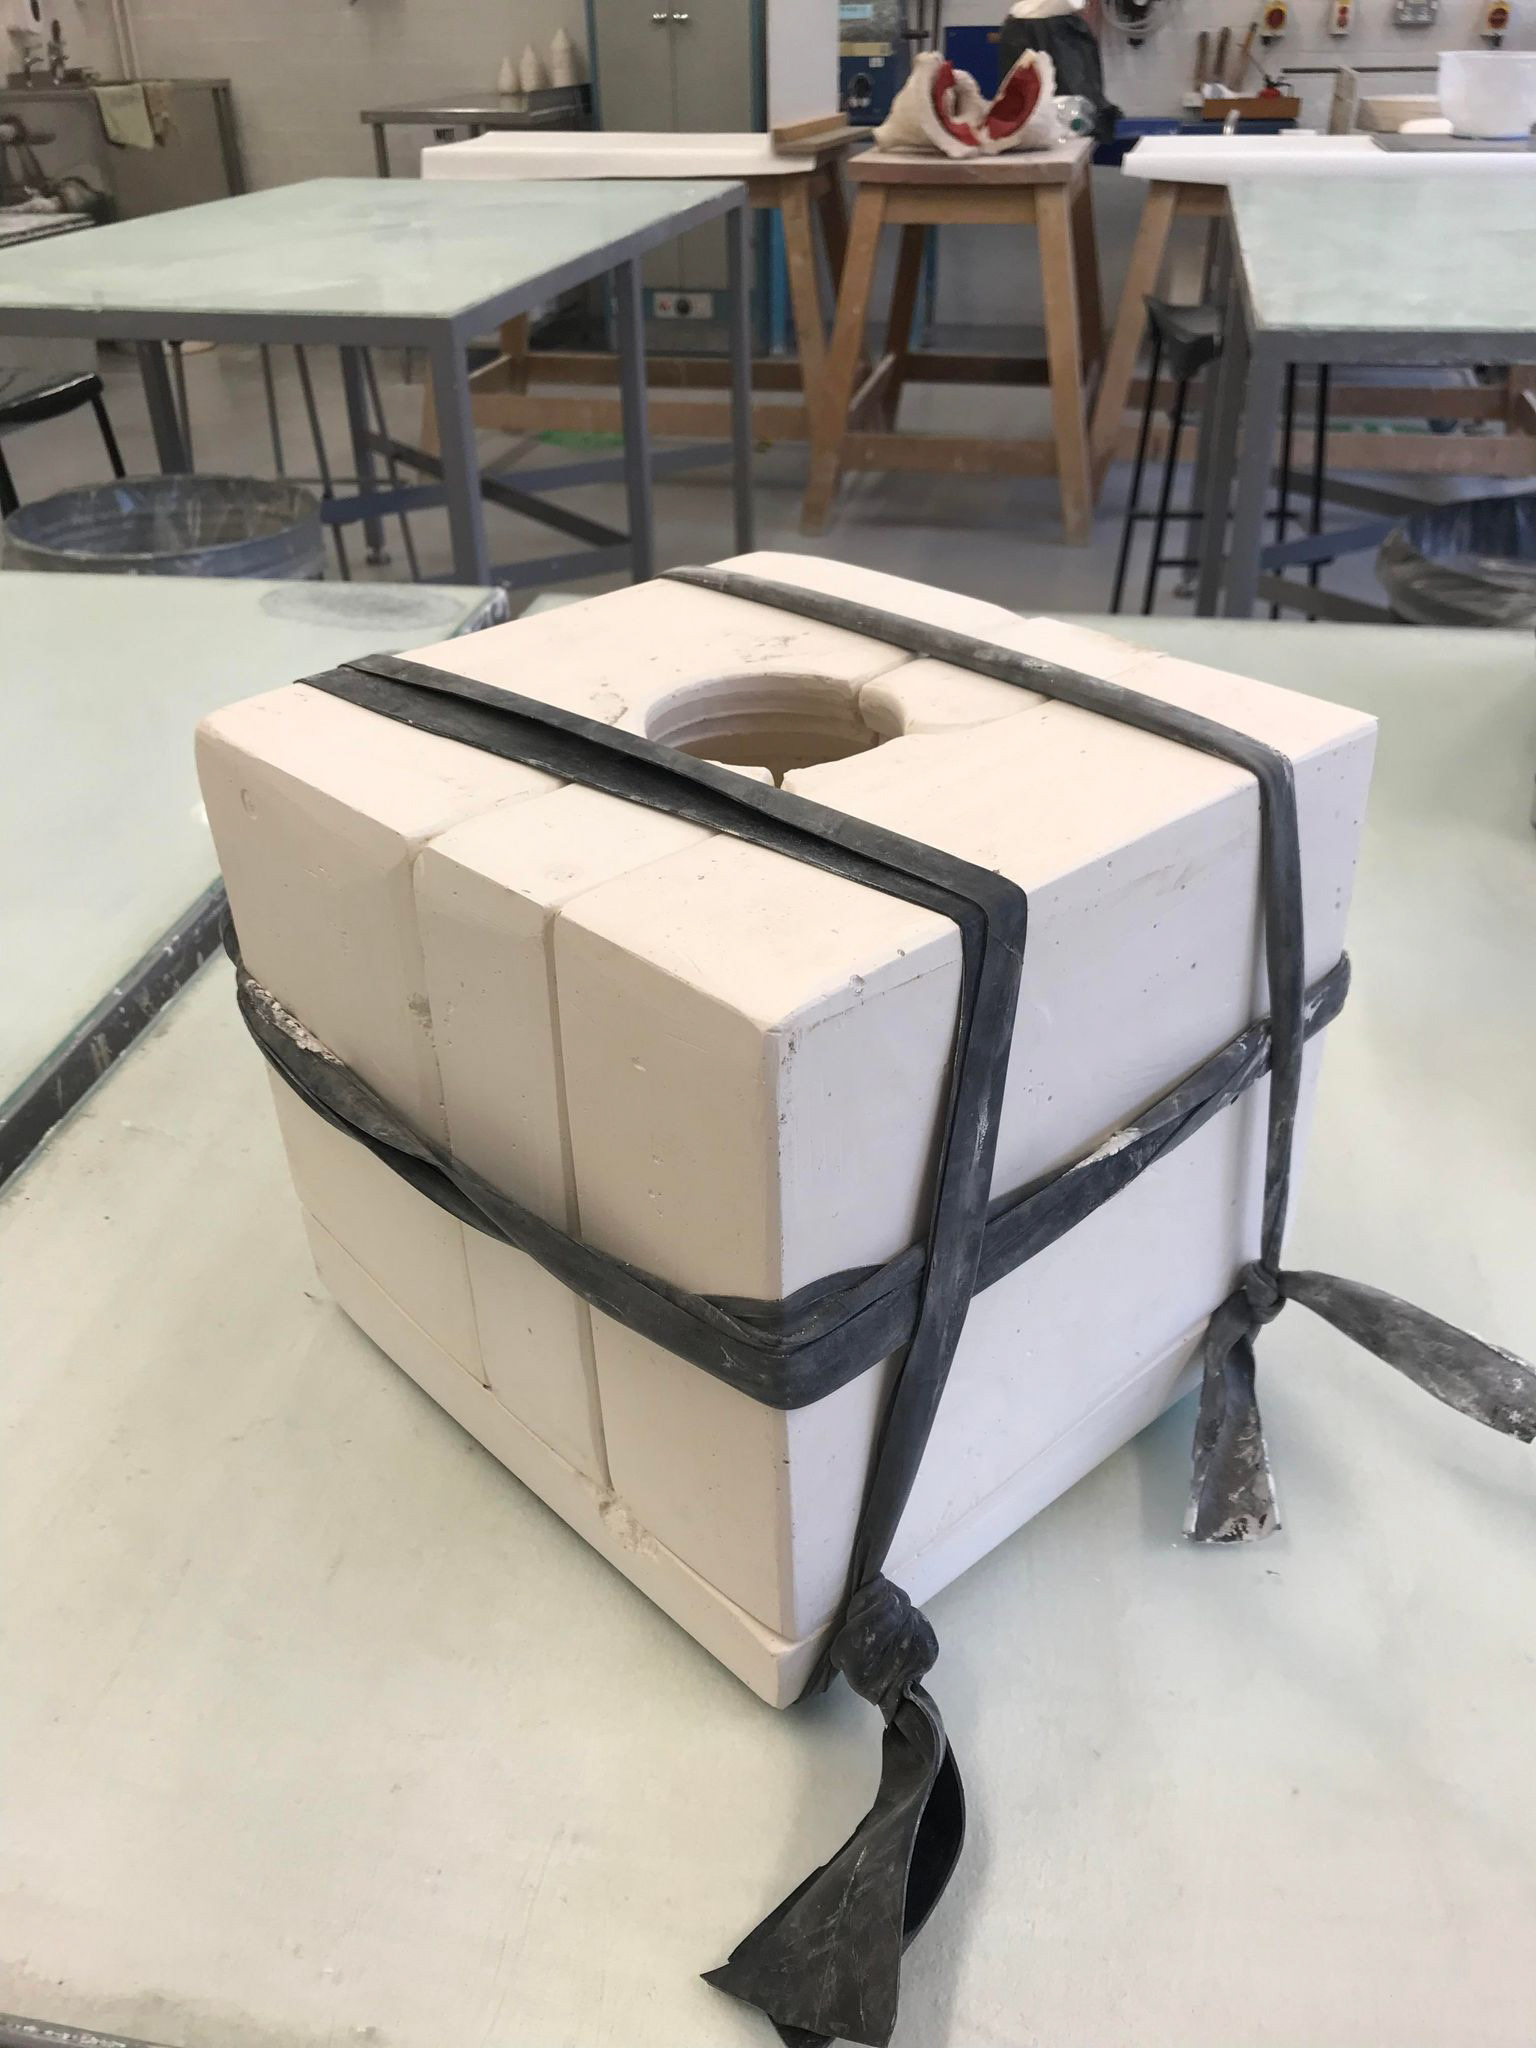
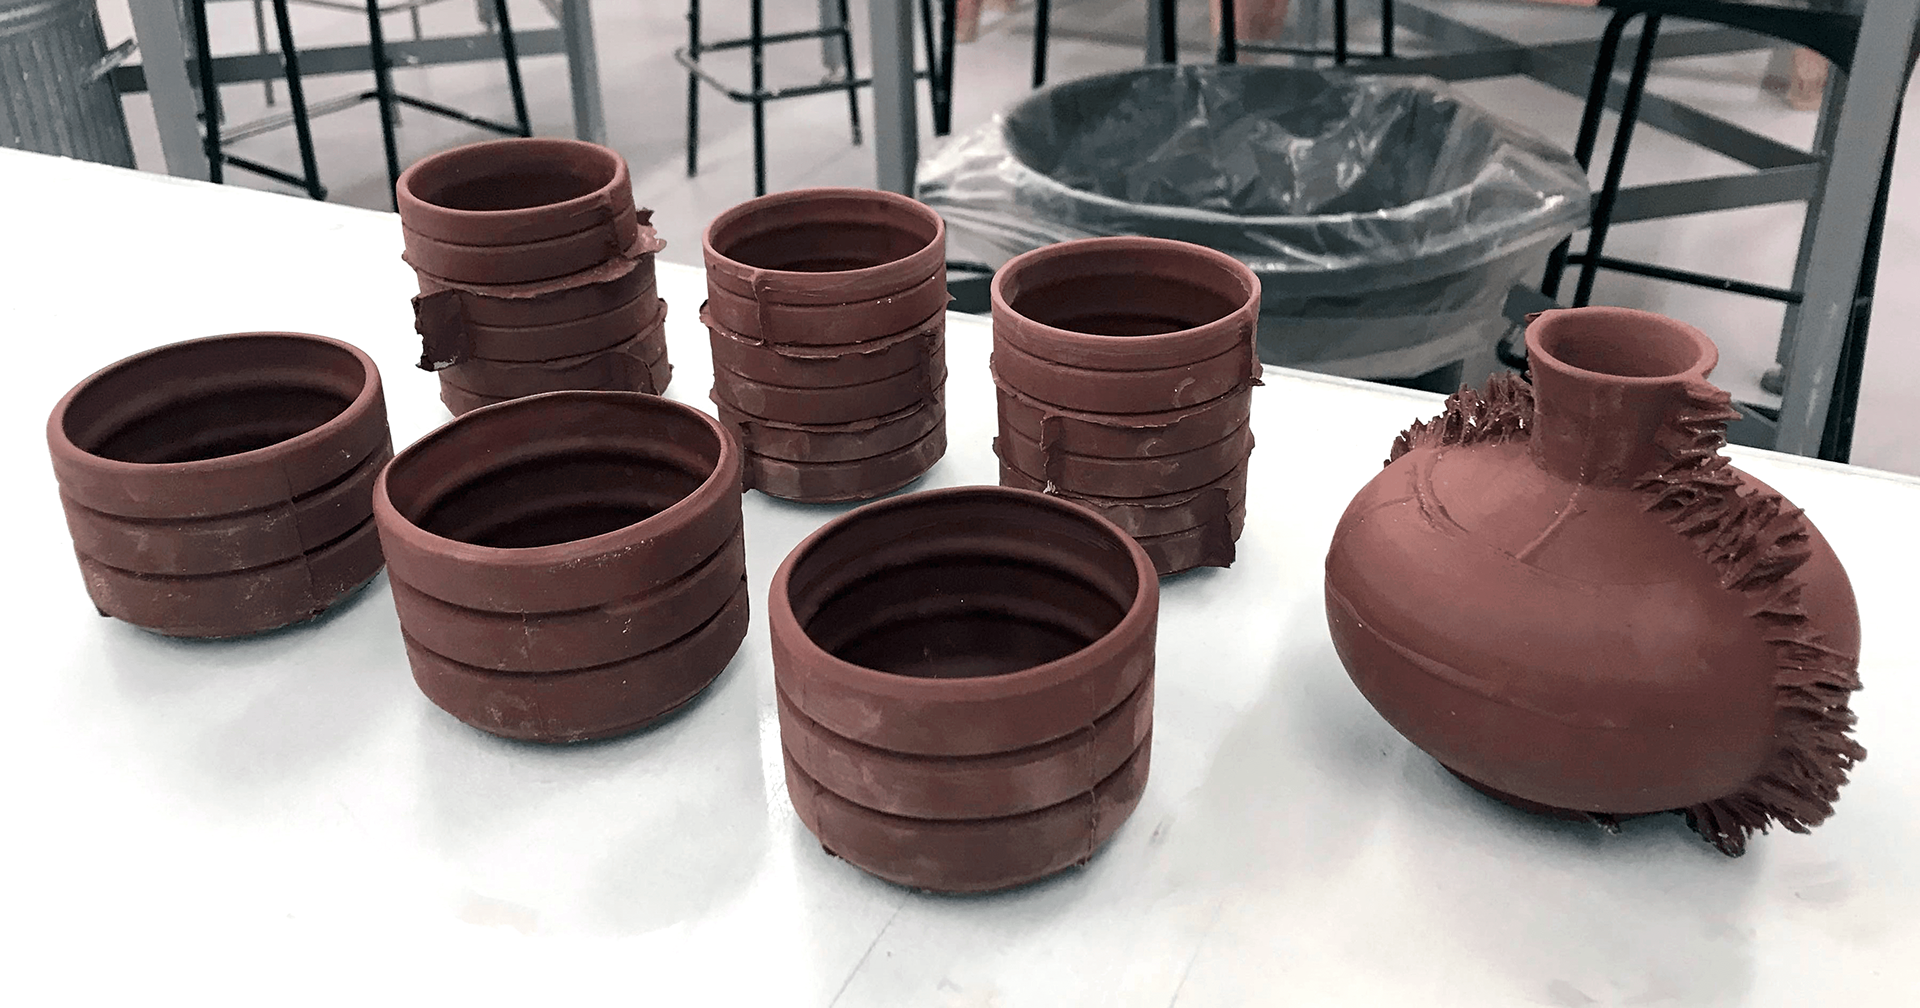
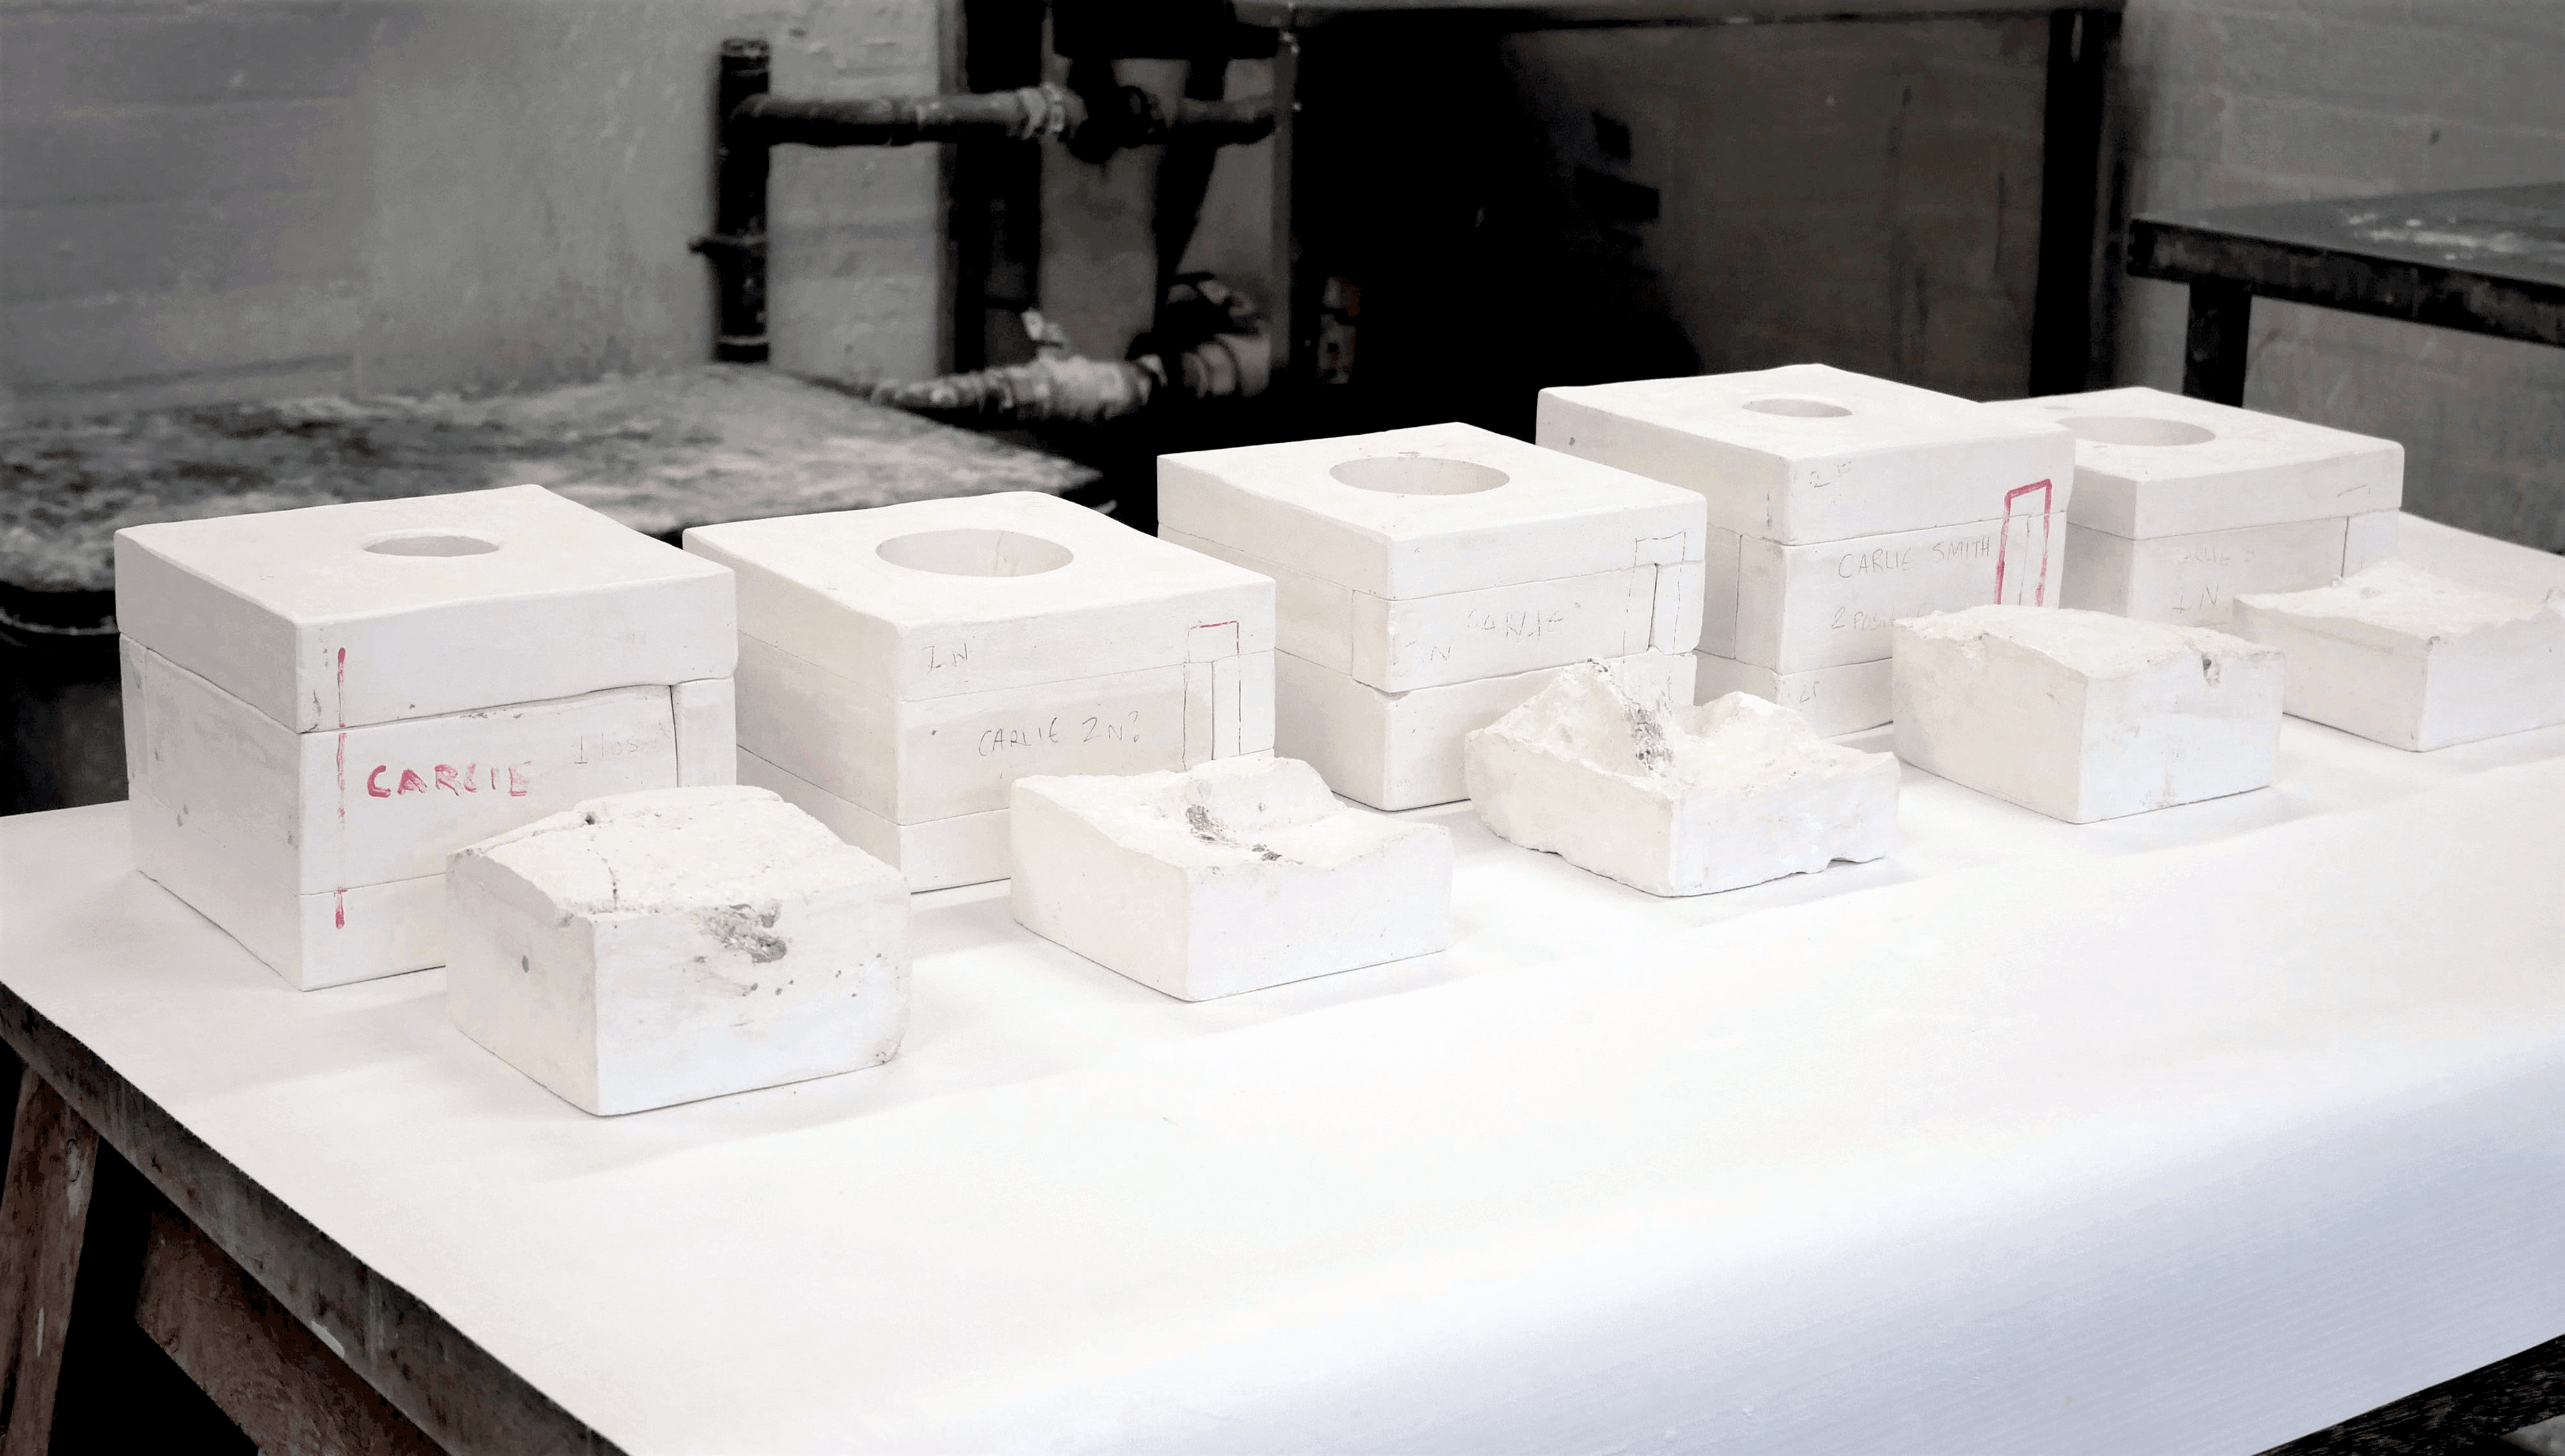
I cast each object into a multi-part plaster mould. This was the most time-consuming element to the project.
However the repetitive nature of creating five moulds at once allowed me to refine and improve my ability and efficiency in mould making.


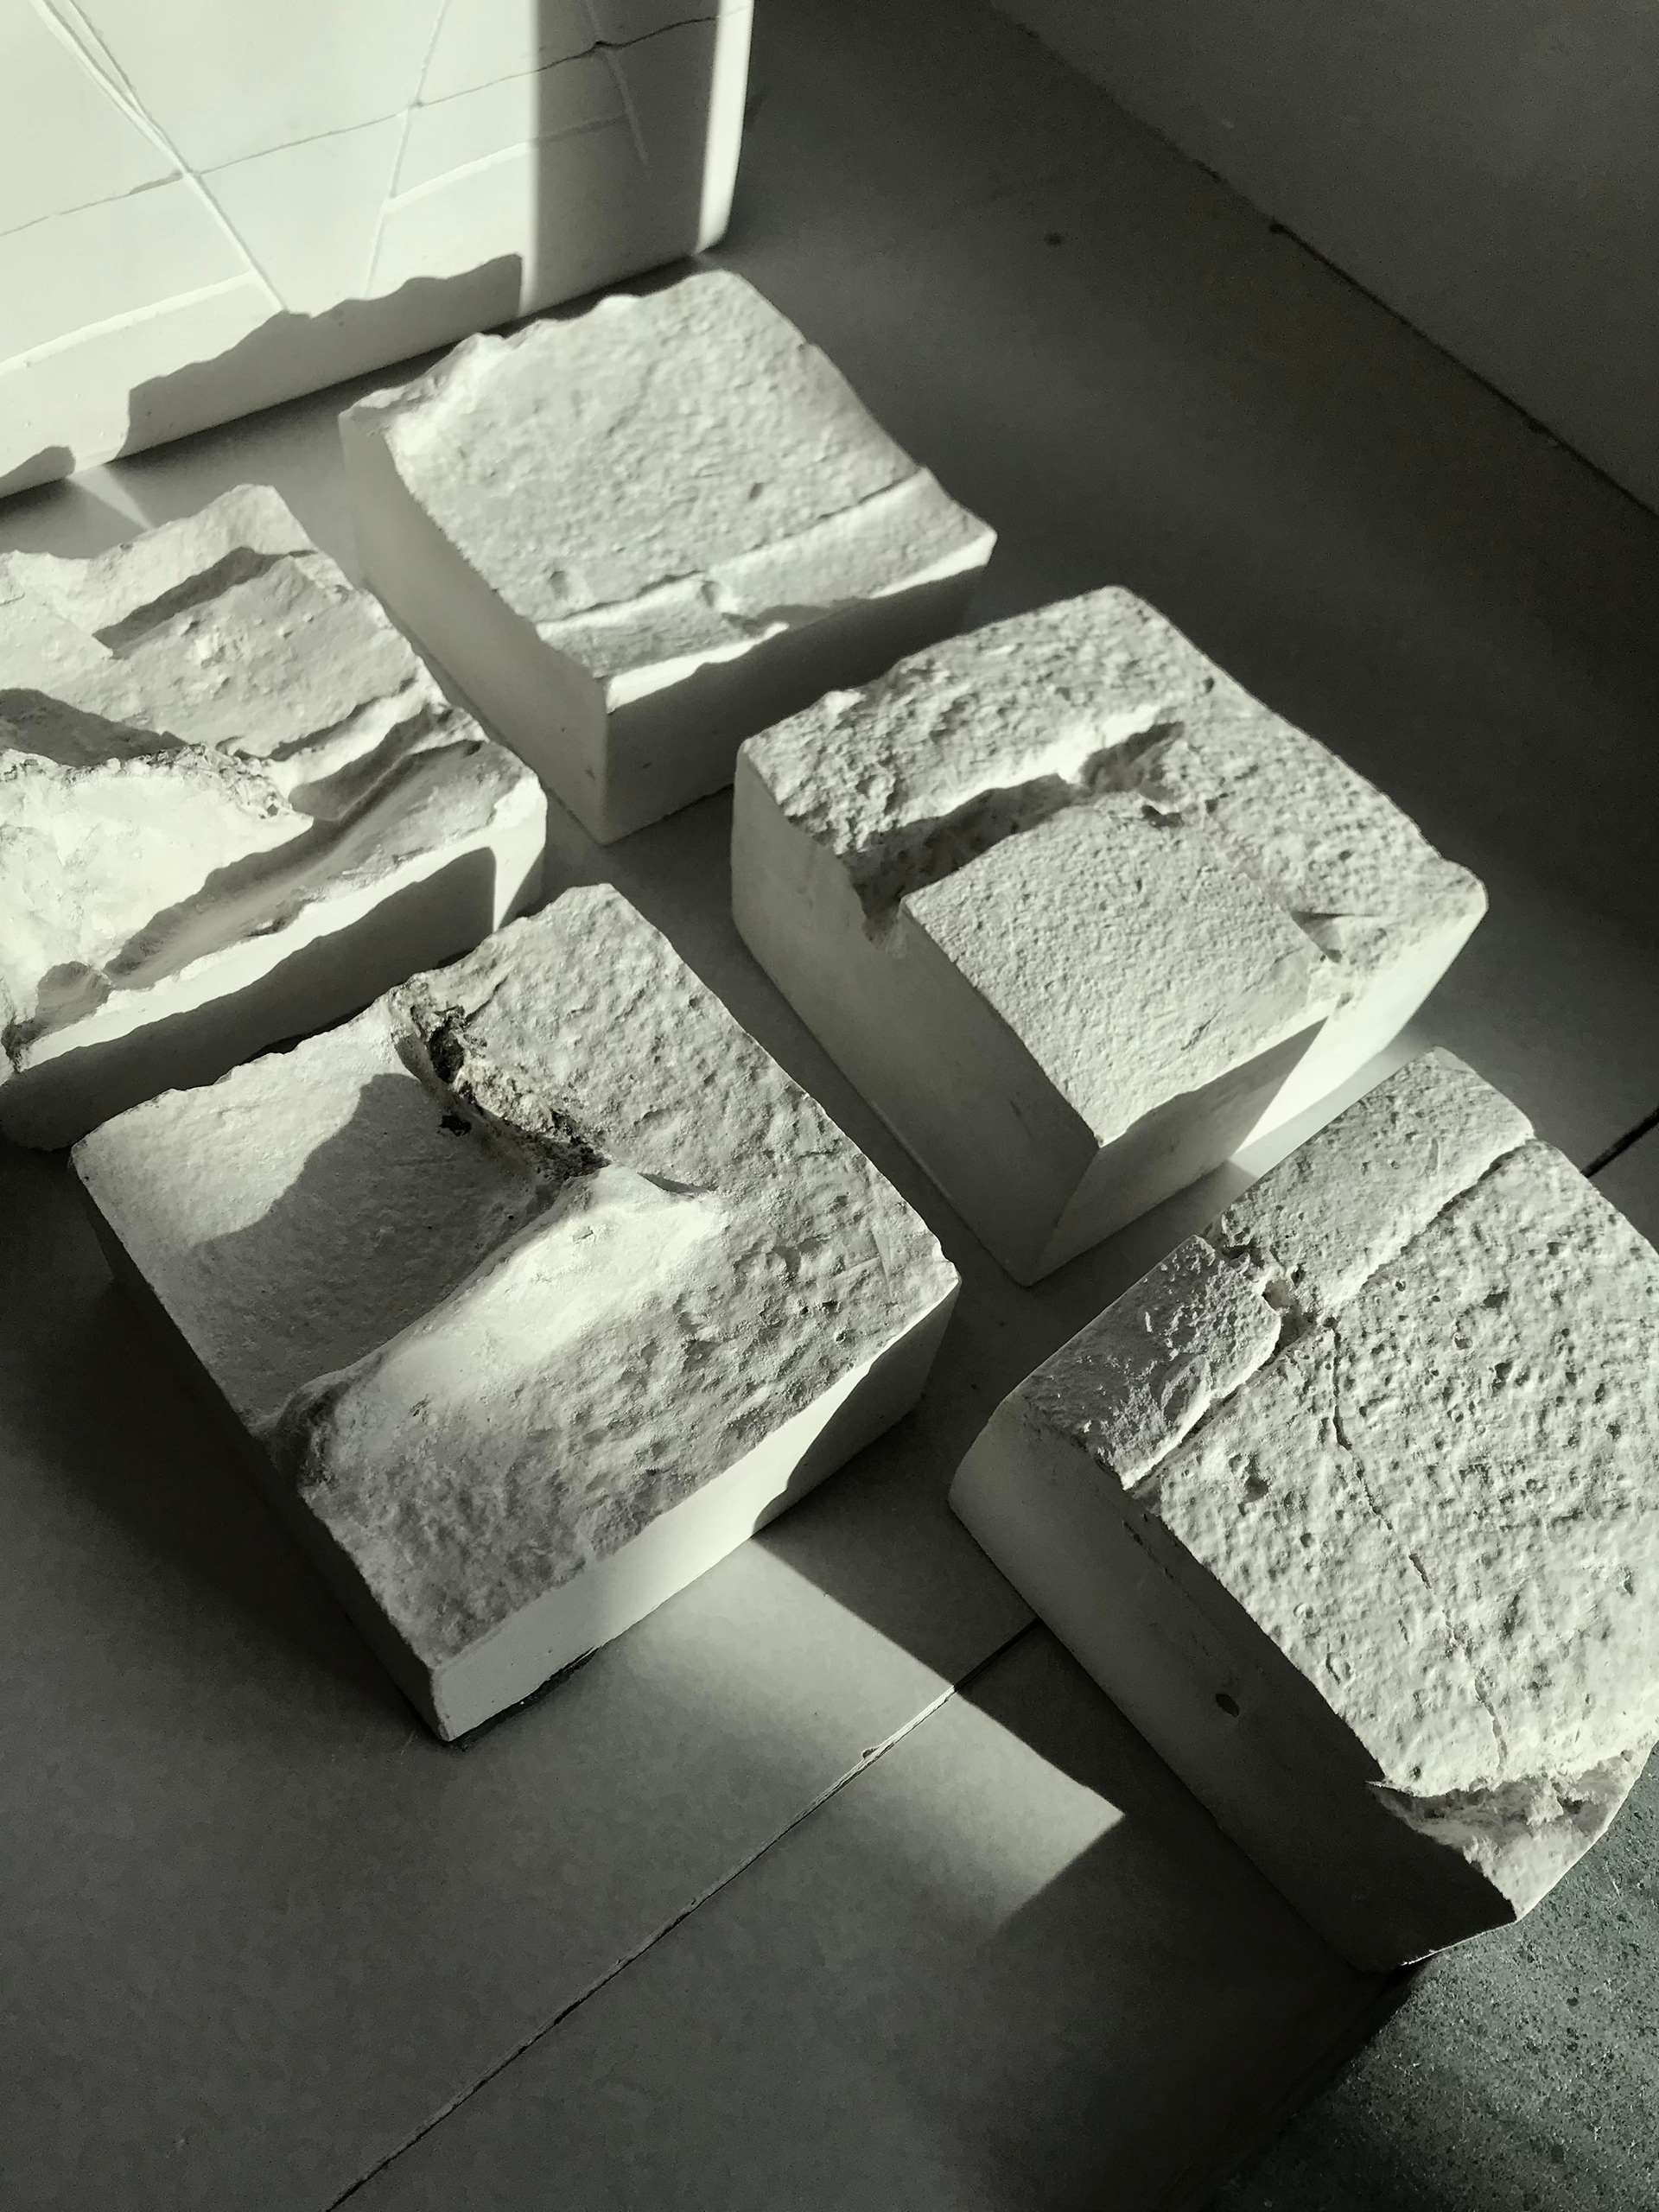
Test-Casting from the moulds
Before casting with the black porcelain, I used ivory stoneware slip to ensure the moulds were sufficient. The texture within the cast was a success, and the depth of the cracks were impactful.

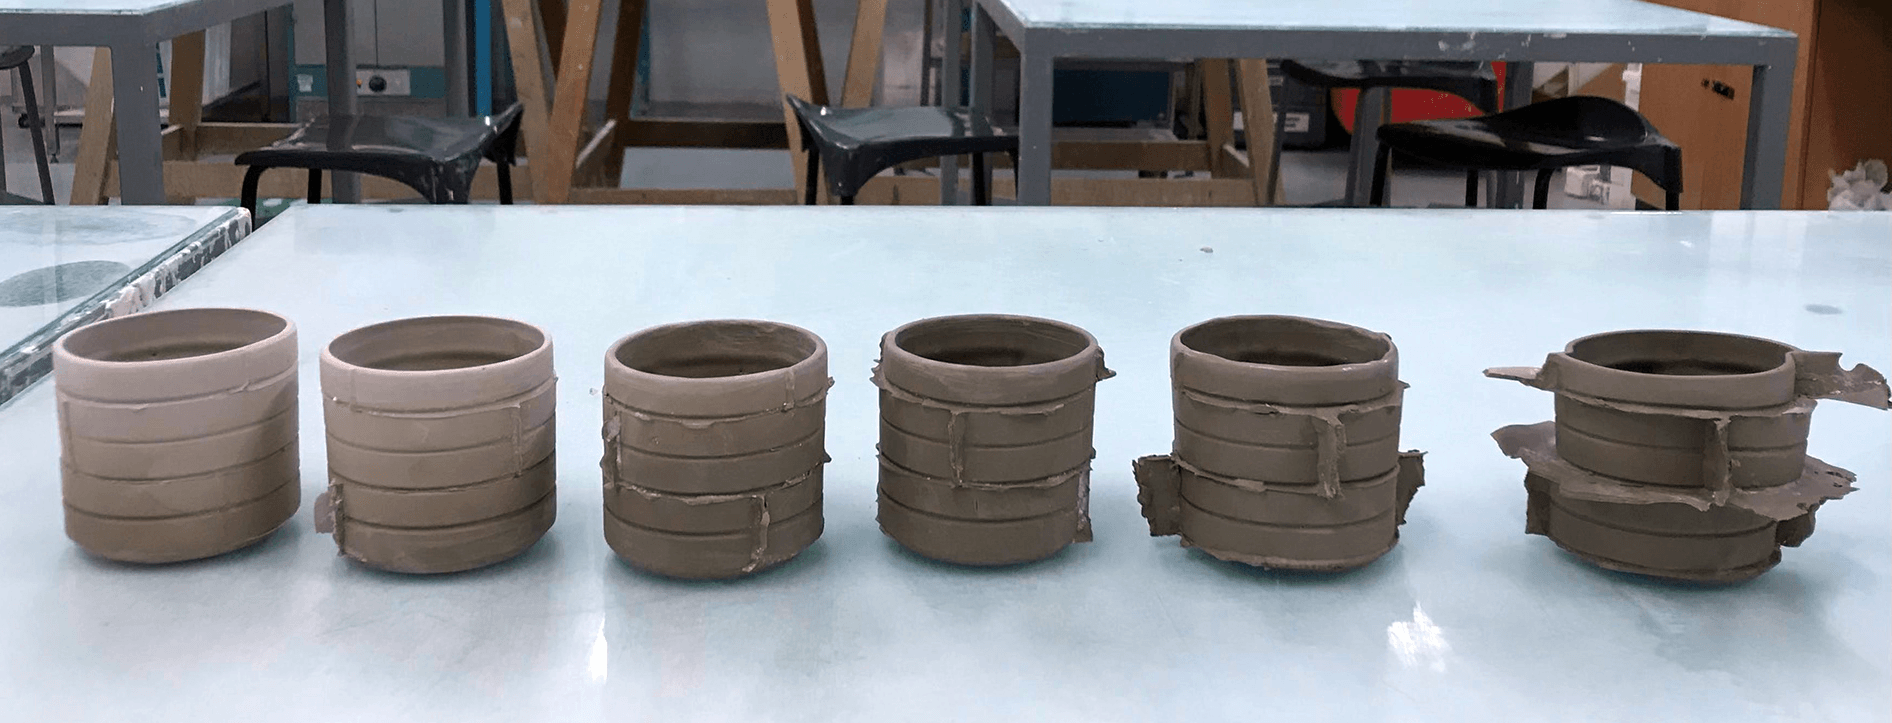
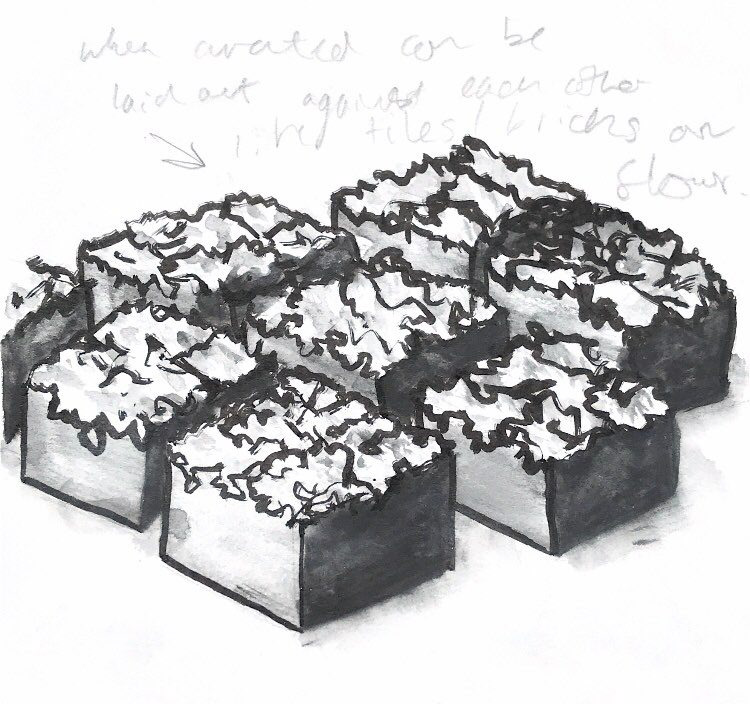
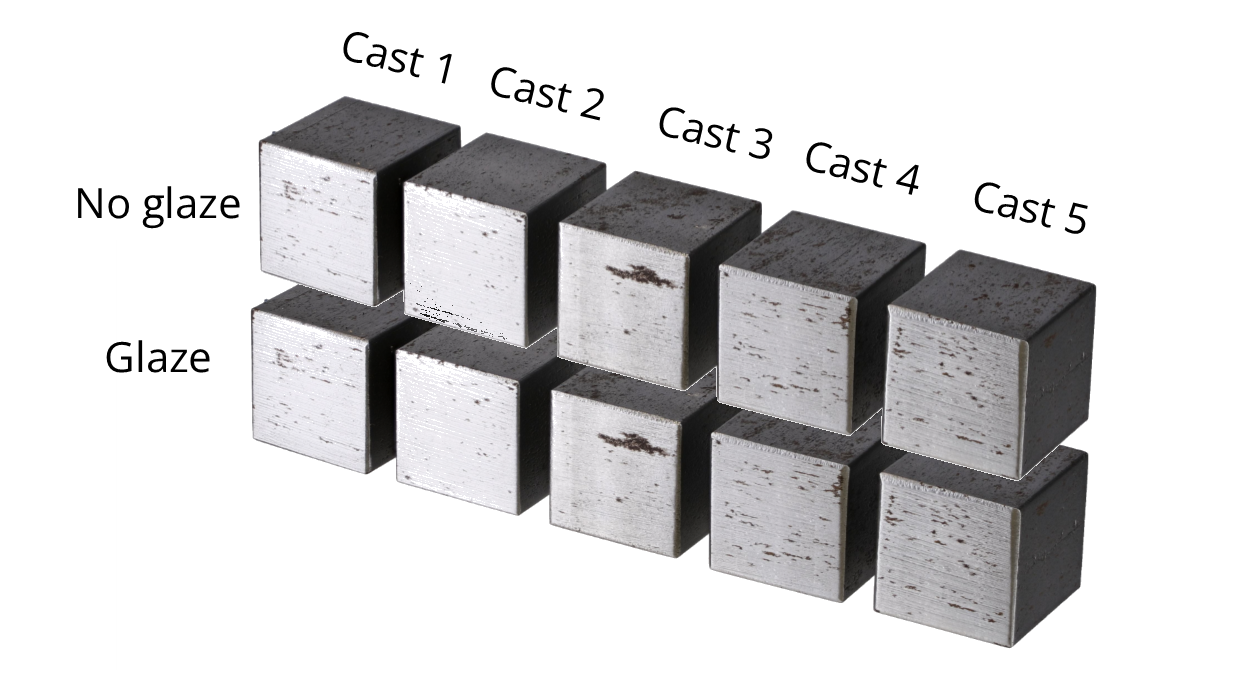
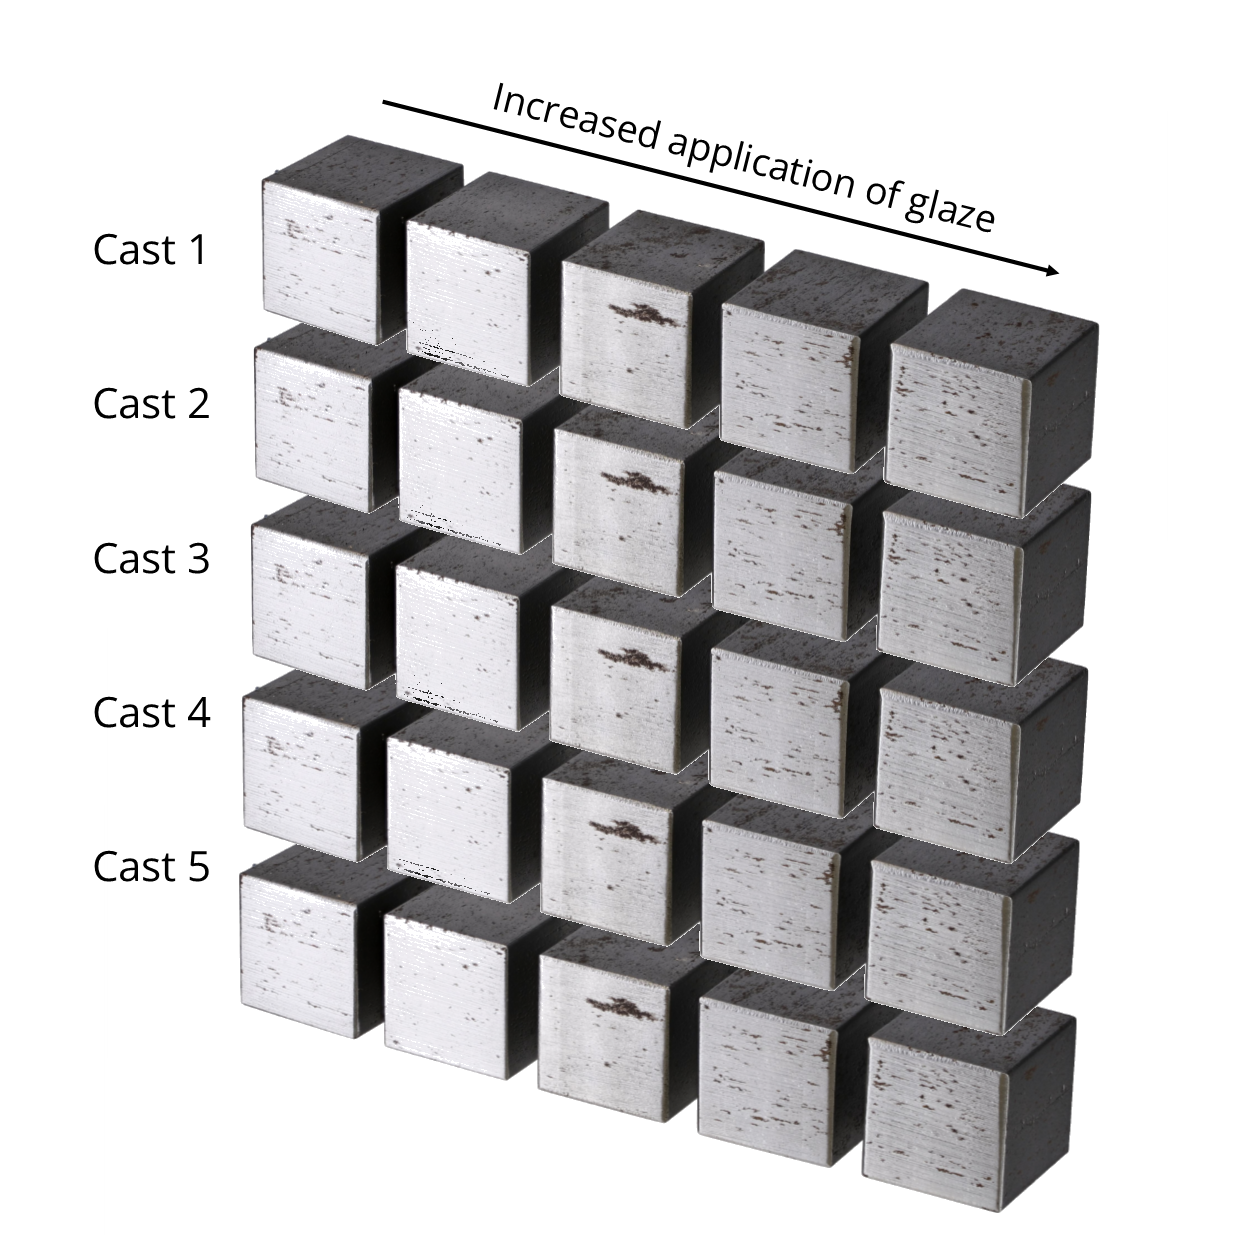
Uniformity
The pieces at first appeared successful whilst viewing individually, however once exhibited together, the irregularities in height and width was very noticable.I felt this drew the attention away from the top surface, which is the intended focal point.
I felt the next step was to ensure consistency throughout each piece, to create a uniform body of work.

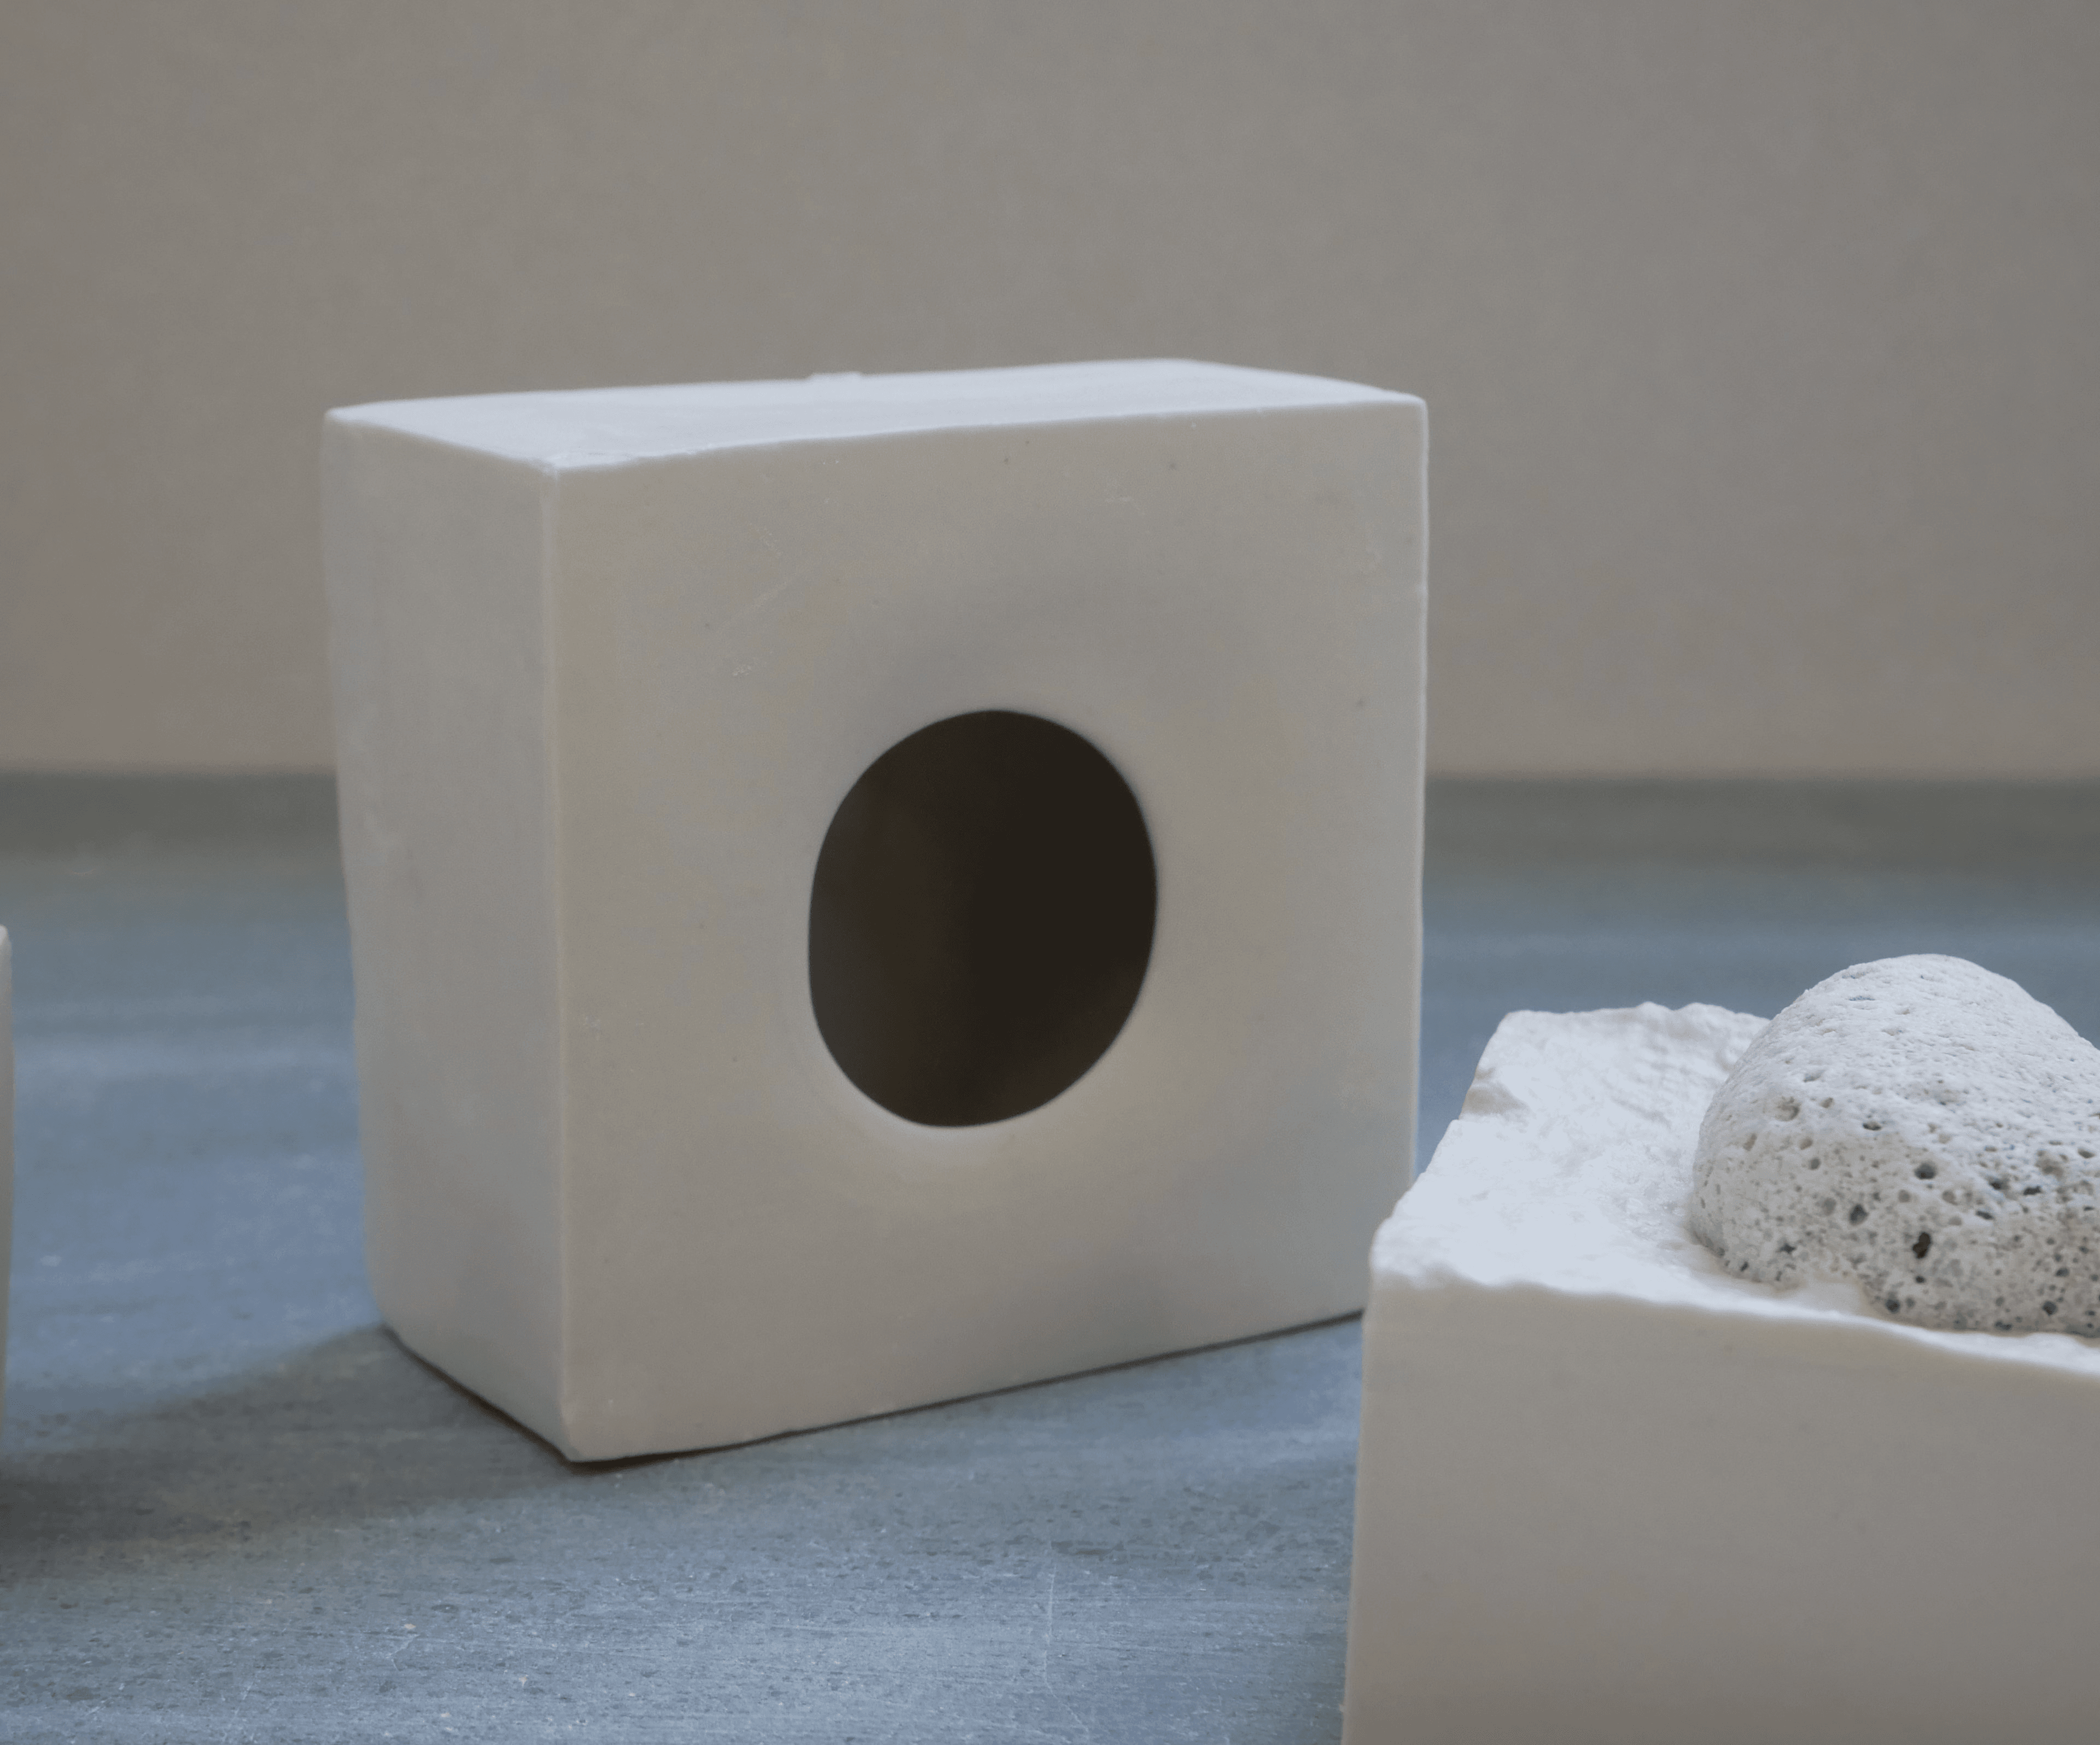
Symmetrical base for universal mould
Some of the test pieces did not sit completely flat against the table, and the edges were inconsistent.
I casted a 'perfect' cube to use as a universal base for each casted form.

Updated time-plan
Testing Black porcelain within form
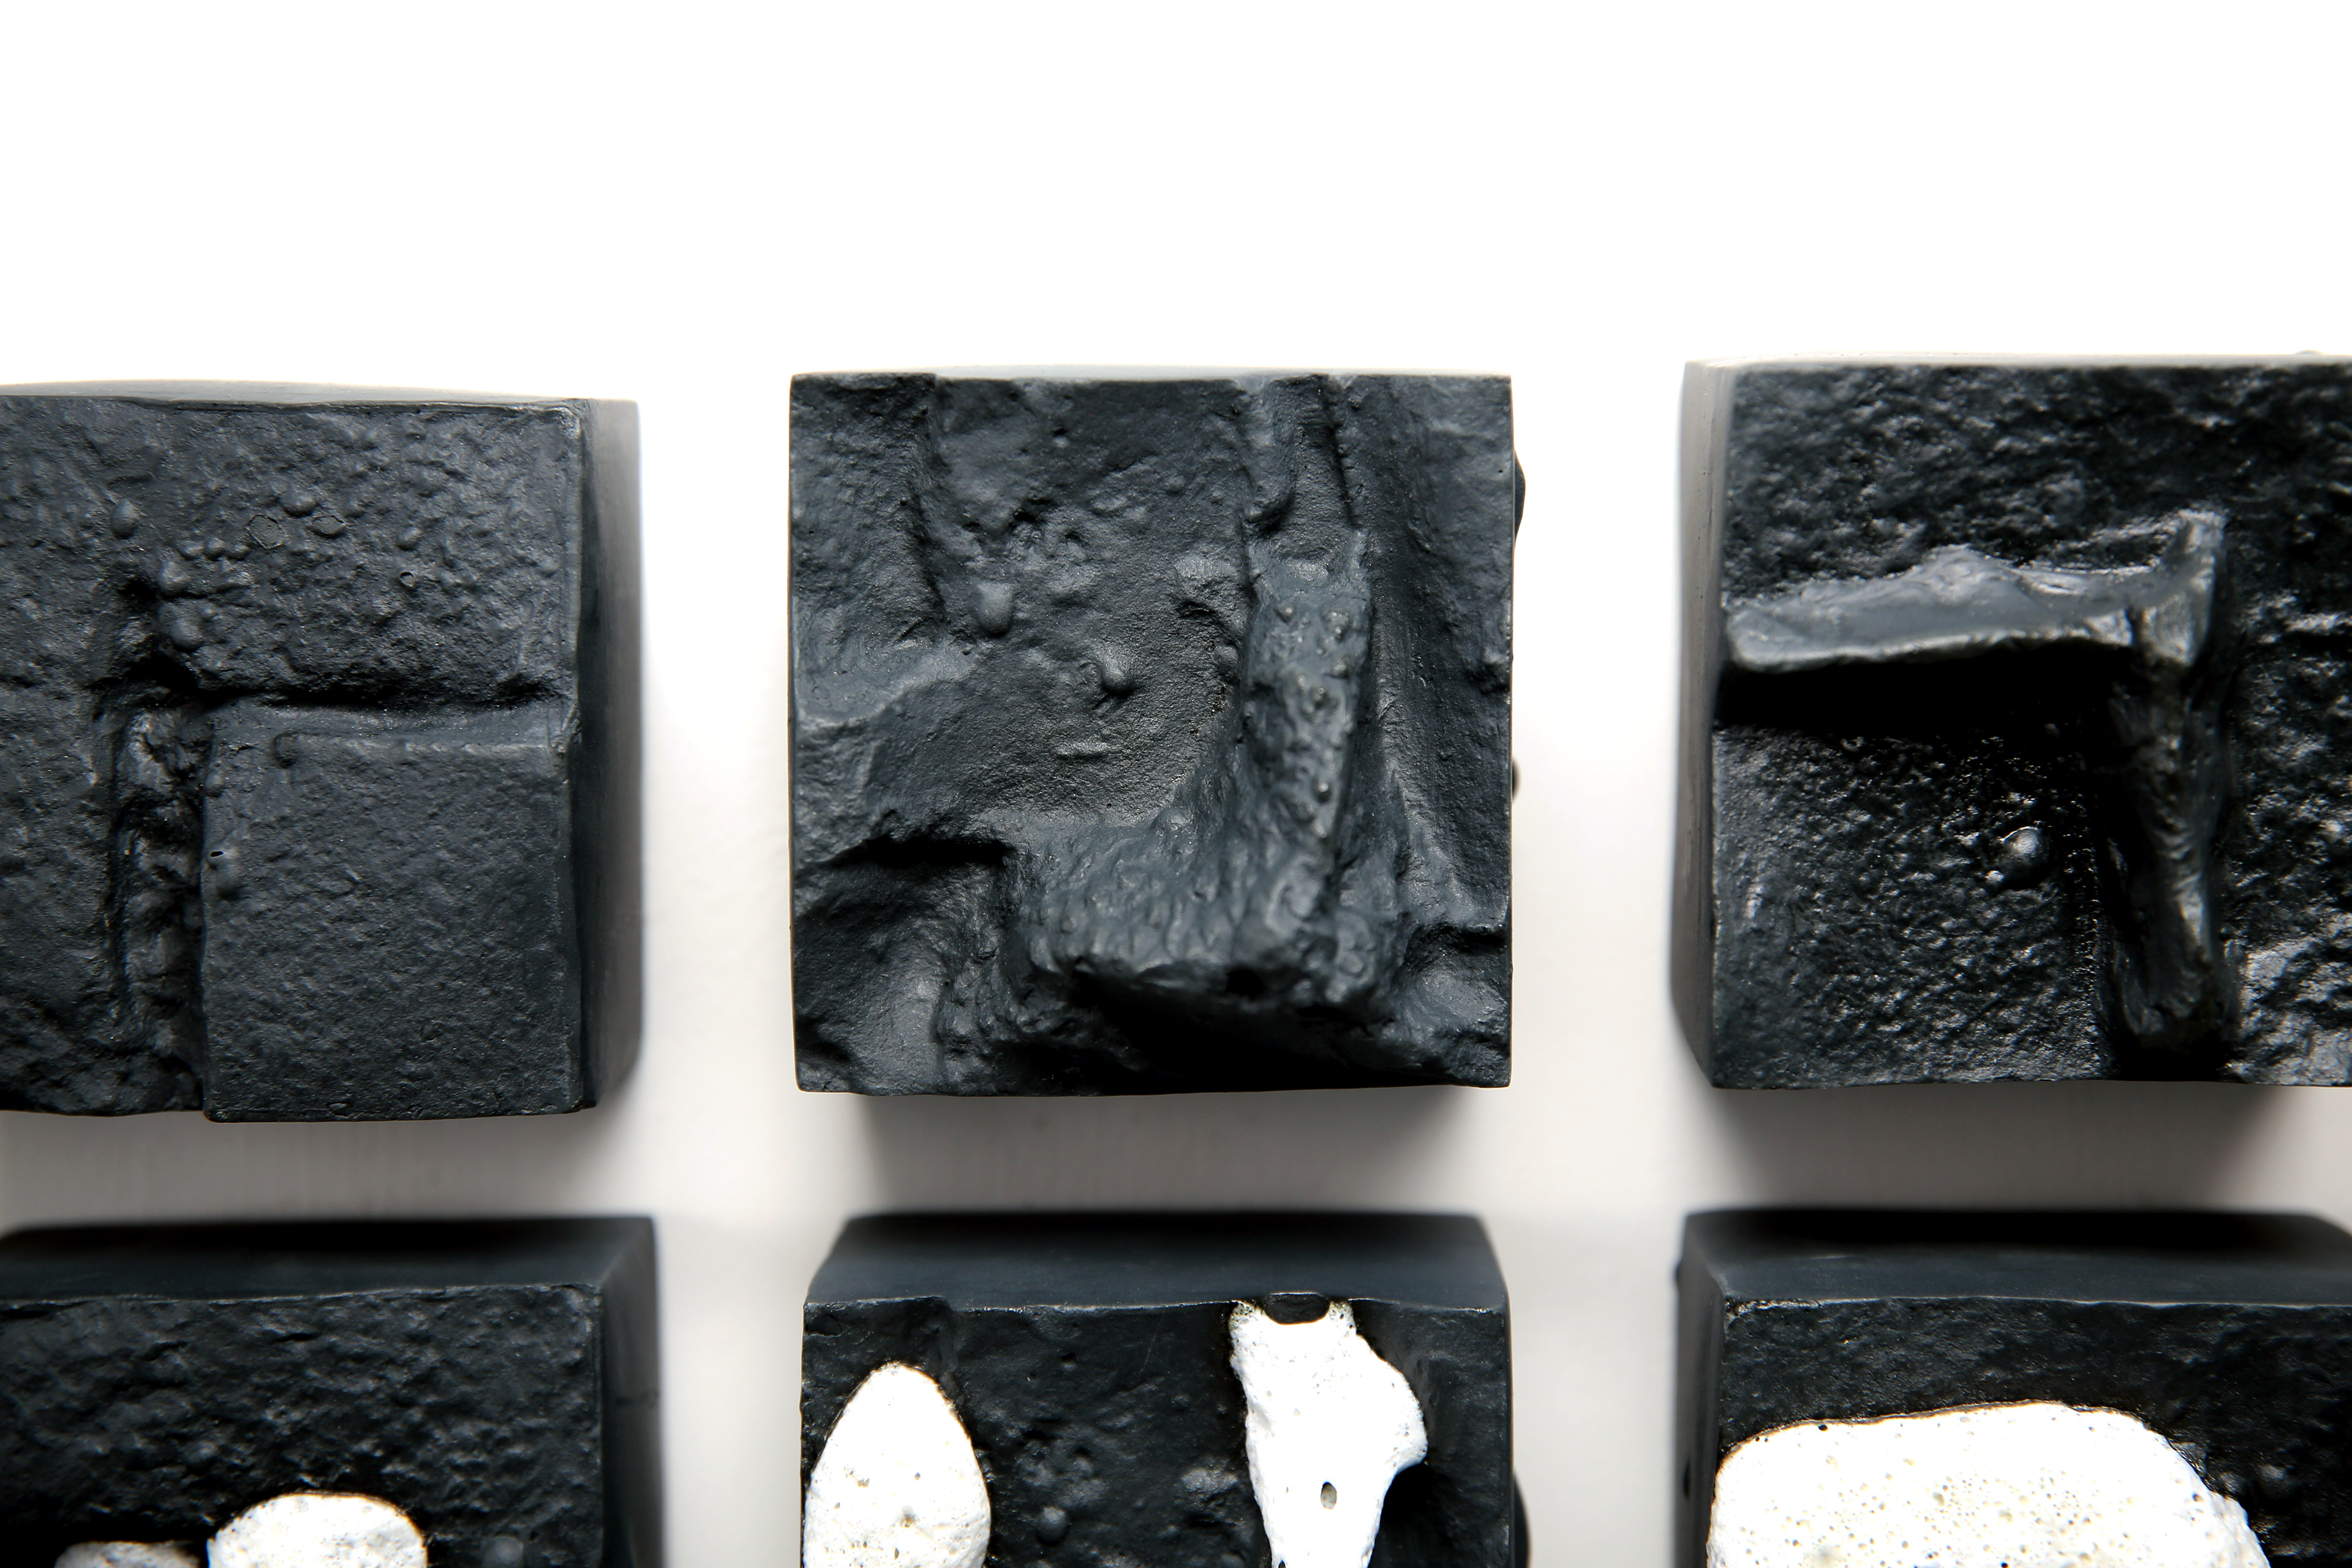
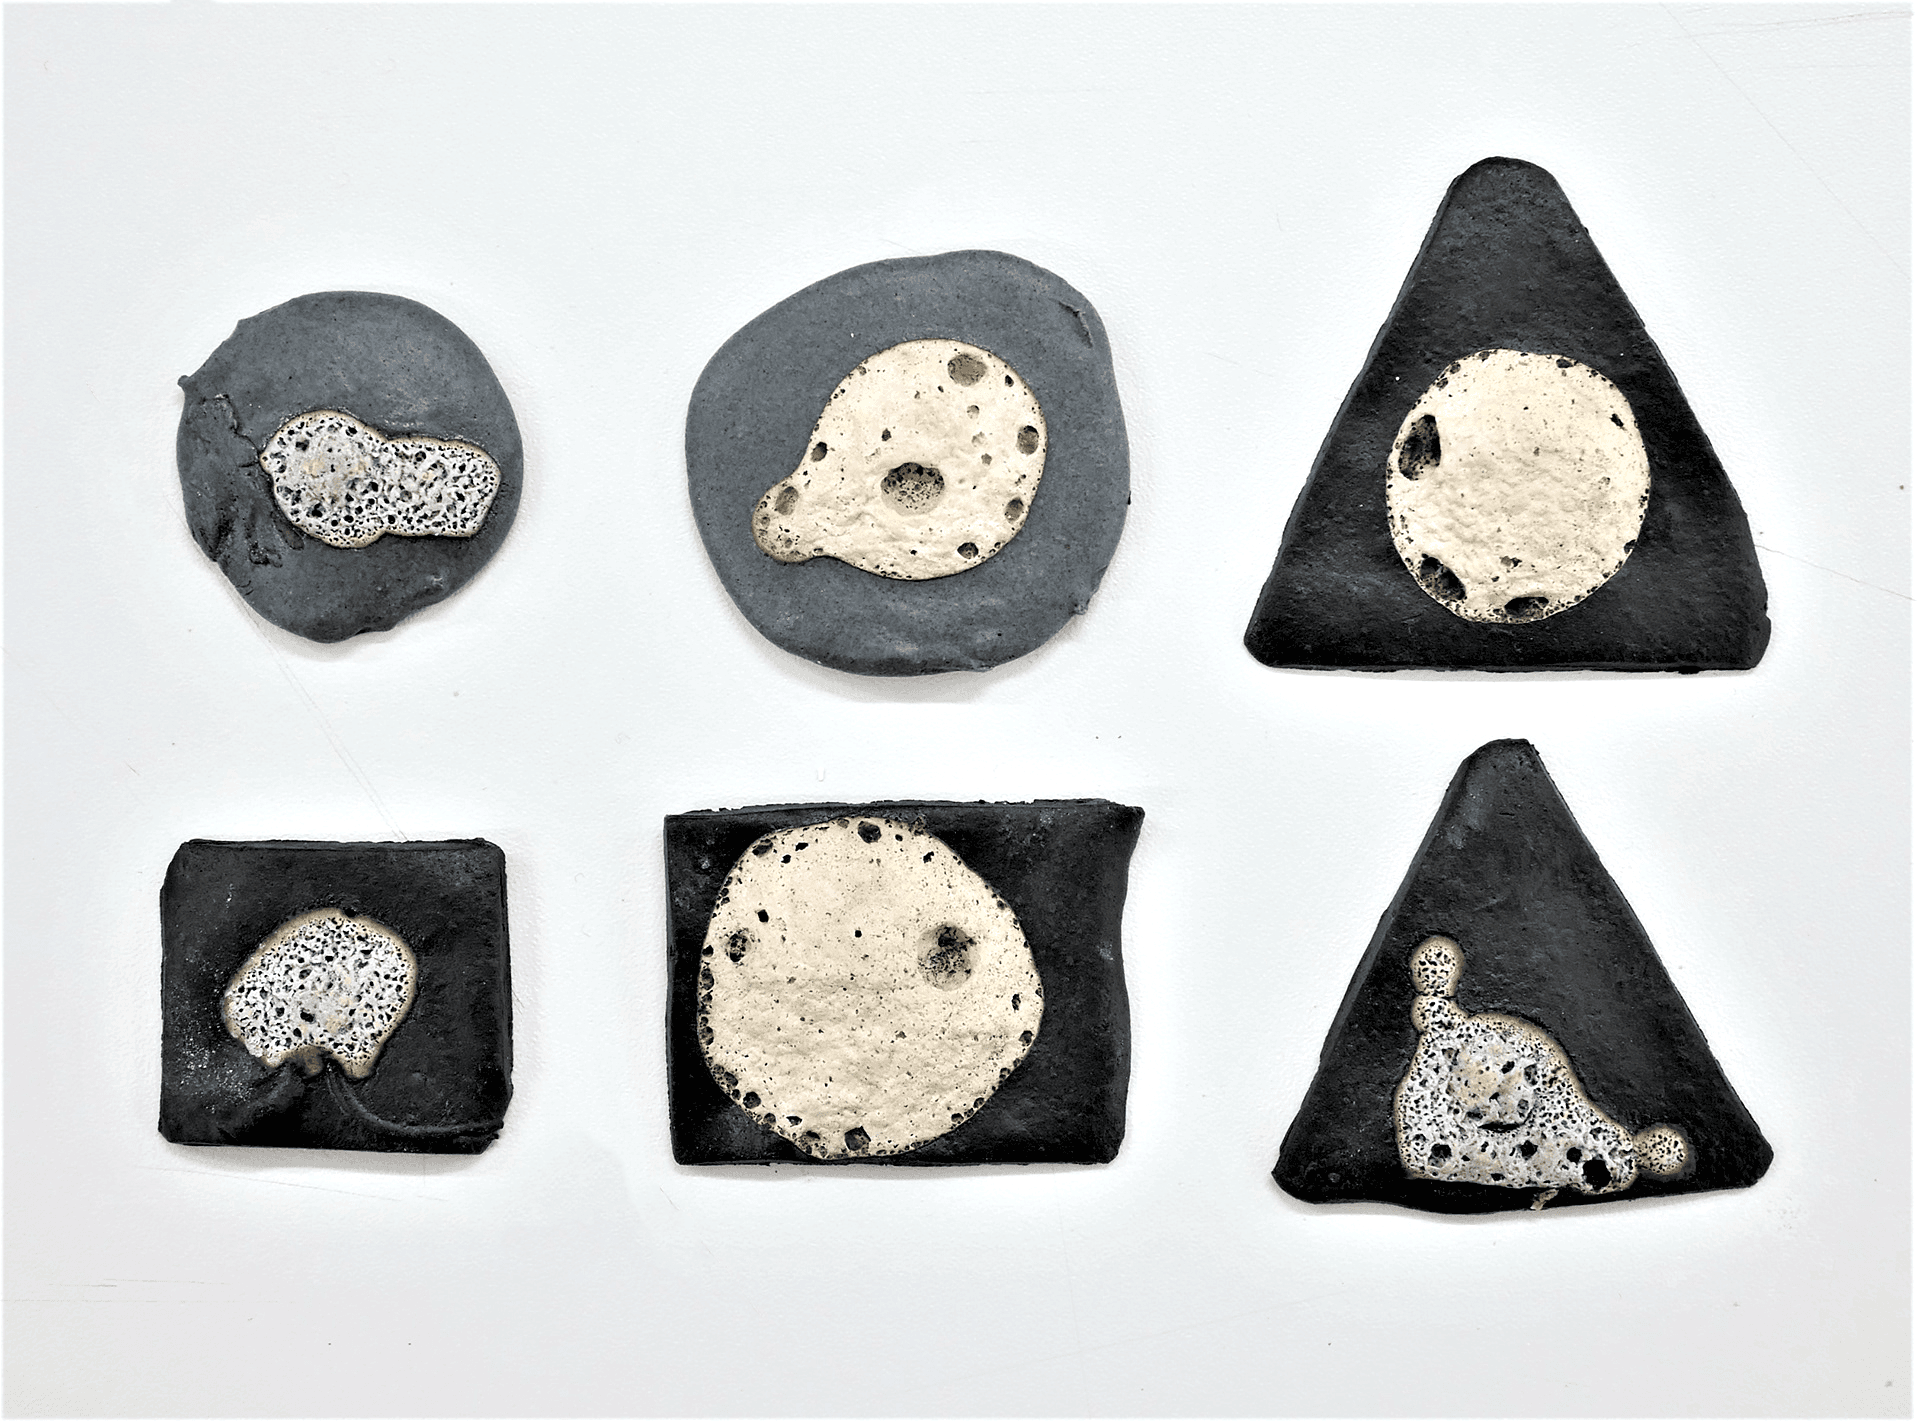
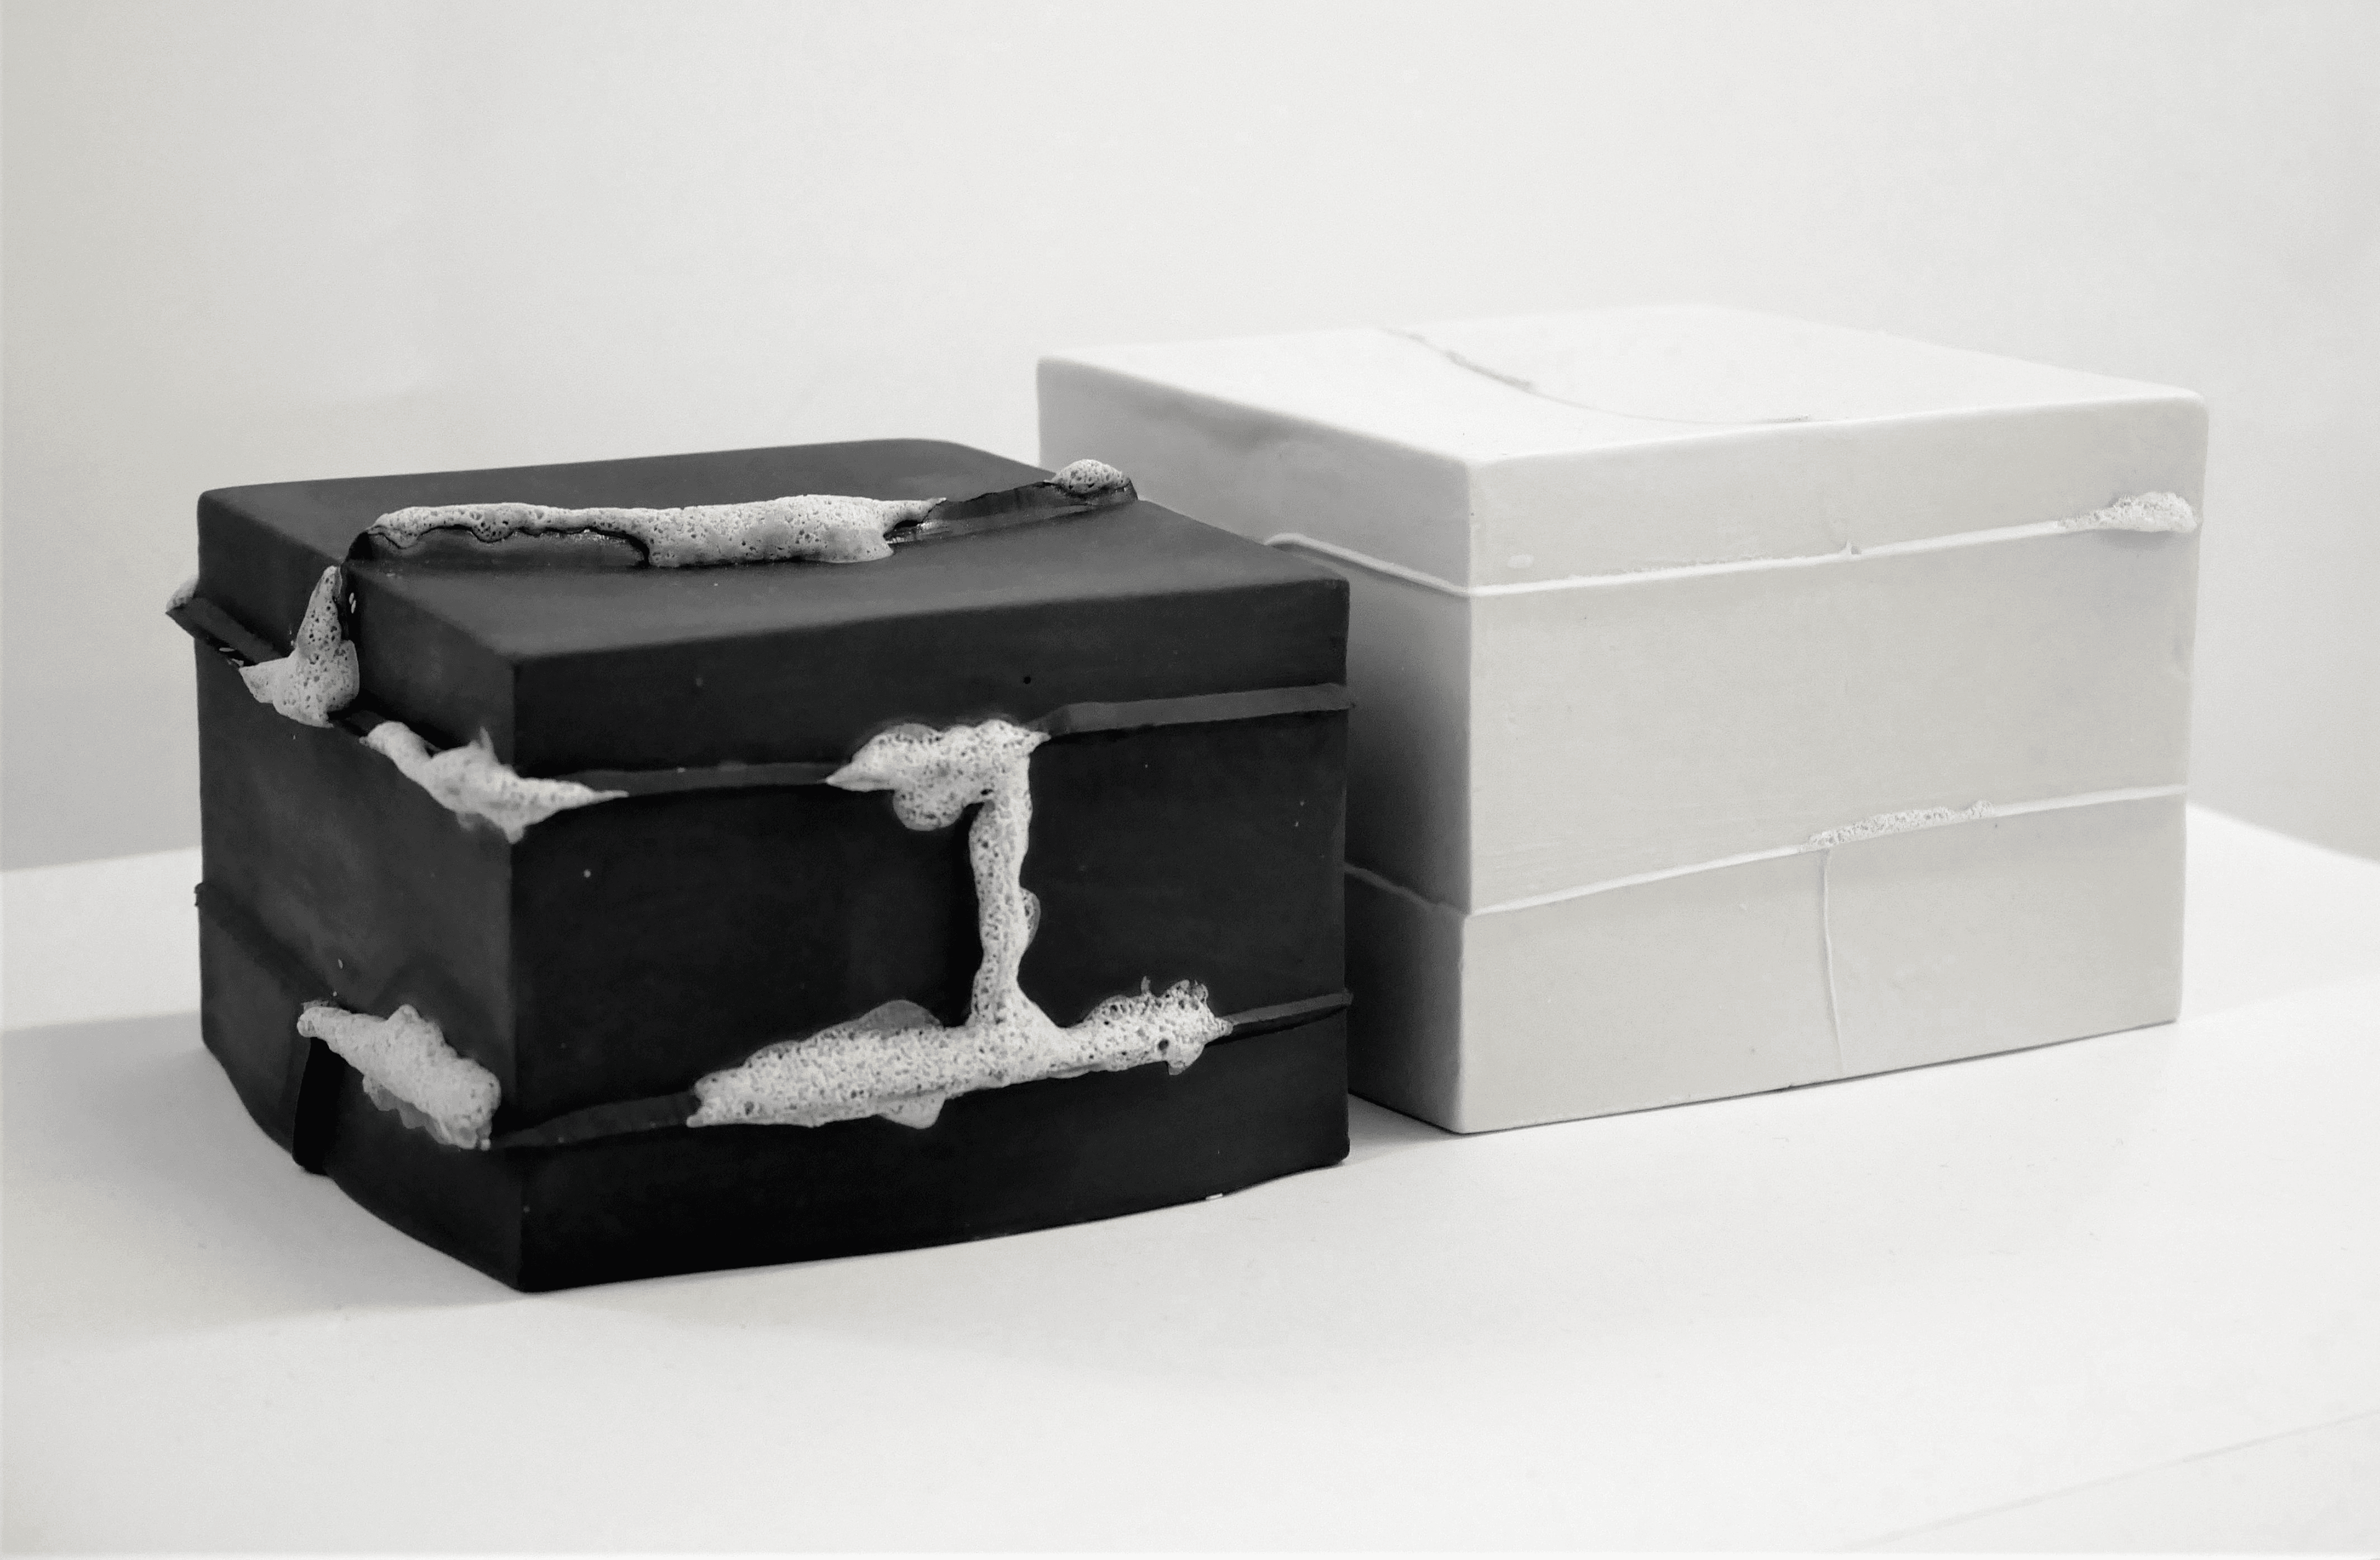
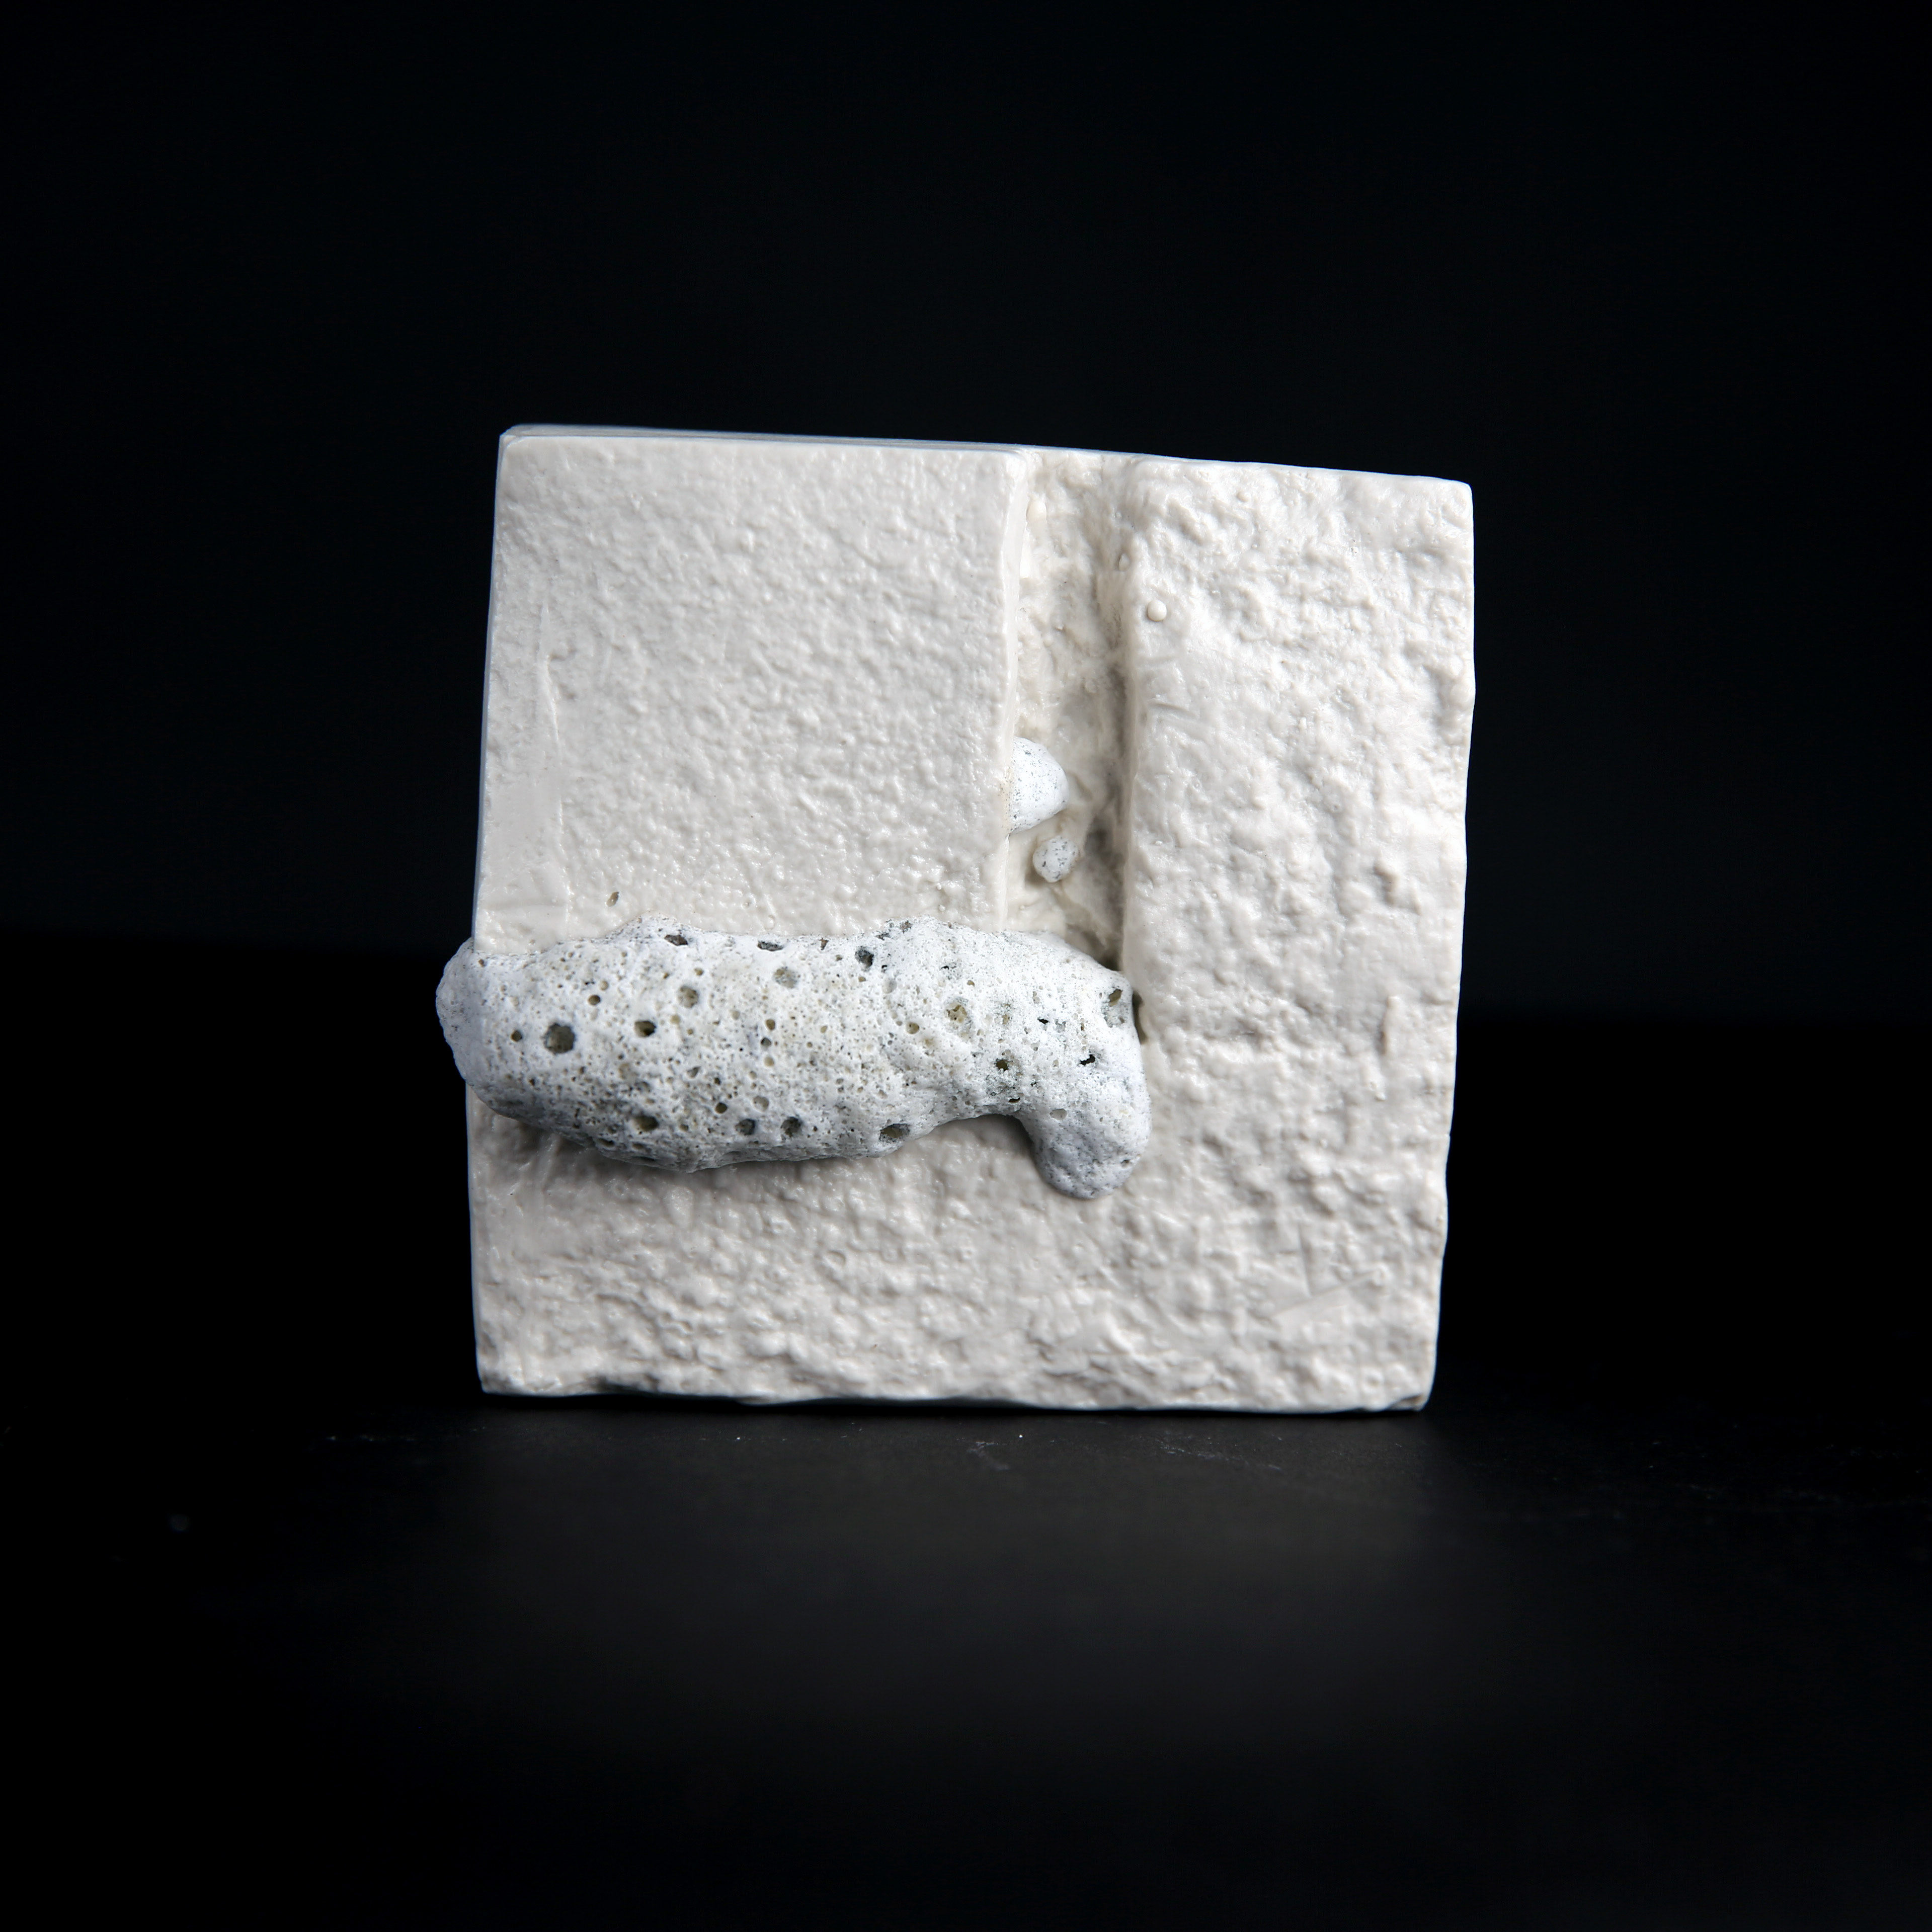
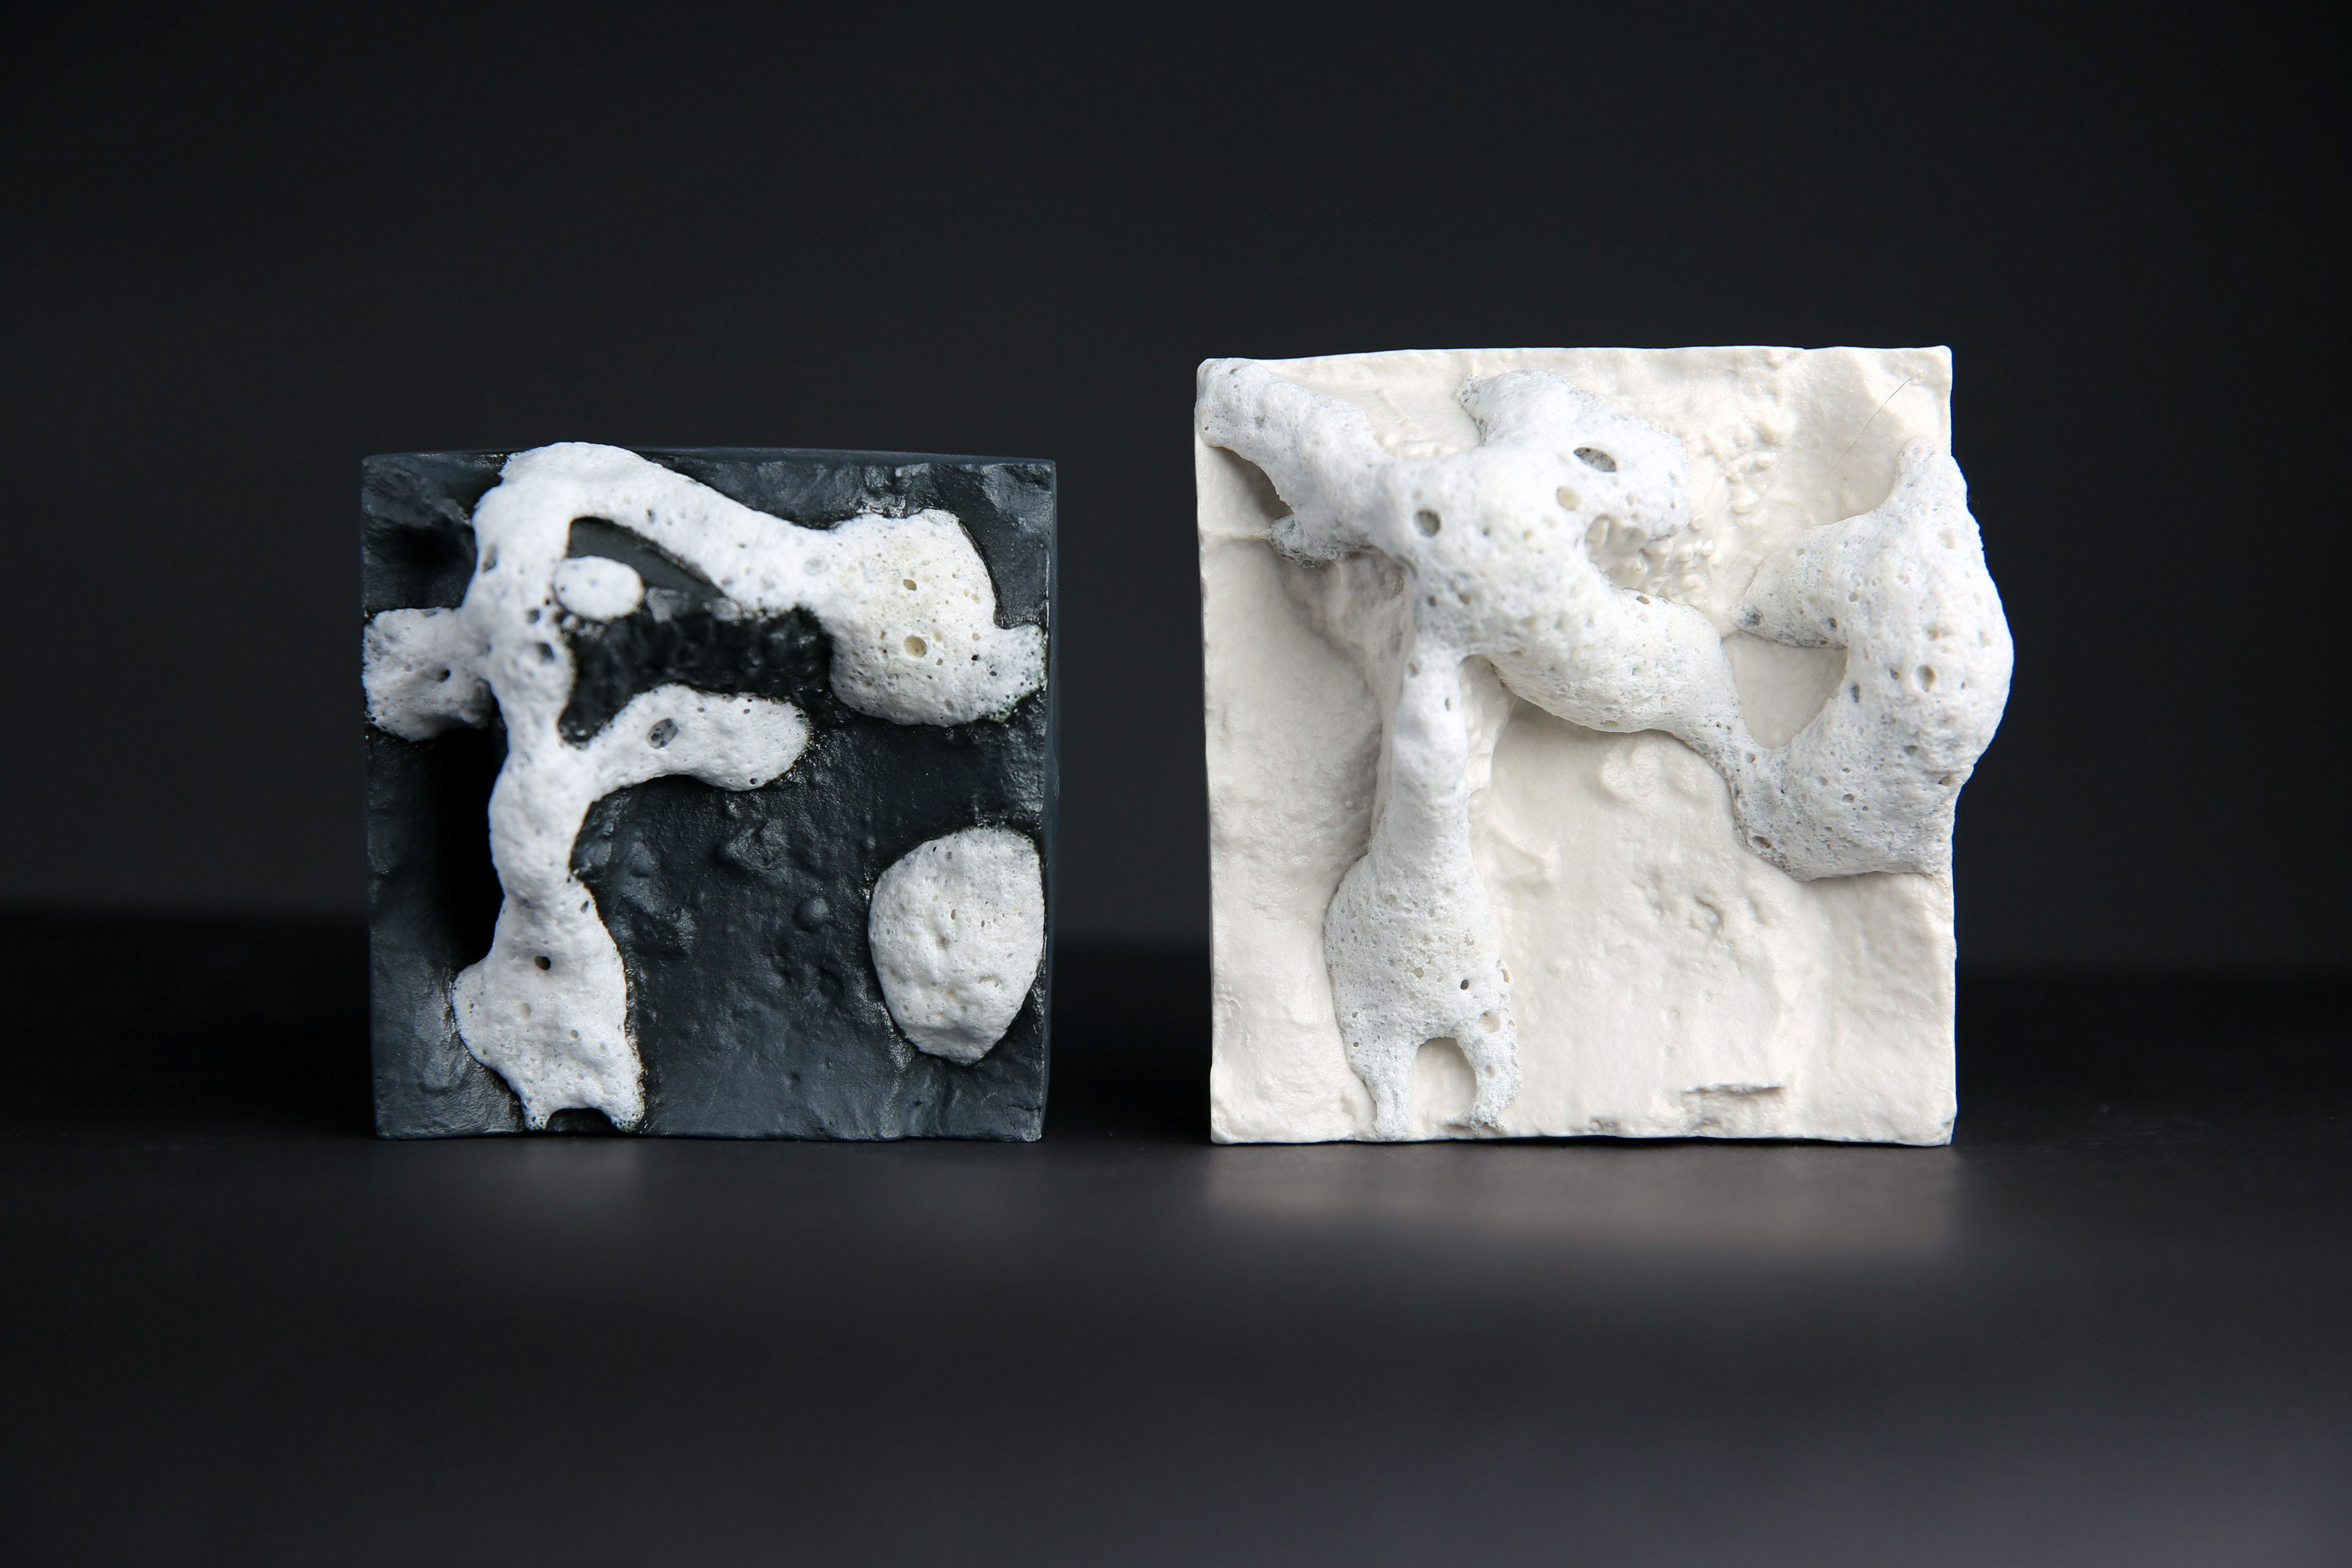
I found the black porcelain to hold the form particularly well, and I felt the jet black colour of the slip enhanced the man-made appearance; creating a parallel to paving slabs.
I was surprised at the shrinkage rate in comparison to the white, however found it captured more detail and contrasted against the white of the glaze best.
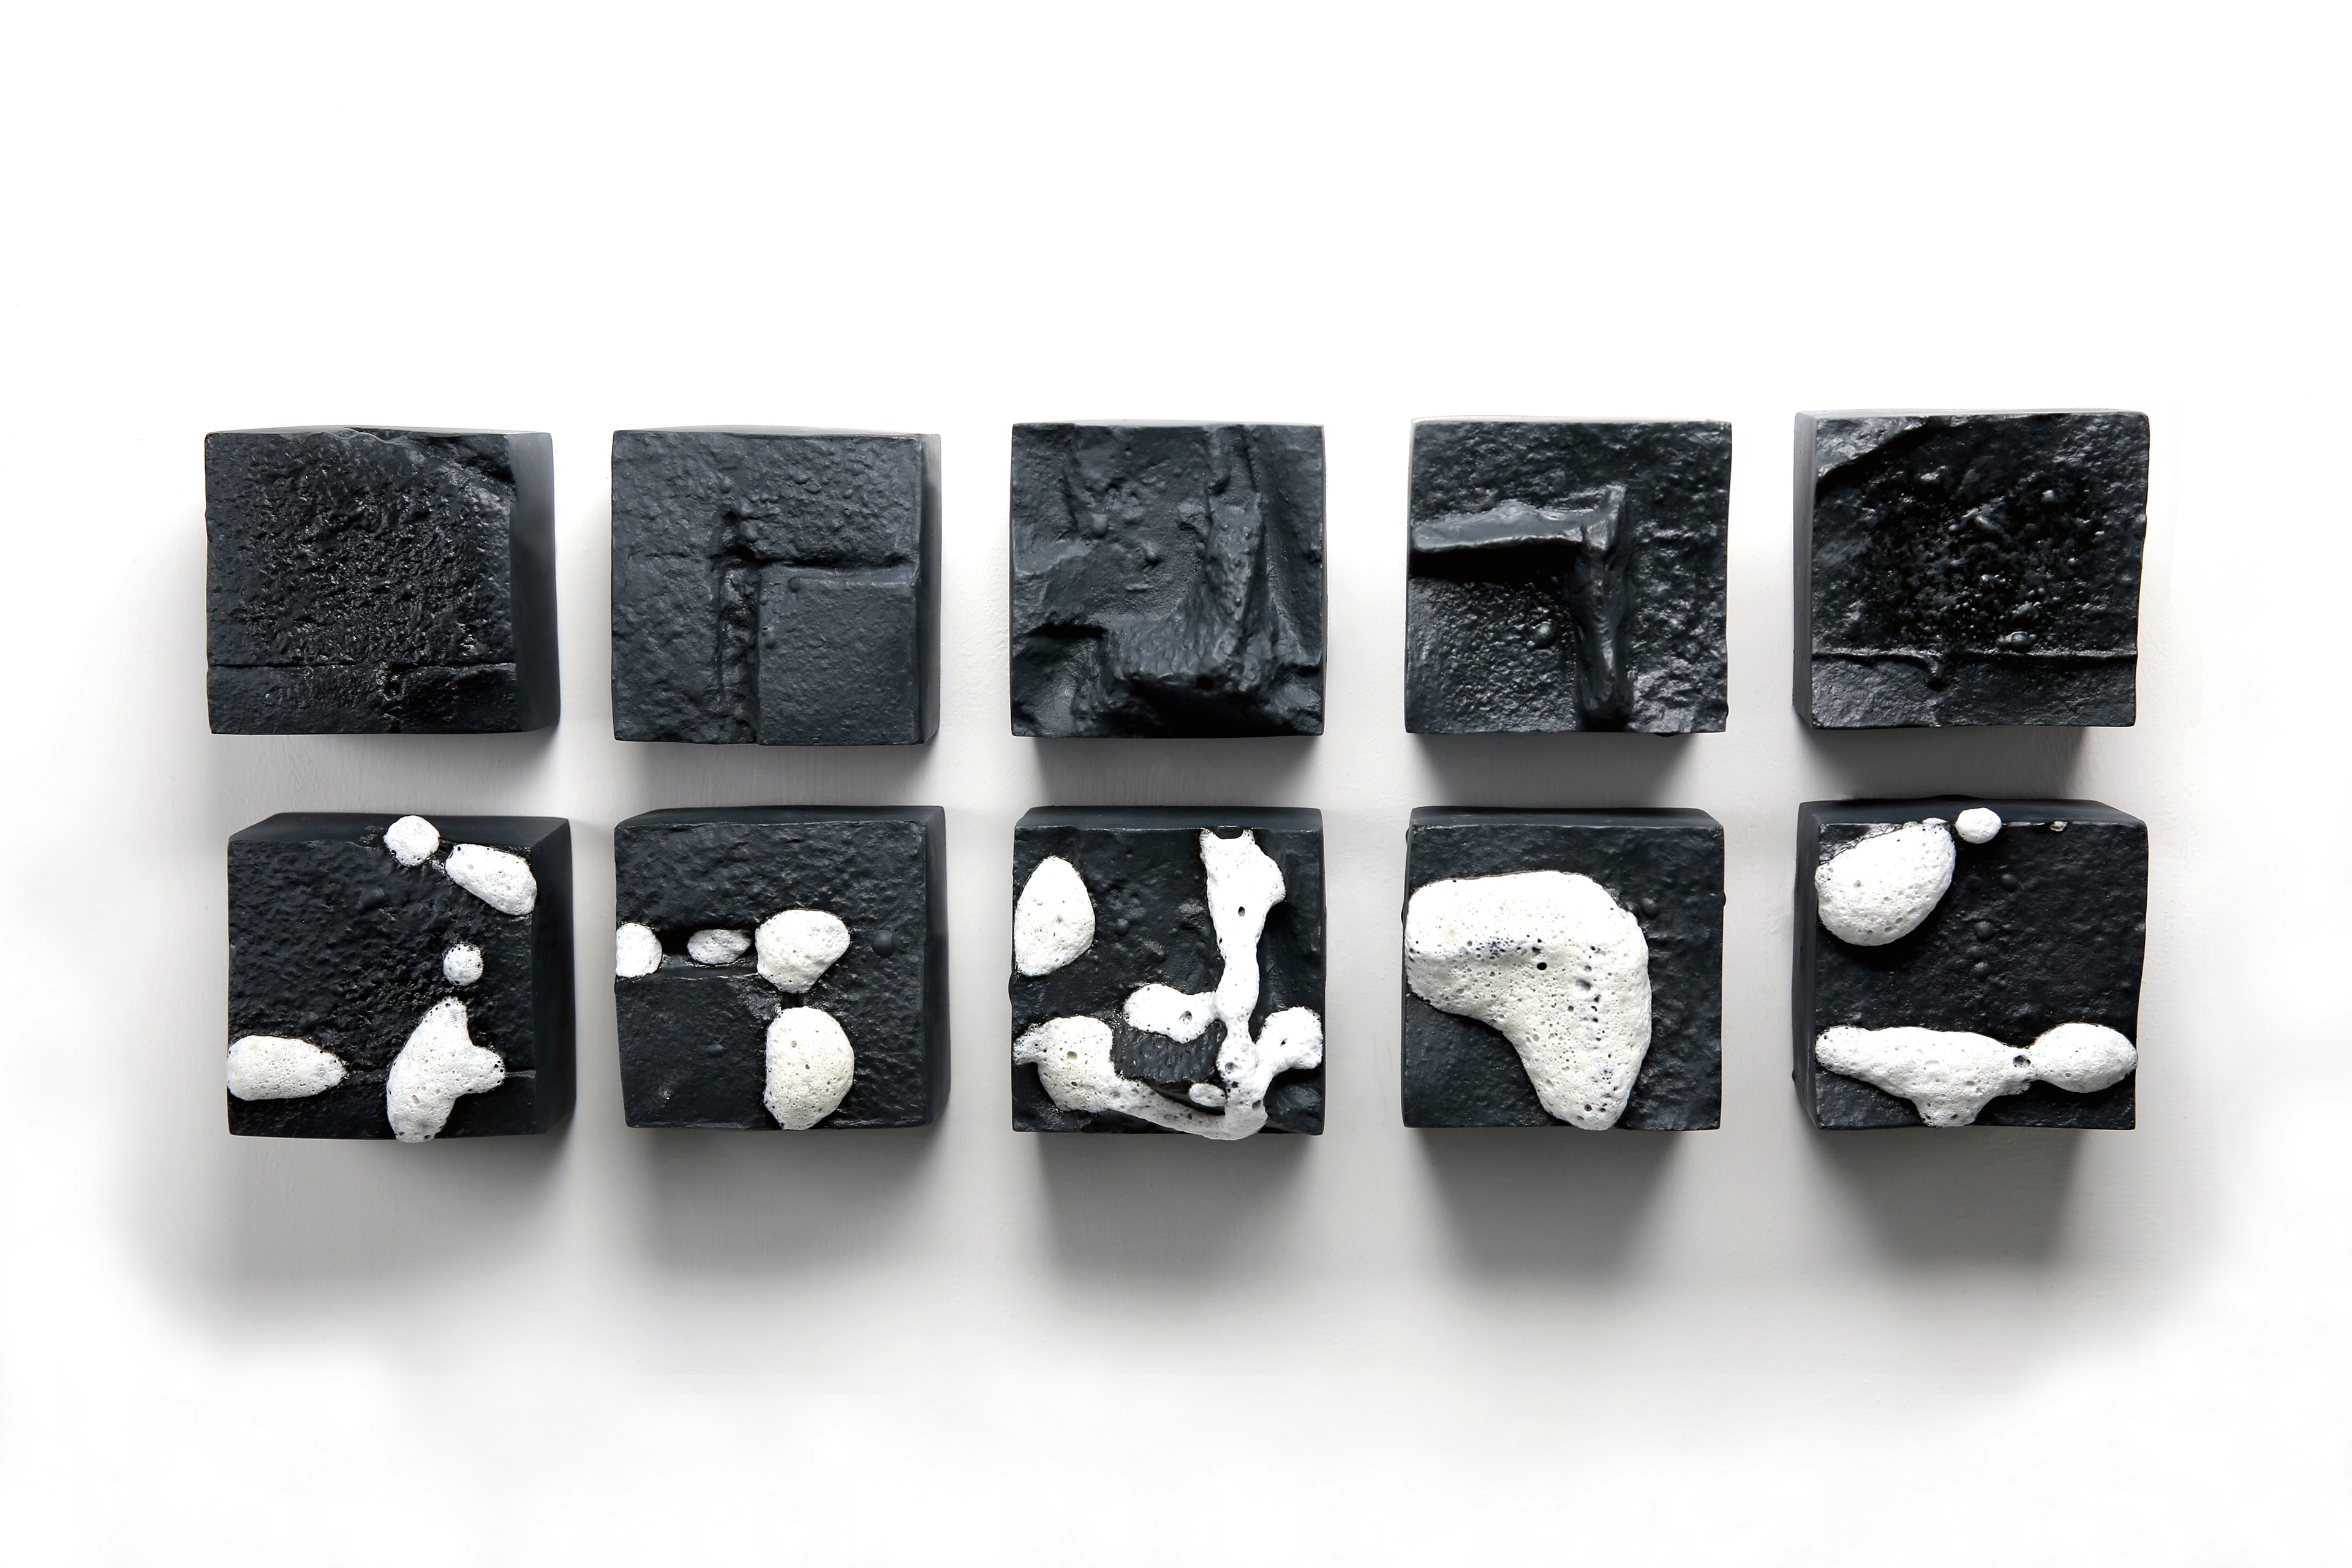
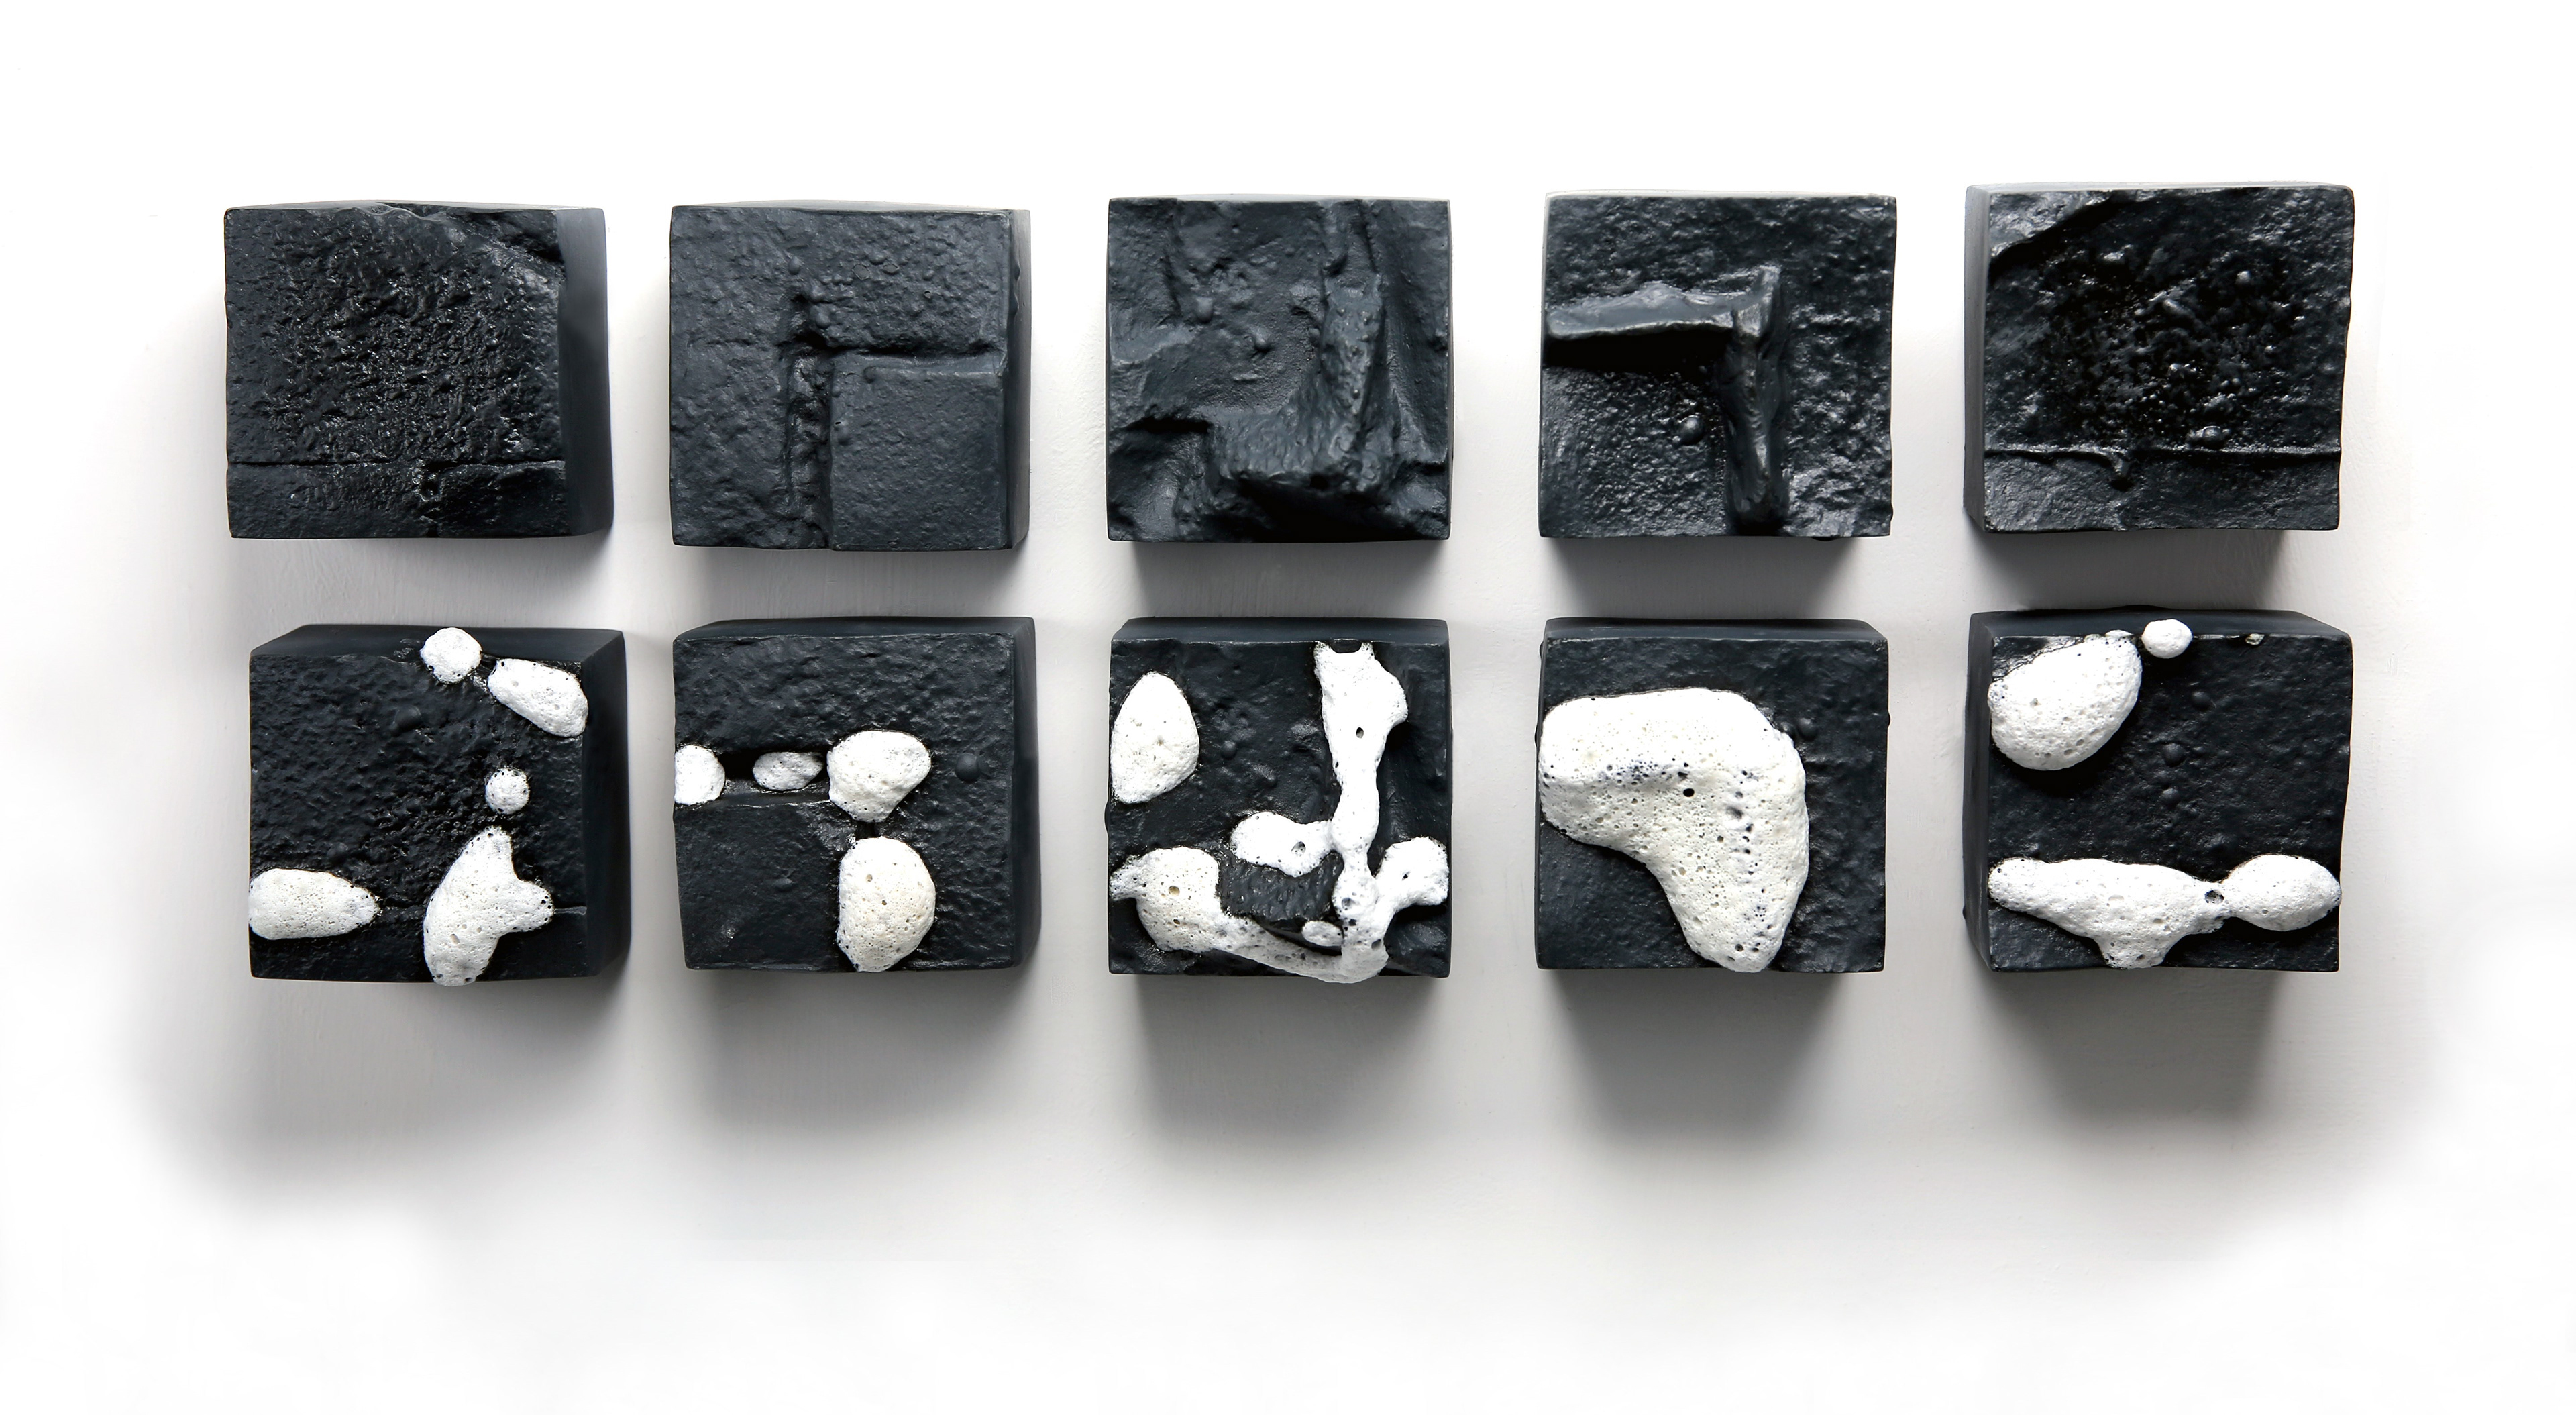
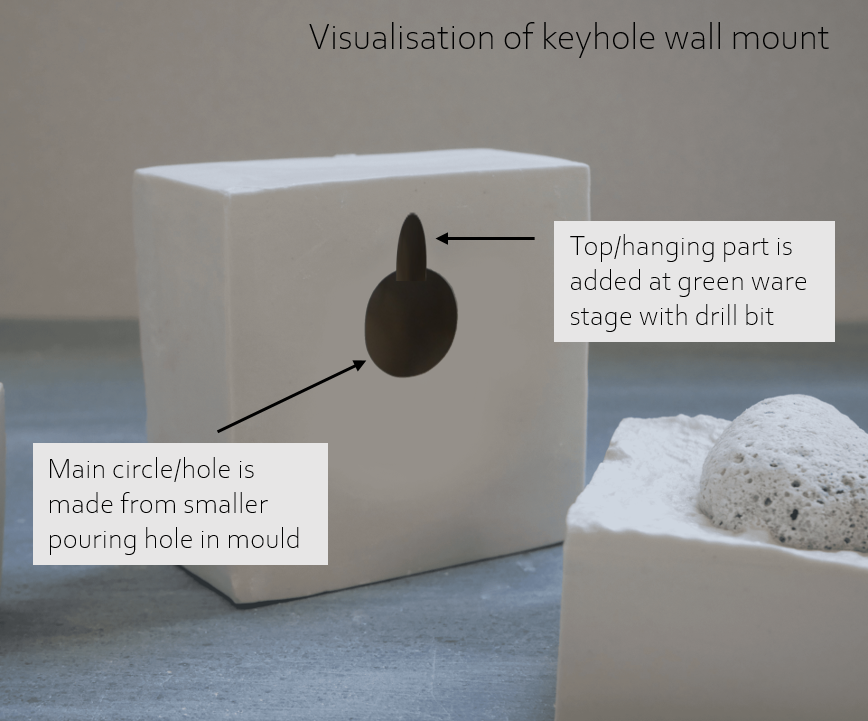
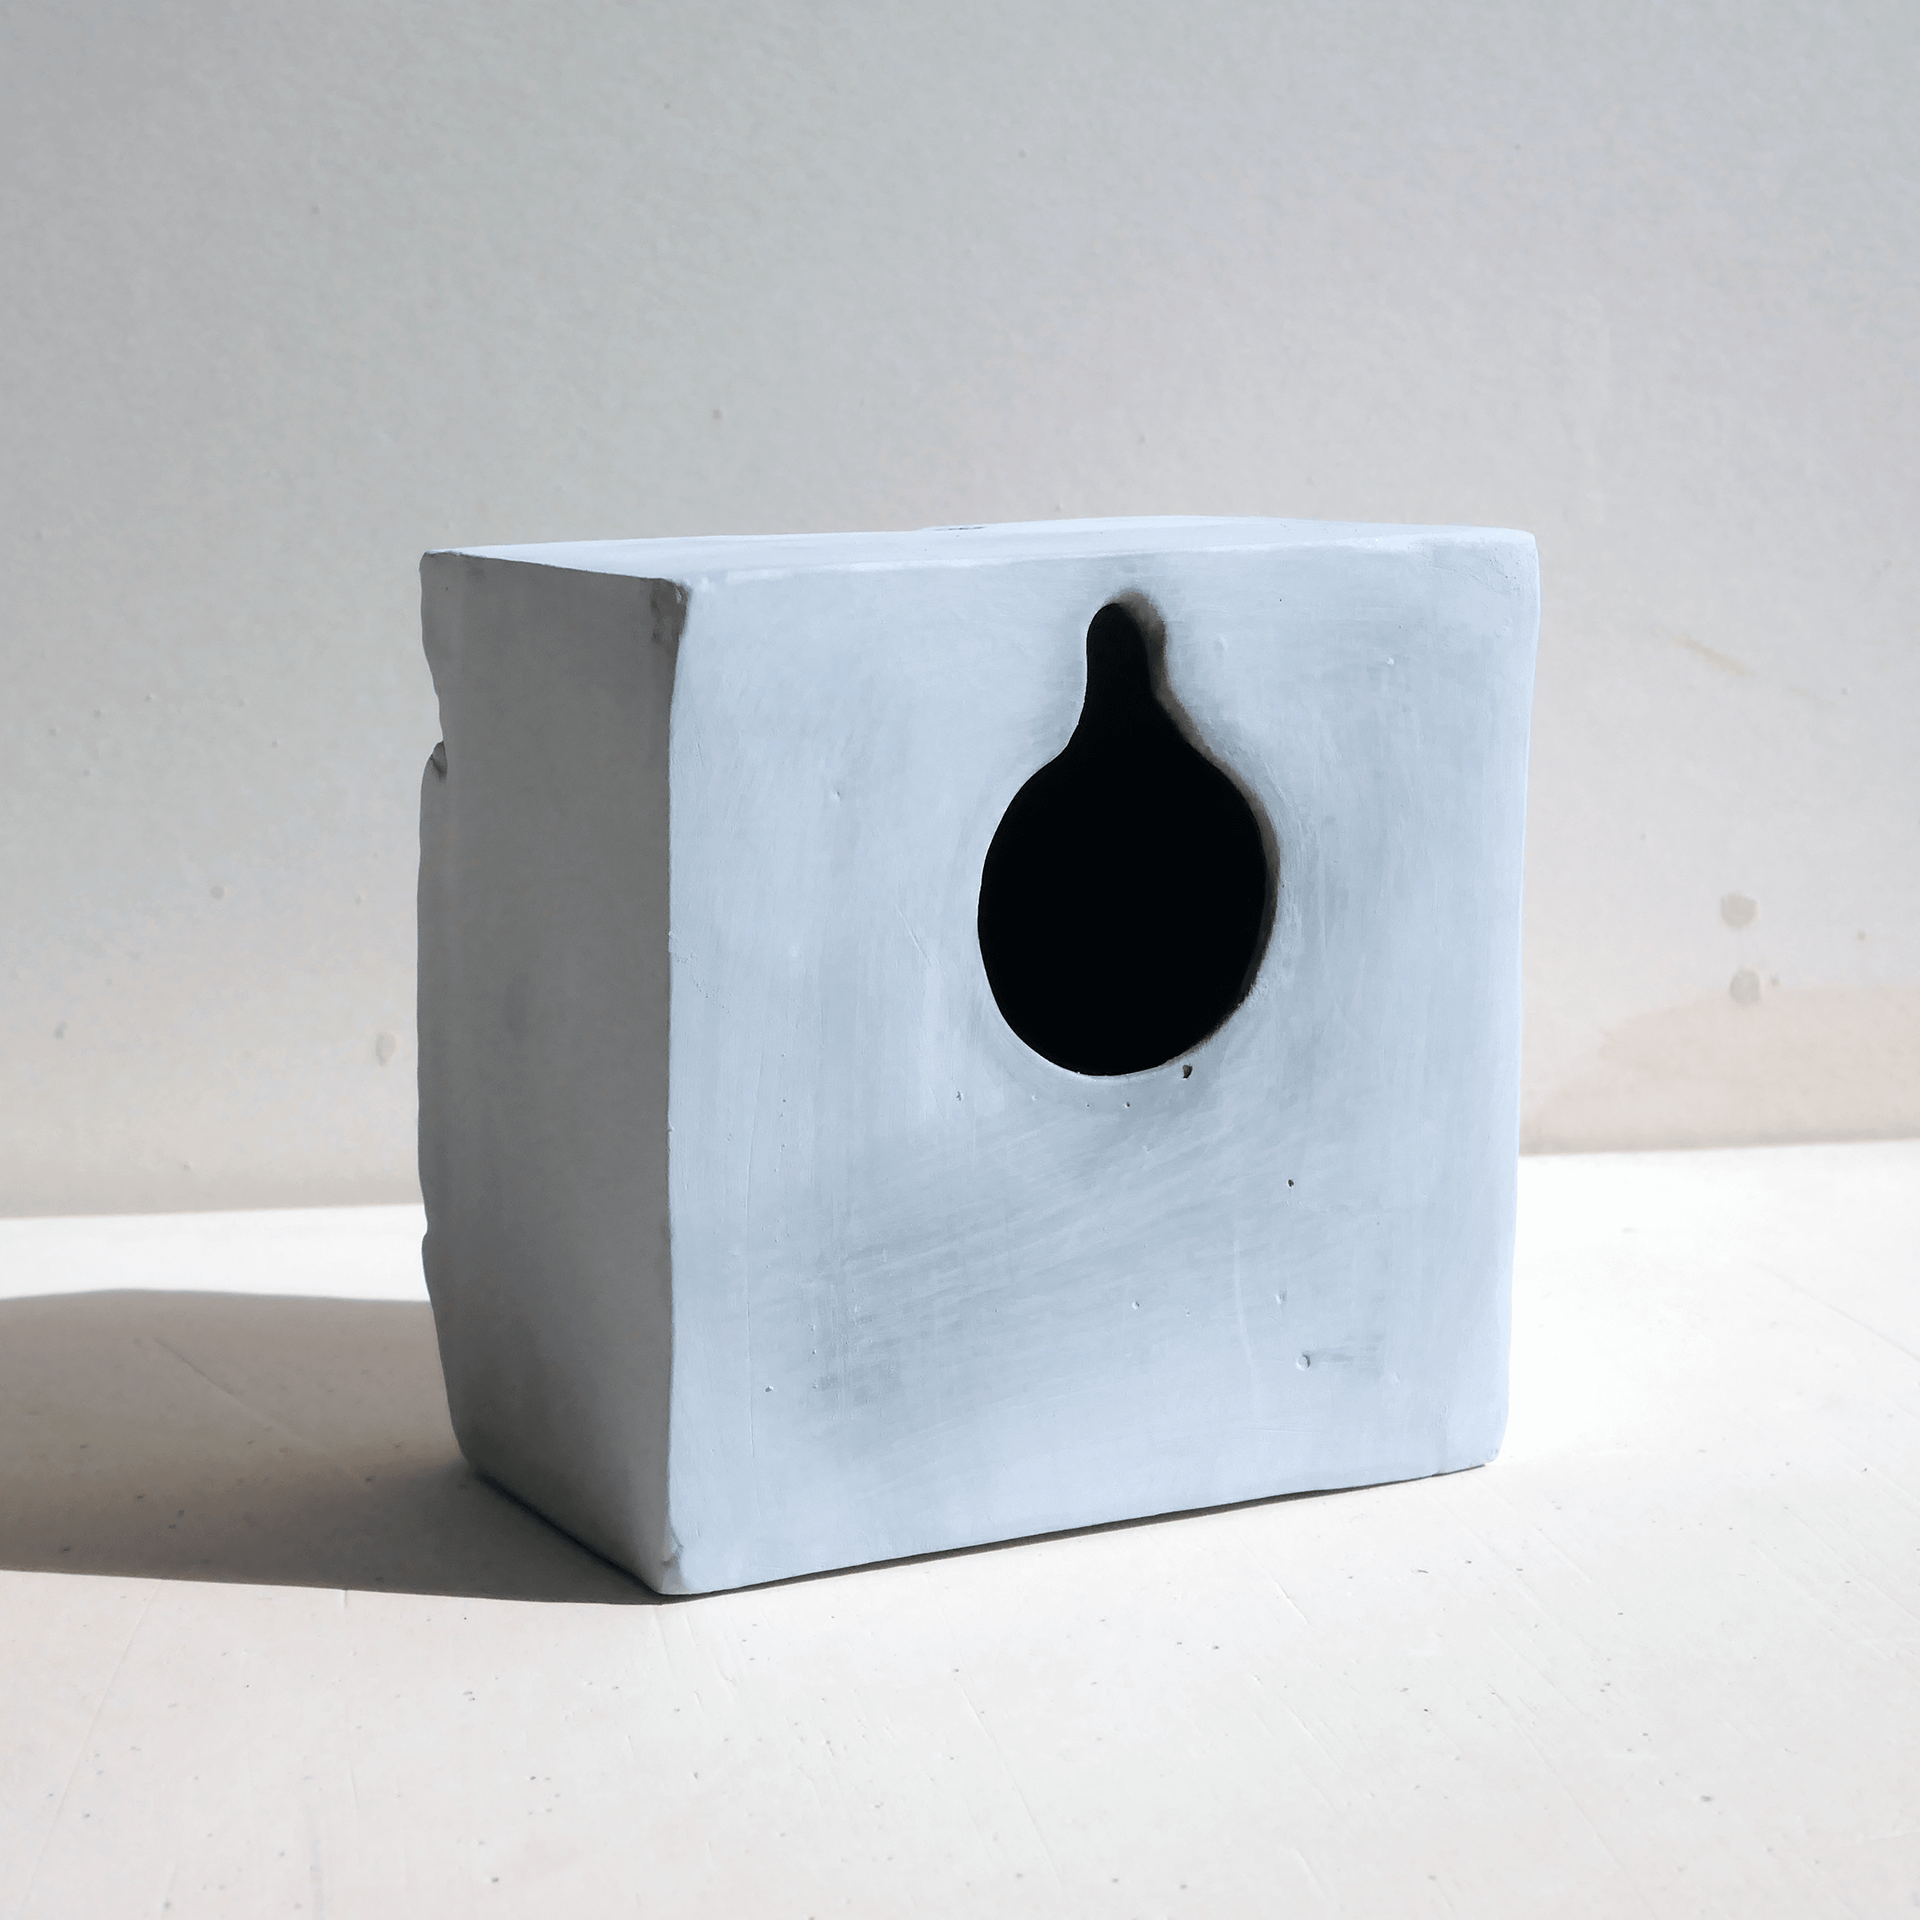
Wall mounting the objects
I chose for the pieces to be wall mounted as the top surface of the pieces are the focal point. Furthermore I found when the pieces were upright they caught the light and created shadows which accentuates the form and texture.
Casting with black porcelain
After testing and ensuring the moulds were sufficient, I slip casted using the black porcelain. I found it to hold the form particularly well, and the quick casting time sped up the process.
However due to the fragility of the unfired porcelain in combination with being overly forceful, I had three breakages when tidying the pieces. I realised I had to slow down and adjust my force when handling them.


Layering glaze
After firing to bisque, I sanded the pieces to have immaculate edges. When glazing the pieces, I had to predict the outcome based off previous investigations.
Rather than applying the glaze liberally into the cracks, I chose to maintain an element of control; layering the glaze to erupt in a way it would appear to be growing.

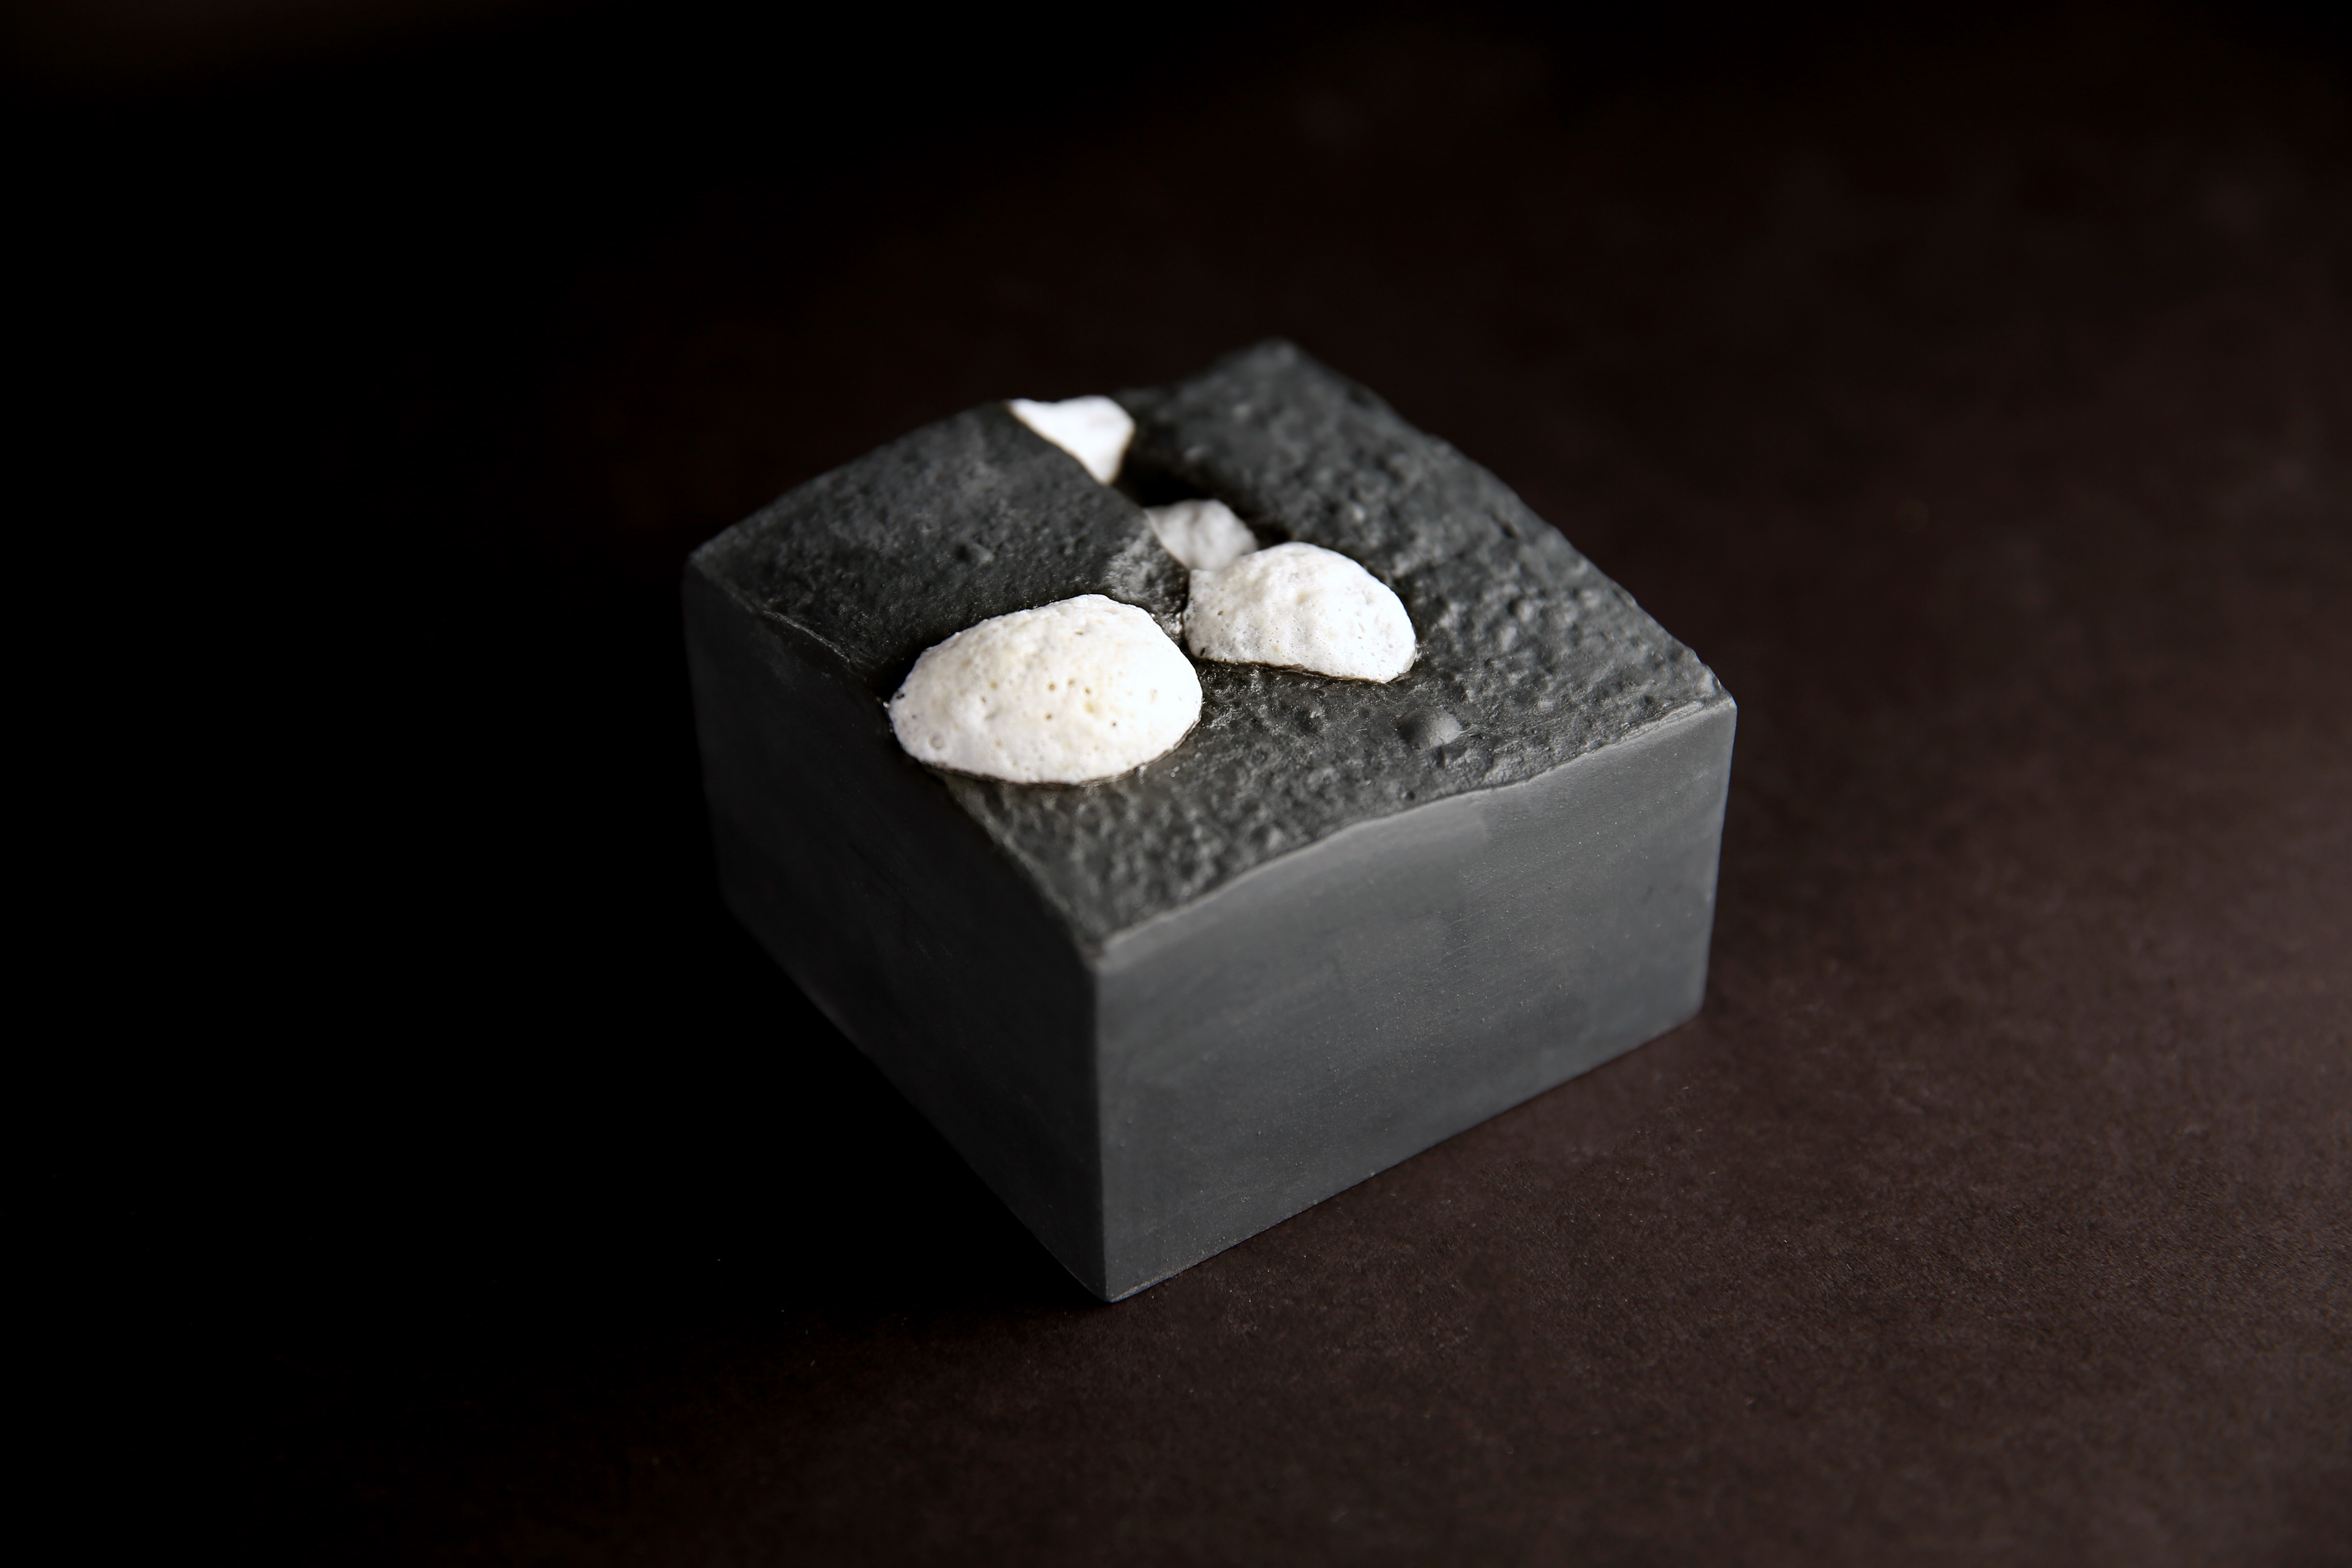
Resolved objects
I was very pleased with the outcome of the resolved pieces. There were bulges which appeared during the firing process. This could have been due to not mixing the porcelain thoroughly enough between each cast. However, I felt this added to unpredictable component fundamental to the project.
Throughout this project, I revealed many valuable components to my practice which I will take forward. Not only have I refined making; I have also enhanced my ability working self-lead. Following a time plan, updating my website and utilizing a sketchbook are practices I will continue.