Video
I have added a clip to the end of my exhibition video of me capturing the ground using Vinamold.
Degree Show and New Designers aims
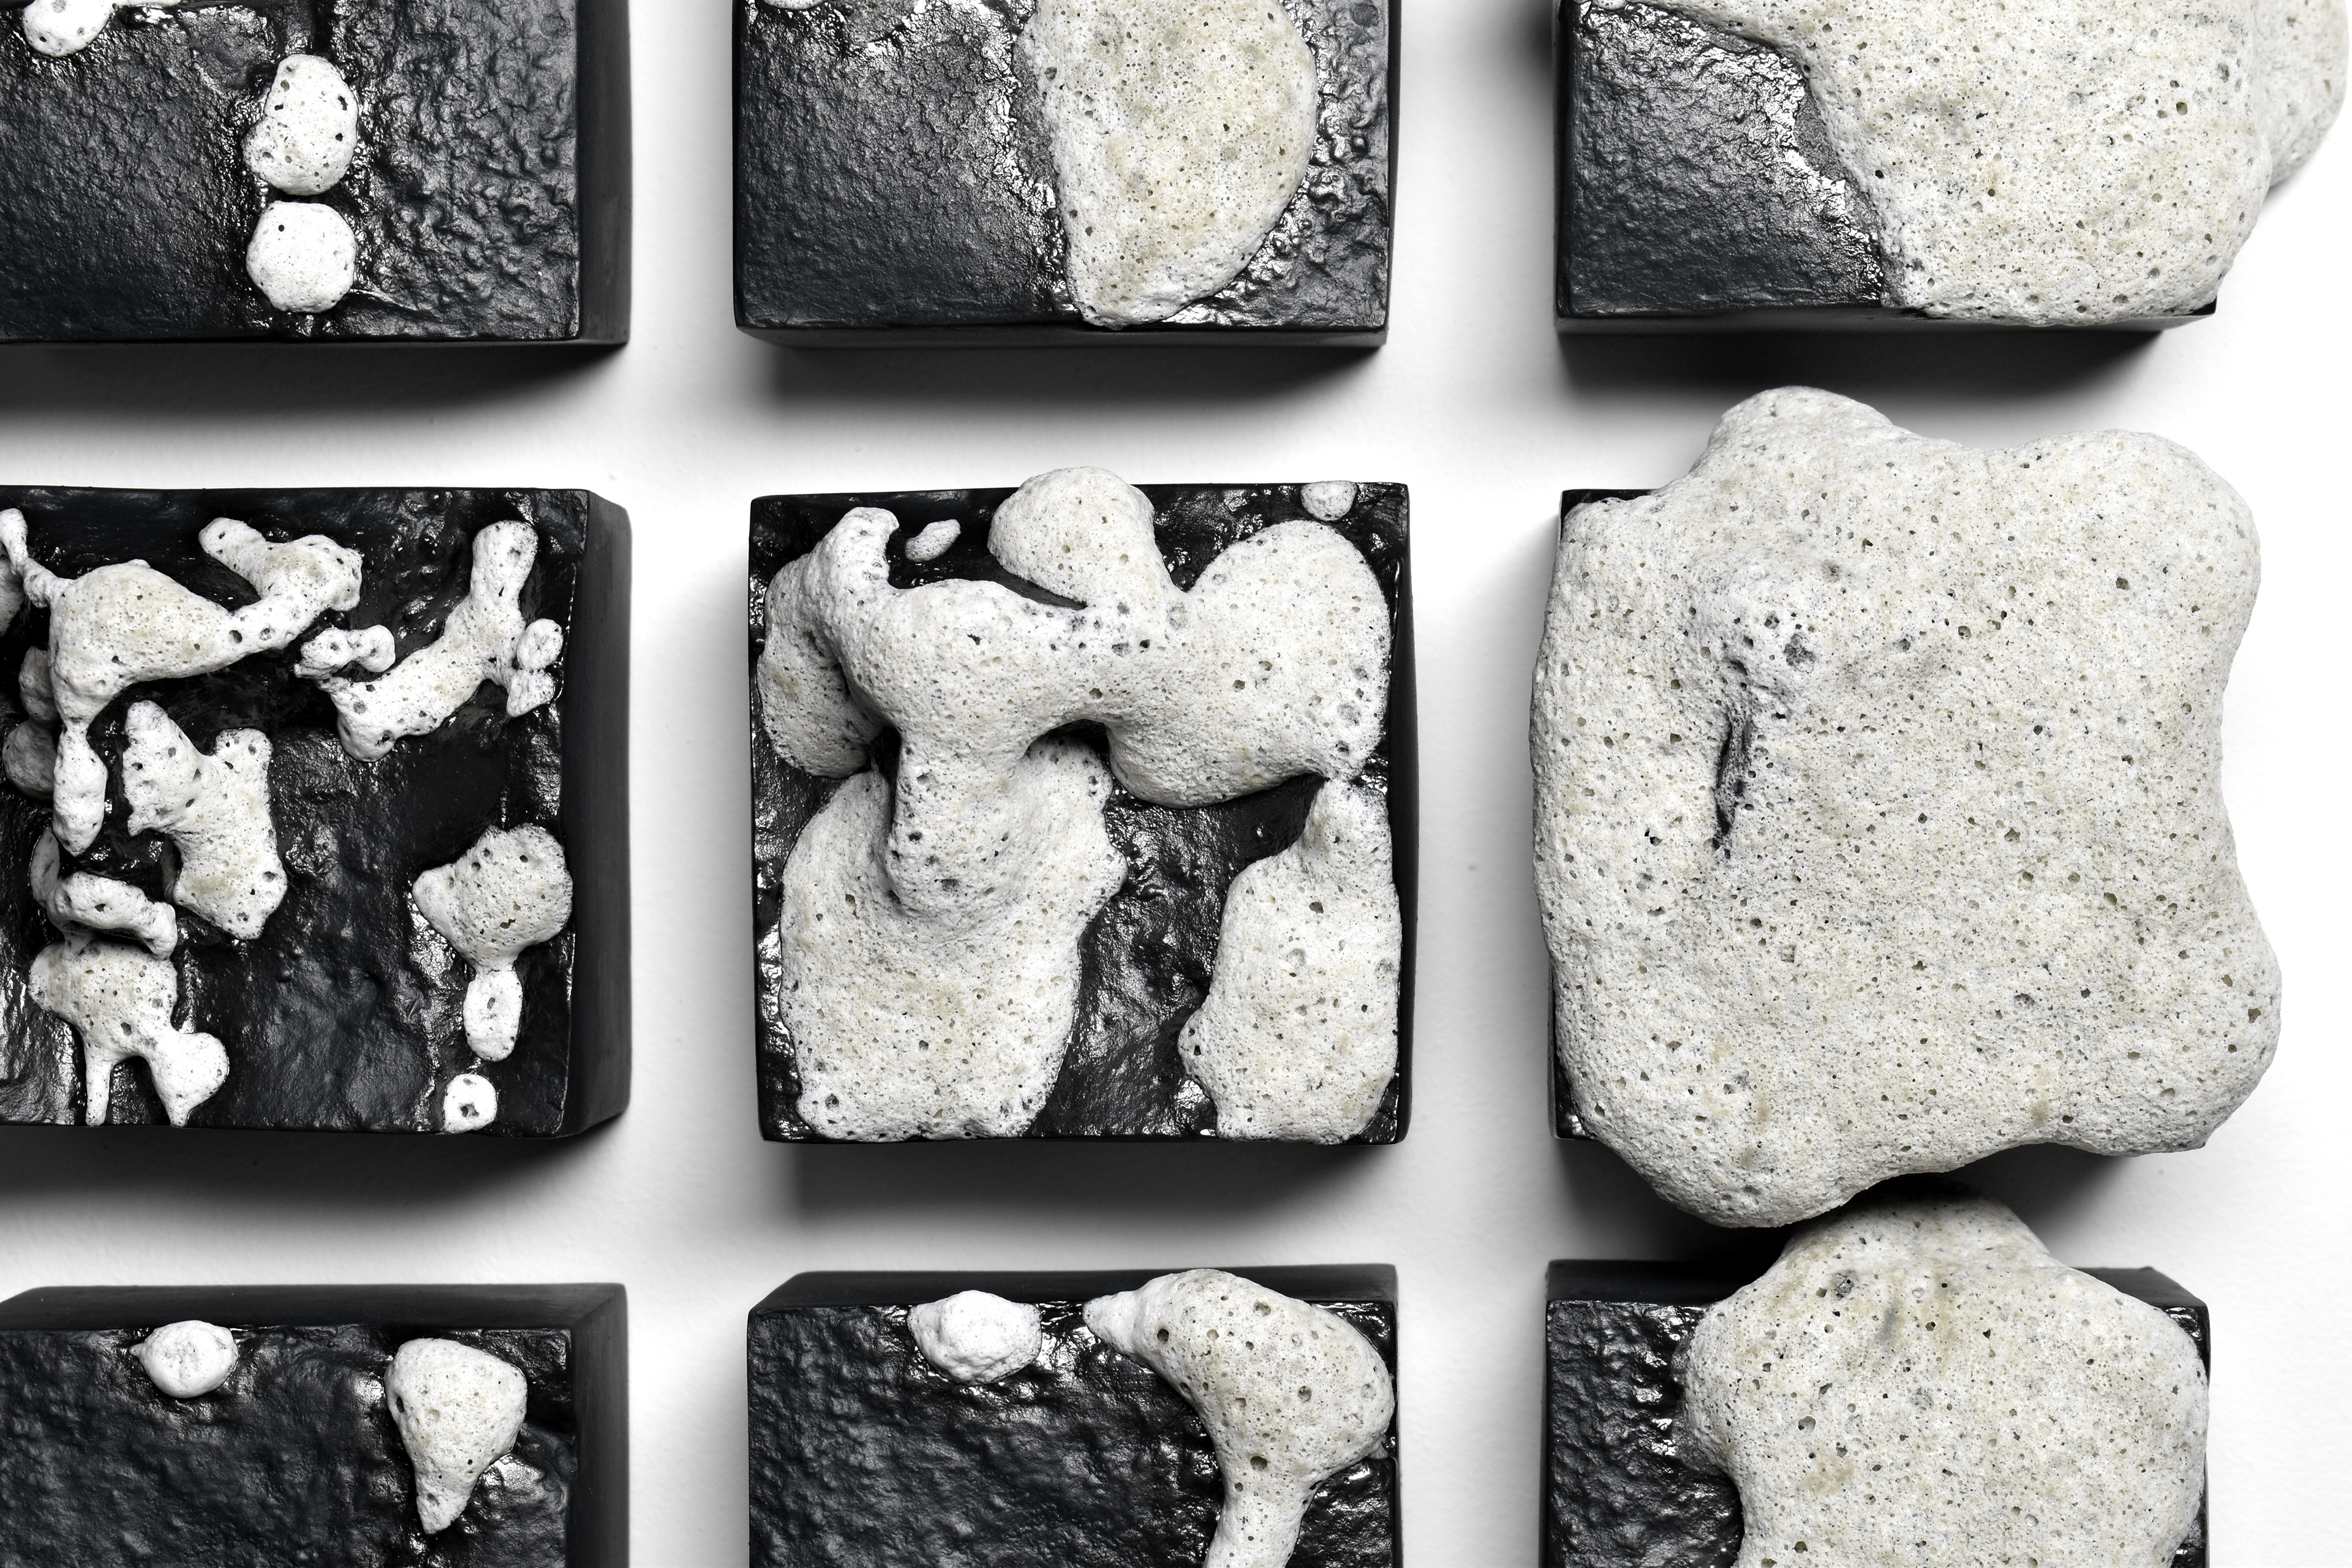
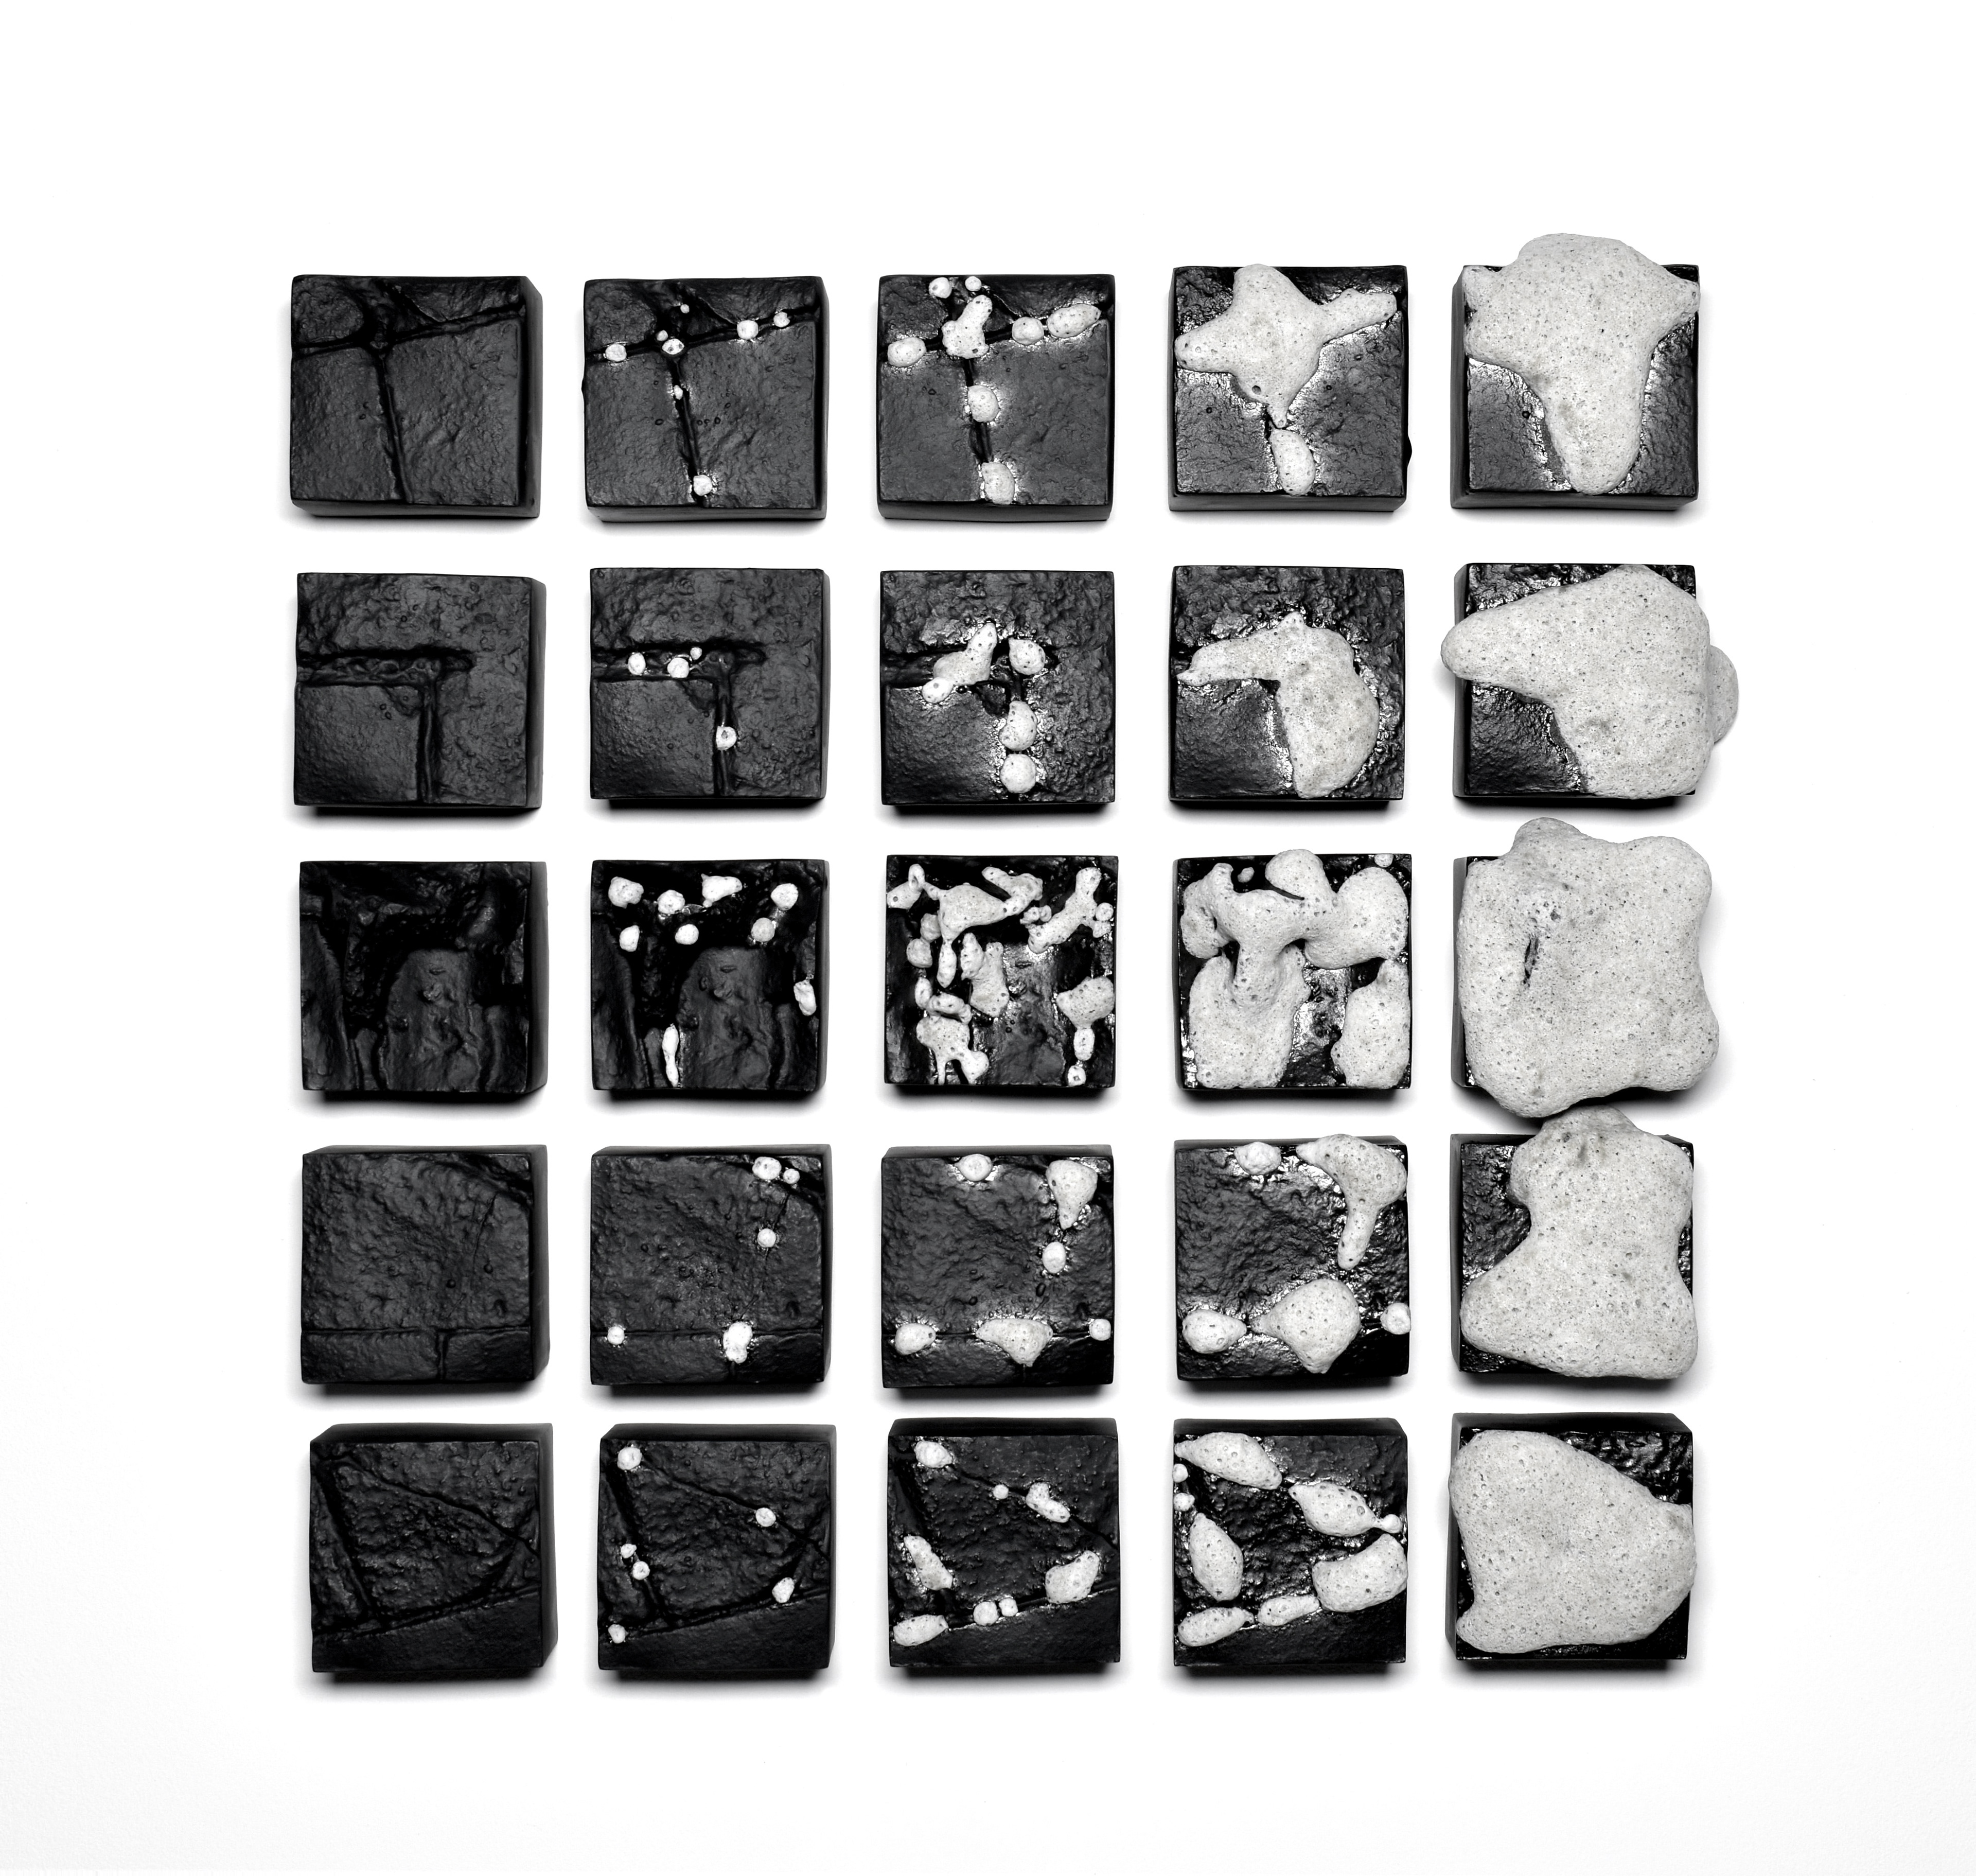
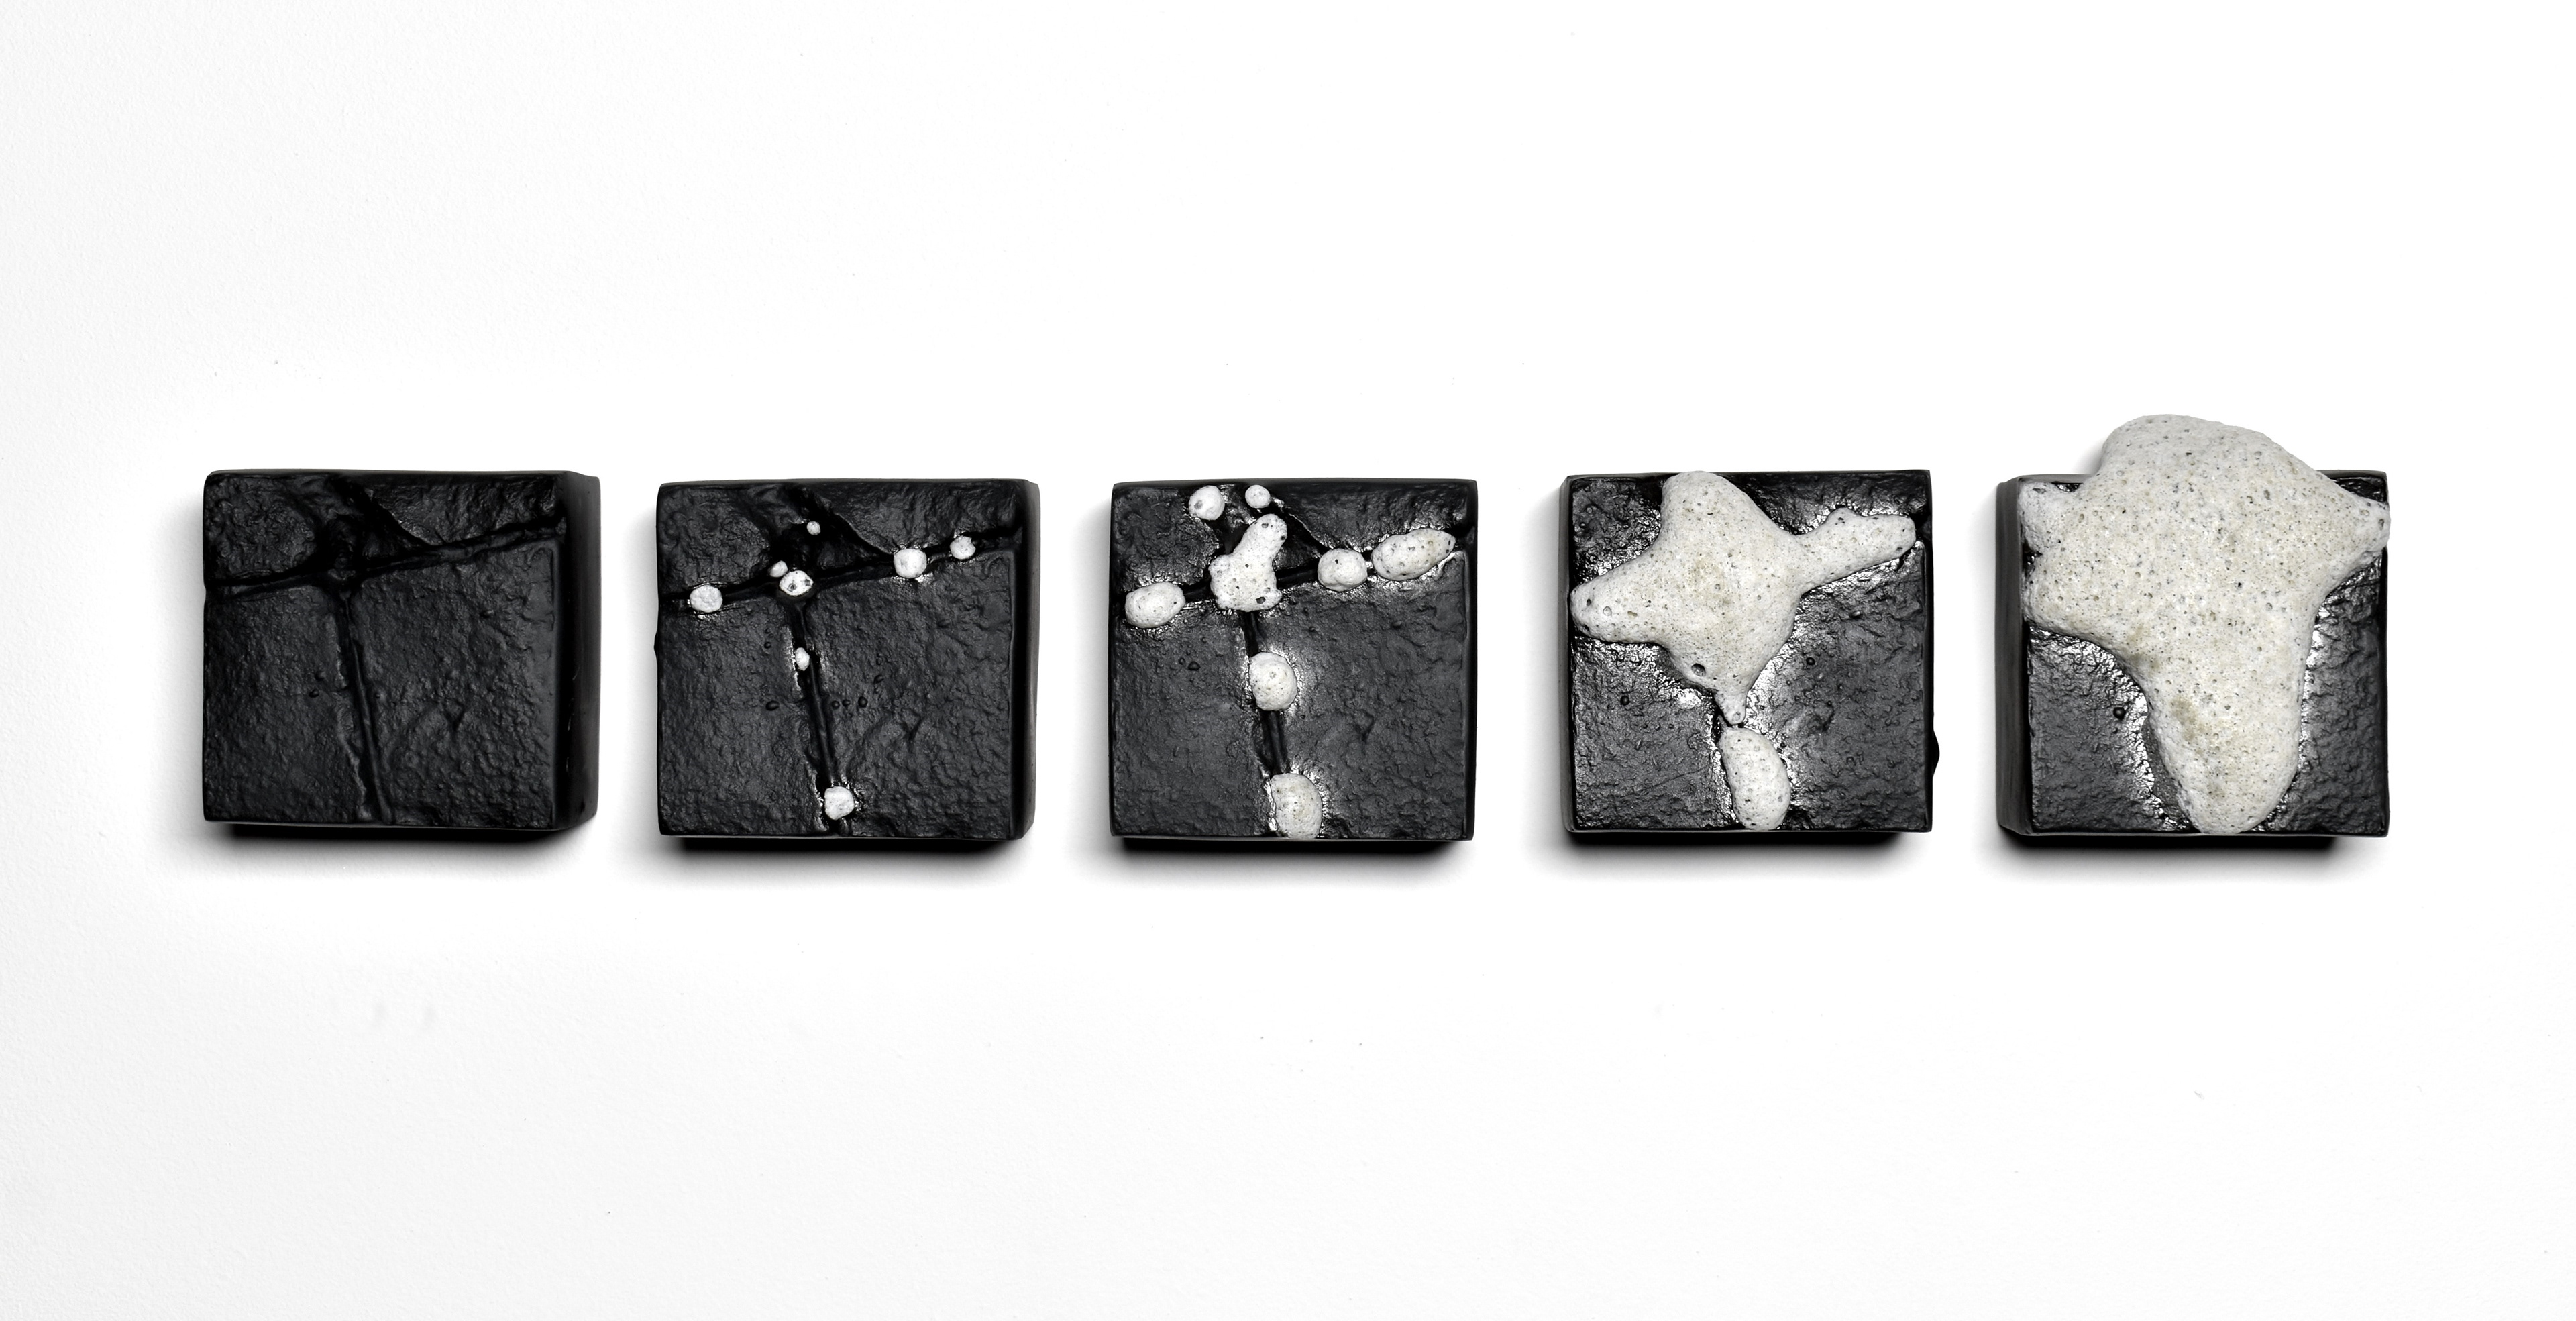
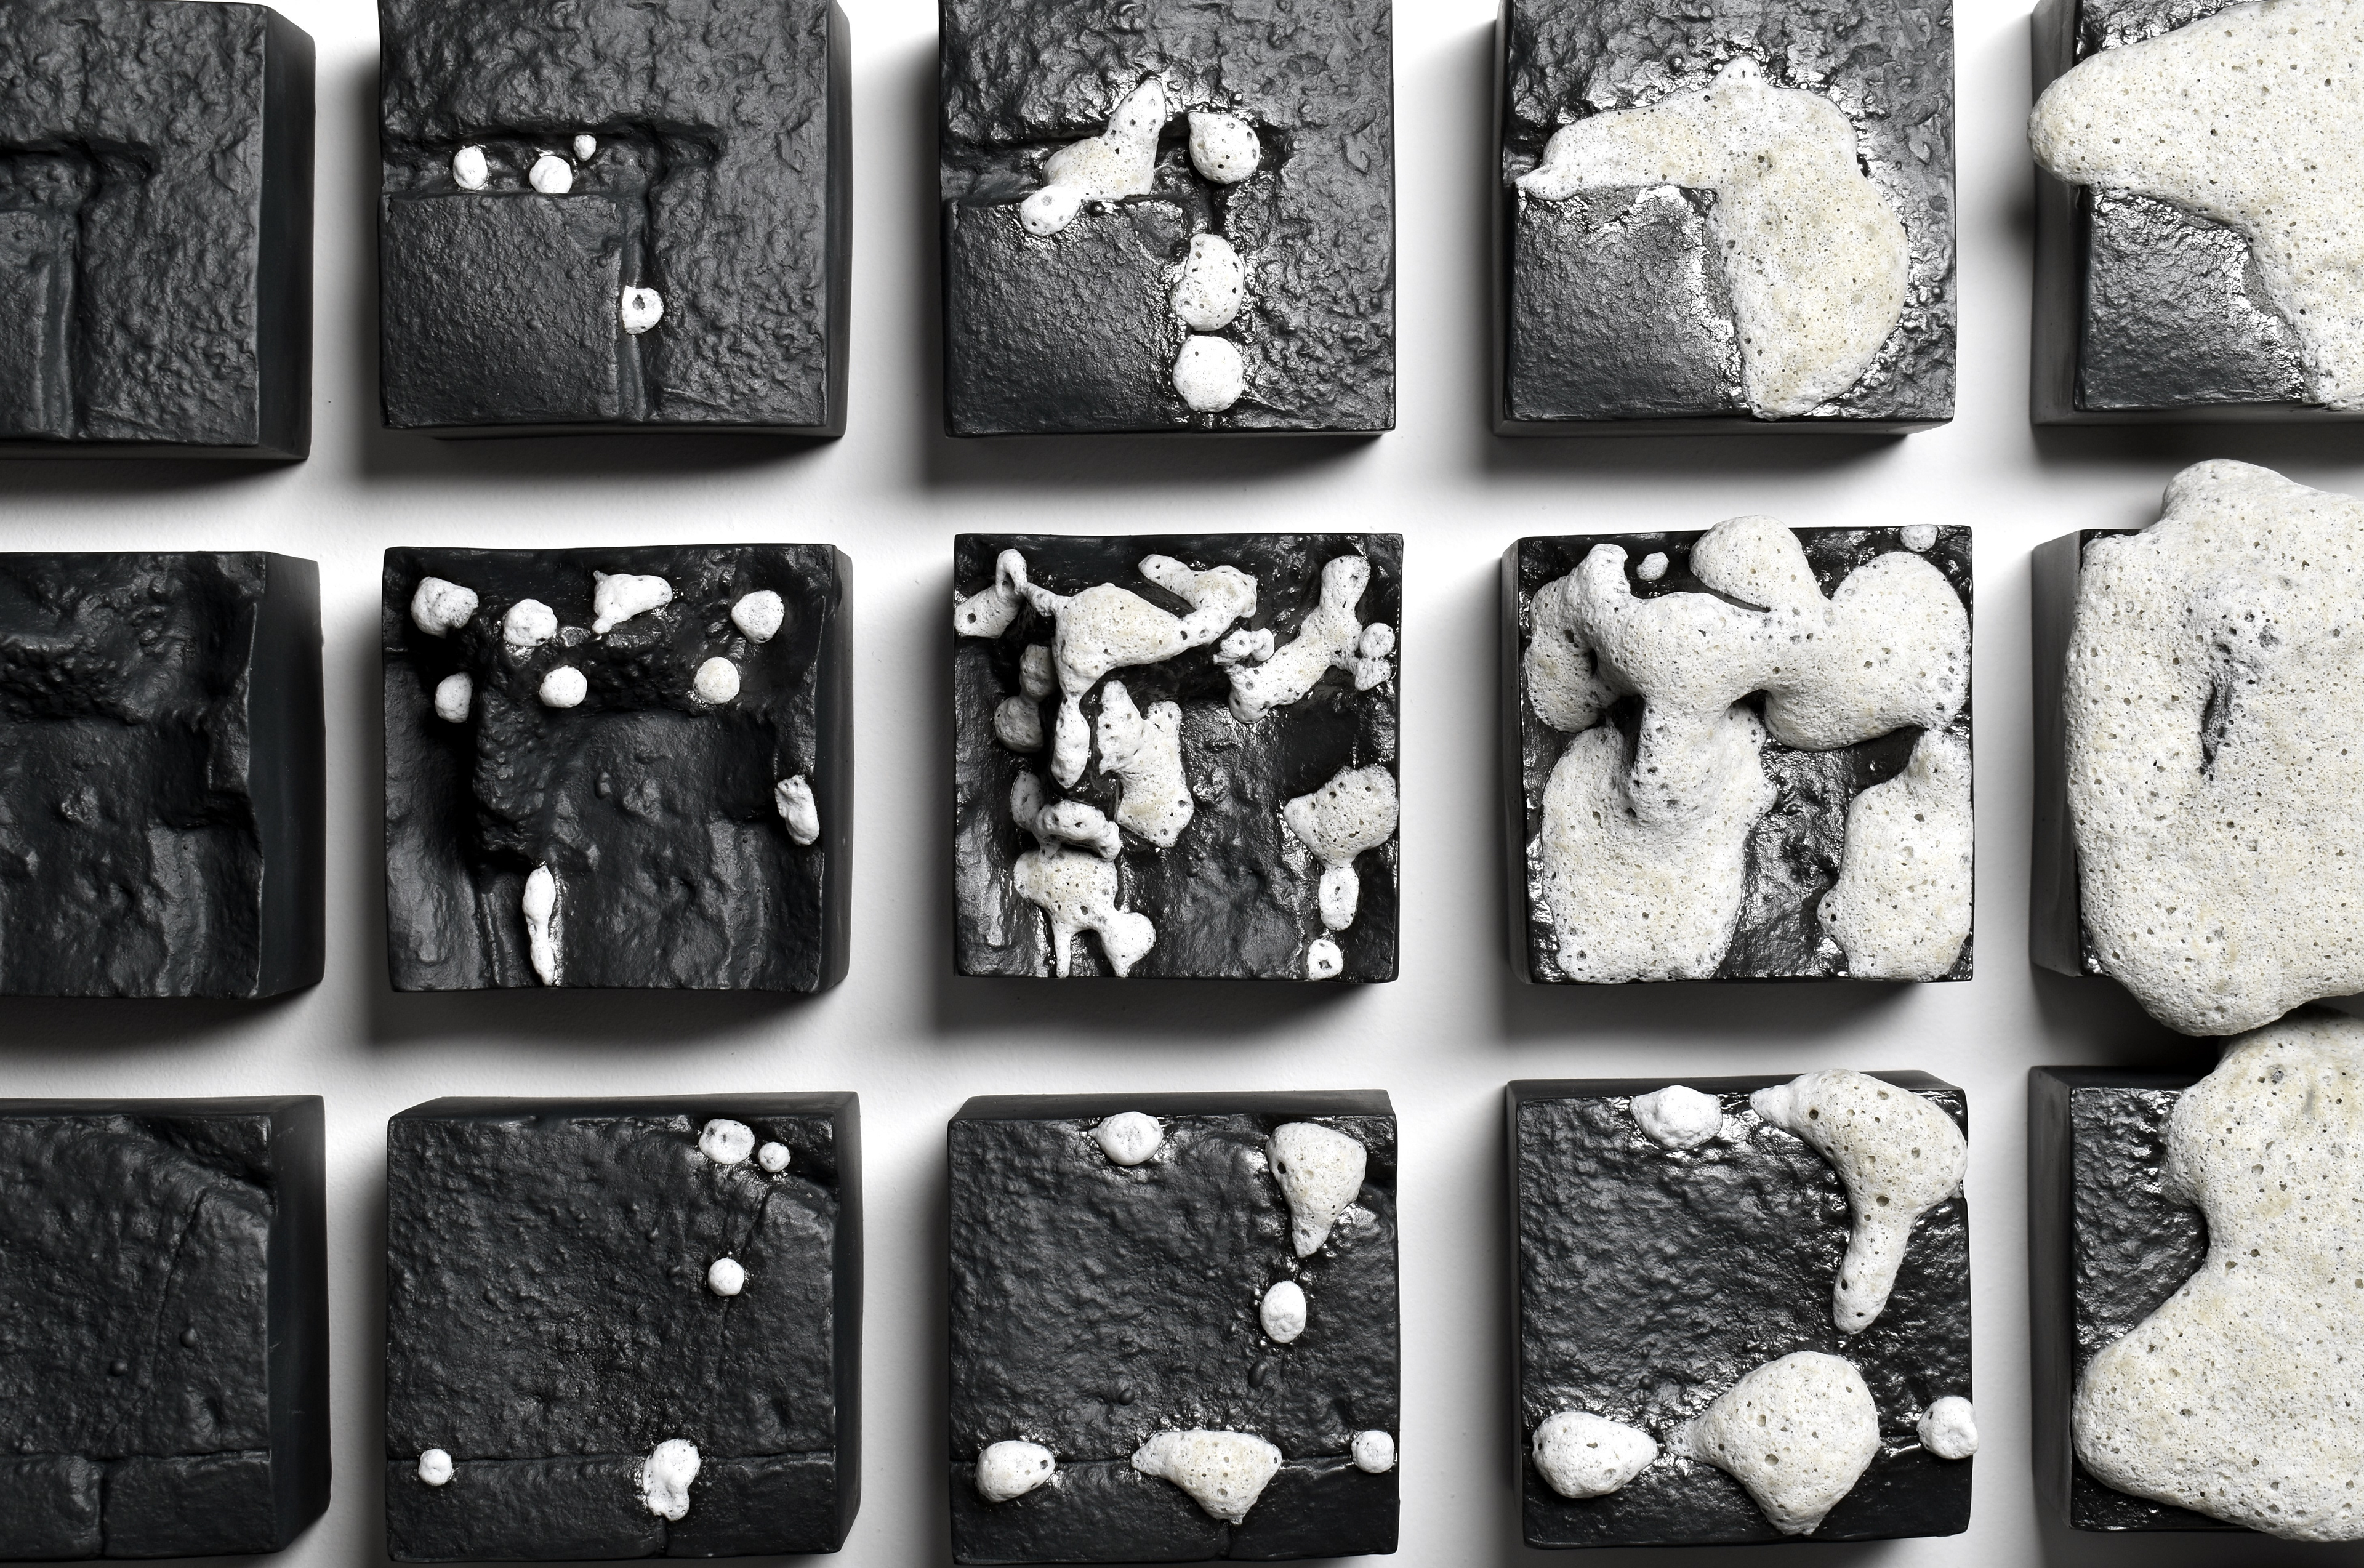
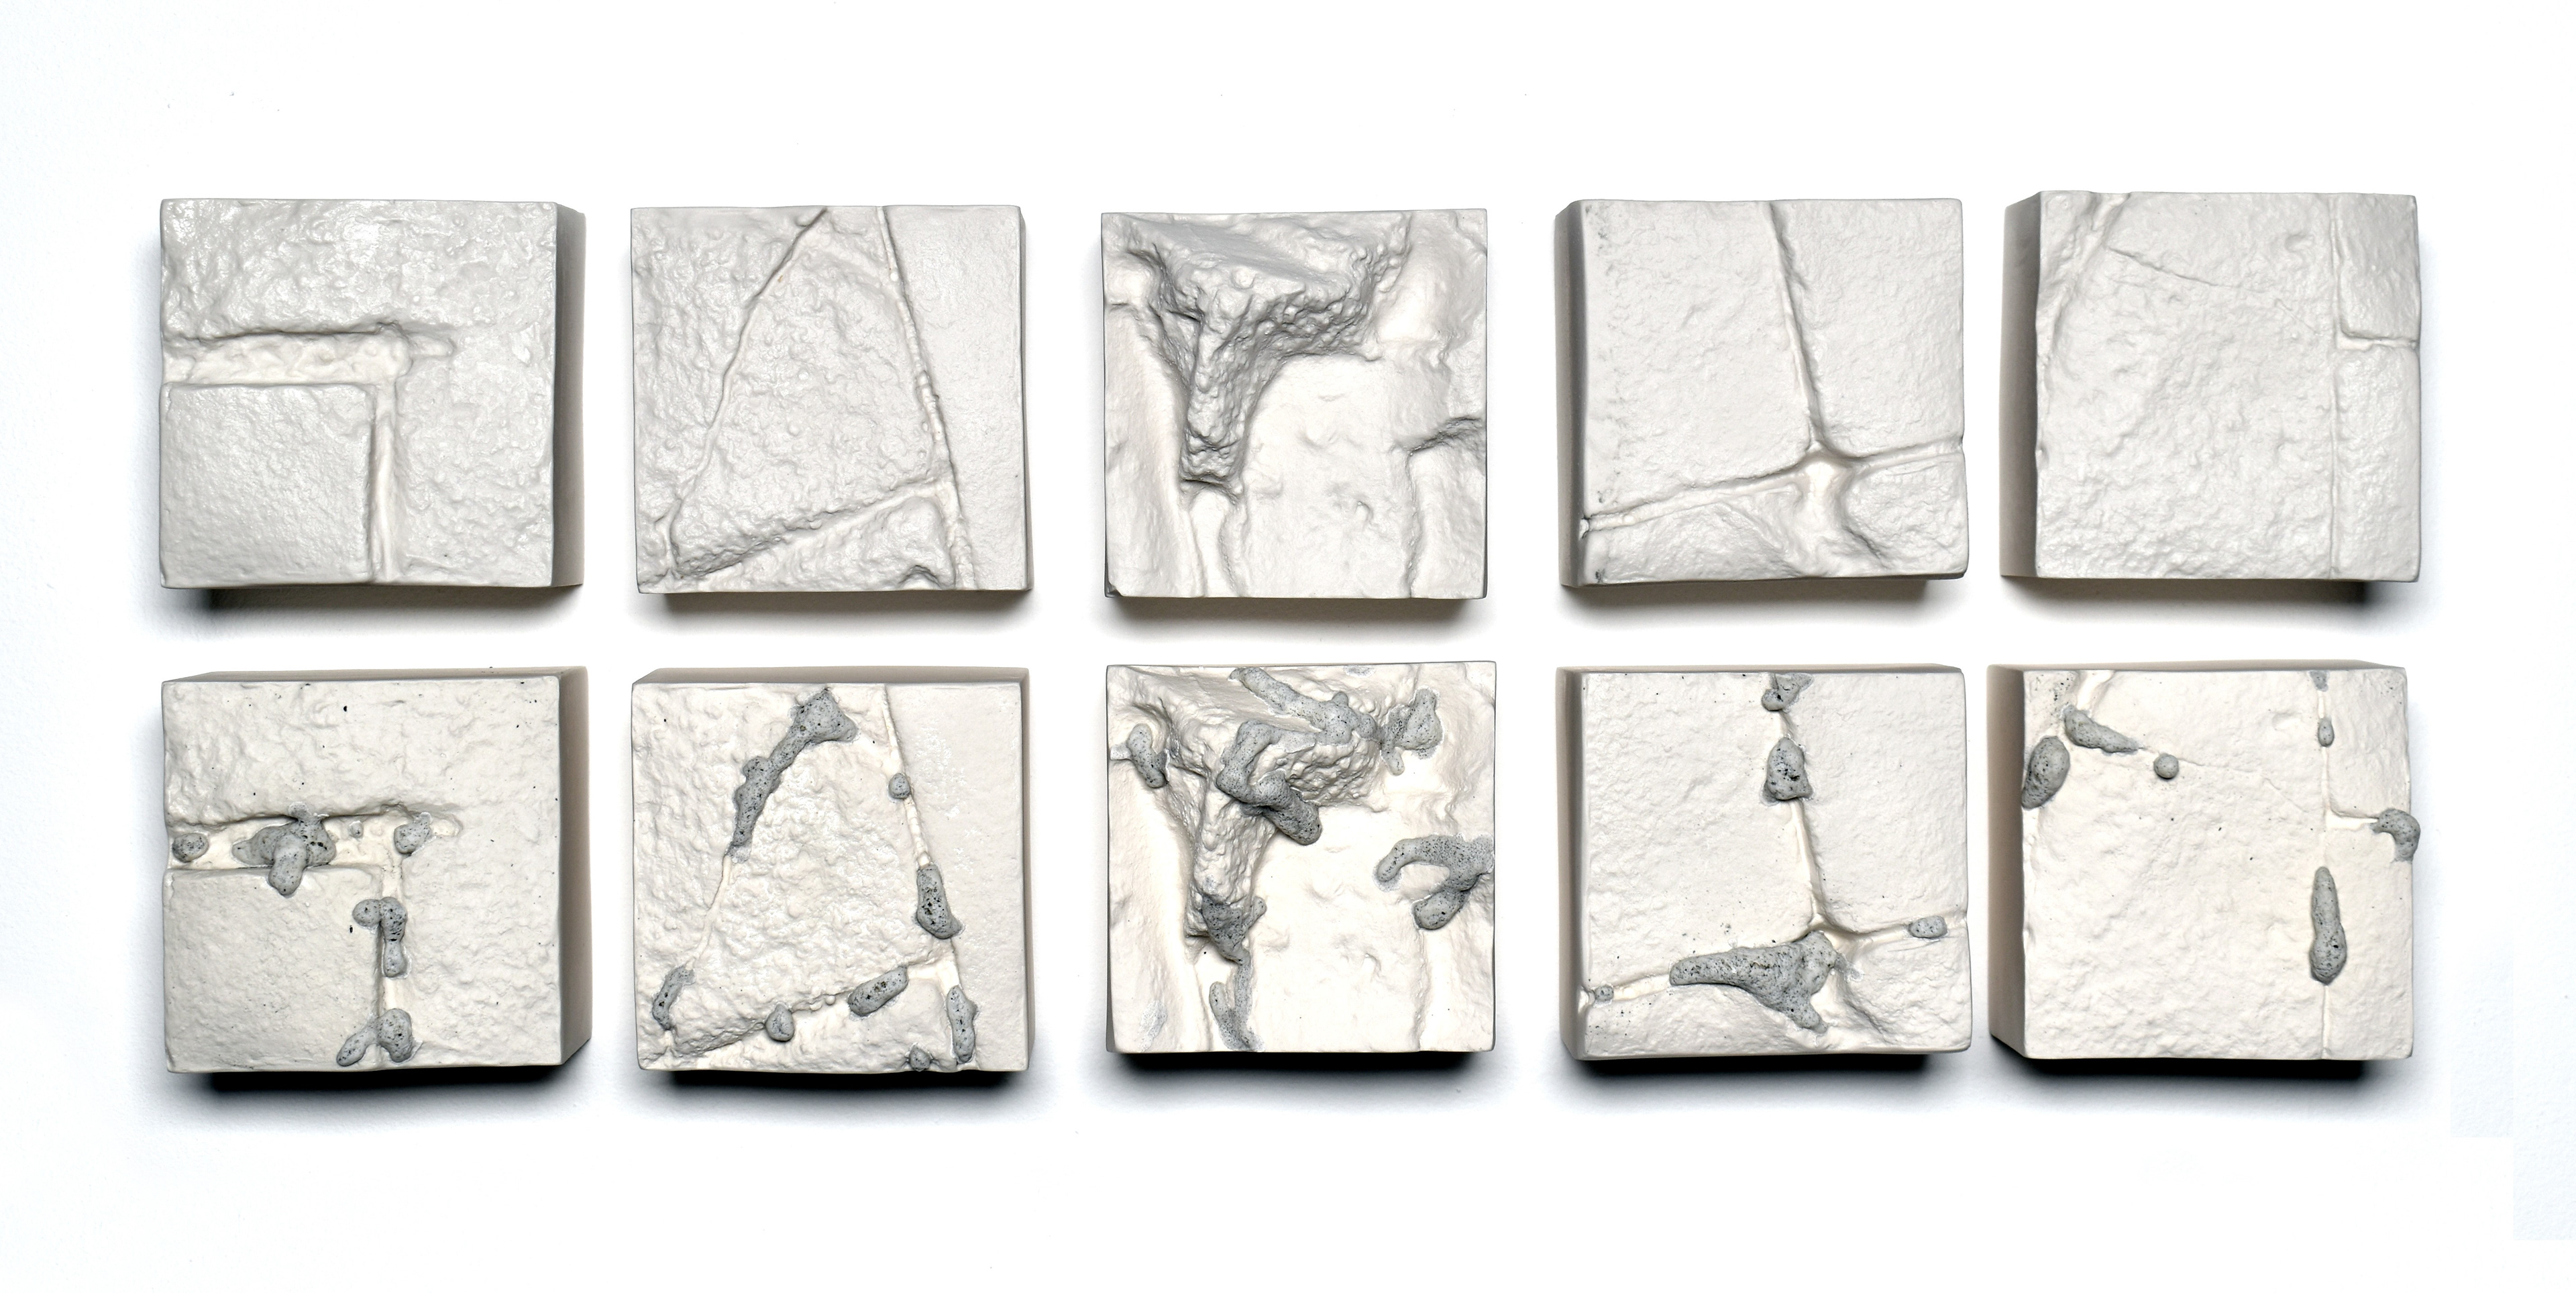
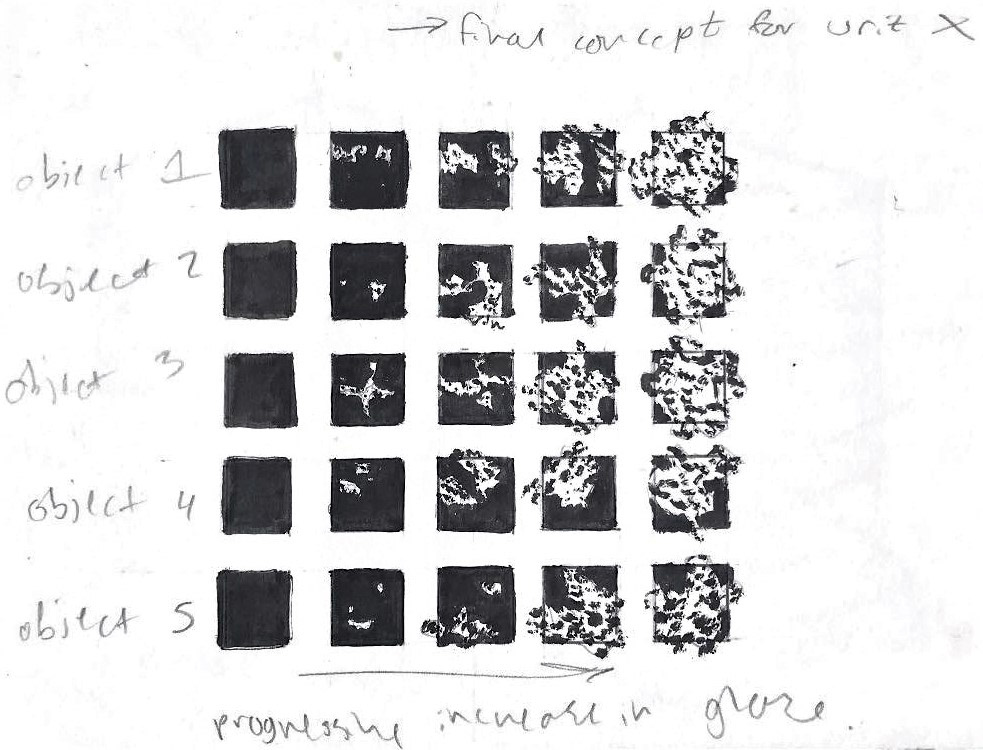
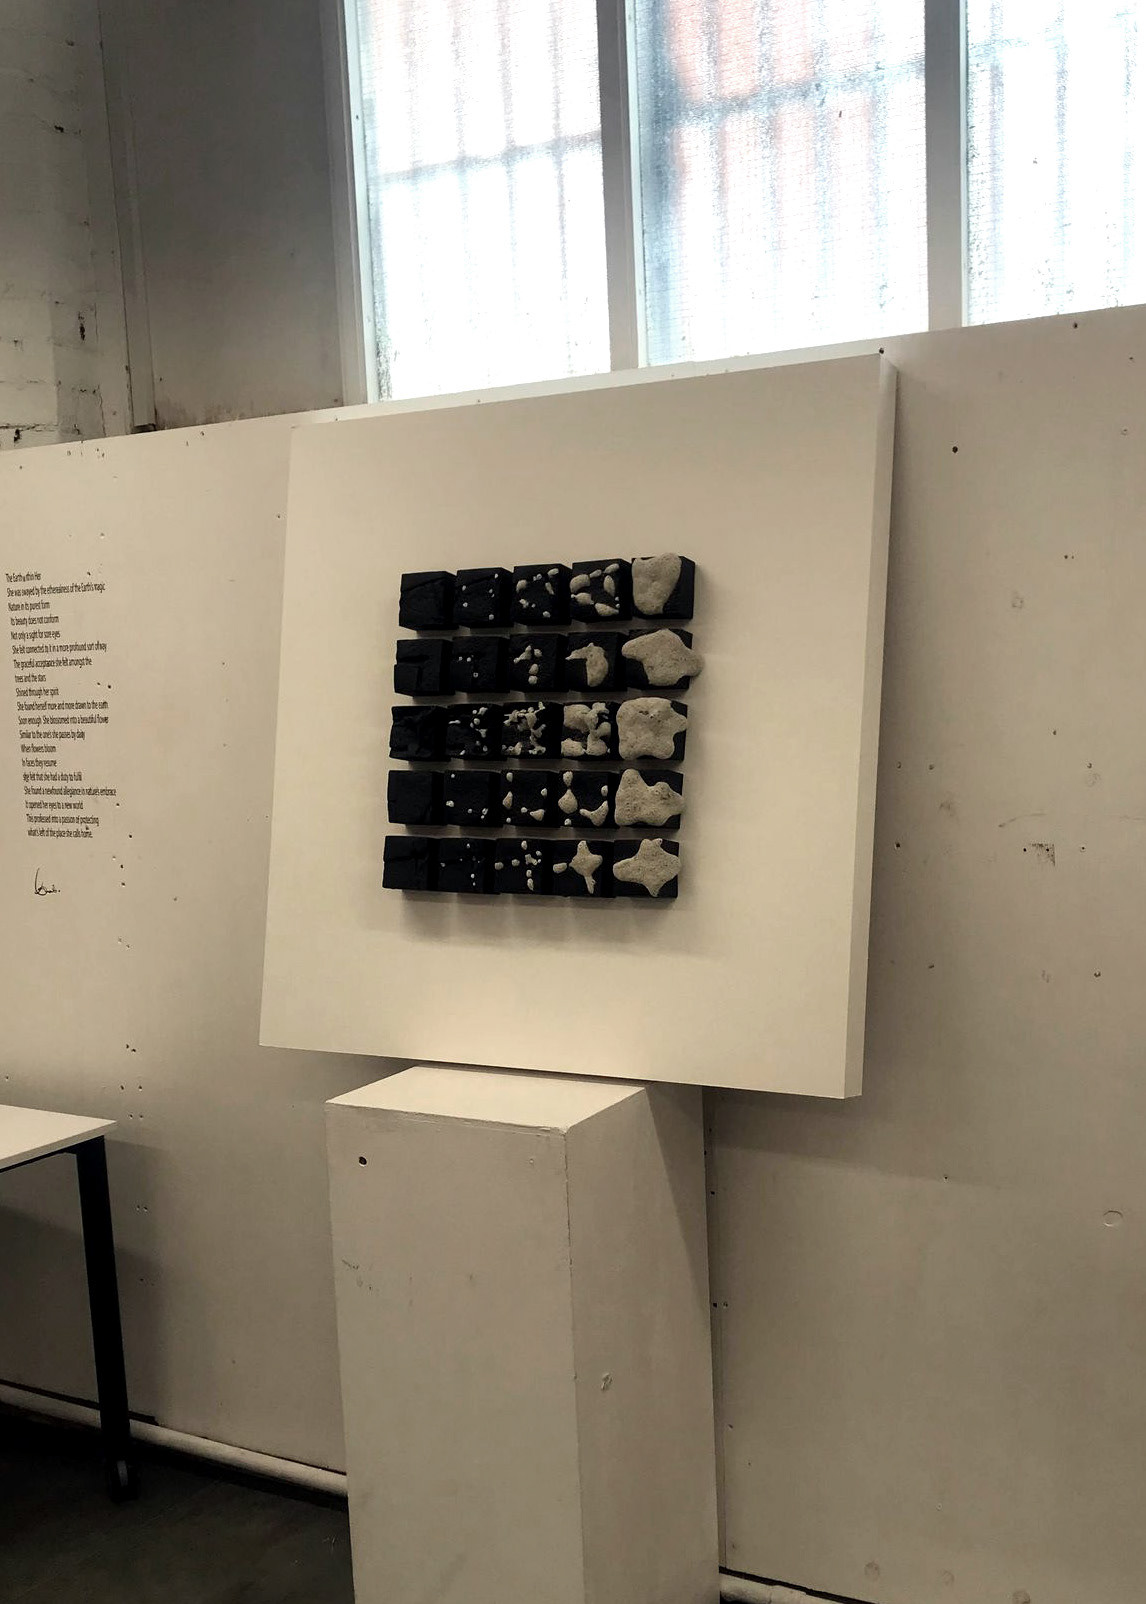
My final set of pieces I aim to exhibit will be a set of twenty-five wall-mounted objects, in rows of five. Each row will be a different cast of the ground. The far left pieces will be un-glazed and on the right will be engulfed in volcanic glaze.
The pieces between will gradually increase in glaze application, which will create a narrative for the onlooker; reading from left to right to visualise the time and growth of the plants growing between the cracks.

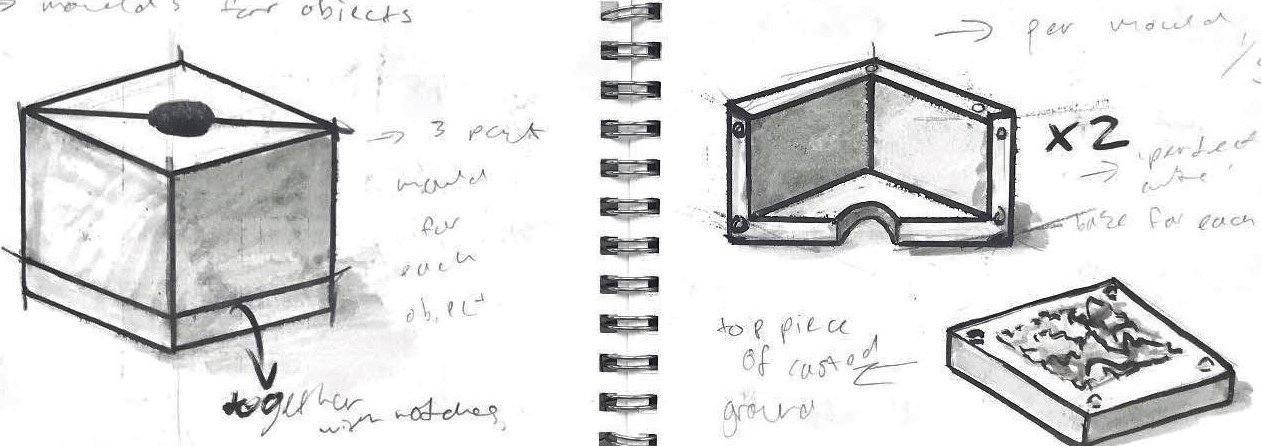
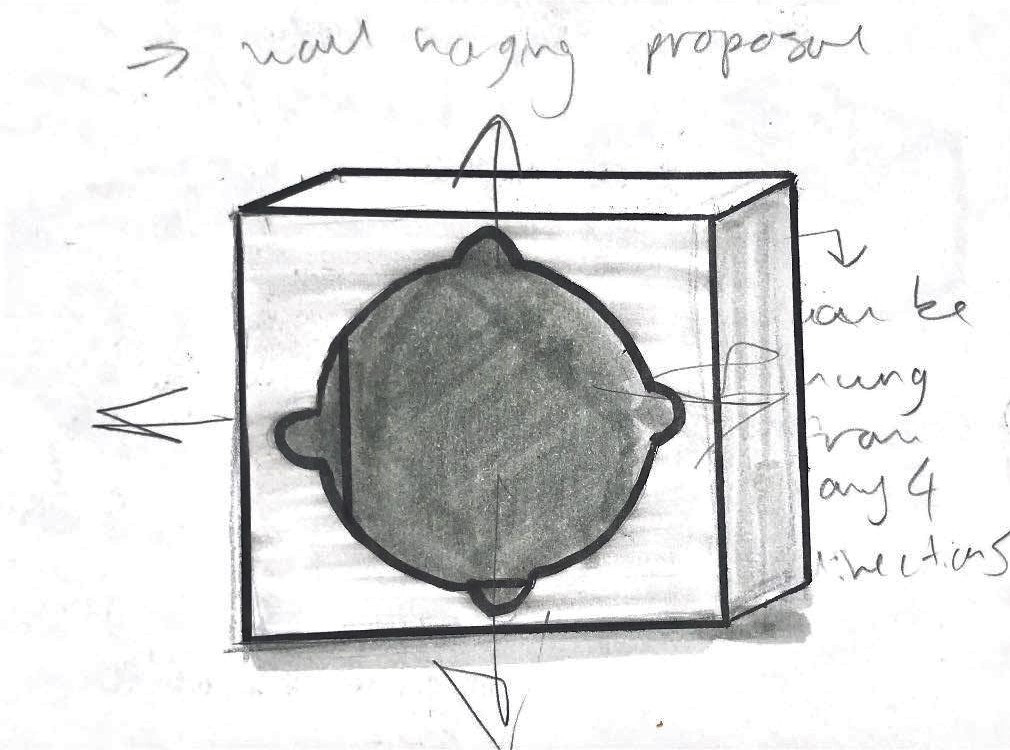
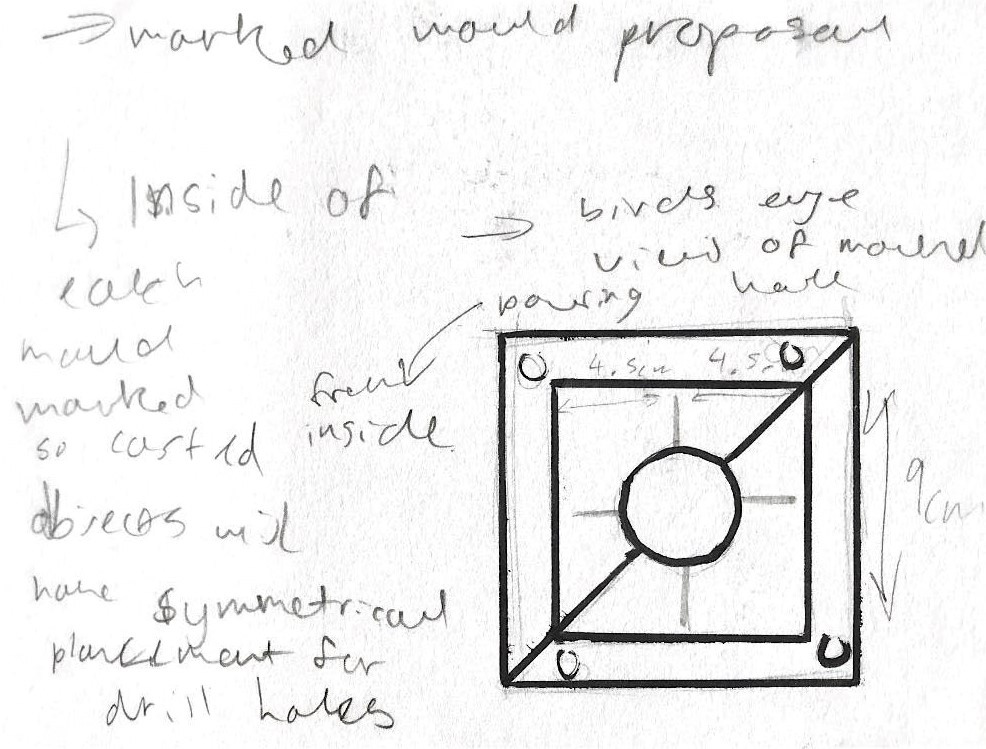
In order to refine my process, I am going to create a perfect set of moulds to slip cast five pieces at once; resulting in a more time-efficient process. At the back of each piece, I will create a method to hang each piece from a central pour hold with four notches, enabling the objects to be hung from any four directions.
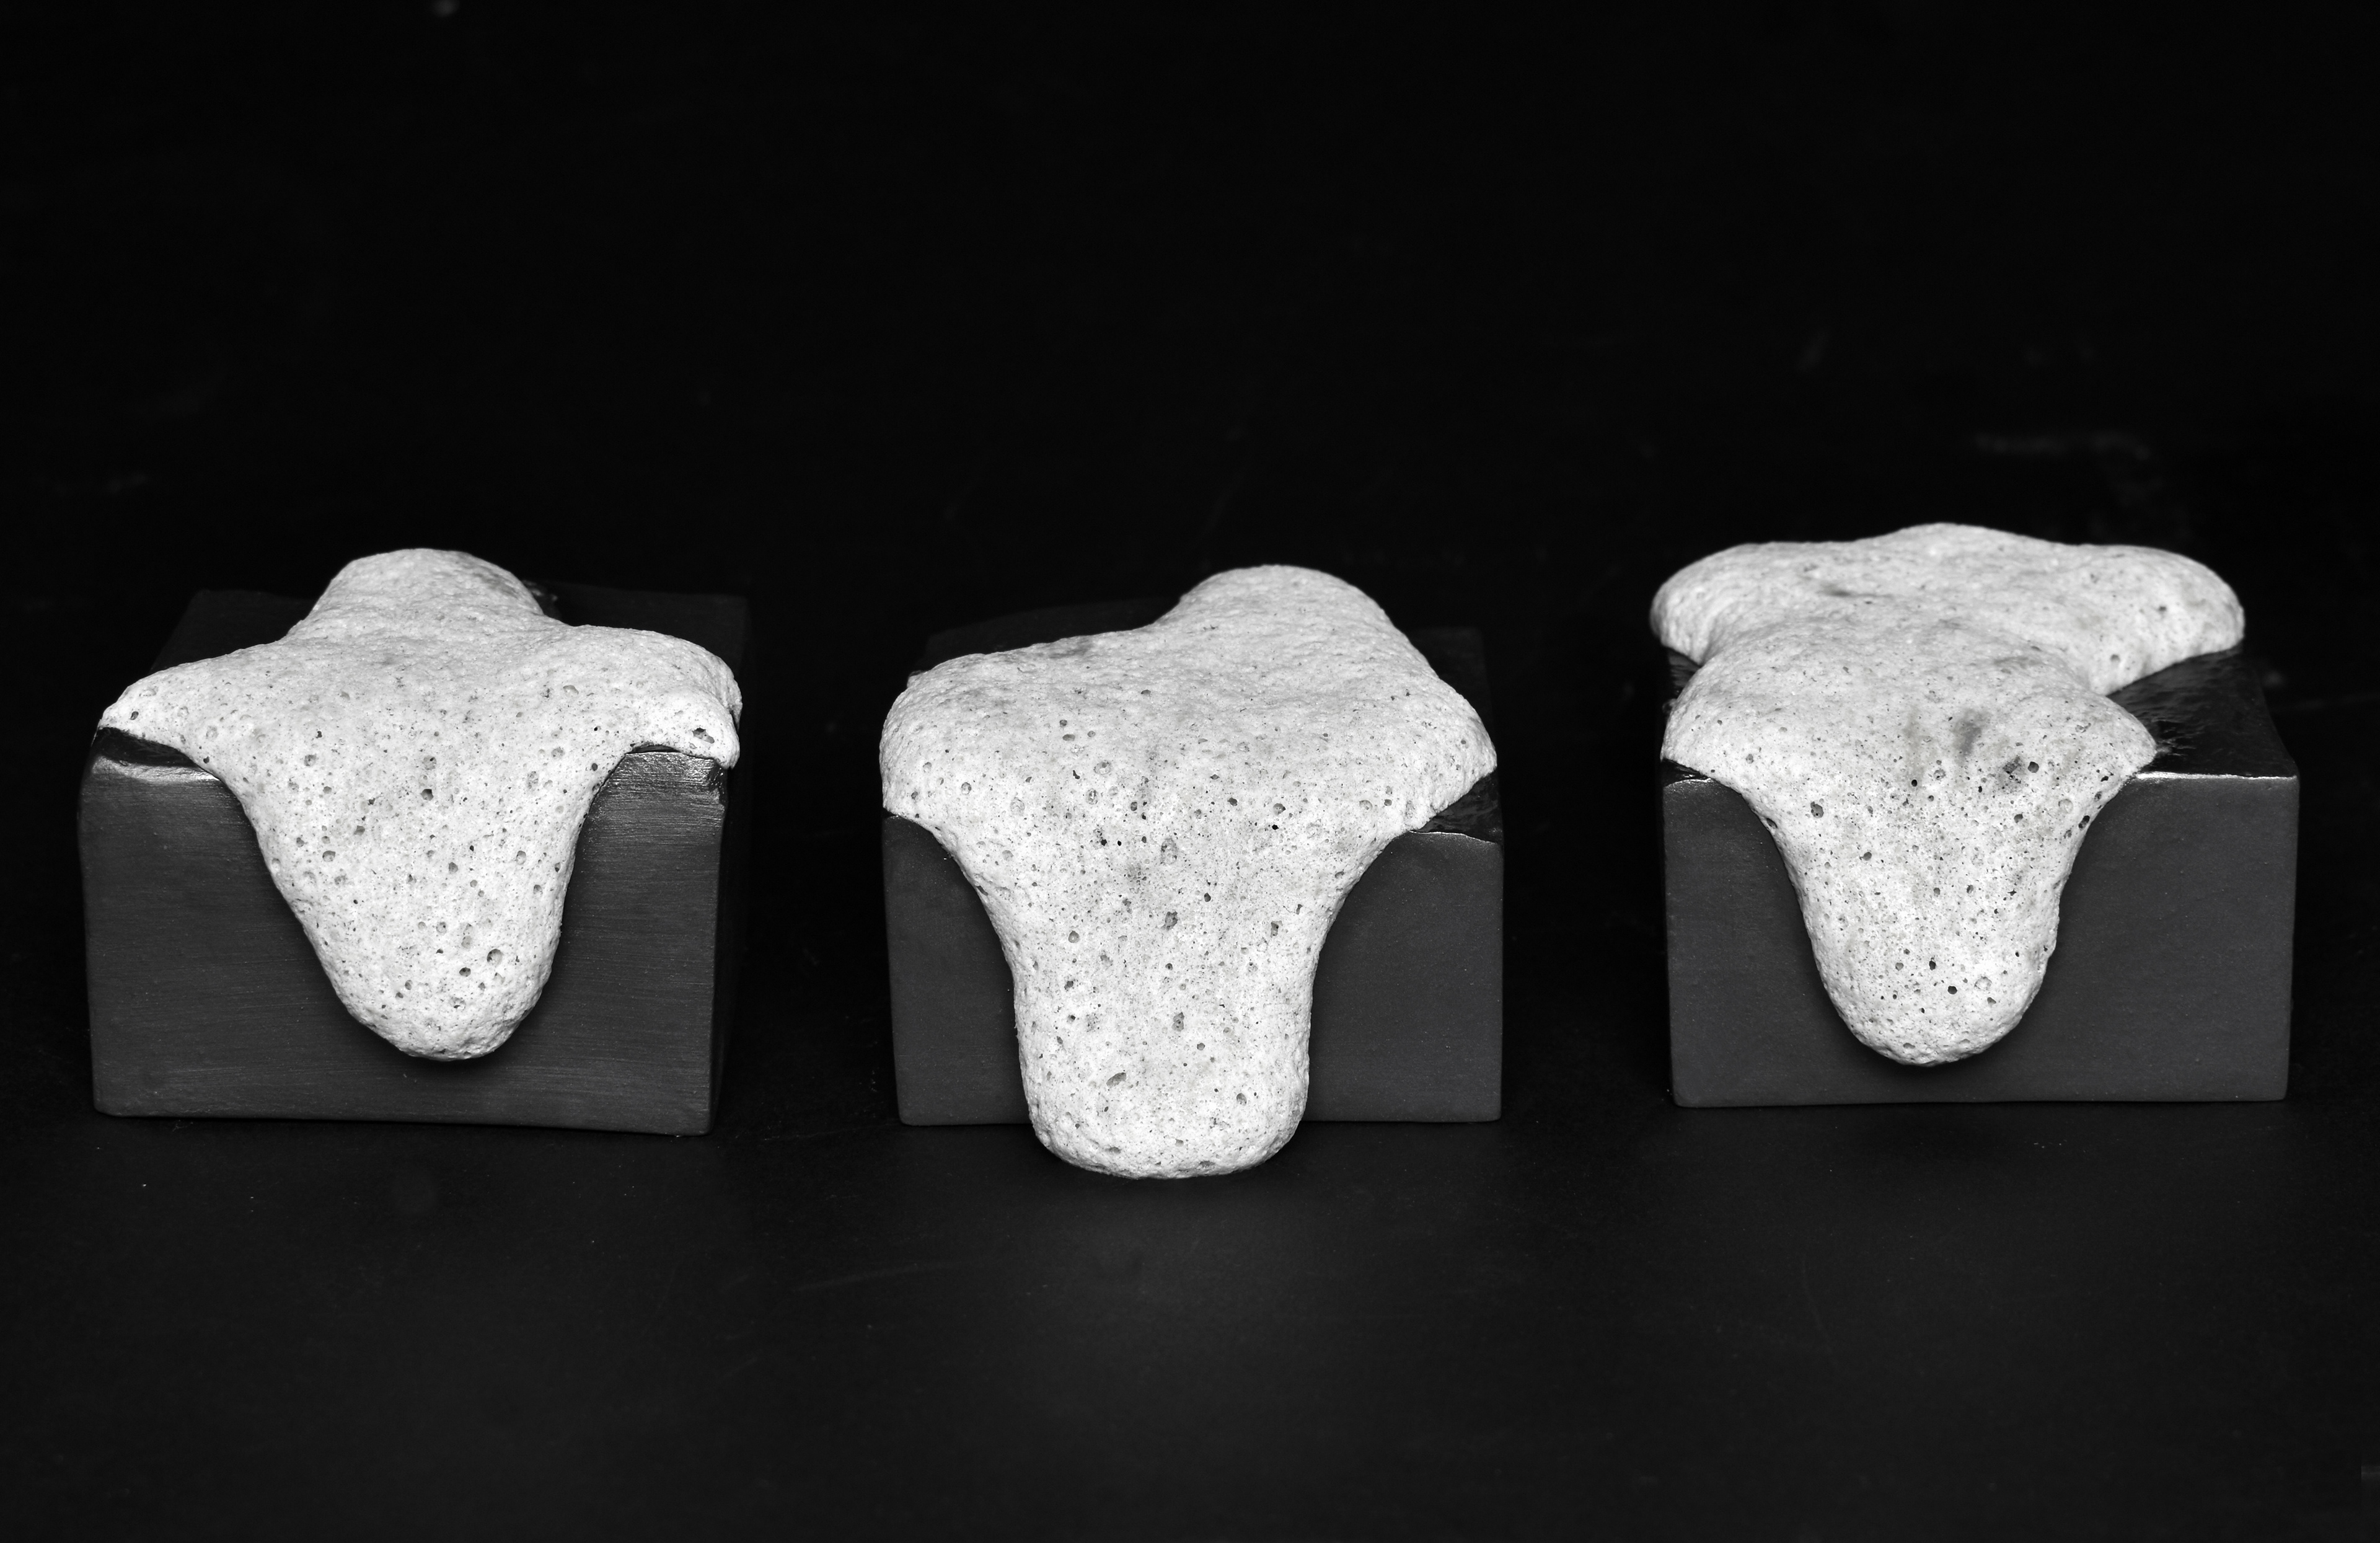
I will continue using black porcelain combined with volcanic glaze as I have developed an understanding of each material, and feel they successfully present the elements essential to the subject.
New Vinamold Casts
Within my previous set of casts, I used two inverted replicas. For the final set of pieces, each of the five original pieces will be unique.
I casted three new sections of the ground in order to choose the two most successful. This process was much quicker this time, as I previously established the most efficient method.


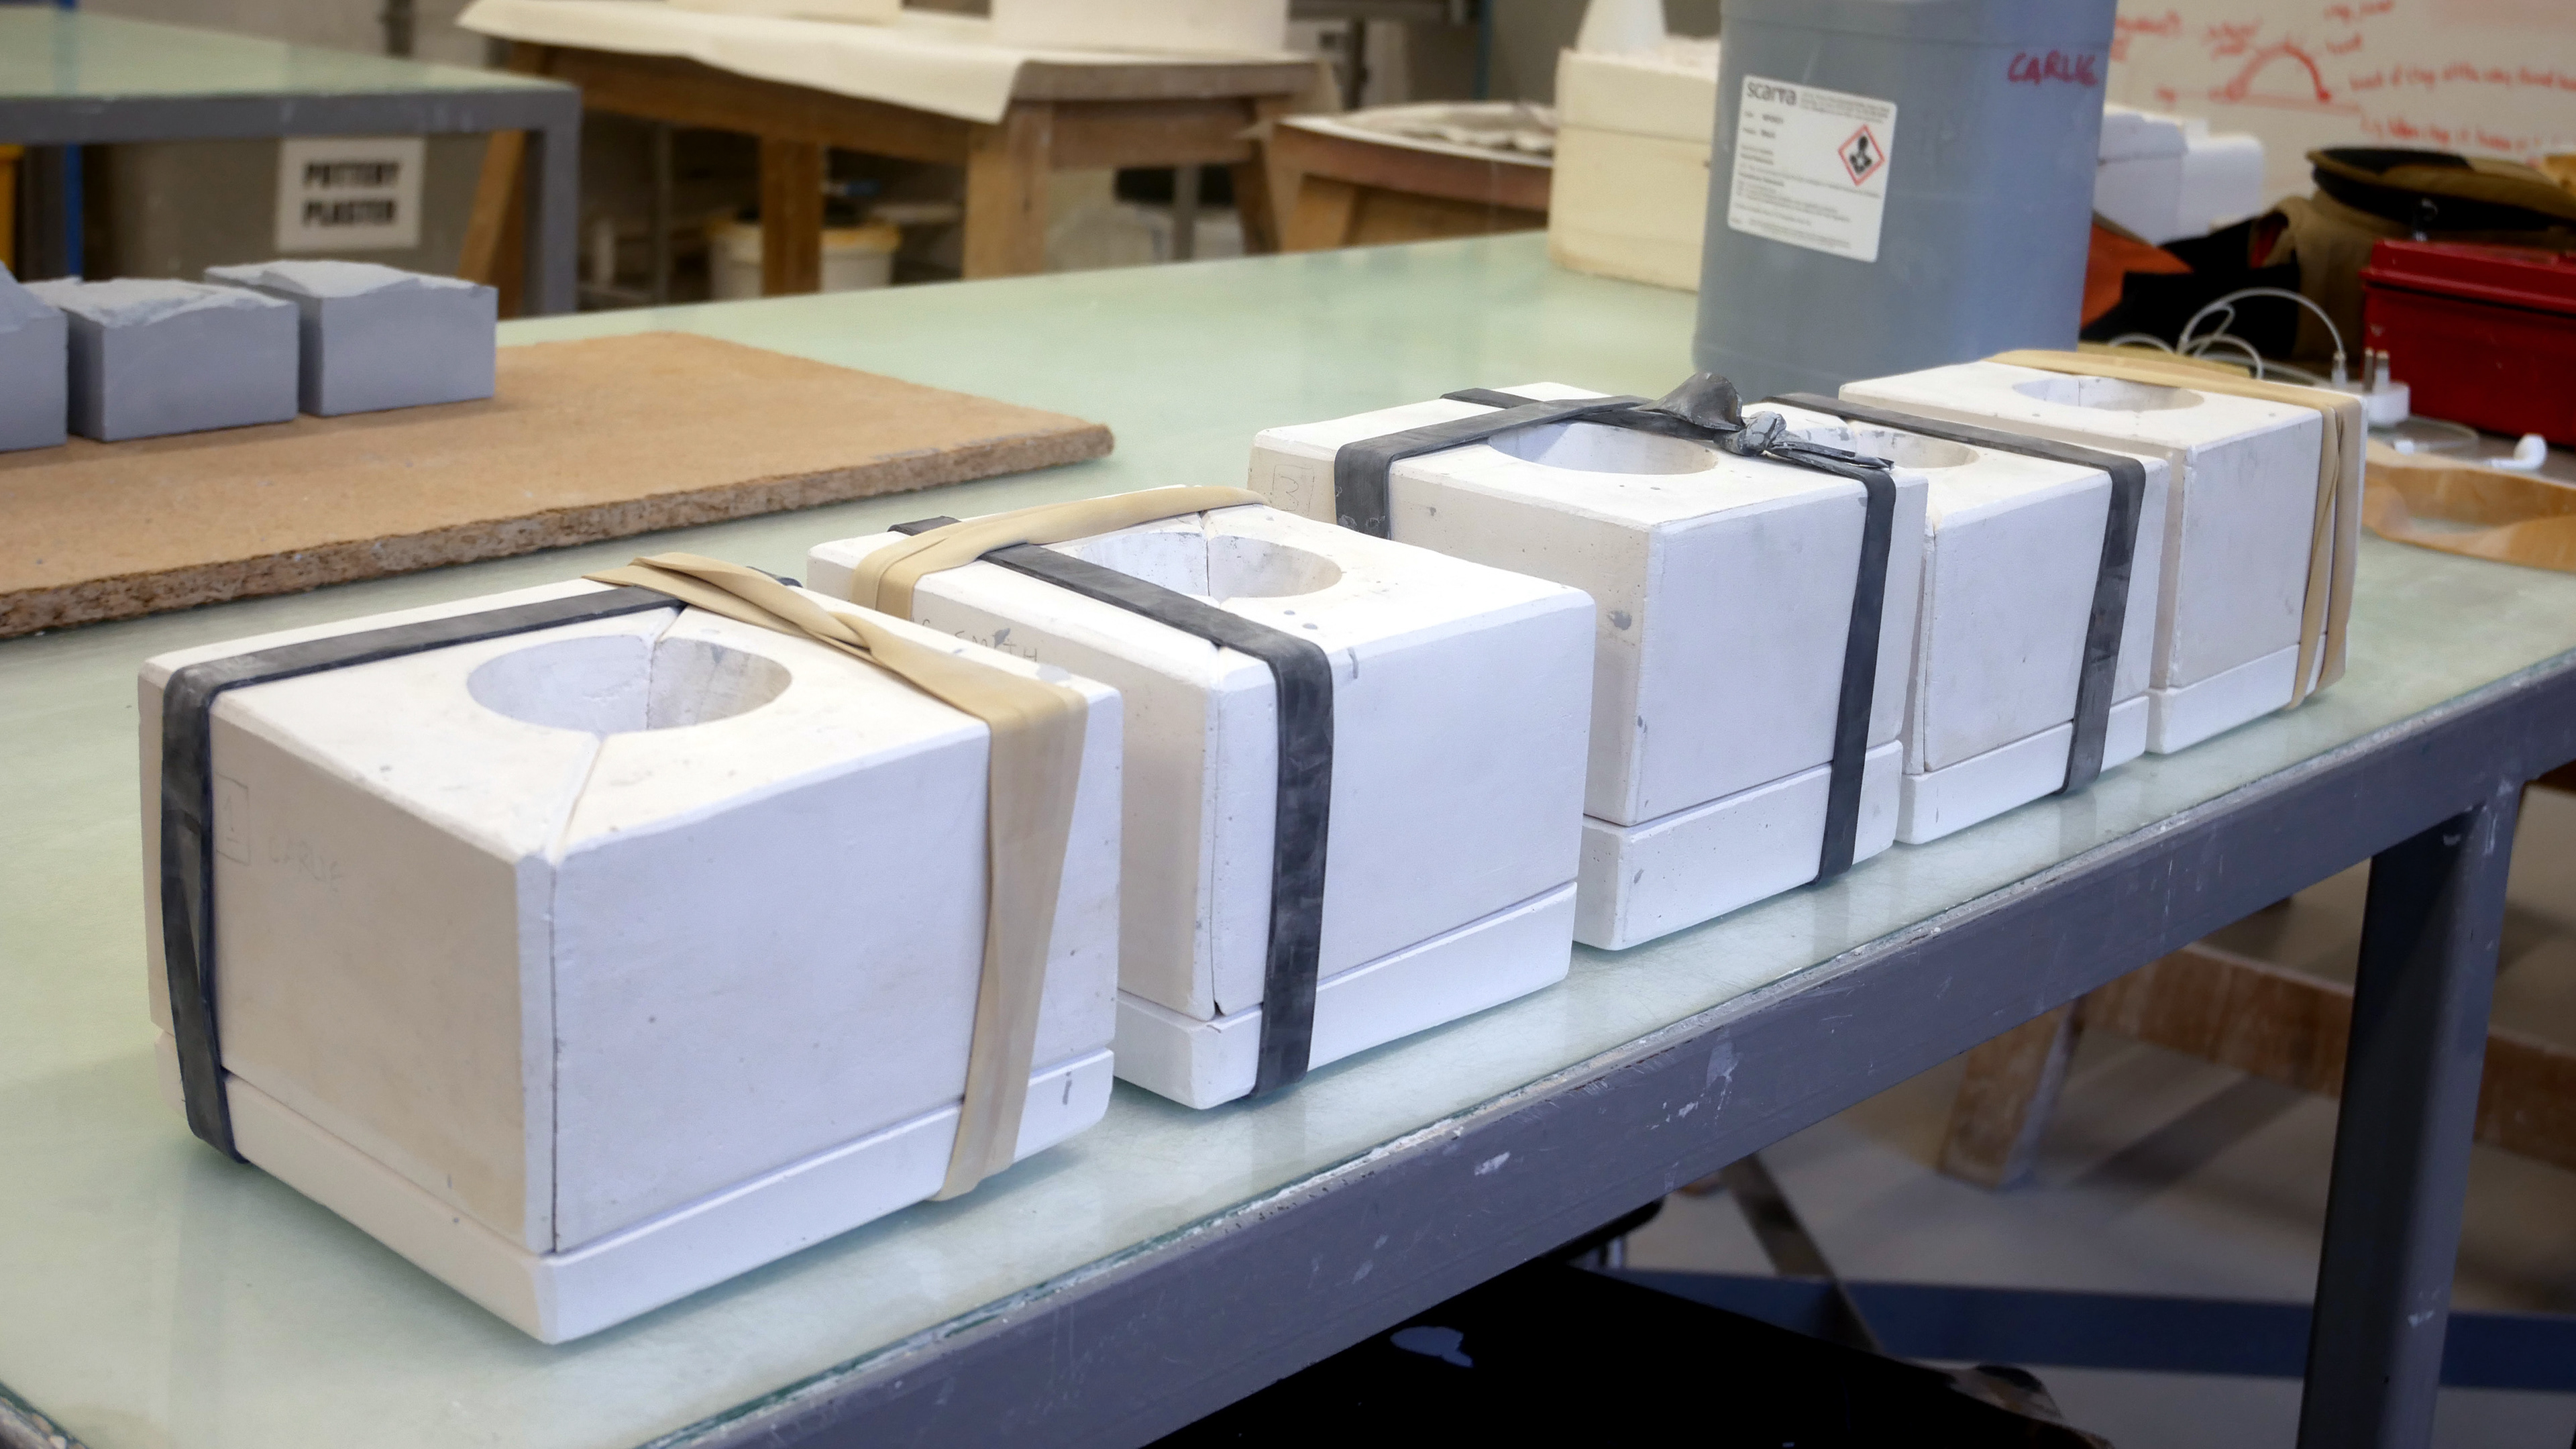
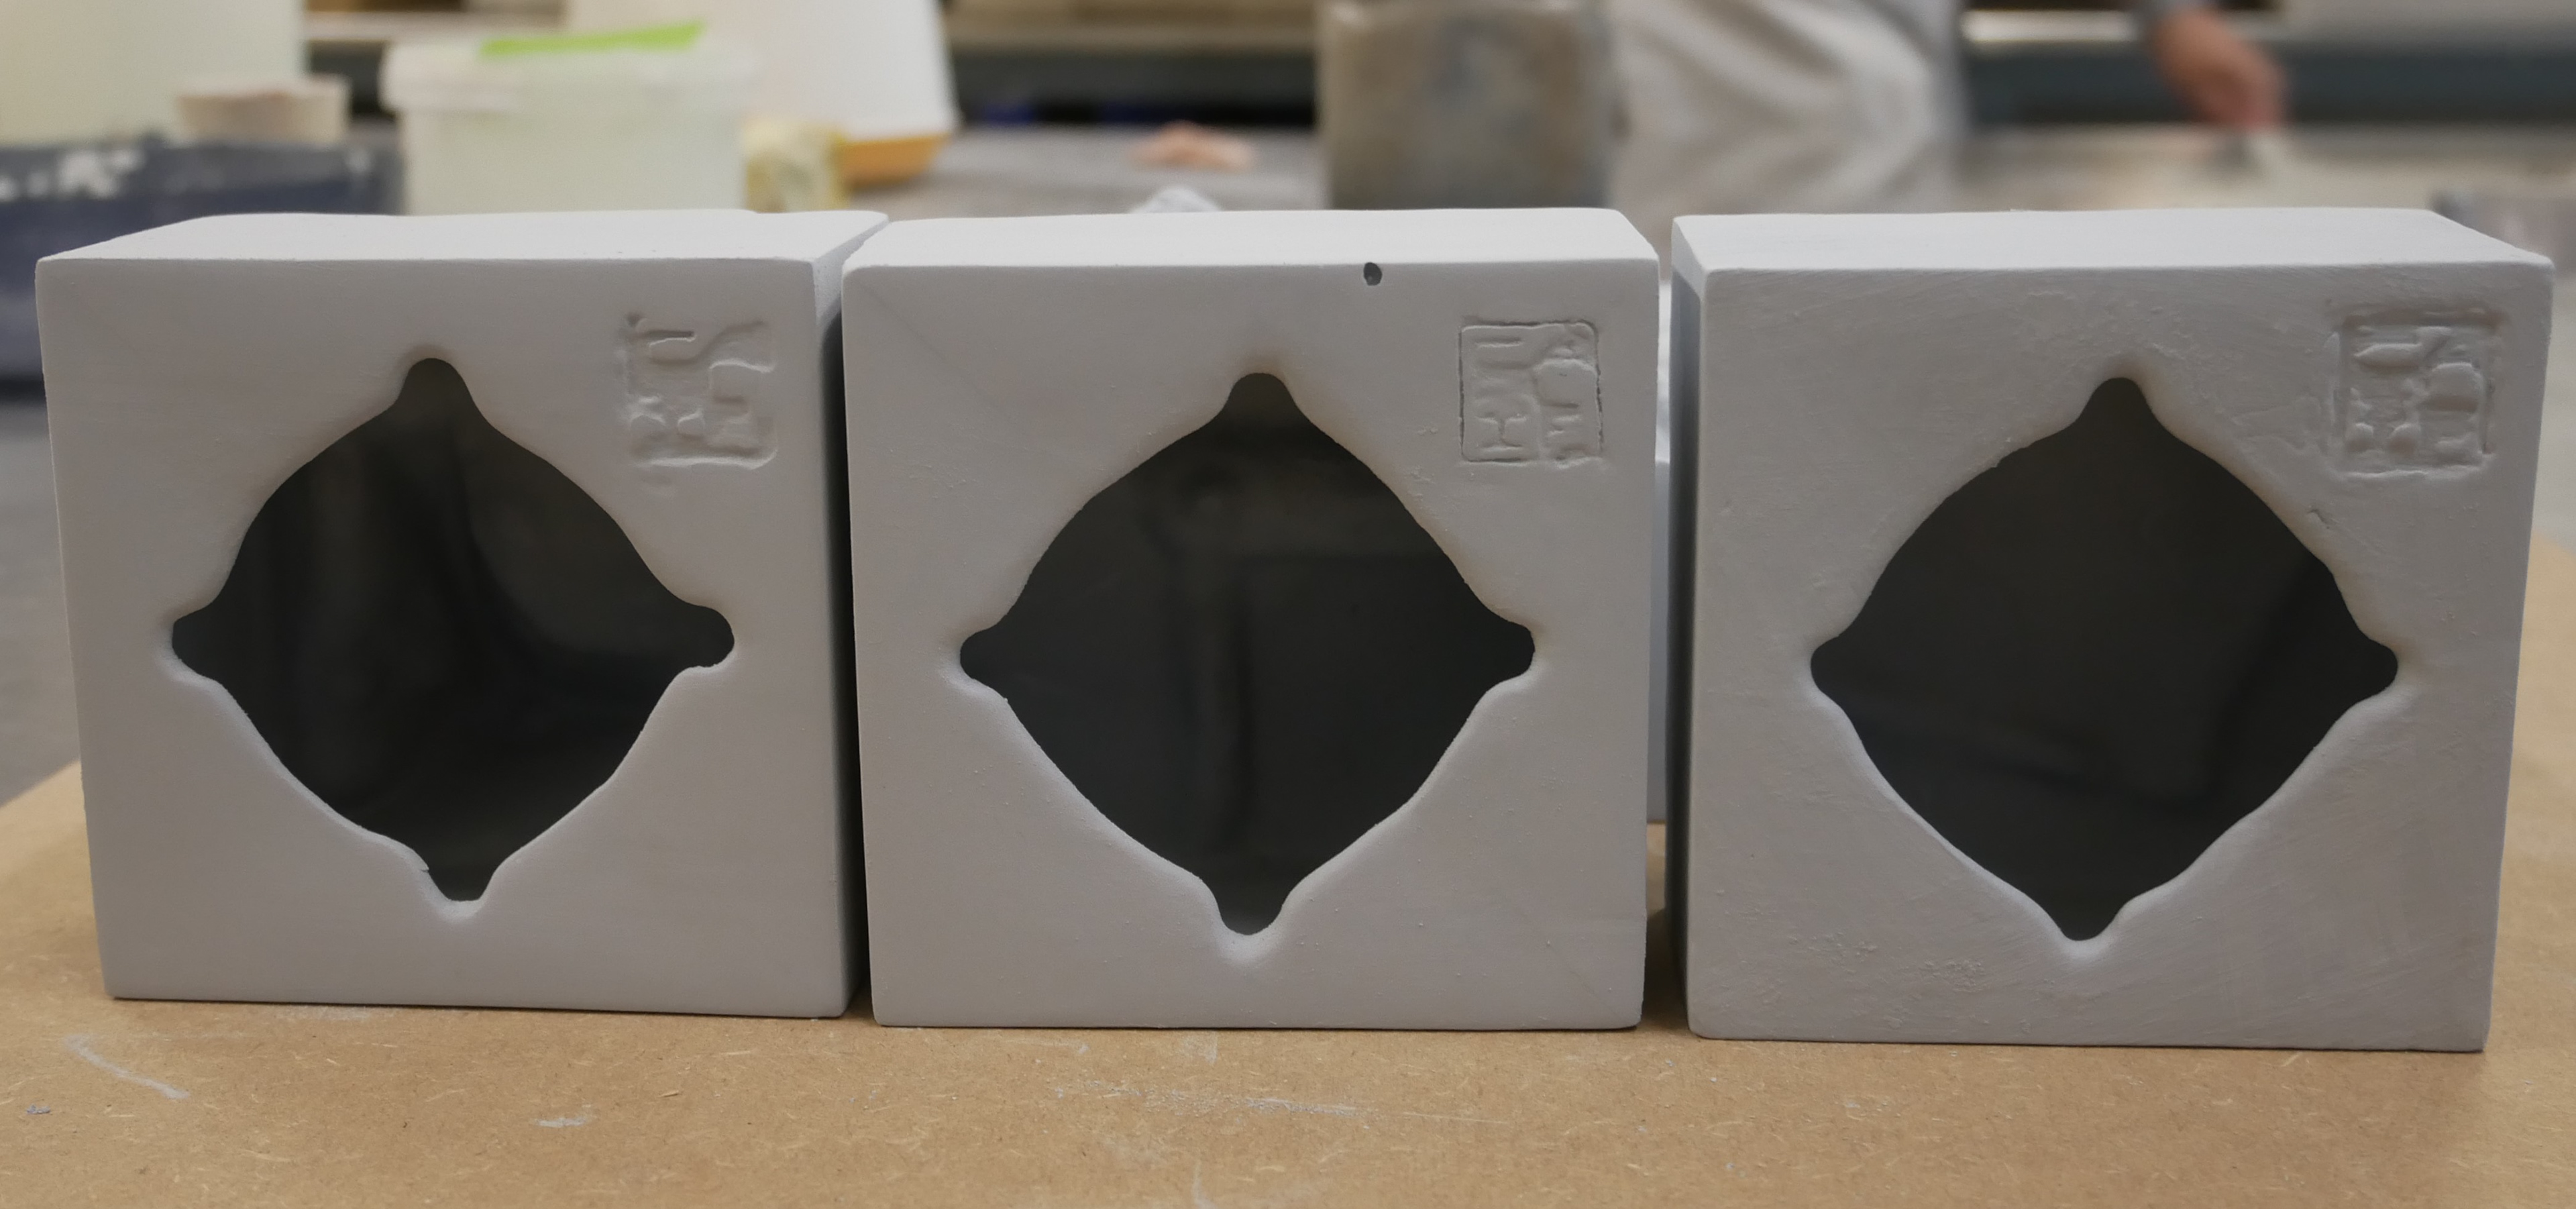
New set of 5 moulds
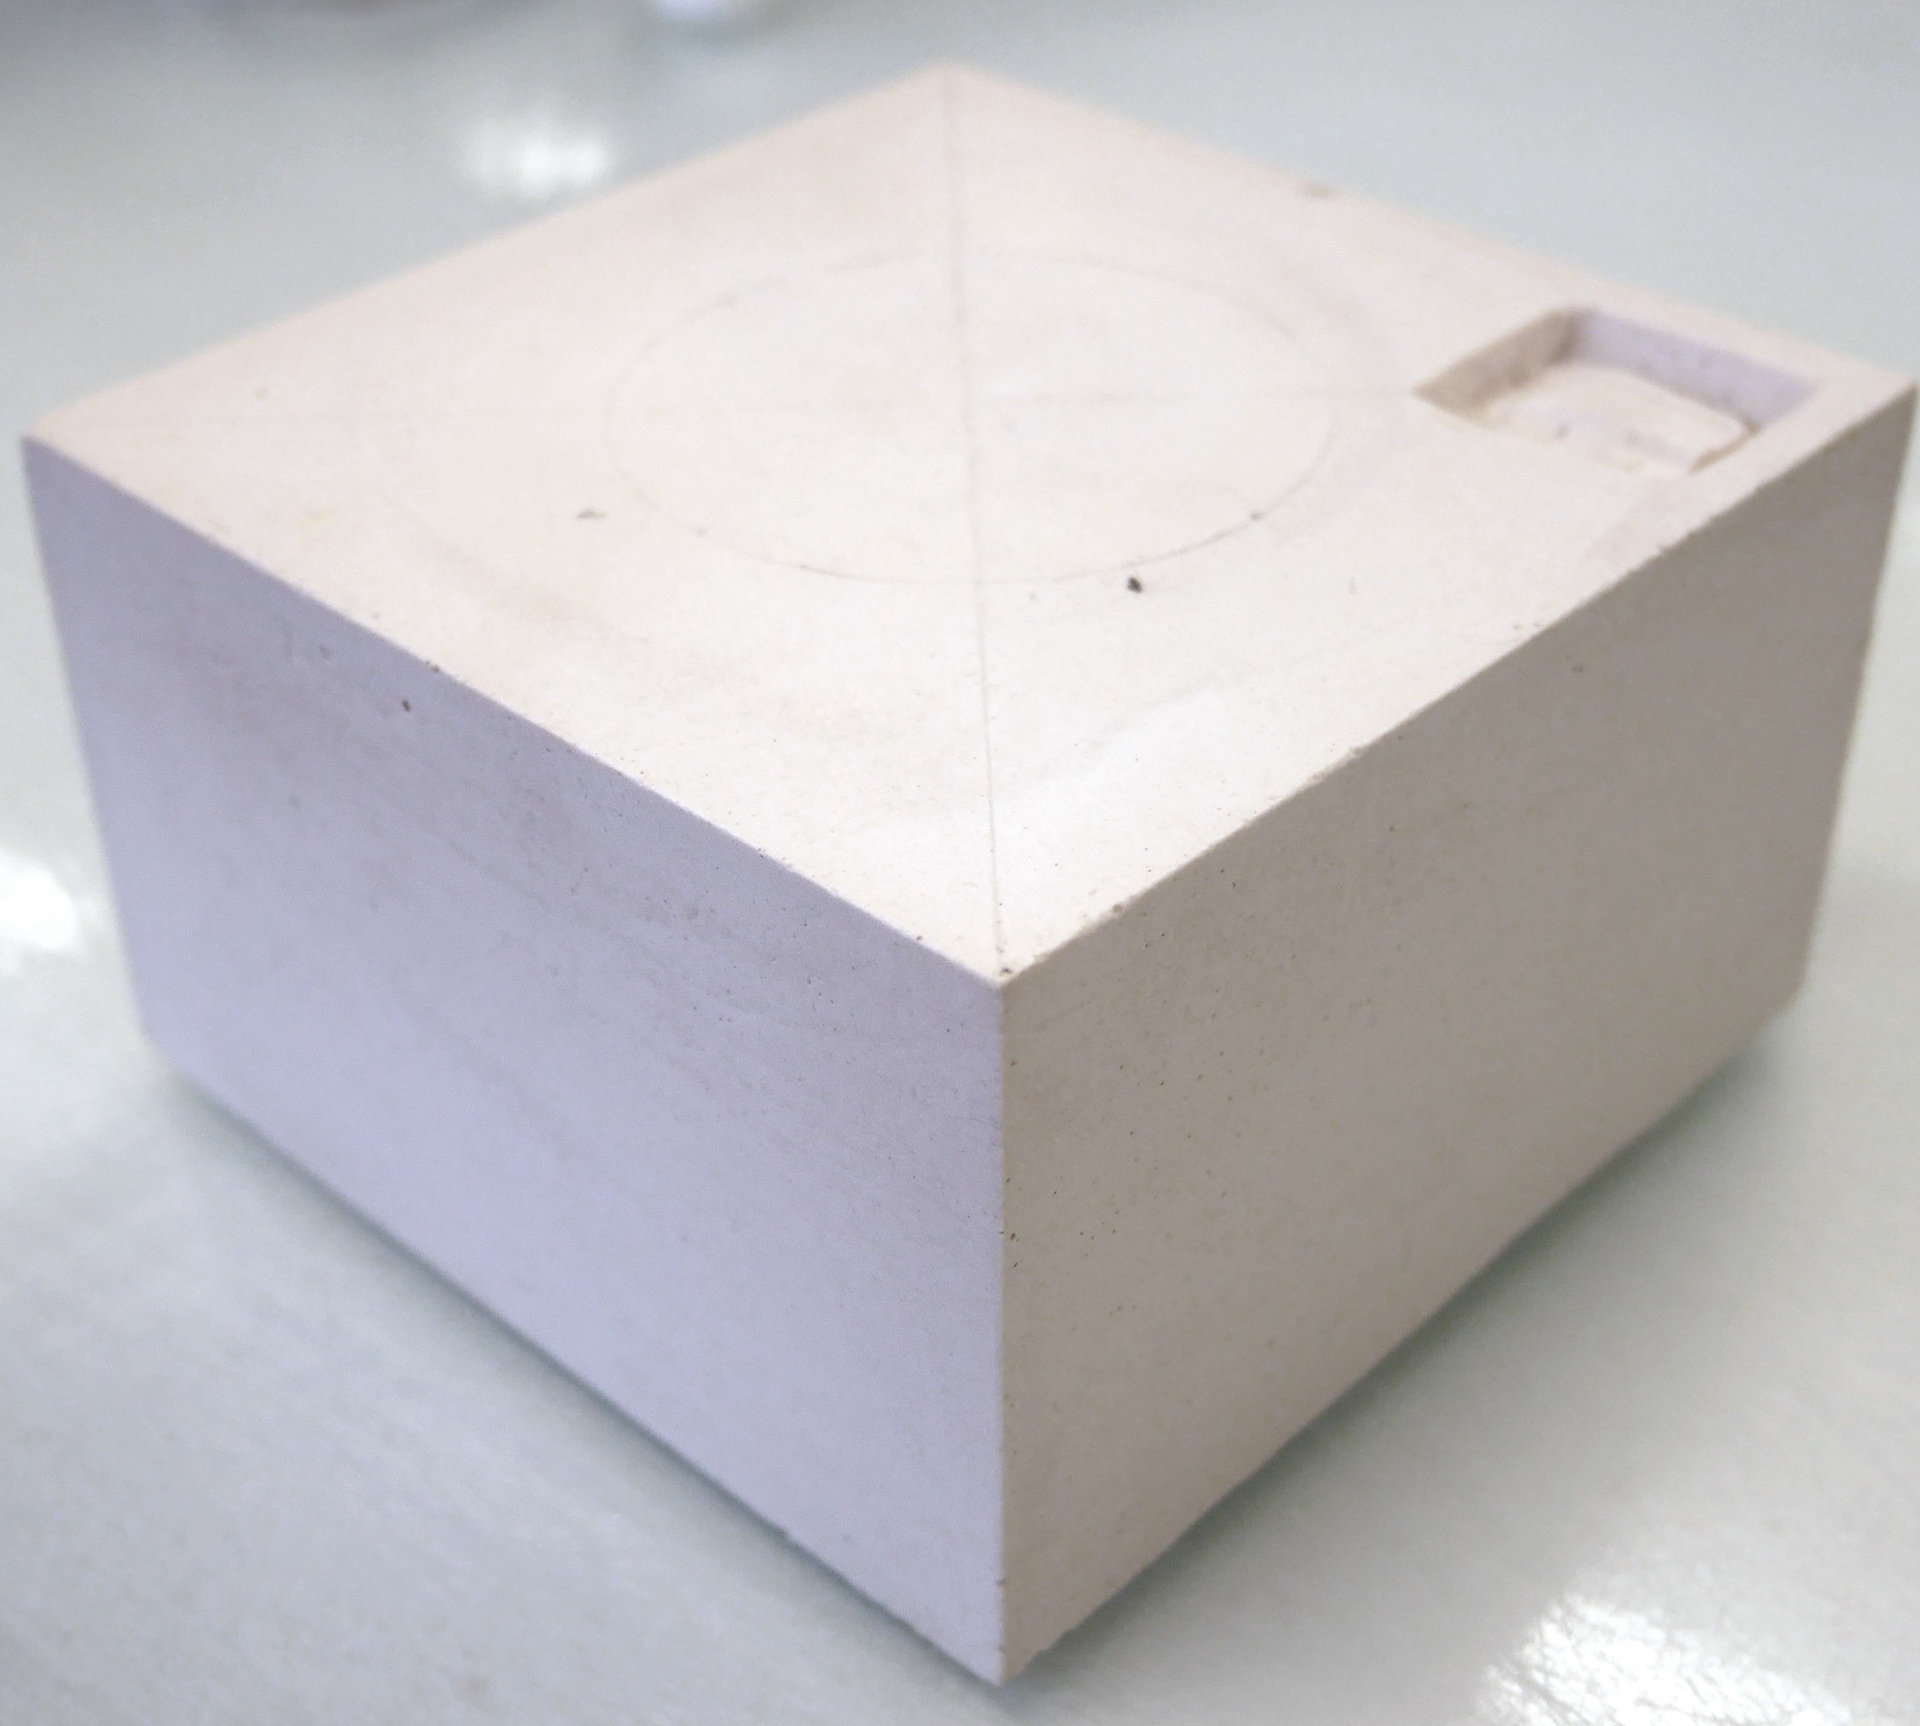
I chose to design and create the moulds in a three-part approach which allowed for the bottom two pieces to be removed diagonally whilst the more fragile, textured piece could stay flat on a surface.
I found this method to work most successfully with my previous set of moulds, as it also ensured the seam lines were best hidden in the corners of the cube.
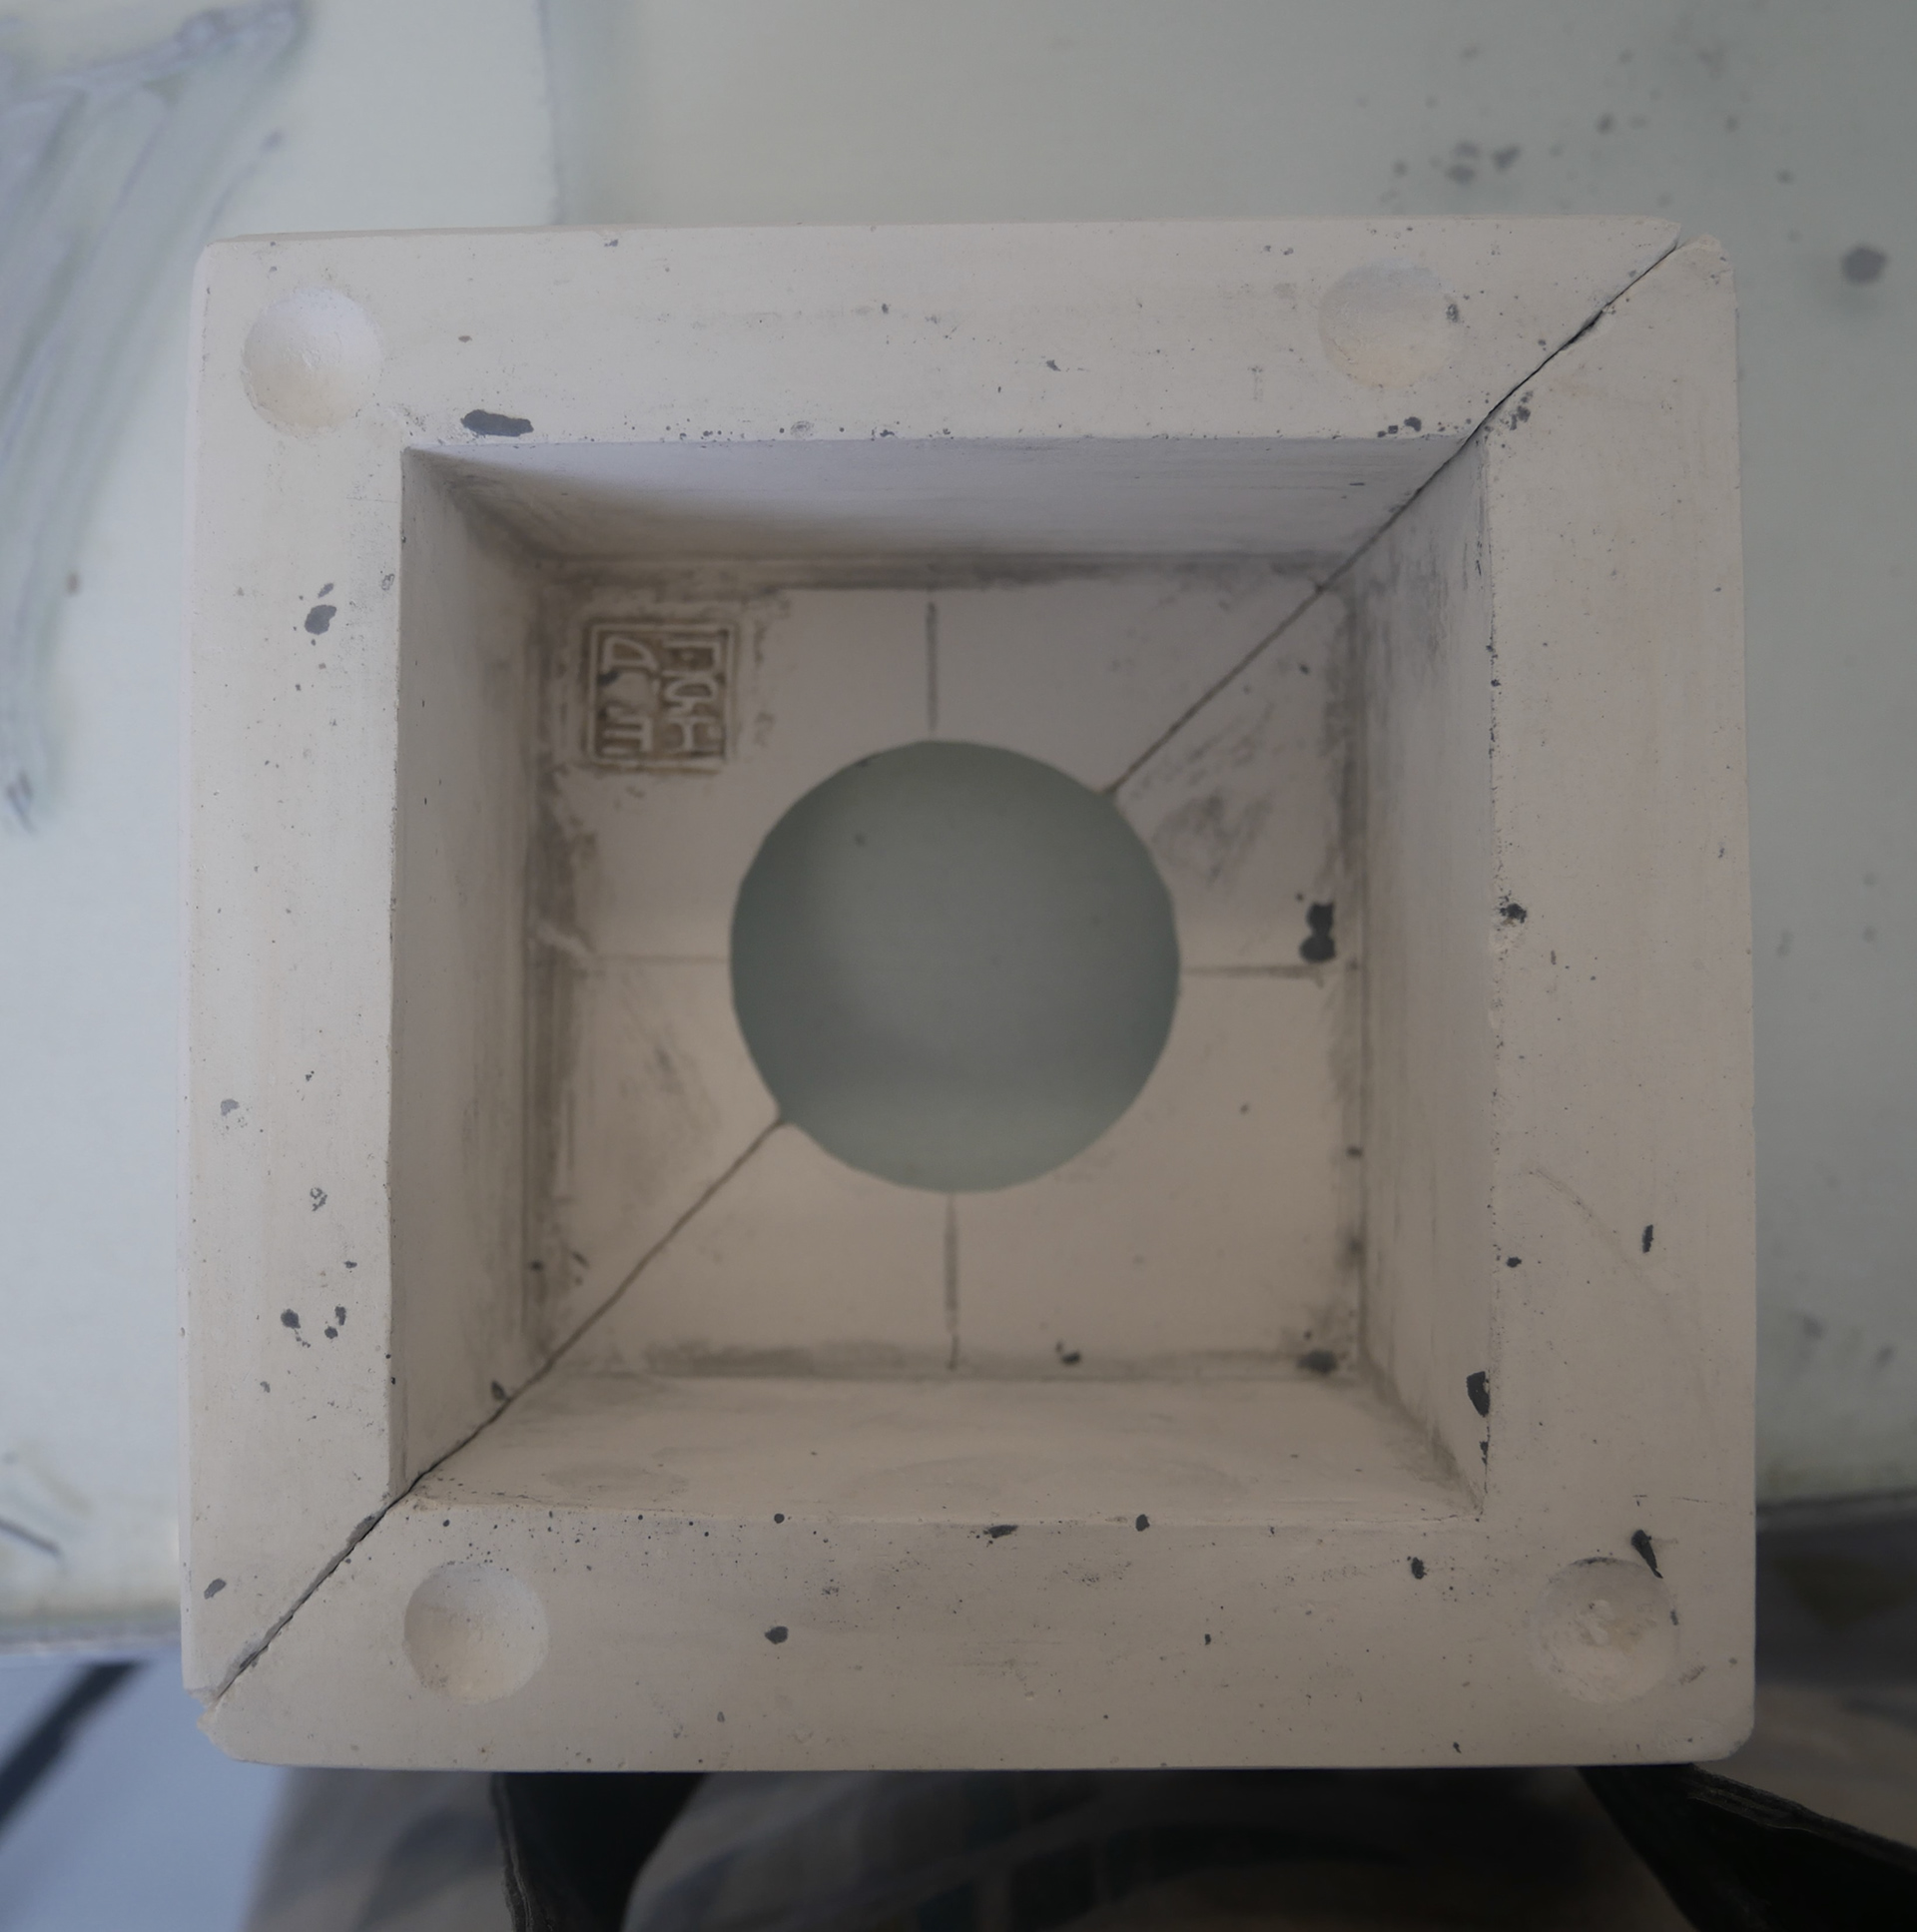
I firstly casted a perfect cube in plaster, which I polished and perfected with a set square. I created the initial mould of the object, which was the most difficult to refine. However, from this mould I was able to effectively cast the rest of the 5 moulds by using one of the previous mould pieces. Not only was this time efficient, but also ensured all the bases of the moulds were identical in size and shape.
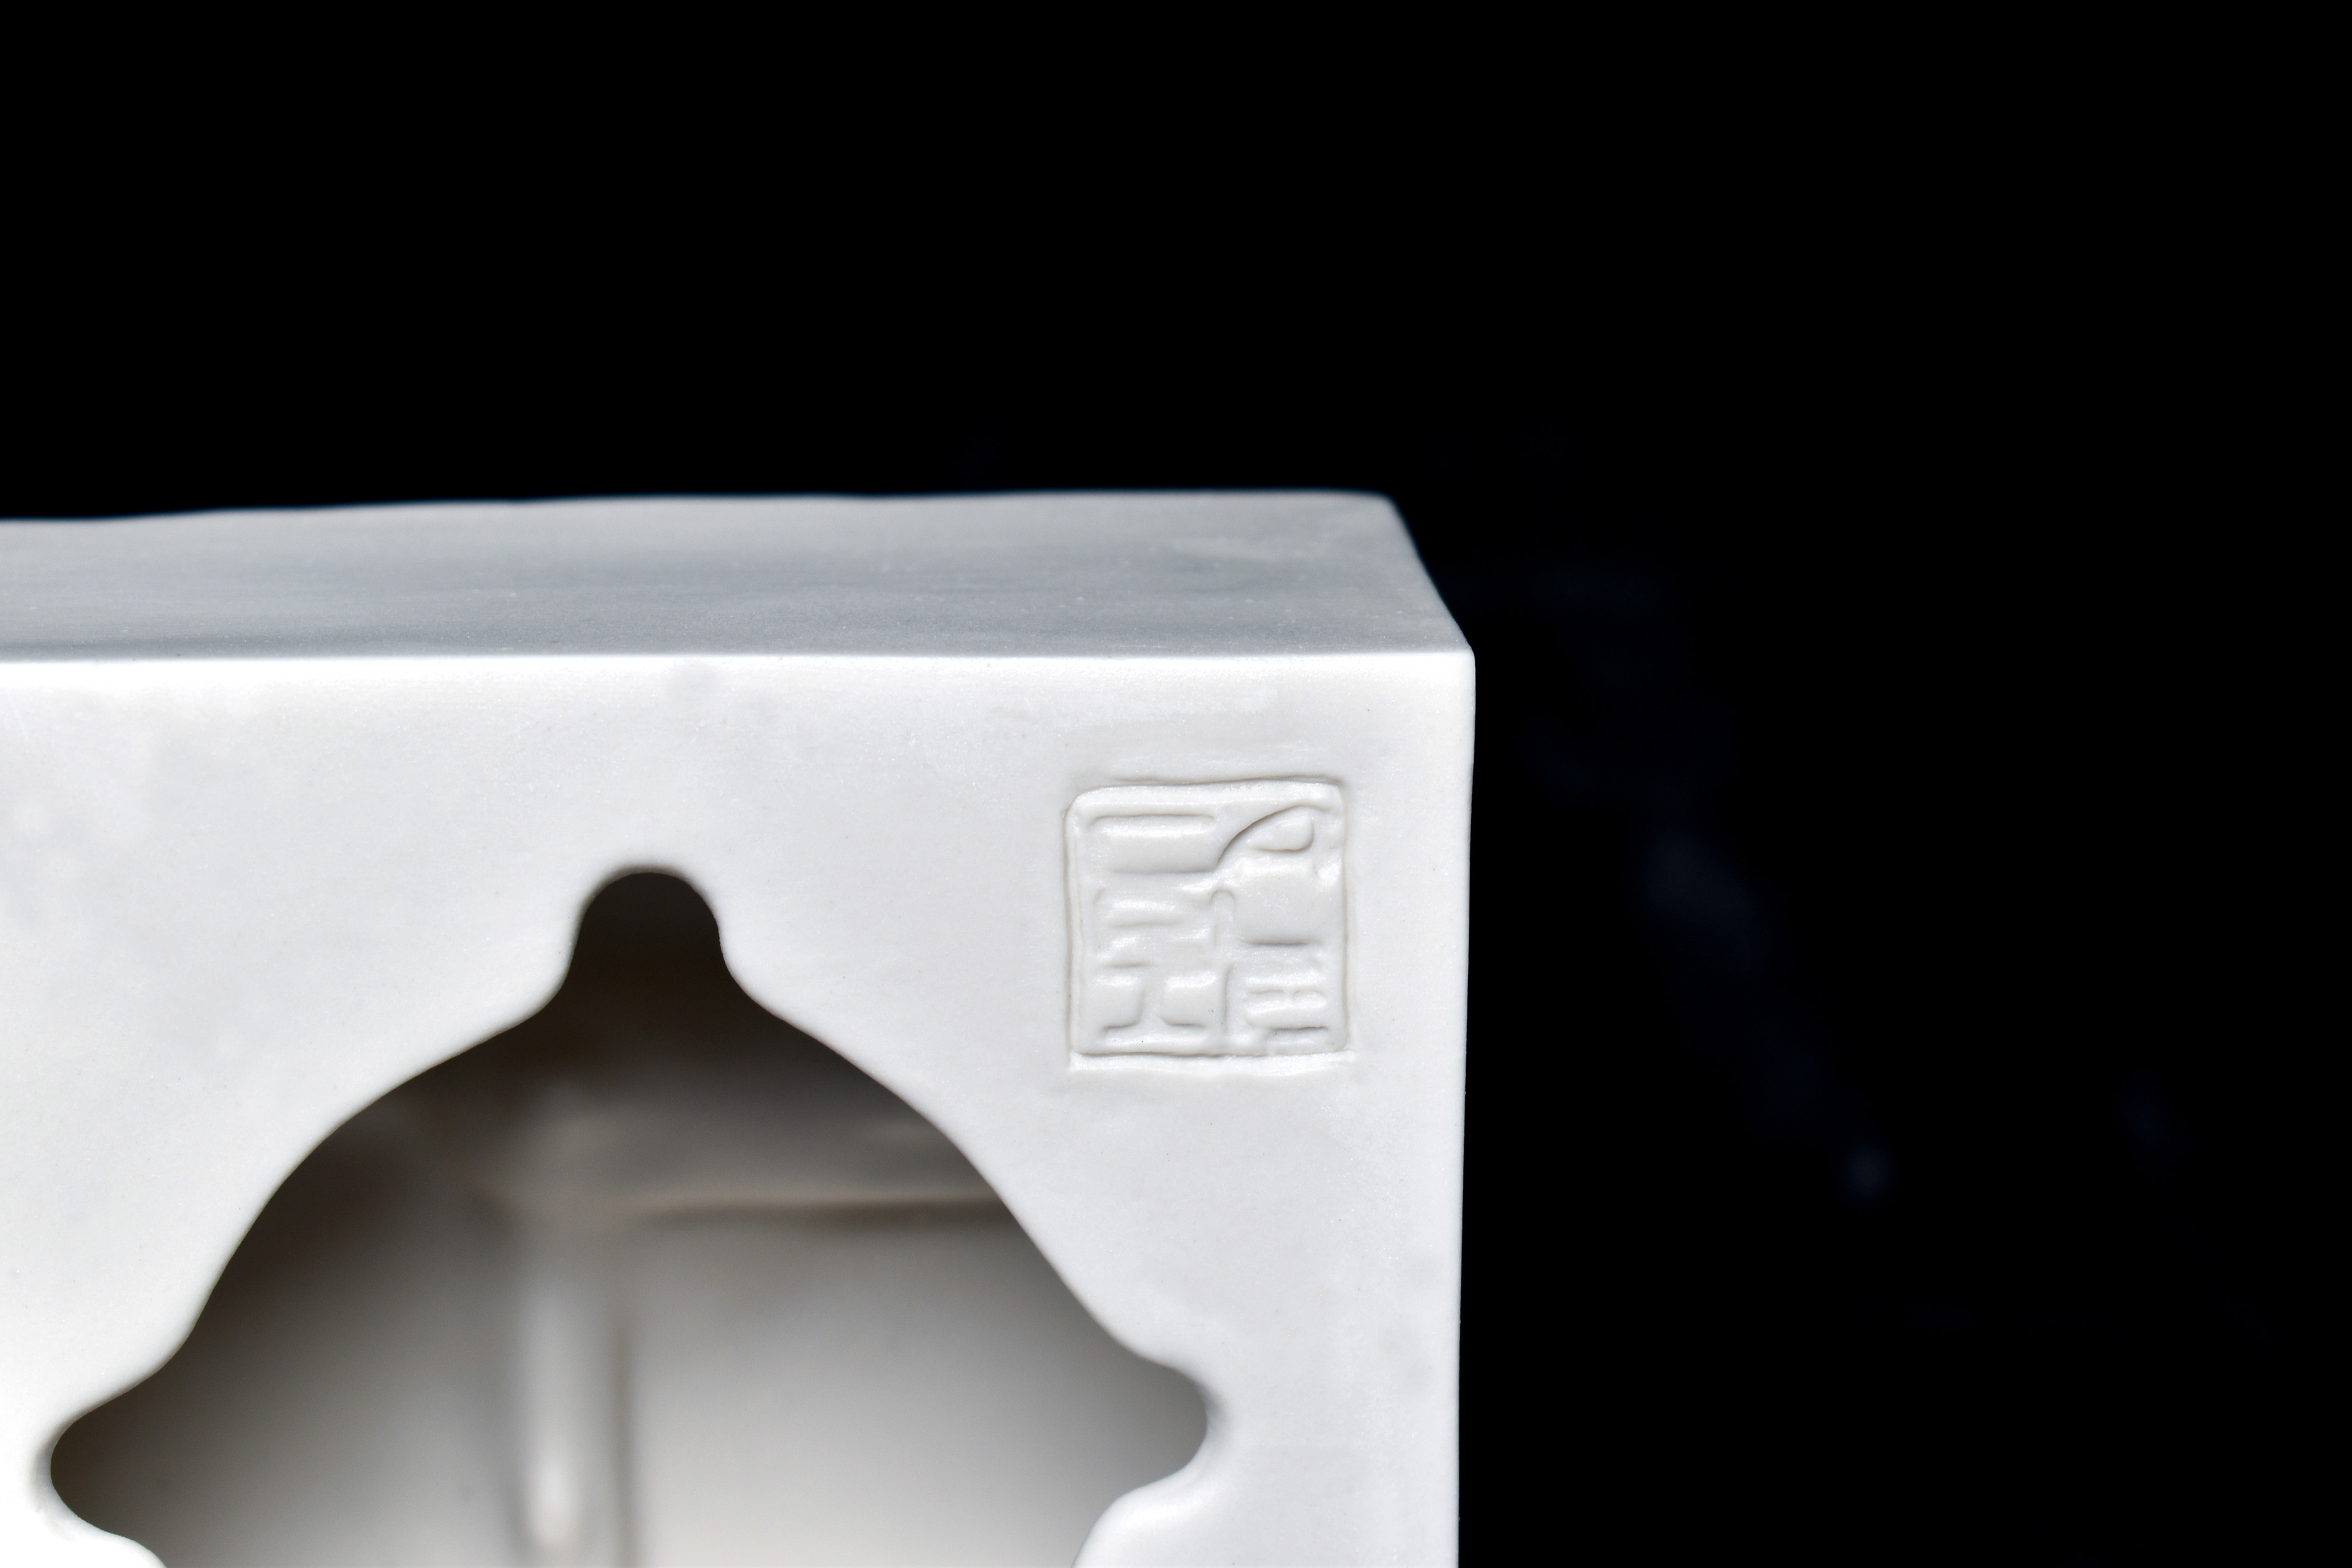
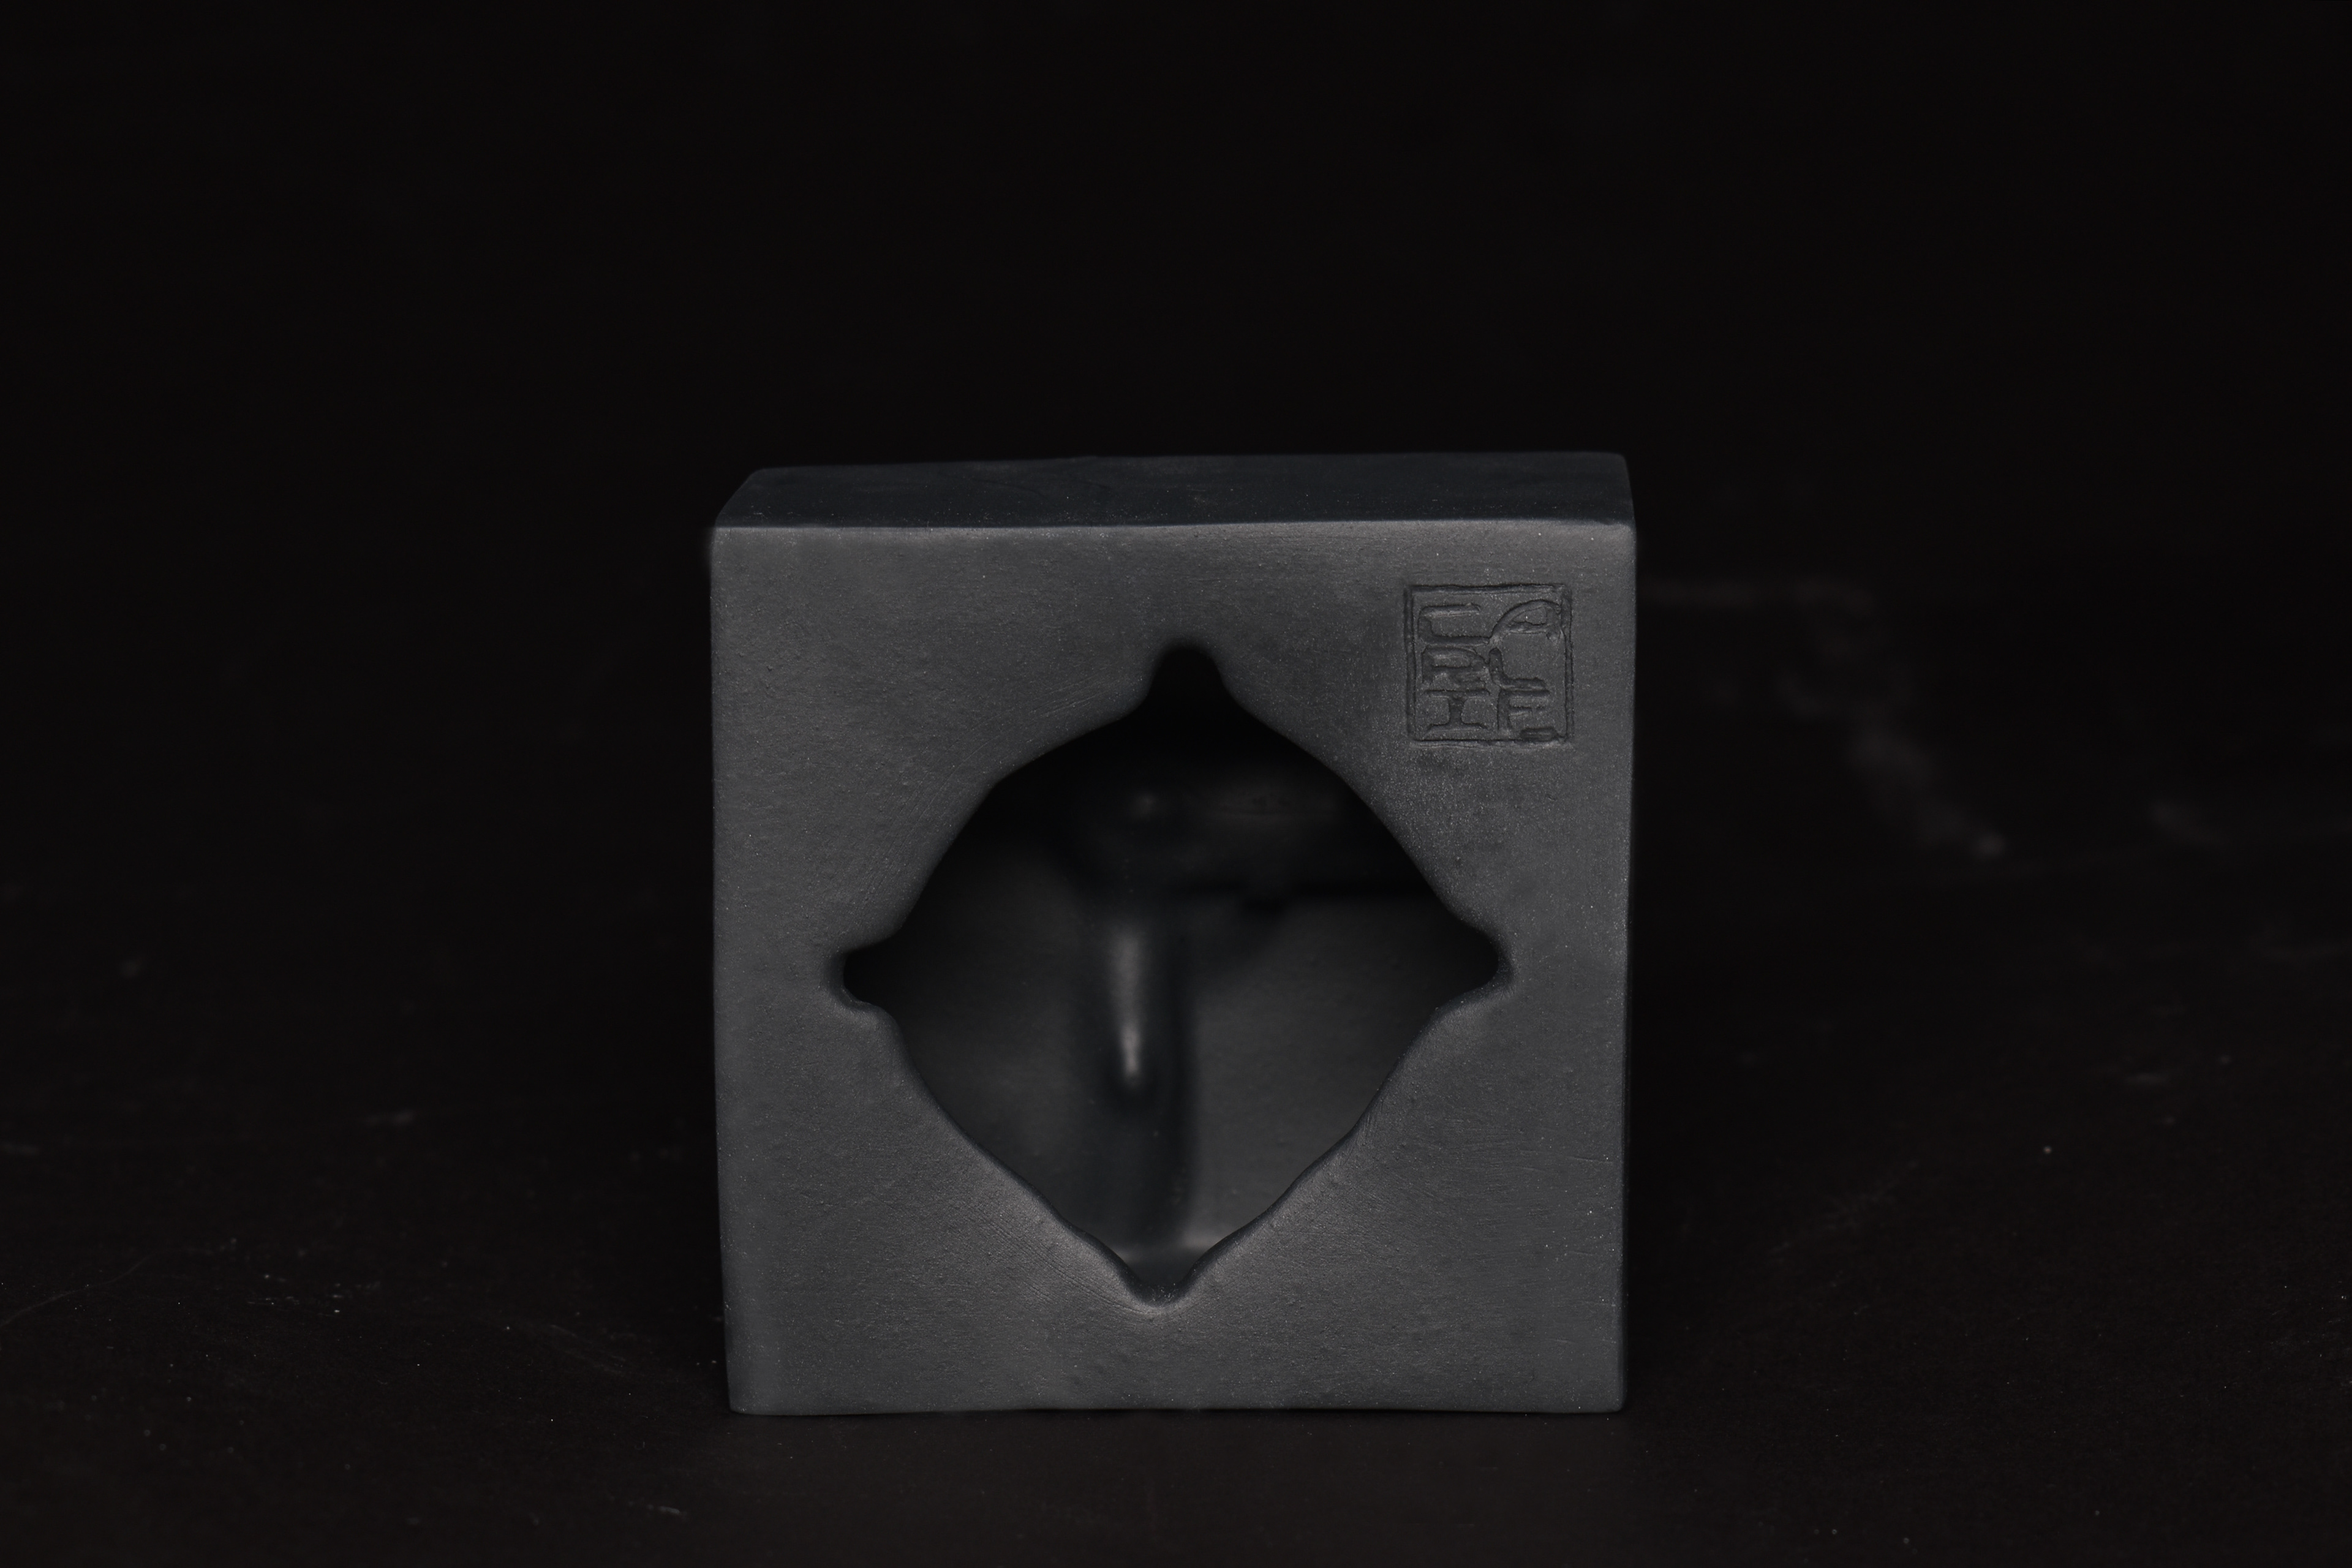
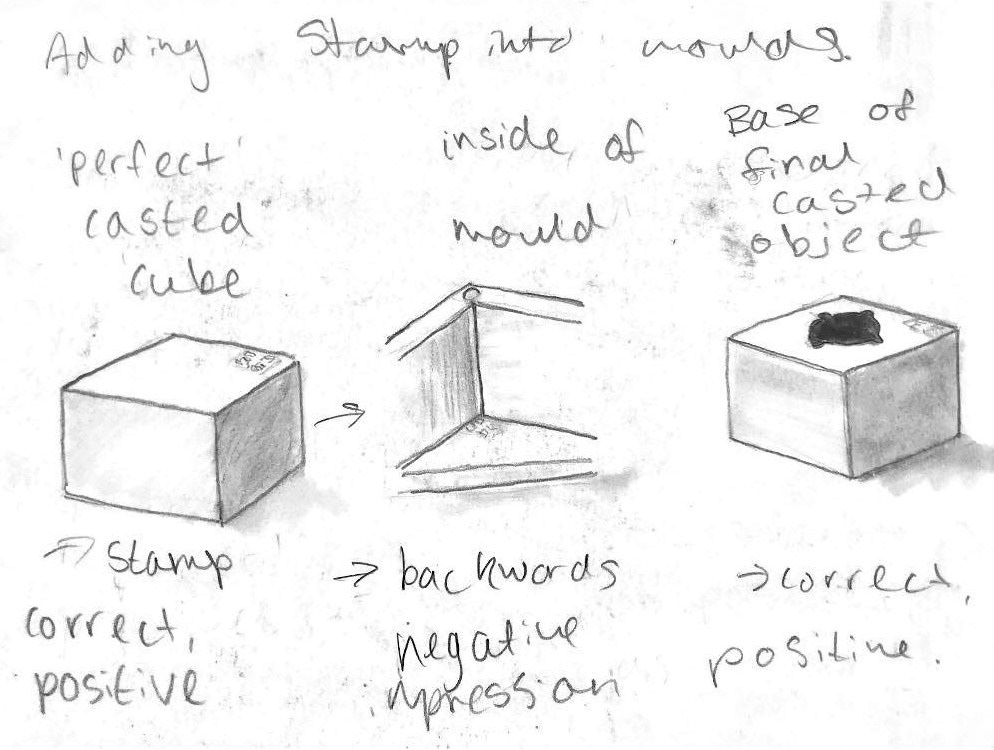
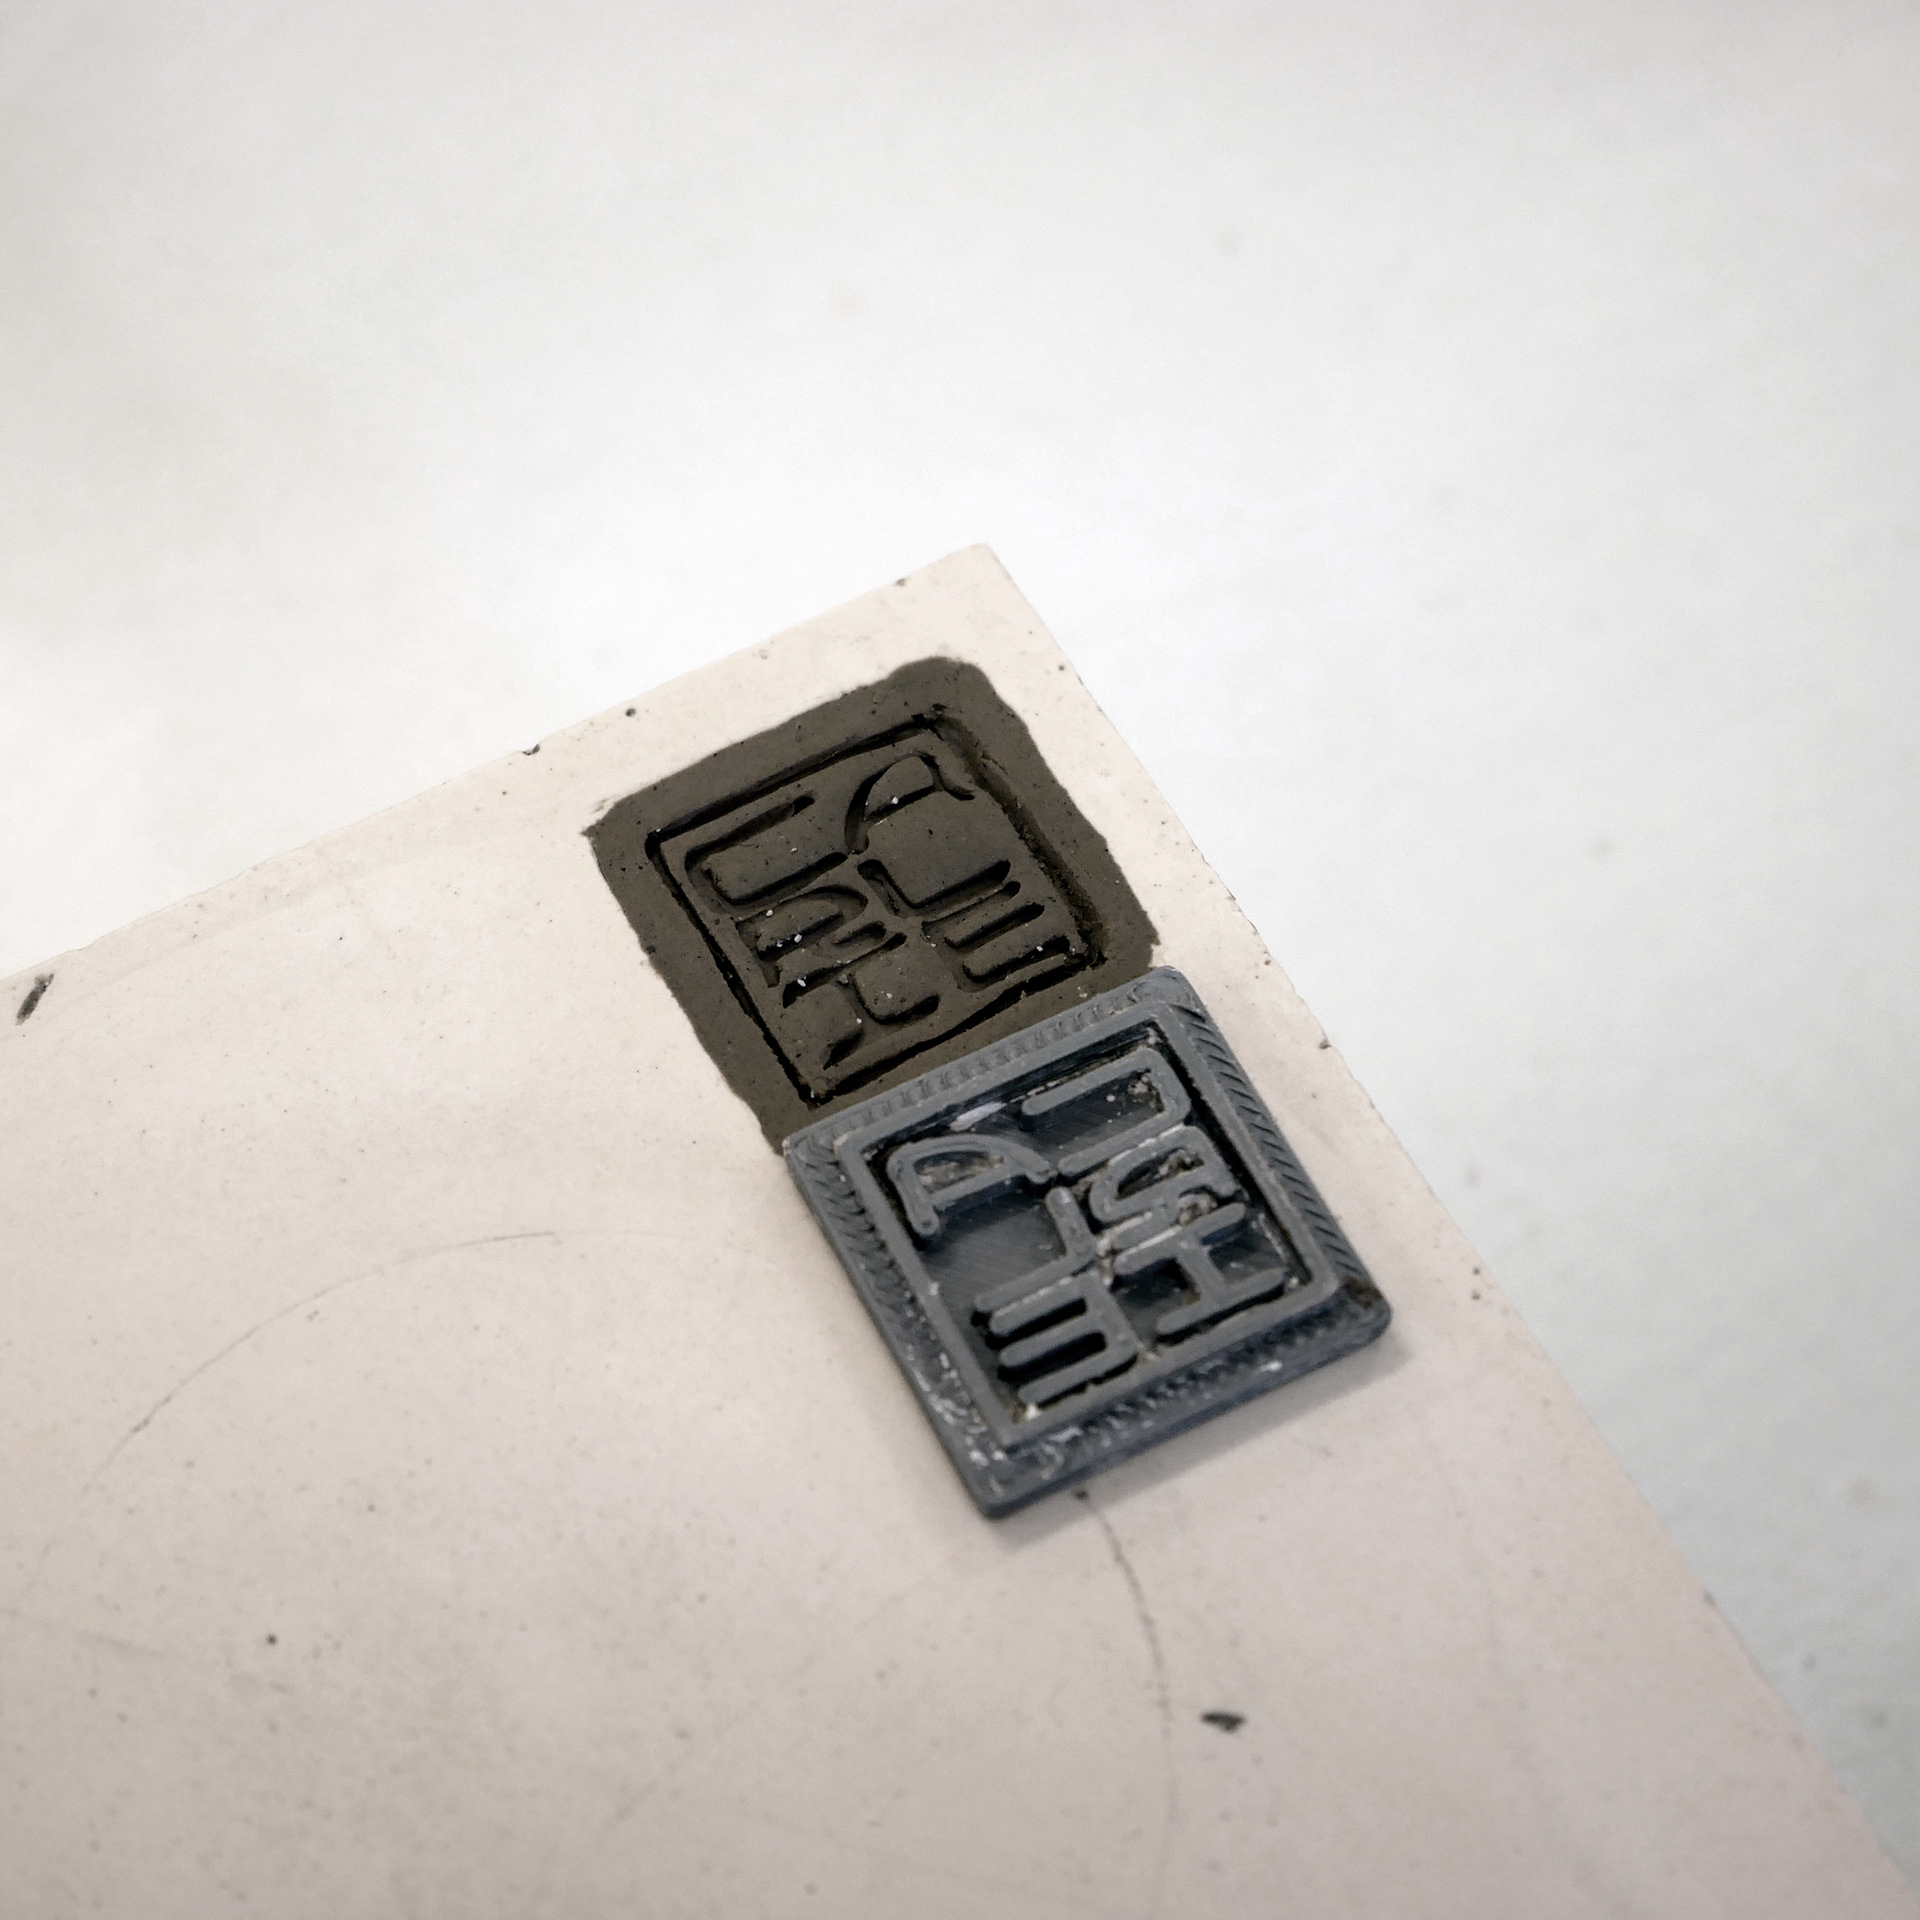
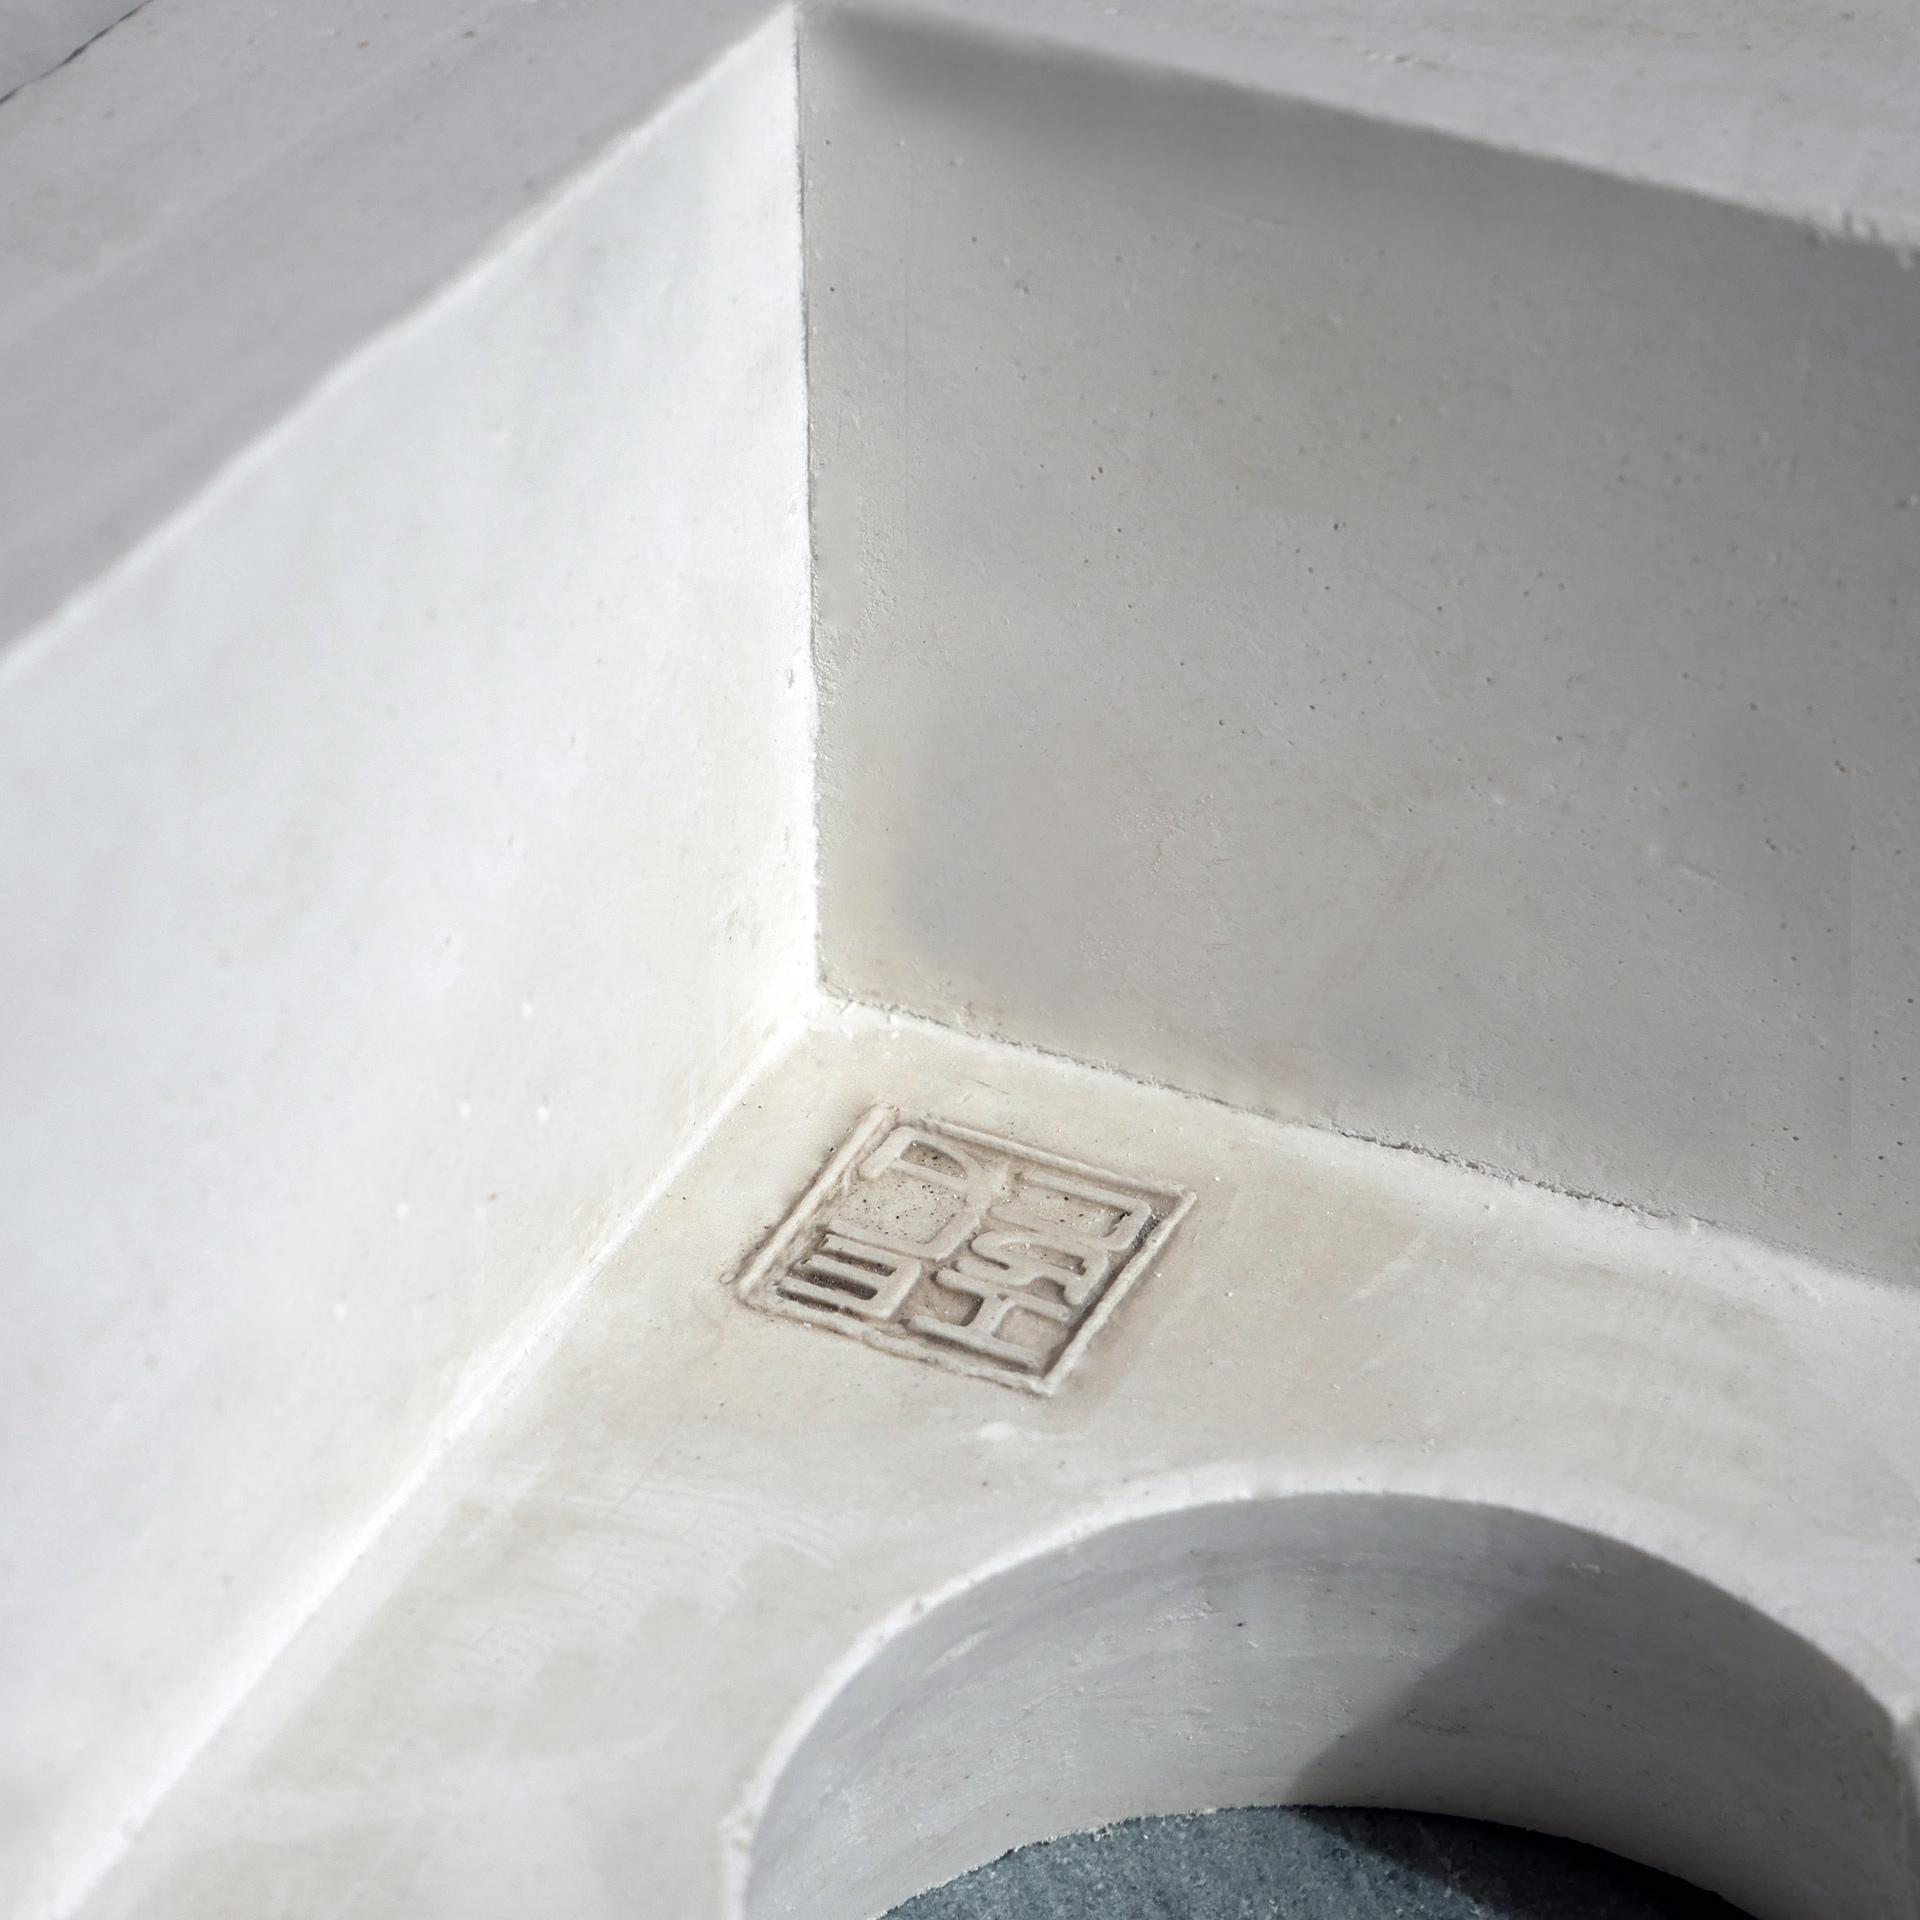
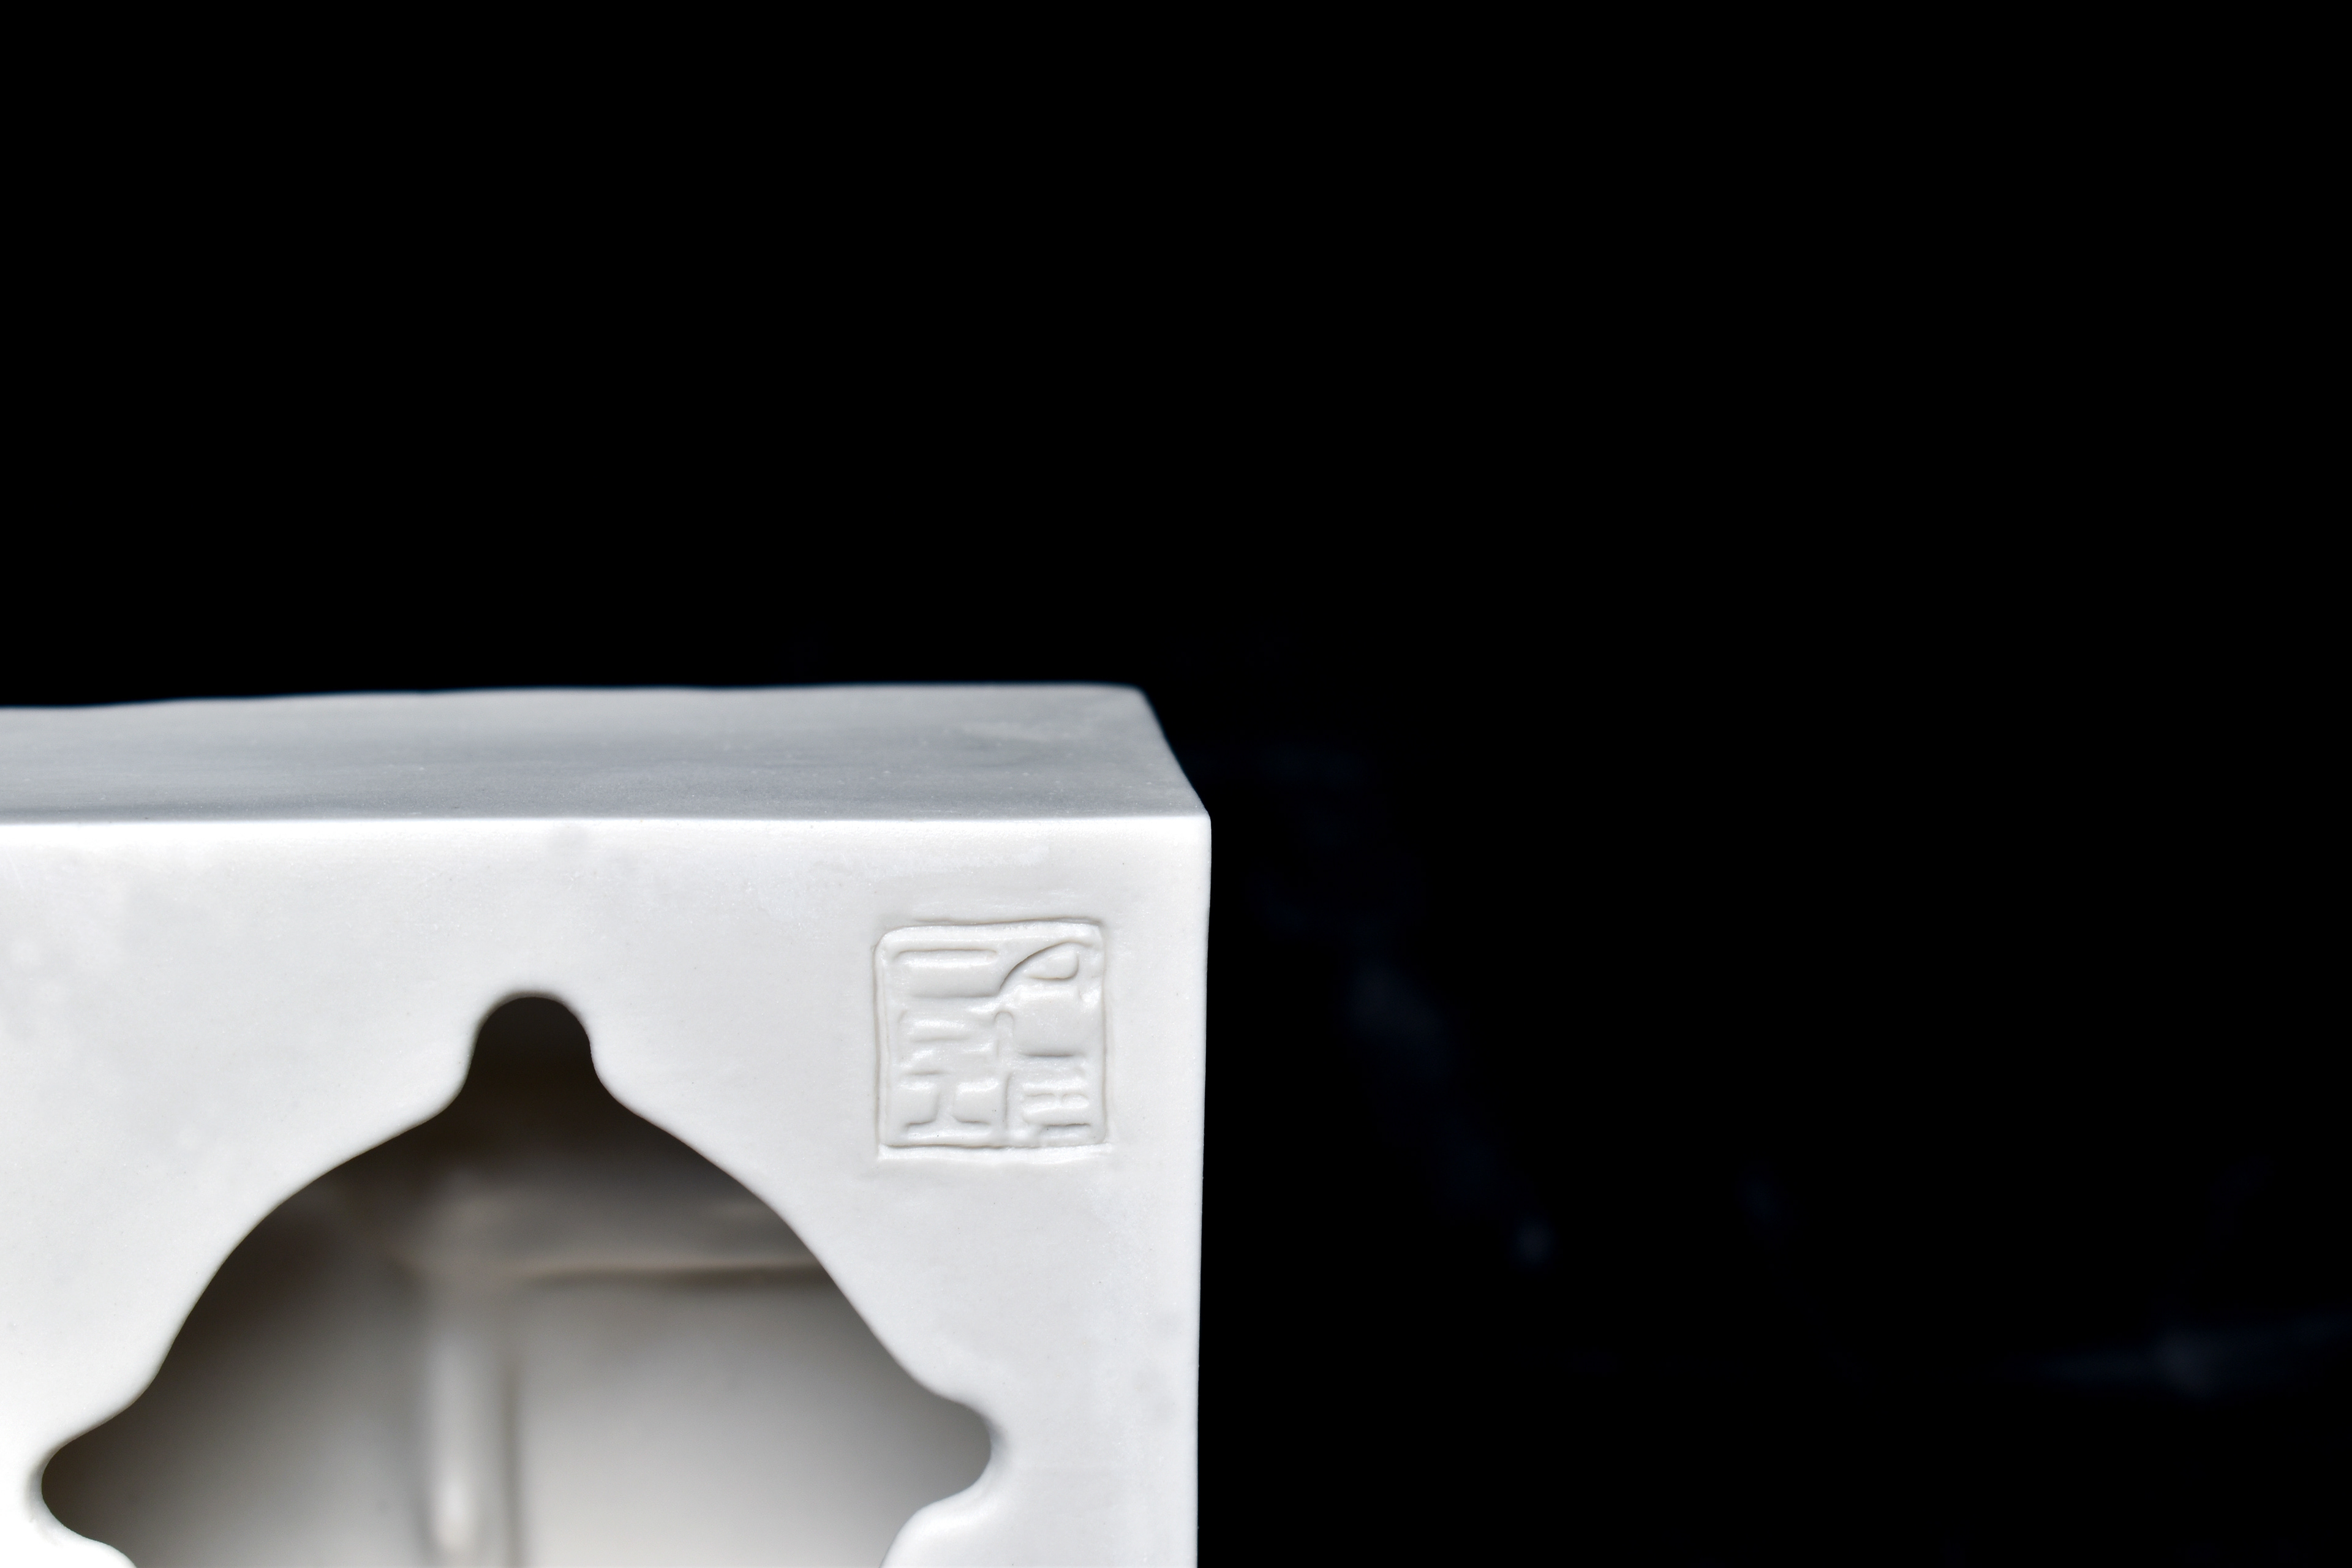
Adding logo into moulds
In order to include my logo into the back of the pieces I had to create a way of placing it within the moulds. I carved a small square from the base object I made and filled it with clay. Using my 3D printed stamp, I stamped the clay before casting the mould.
This worked well for some of the moulds, however others it was not completely clear and appeared too fragile within the plaster mould.
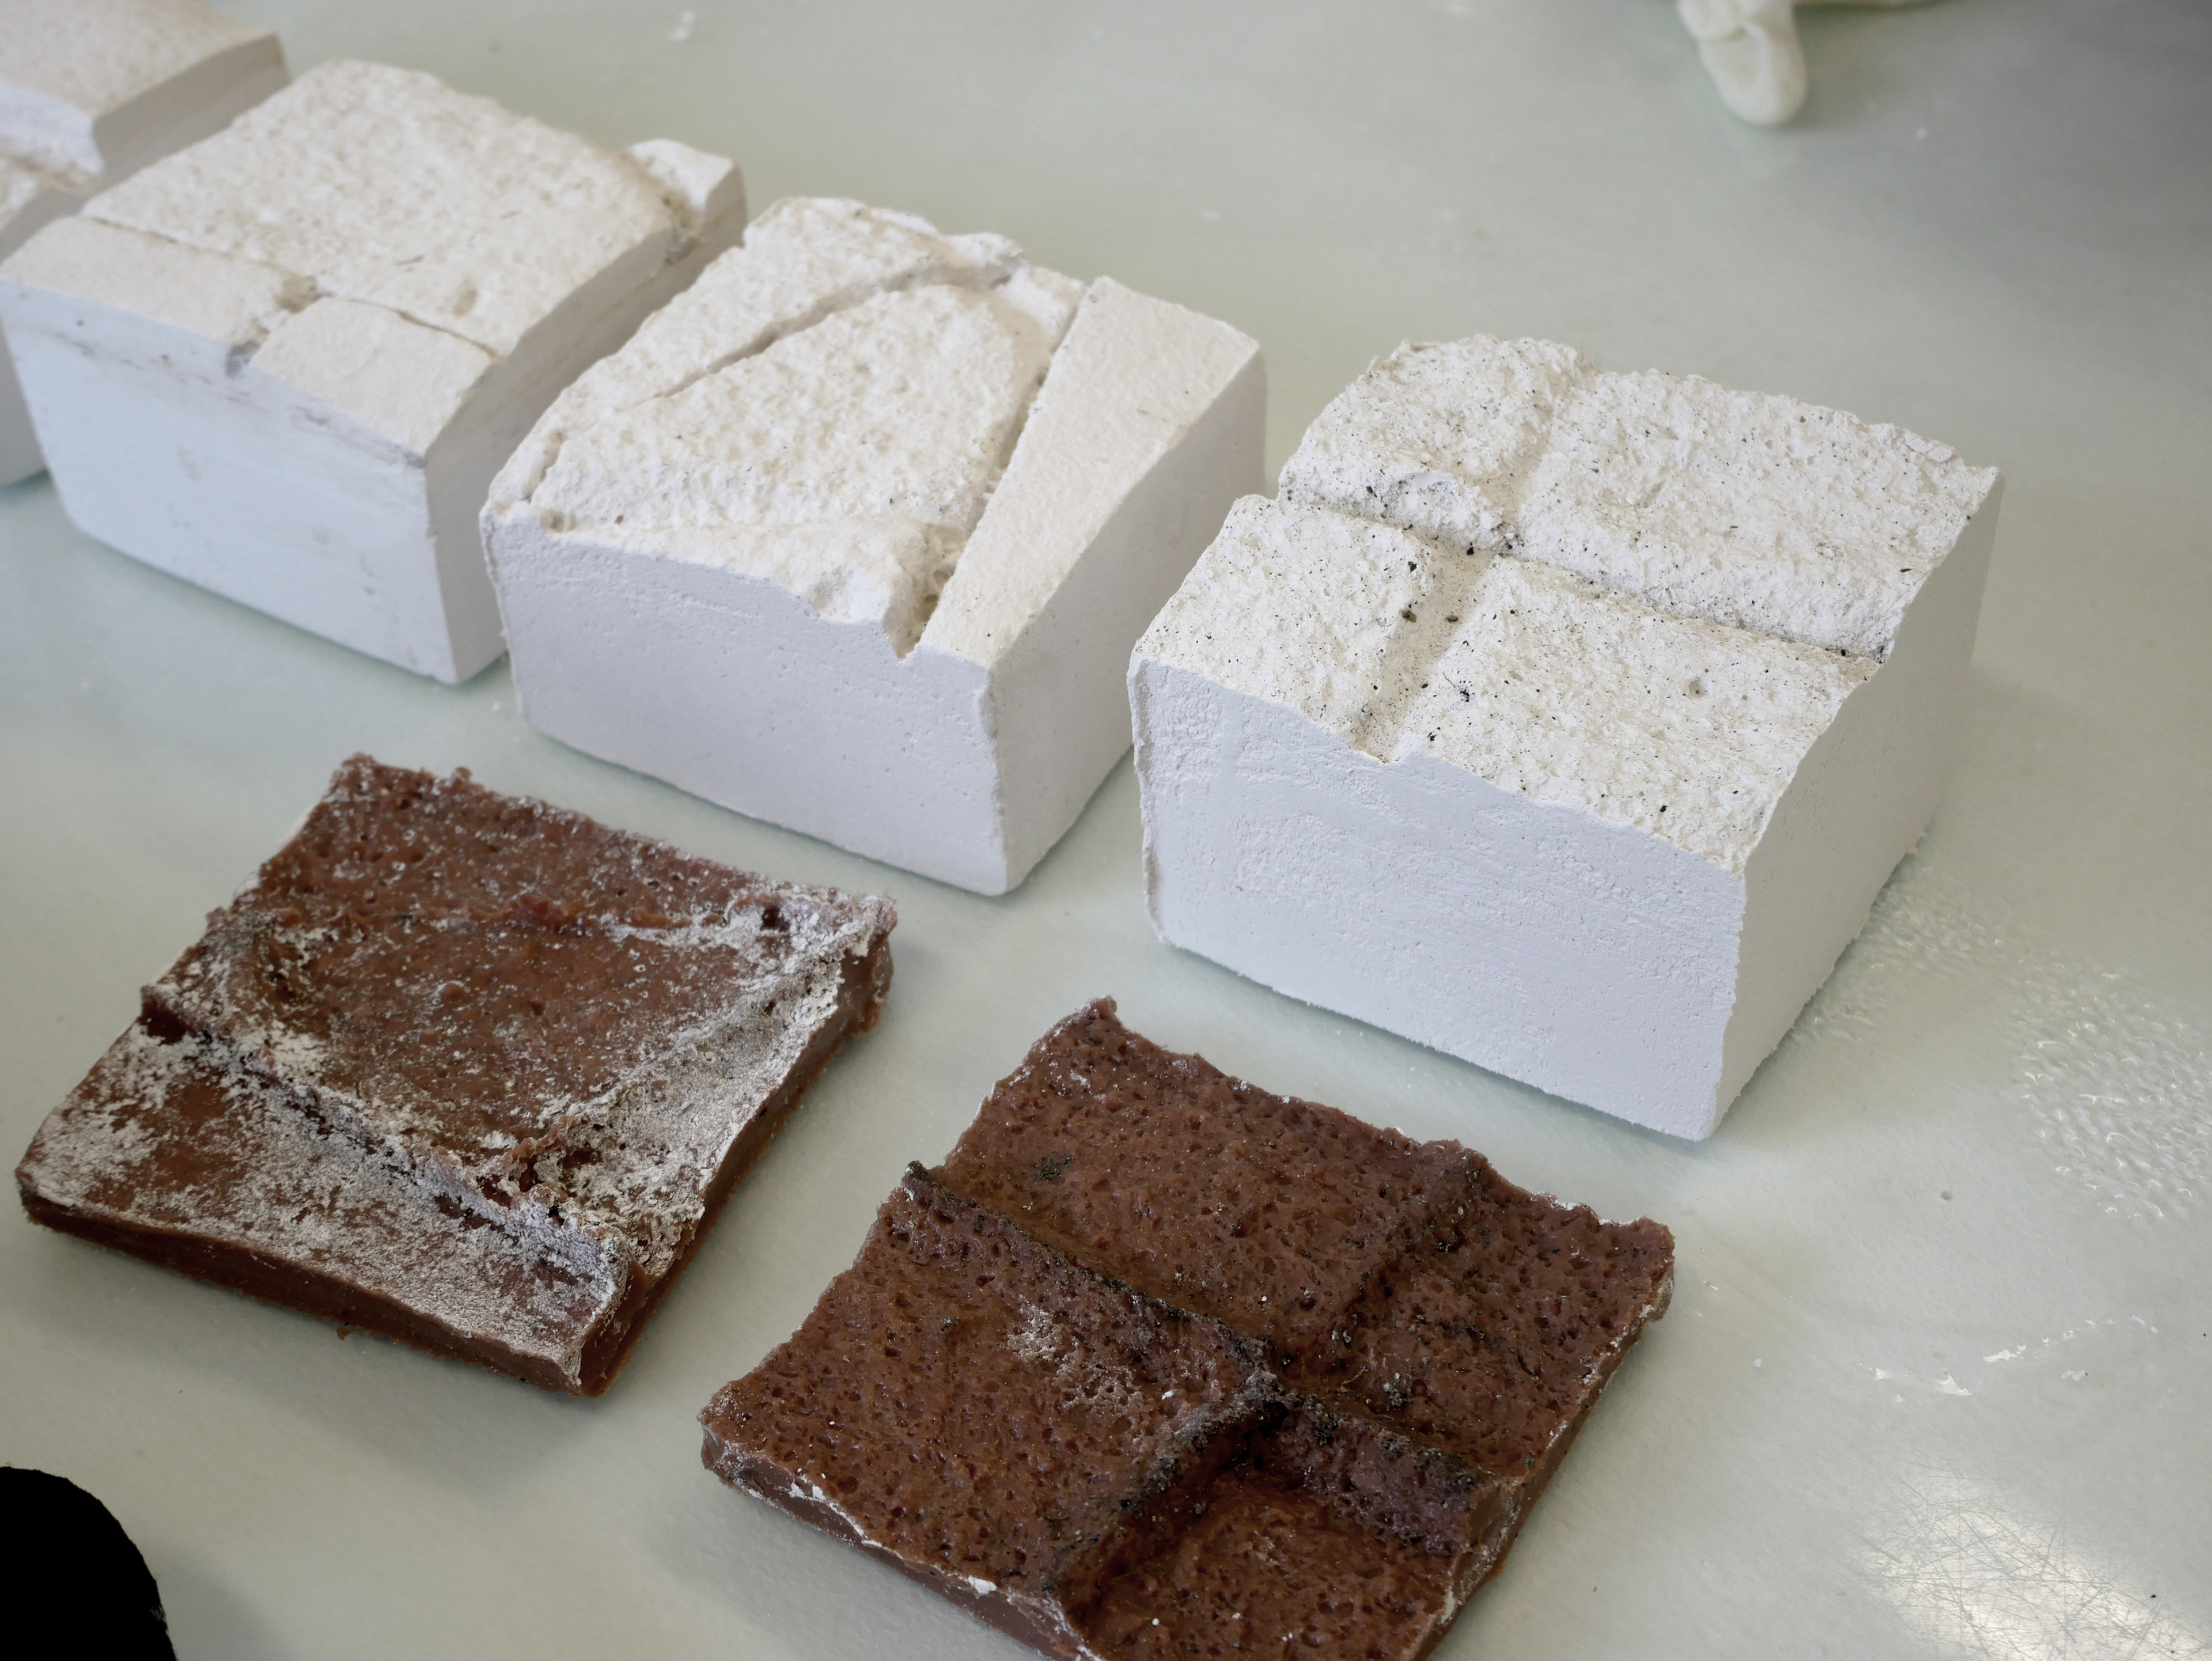
Testing the moulds with white casting slip
The moulds proved to be successful in the white slip. I found it to be much quicker casting the pieces compared to the previous moulds as I could cast all five at once.
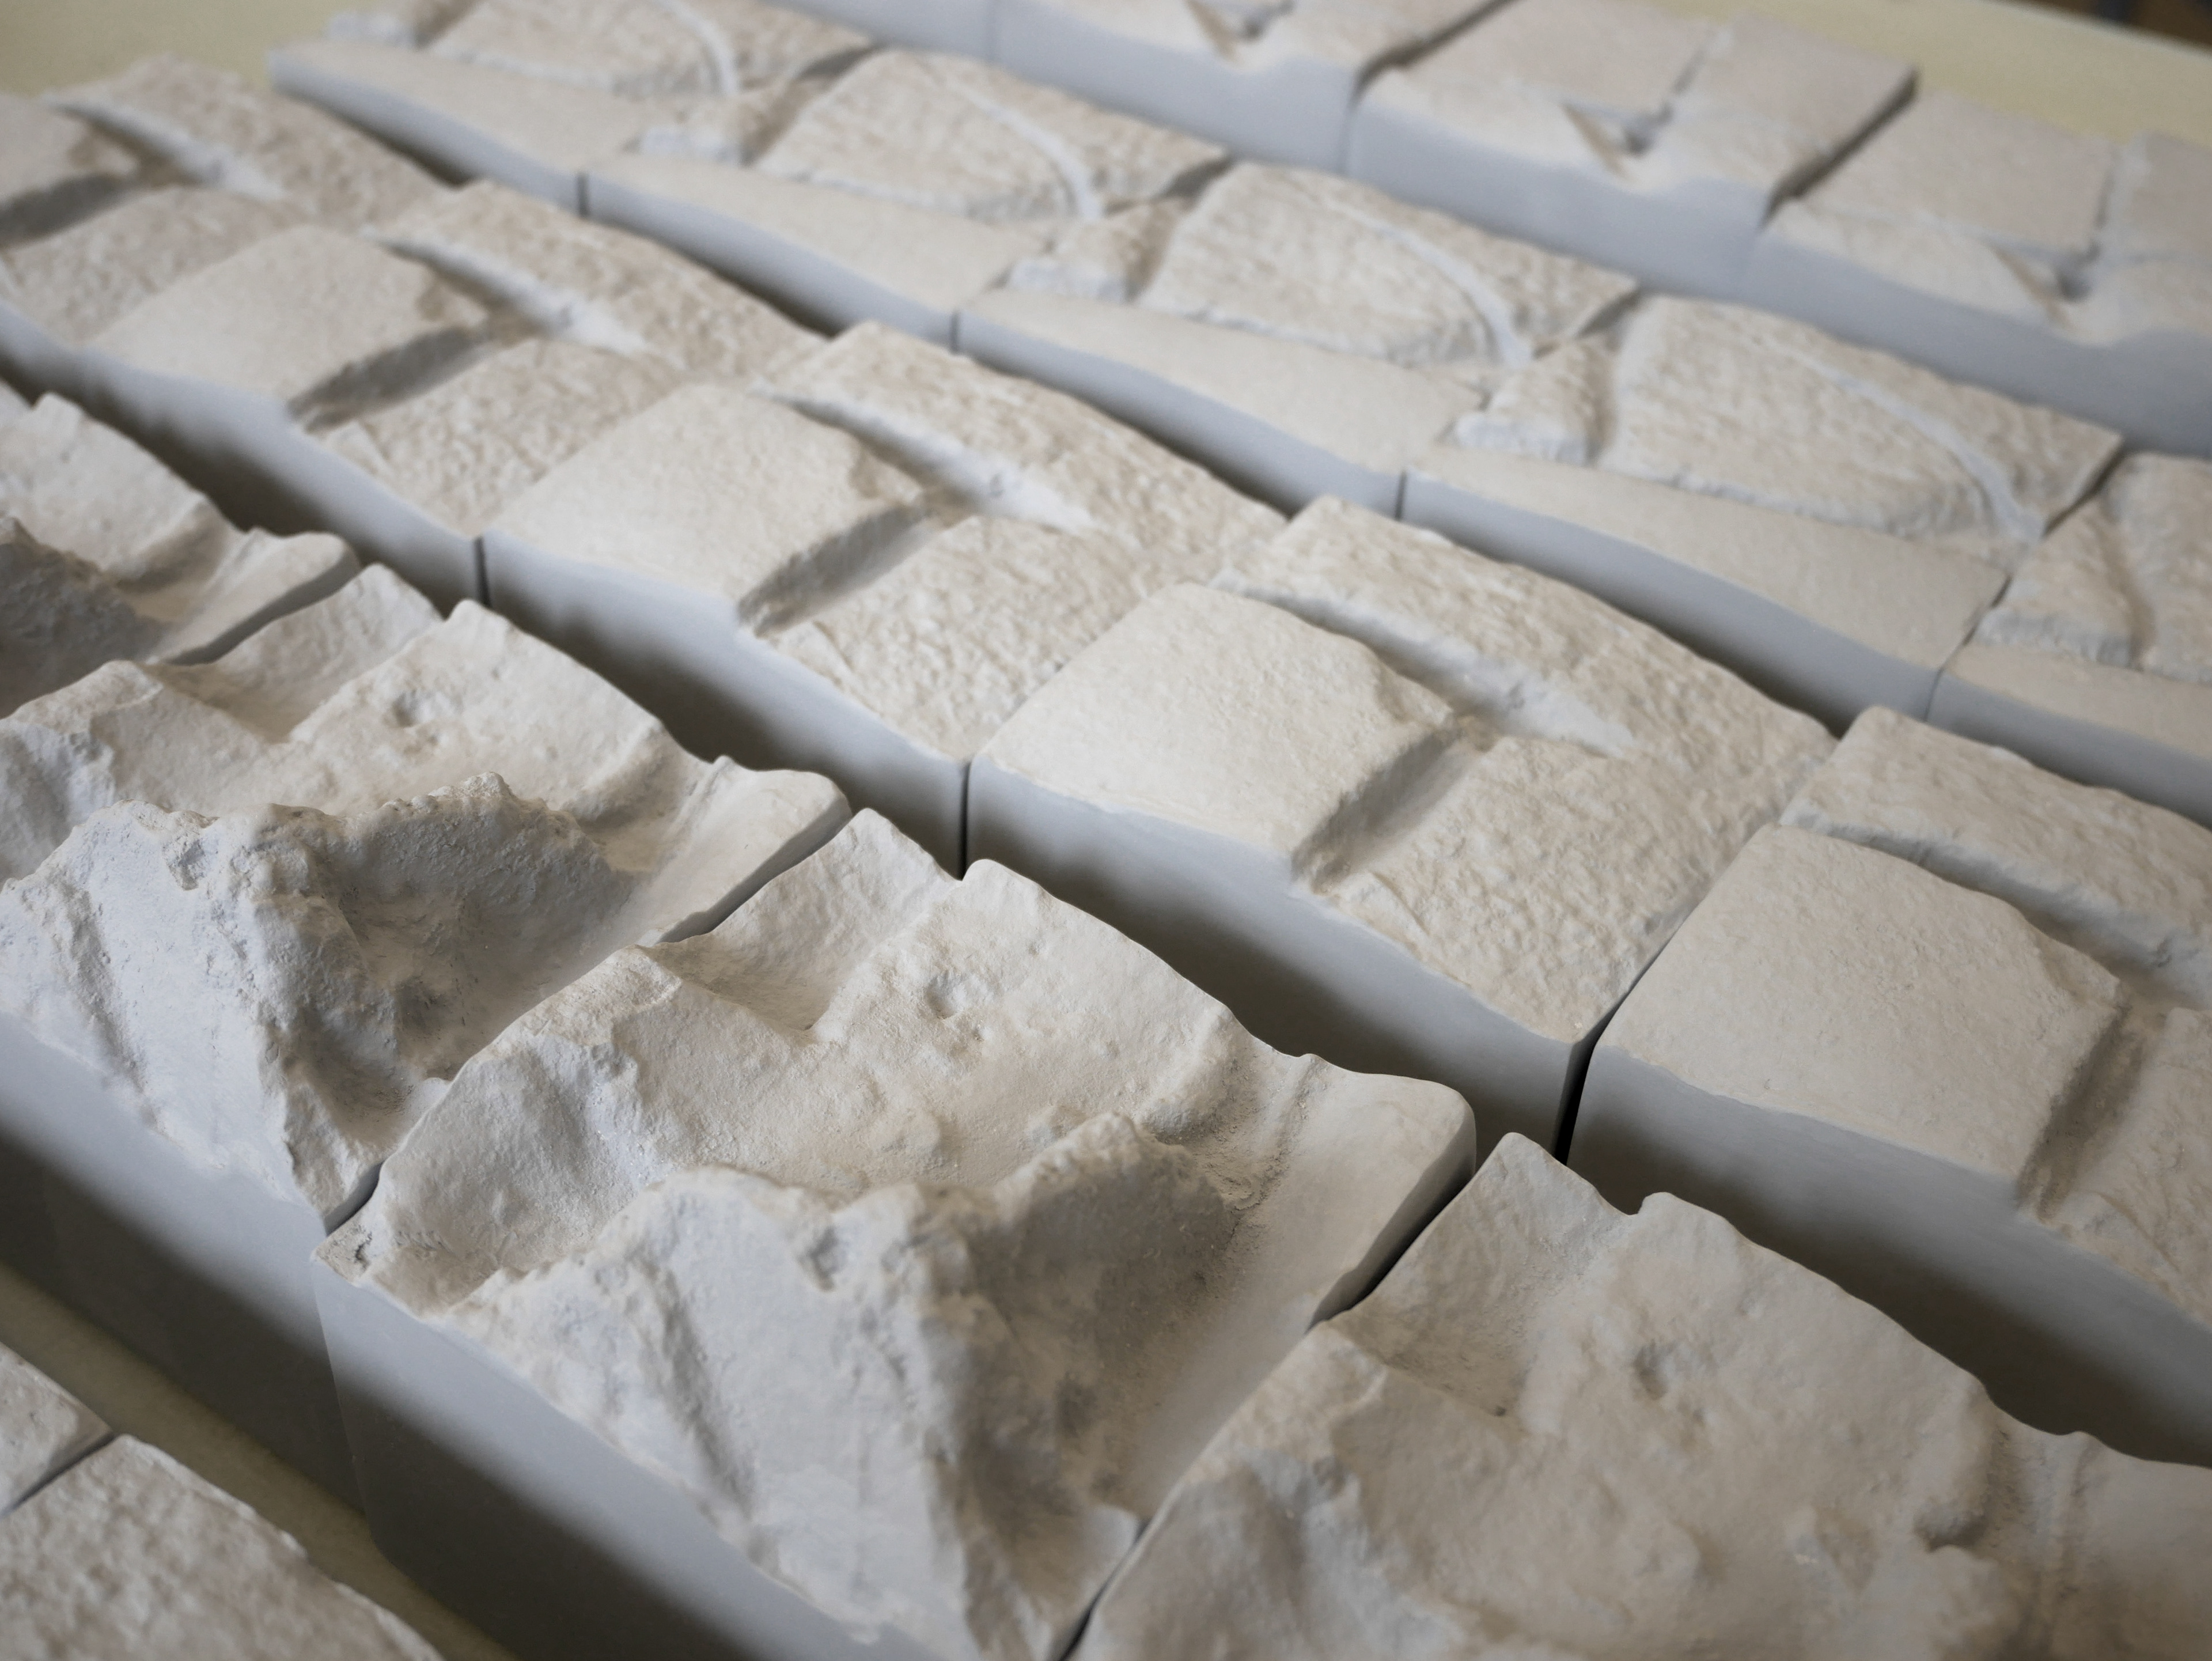
Casting 25 pieces
Once the moulds were dried, and my black porcelain had arrived, I was able to begin casting the pieces. I was able to cast five to ten pieces per day, which took roughly a week. I ensured to cast a spare two of each piece to allow room for breakages.
I found fettling and sponging the pieces was the most time consuming process, as i wanted to ensure all pieces were uniform.
I was able to create a mini production line for myself, and found I could speed up with each piece as I became more in tune with the pieces. the repetitive nature of this method improved my patience and skills, and i did not break a single piece, which was a big improvement!


Method of wall-mounting
I wanted the pieces the be able to be hung from any four directions, so I created a large pour hole with 4 notches from each direction.
Too ensure all 25 pieces had the hang-notches in the same position; I meaured and marked inside each of the moulds, so the casted objects would have a guildline of where to create a hole. I used a carving tool, a drill bit and a sponge to create the multi-keyhole style hanger.

Fettling
Fettling the thirty-five pieces at bisque felt like a monumental task. I wanted each piece to have crisp edges and smooth sides, which meant taking my time on each one. I was able to speed up towards the end as I began getting muscle memory from the motion.


Selecting final 25 out of 35
Once all the pieces were ready to be glazed, I checked each one for imperfections and select the 25 most faultless pieces. At this stage I was very glad I had spares, as I came across a few pieces with holes and lumps in the base.


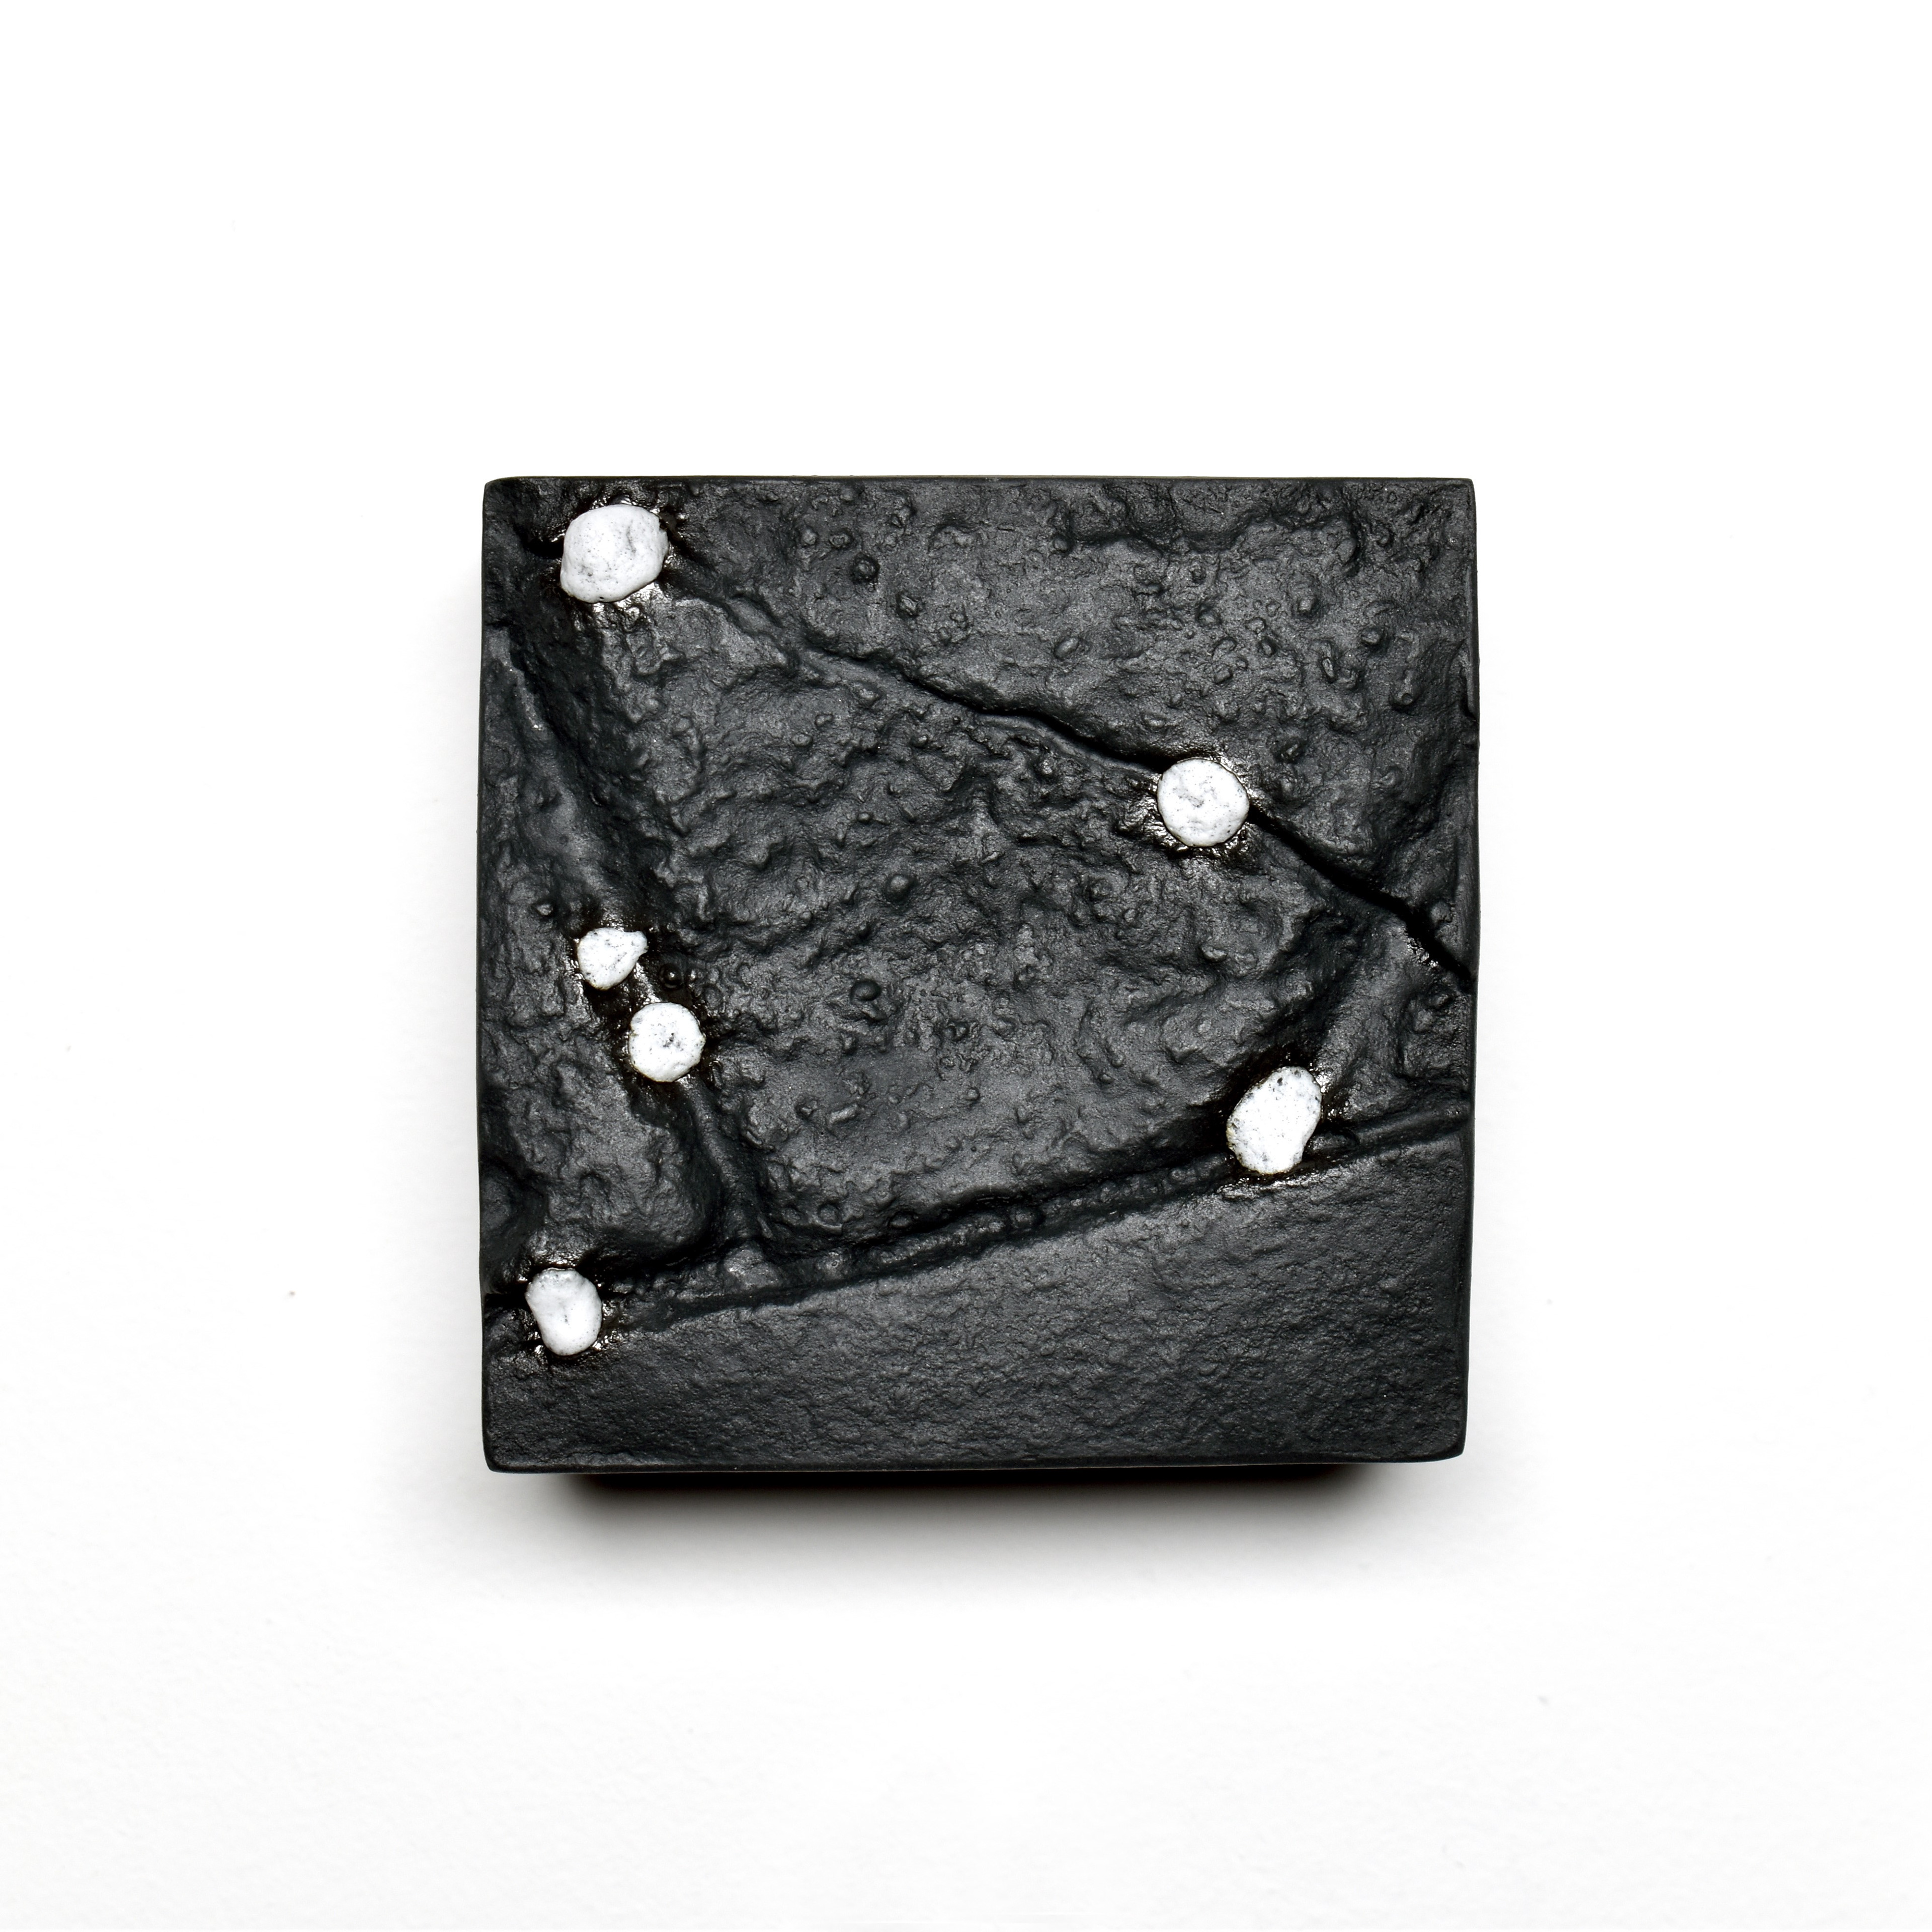
Glazing
Although the volcanic glaze is intended to be unpredictable; I had to maintain an element of control when glazing, to direct the growth.
I followed my initial sketch, and glazed in both rows and columns to ensure consistency. I maintained a method with each row, with the 2nd columm having one blob of glaze scattered, ranging up to 5th column having generous layering of glaze.


Wall Curation
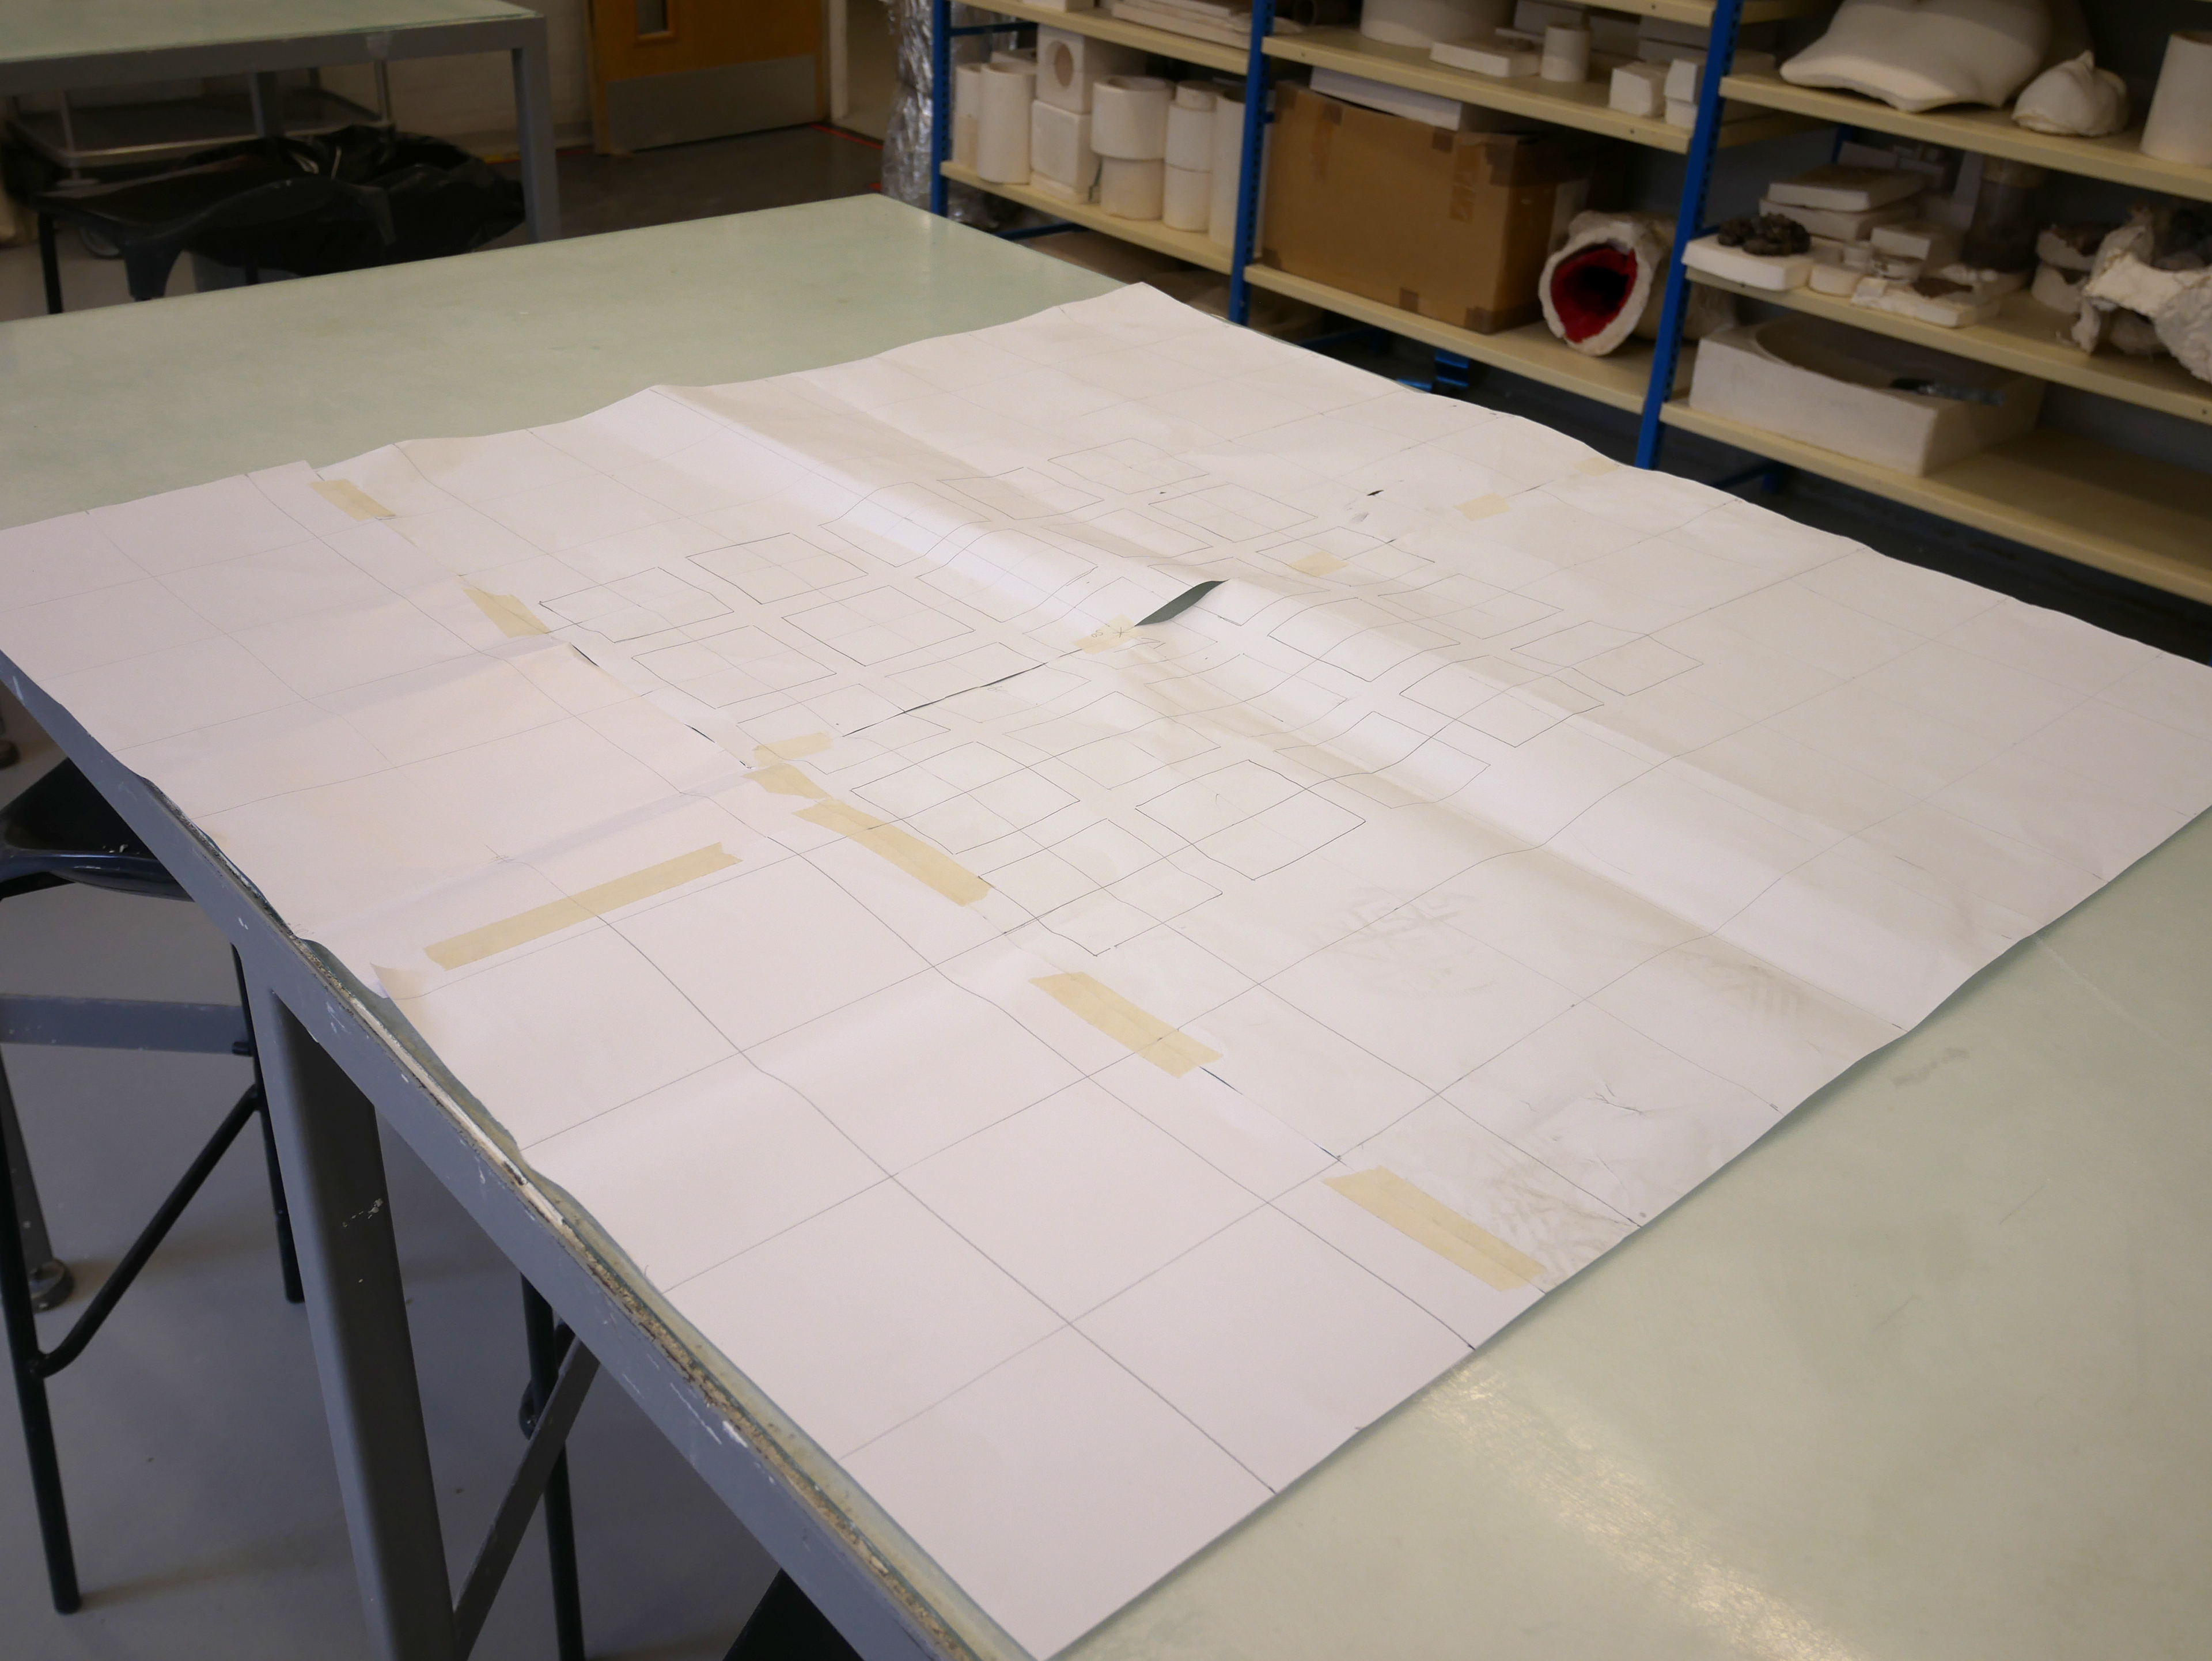
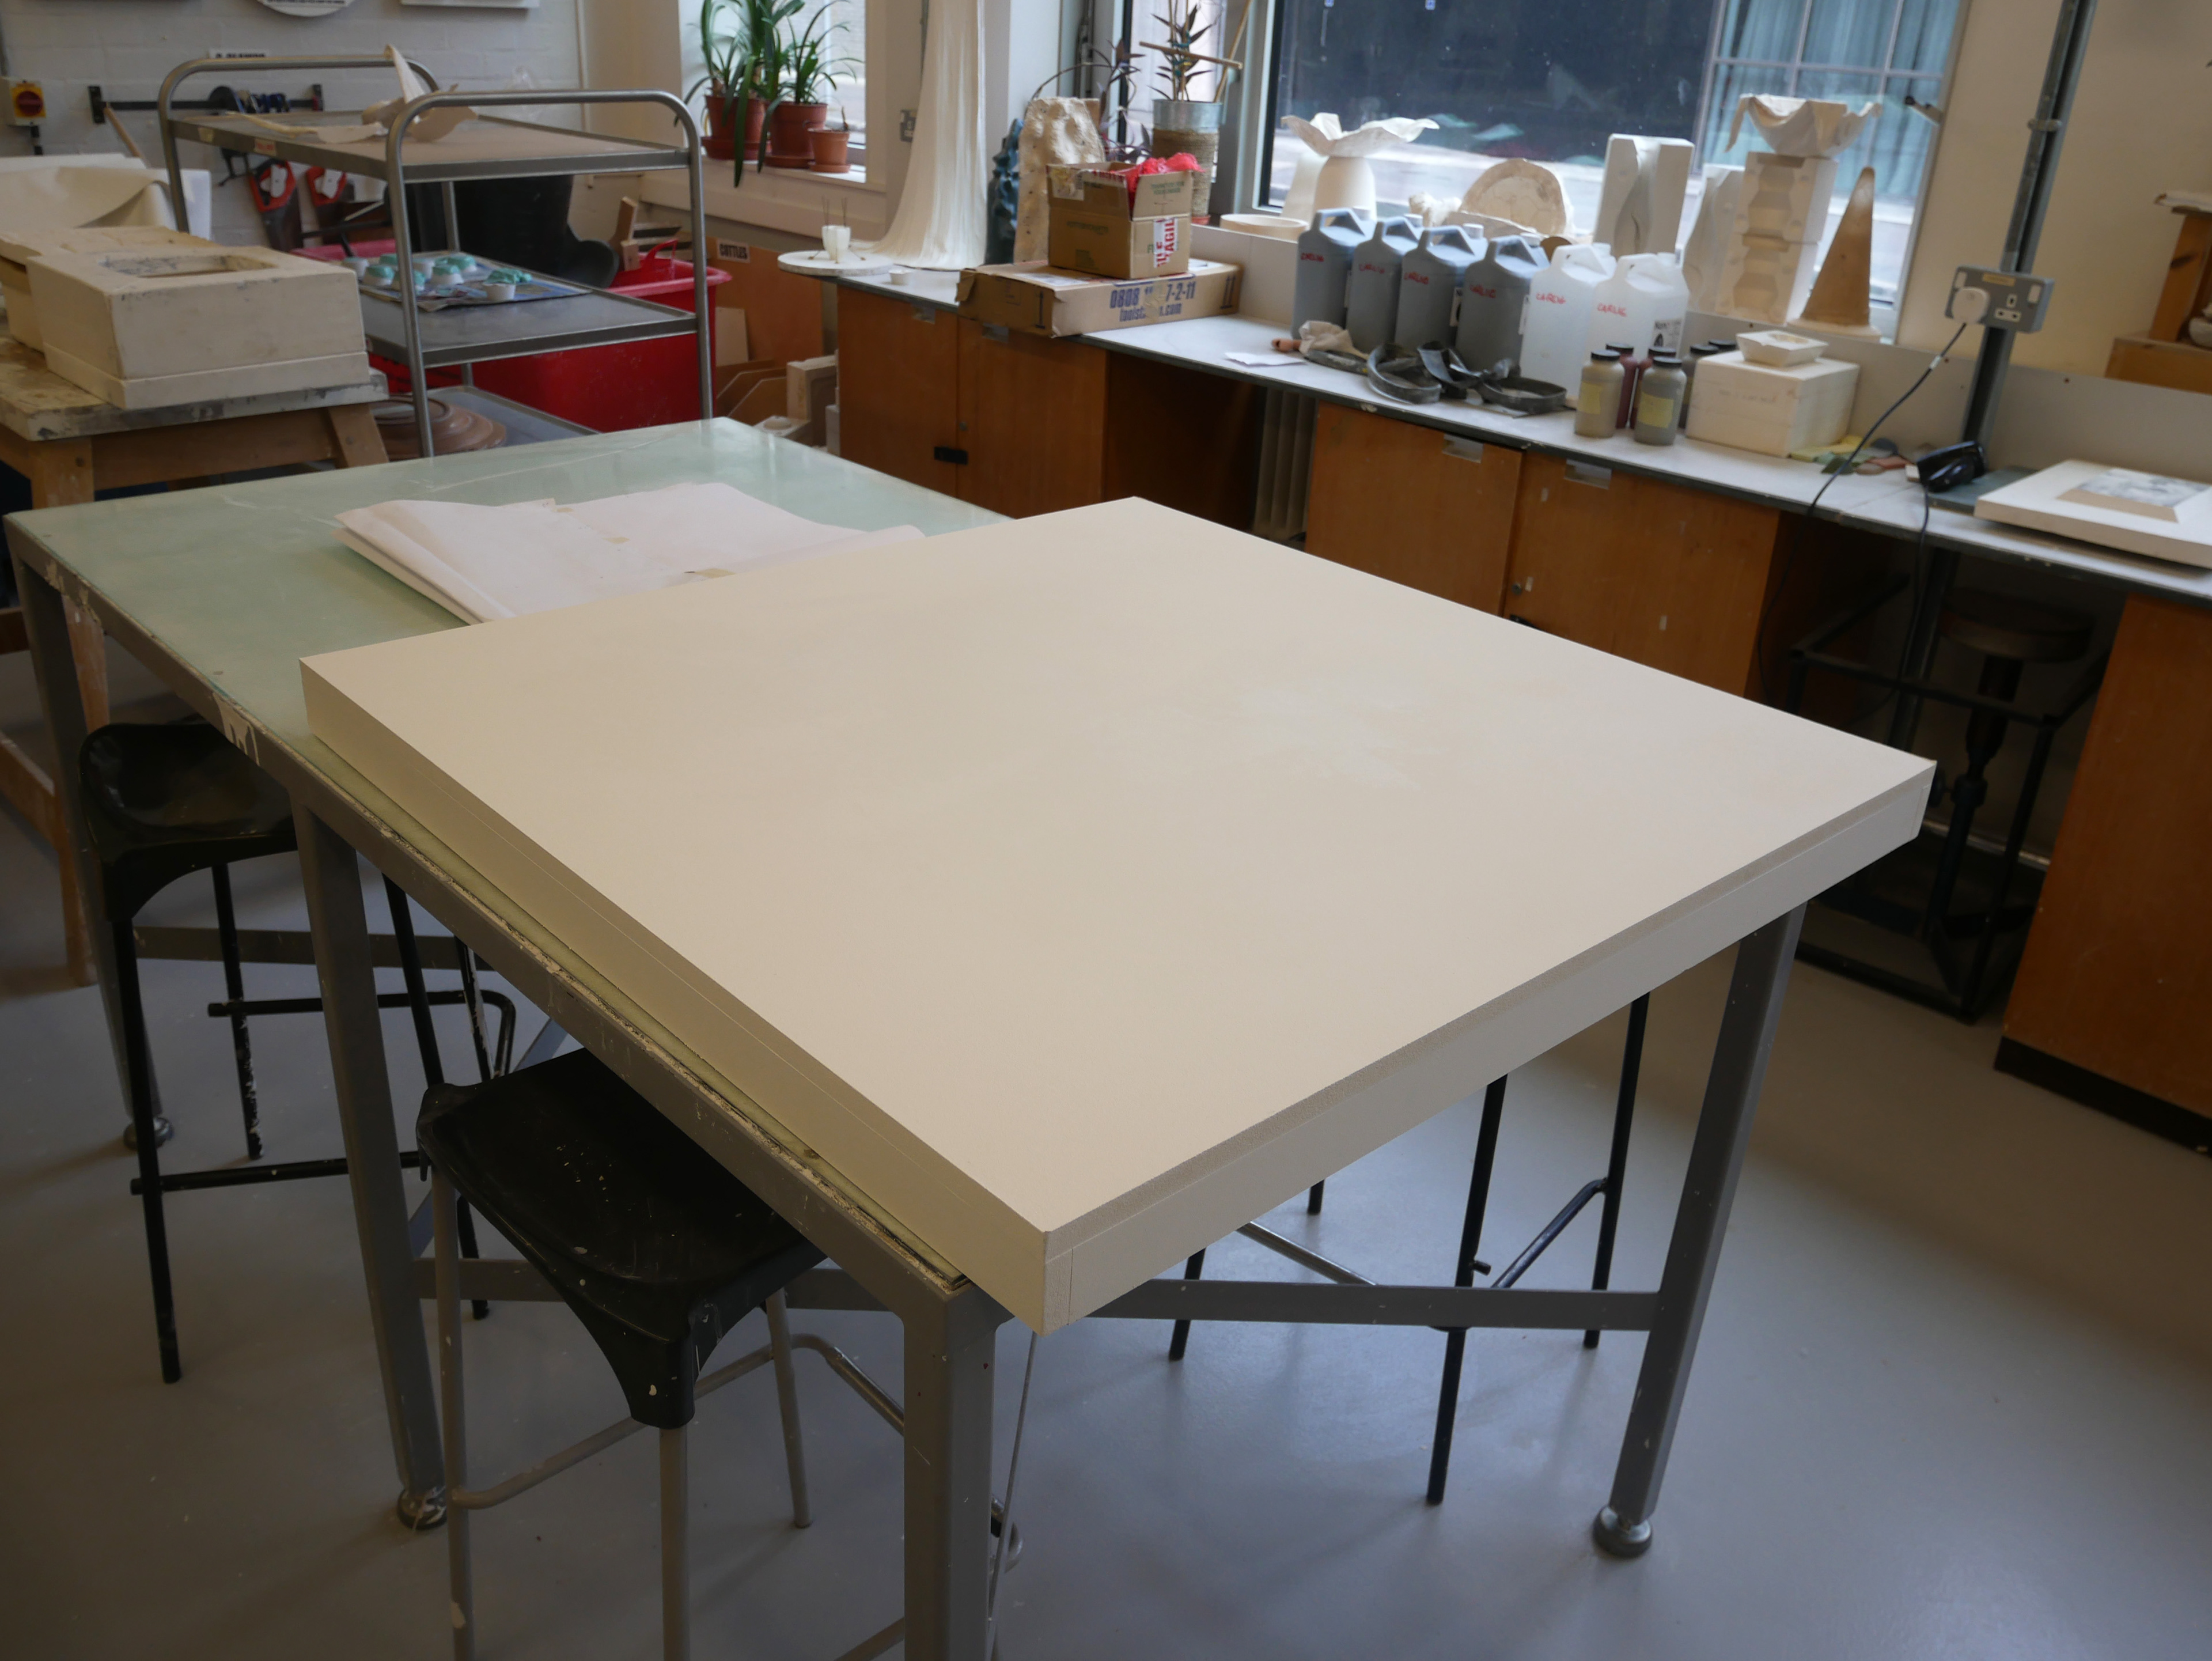
I designed and created a board for mounting the pieces 1 x 1m. I intend to mount the board on the wall using a split baton.
I created a template one metre by one metre for the placement of the screws. This allowed me to place the template straight onto the board when making the pilot holes. This same template could also be used if drilling straight into the wall.
Daylight Studio Images
Whilst mounting the pieces and taking the images, I found the multi-directional method of wall hanging to be particularly useful. It was great to be able to rotate and move the pieces freely; to curate variations of the same installation.
I was really pleased with the final set of pieces and images. There was little to no blistering in these pieces, as I shook the porcelain before casting. The glaze errupted just as I'd hoped, a mixture between control and unpredictability.