
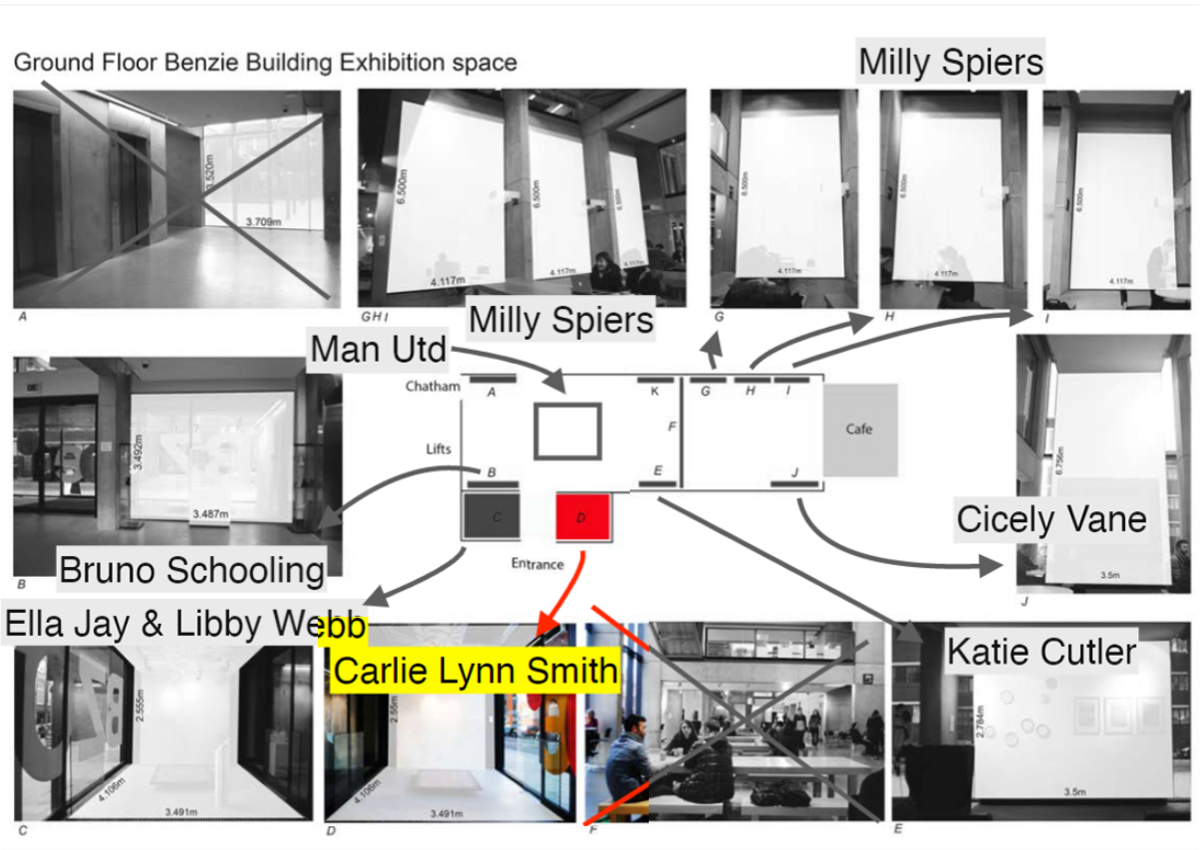
For the Vertical Gallery, I proposed to scale up my pieces to 30 X 30 X 20 cm. In our initial meeting with Kate and Claire, I was shown my position in my exhibition; at the front entrance on the right hand side.
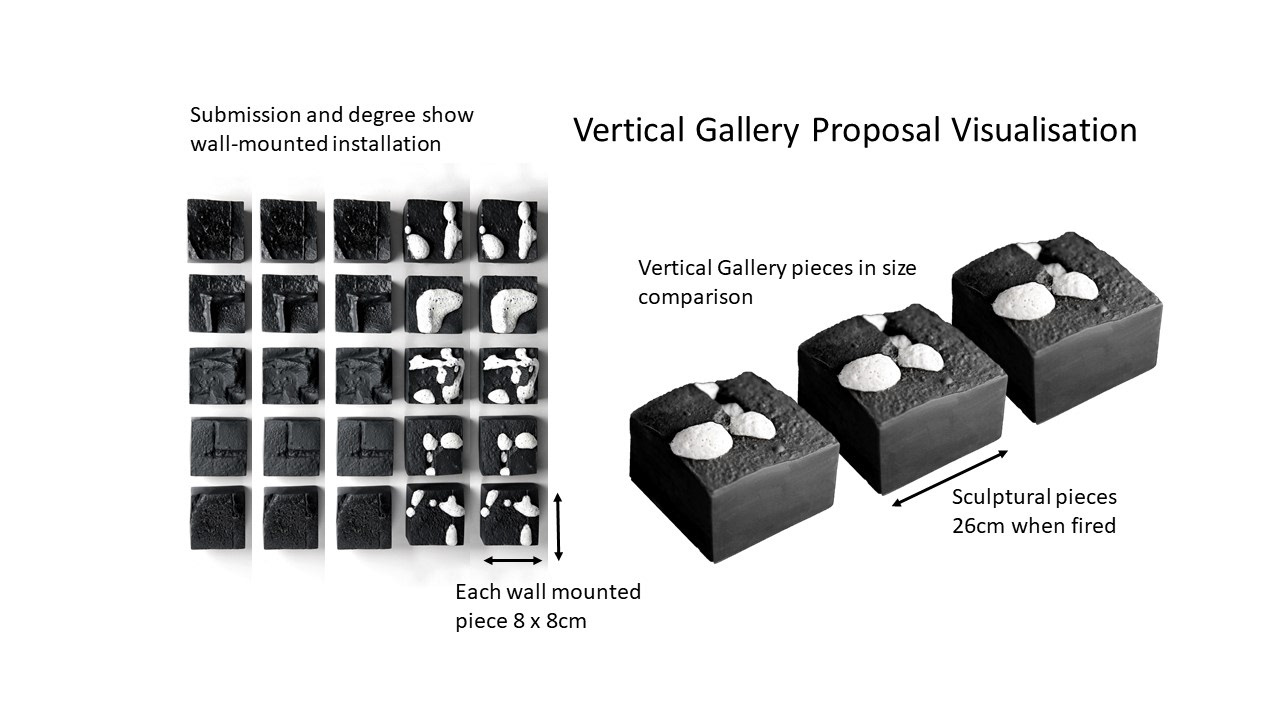
Scaling up for Vertical Gallery
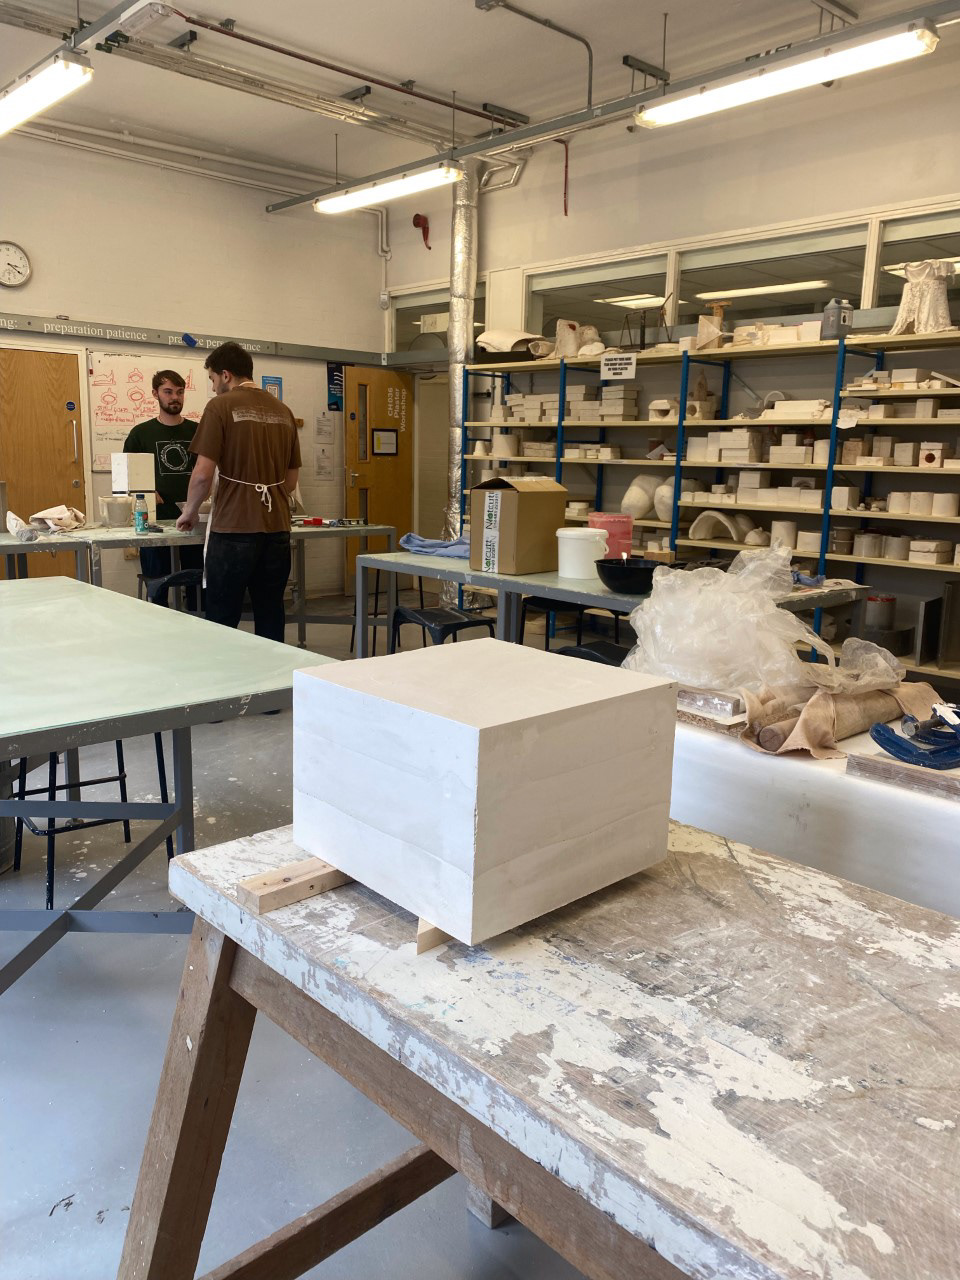
Whilst scaling up, there was many factors to consider such as managing the weight of the plaster in addition to creating a perfectly cuboid object. I chose to cast the block of plaster separate to the Vinamold cast to obtain as close to perfection as possible.
I used 15 Litres of water mixed with 18,000 grams of plaster to create roughly 18 Litres of plaster. After casting, I faced a few difficulties managing the weight of the plaster when trying to grind, polish and lift it. I chose to cut the block of plaster in half height wise. This also opened up the opportunity of wall-hanging the pieces.
Large Vinamold cast
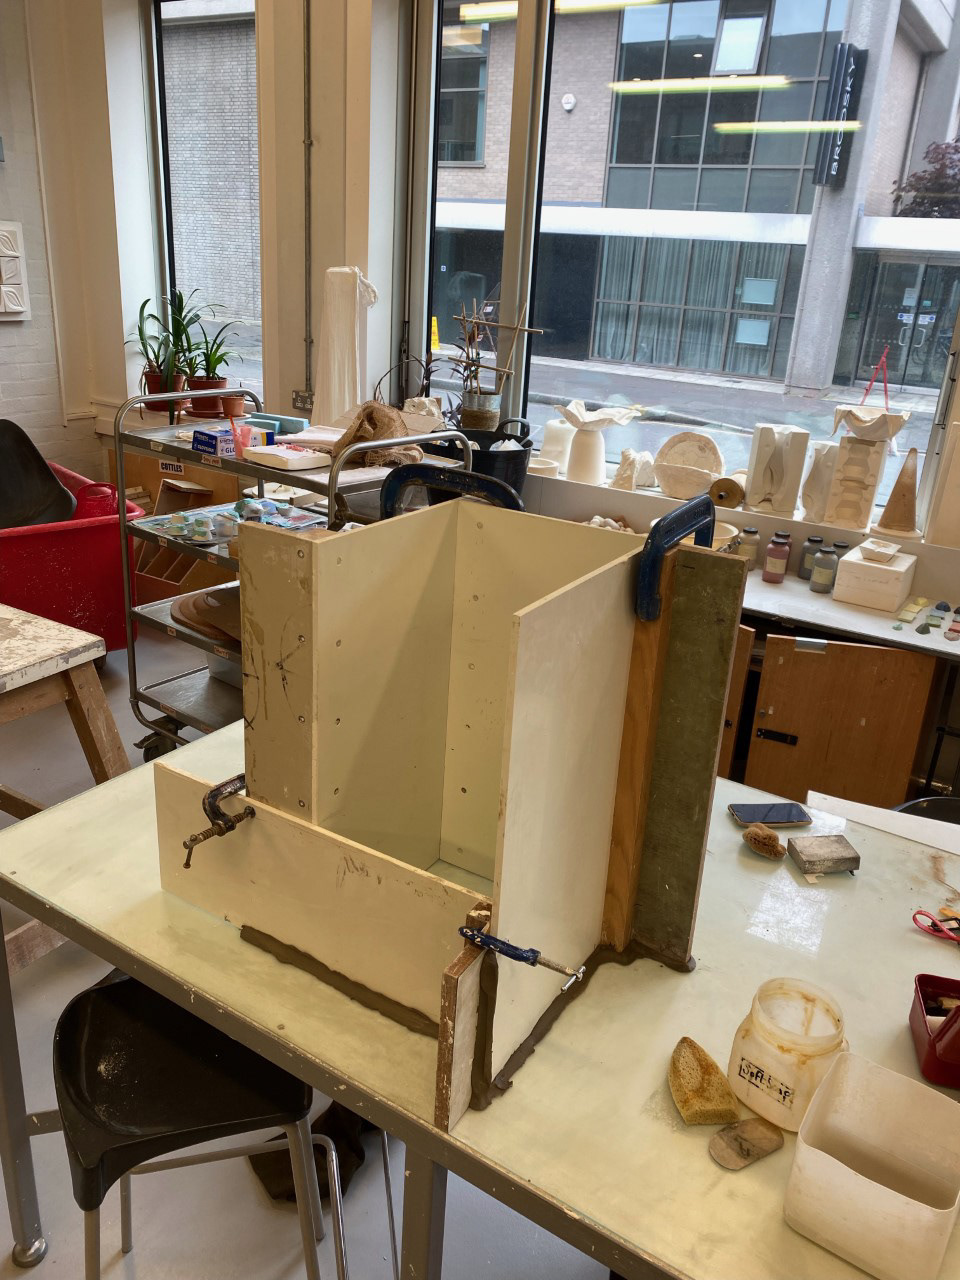
I measured a cottle 30 X 30 cm and placed it directly onto the ground. I found an area with large cobble stones mixed with tarmac and deep cracks. I chose this square as I felt the variety in shapes and textures would be intruiging in the final object.
I melted the Vinamold on an outside stove. Once it had turned to liquid, I poured it into the cottle and left it to set.


Creating a mould from the cast
Creating the 30 x 30cm mould was by far one of the most difficult tasks I have undertaken. The first time I poured for the mould, the cottle slipped and the plaster spilled everywhere. This was demotivating, but I restarted and got some assistance the second time.
Although the mould was not completely perfect, I was still pleased with the result considering the implications I encountered during the process.


Testing the mould
I chose to test the mould using the white half-porcelain casting slip before using the black porcelain. This was in order to calculate how much slip was required to fill the entirety of the mould. I calculated a total of 12 Litres of slip was required to fill the mould.
I left the slip in the mould for 45 minutes to ensure it was a sufficient thickness. When casting with the black porcelain; I will have to leave it for much less time as the casting time is significantly shorter.
When pouring the slip out, I had to aquire some assistance from Bruno and Ed as the mould was too heavy for me to lift.


The piece casted successfully, however the top cracked due to leaving it too long in the mould


Time testing for thickness
I tested 10, 15 and 20 minutes using the black porcelain. I found that the 20 minutes seemed too thick, whilst the 15 was not thick enough. For the real deal, I chose to cast for 17-18 minutes for the optimum thickness.

Casting with black porcelain
Casting with the black porcelain was a much quicker process than the white casting slip. I made sure to dry the slip upside down to avoid it sinking and cracking.


